 by
by Great pick — here’s a clear, beginner-friendly text tutorial you can crochet right now. This produces a decorative medallion → square motif that joins into runners, blouses, shawls or trims. Written in US terms with exact round instructions, quick counts/checks, Join-As-You-Go notes, blocking, troubleshooting and a few quick variations.
Materials & finished size
- Yarn: sport / DK (cotton or cotton-blend for crisp lace; softer blend for drape)
- Hook: 3.0–4.5 mm (adjust to reach desired finished size)
- Notions: tapestry needle, blocking pins/mat or towel, scissors, stitch marker (optional)
- Finished motif (blocked): ≈ 9–13 cm / 3.5–5 in (varies by yarn & hook) — make 1 test motif and block to check size.
Abbreviations (US)
- ch = chain
- sl st = slip stitch
- sc = single crochet
- hdc = half double crochet
- dc = double crochet
- tr = treble crochet
- pic = picot (ch 3, sl st into same st)
- sp = space
- st(s) = stitch(es)
- rep = repeat
Short design overview
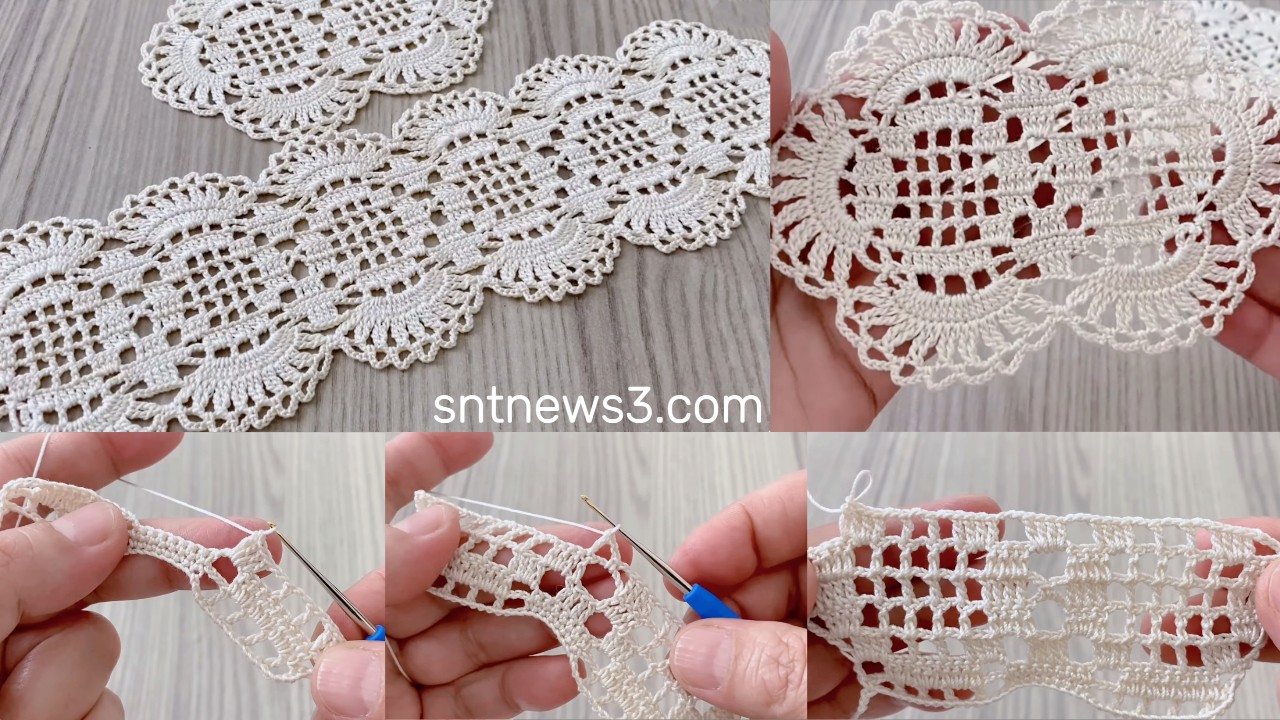
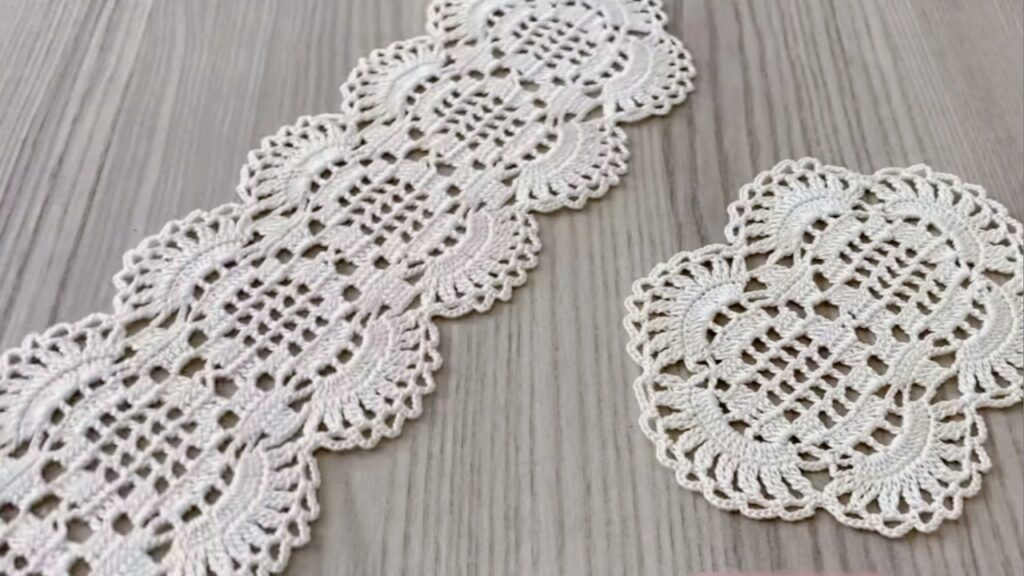
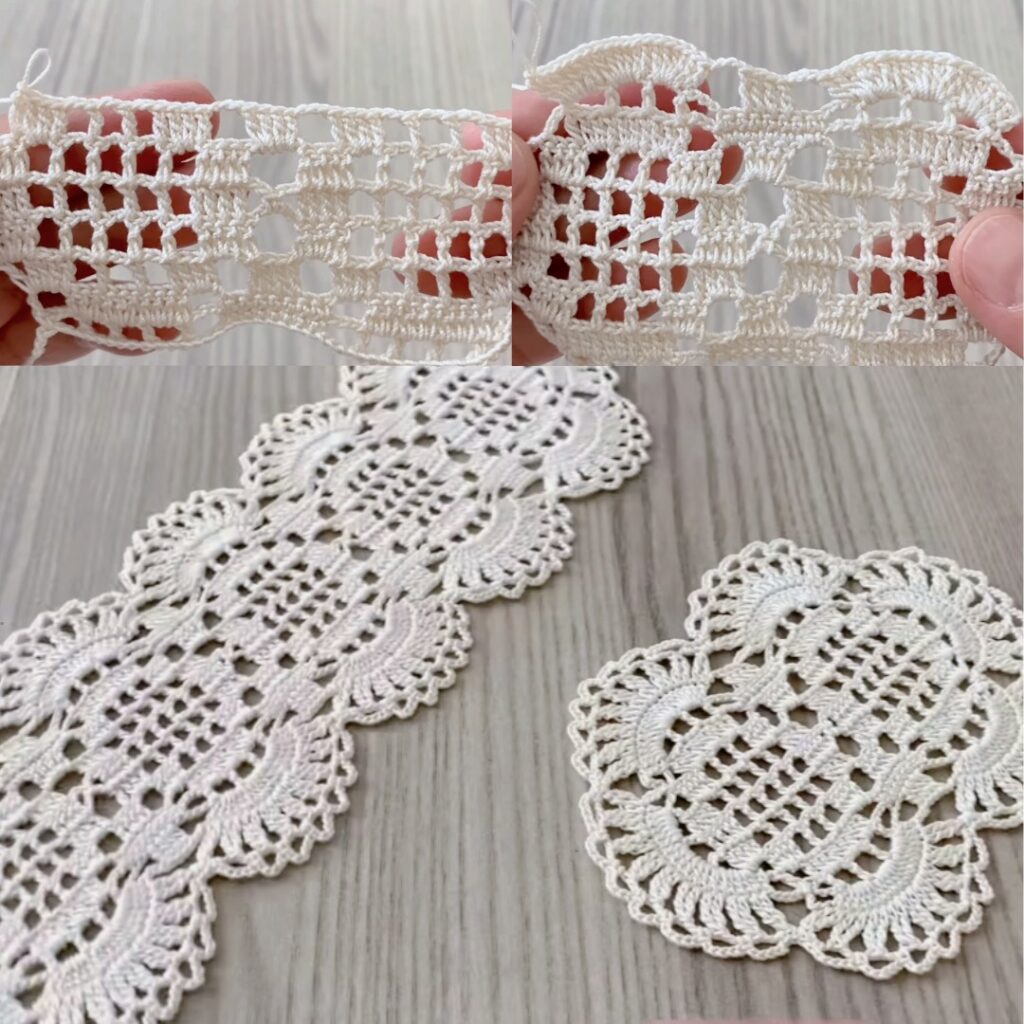
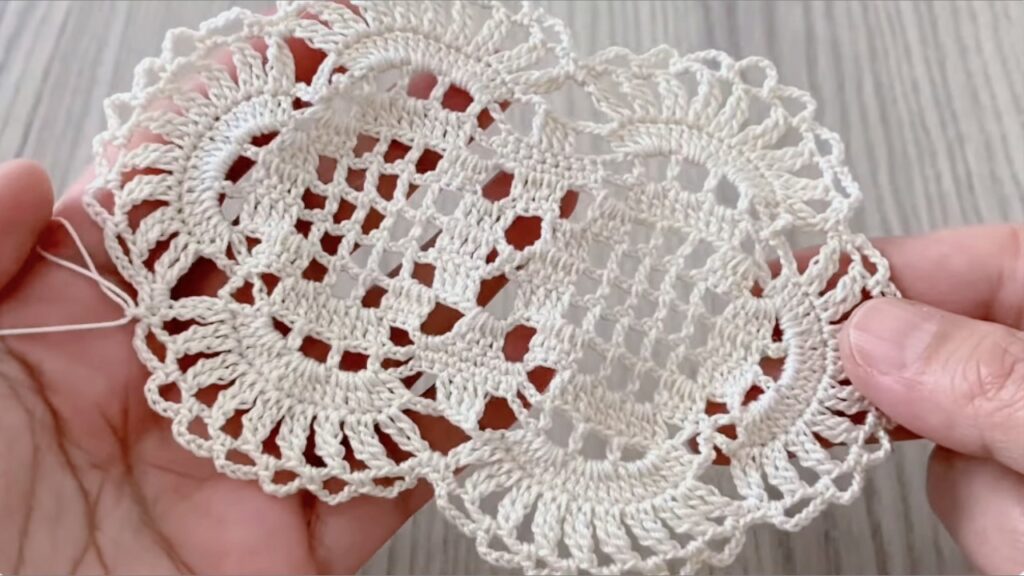
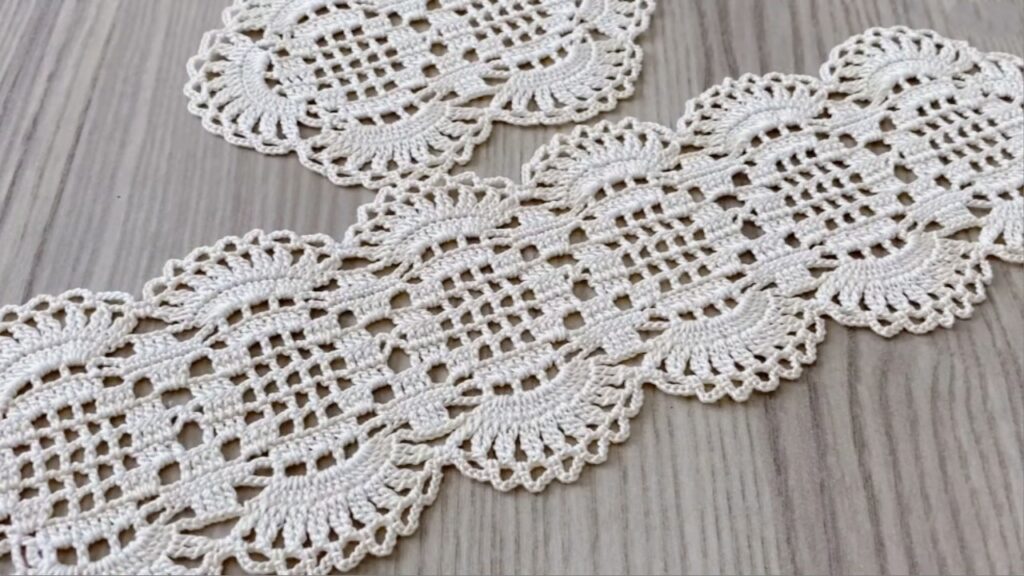
Worked in rounds: small center → chain loops → puffy petals → tidy sc round → tall arches → decorative ribs → optional side & corner loops to convert to a square → scalloped picot edge used for Join-As-You-Go (JAYG). Tile joins are made on the final scallop round so your assembled fabric is flat and neat.
Pattern — round-by-round (US terms)
Work rounds joined with sl st unless noted.
Round 1 — center (magic ring)
- Make a magic ring. ch 3 (counts as dc). Work 15 dc into the ring.
- Pull ring closed; sl st to top of ch-3 to join.
Check: 16 dc total.
Round 2 — loop foundation (petal scaffolding)
- ch 4, skip next dc, sc in next dc — rep around.
→ creates 8 ch-4 loops separated by sc. Join with sl st.
Check: 8 loop spaces.

Round 3 — puffy petals (8 petals)
- In each ch-4 space work: (sc, hdc, 7 dc, hdc, sc) — all into same ch-4 sp (one petal cluster).
- Sl st into the next ch-4 space and repeat around. Join.
Check: 8 raised petals.
Variation: use 5 dc for smaller petals.
Round 4 — tidy sc round
- Rejoin between petals. Work sc evenly around the petal bases to even the circumference — aim for ~9–12 sc across the area made by each petal so motif lies flat.
- Join with sl st.
Check: round is smooth (not cupped or ruffled).
Round 5 — tall lacy arches (frame)
- From a petal tip: sl st to tip → ch 7 → anchor into the sc round between the next petals with (tr, ch 2, tr, ch 2, tr) worked into that sc or small space → sl st back to petal tip.
- Repeat to create 8 tall arches. (If ch-7 looks too long/short on your yarn/hook, change to ch-6 or ch-8.) Join.
Check: 8 arches evenly spaced.
Round 6 — ribs inside arches (decoration)
- Into each arch work: sl st to arch base → ch 3 → dc into top of first tr → ch 1 → dc into top of middle tr → ch 1 → dc into top of last tr → ch 3 → sl st into arch base.
- Simpler option: 3 dc separated by ch-1 across each arch.
- Repeat for all 8 arches. Join.
Check: each arch has 3 inner ribs.
Round 7 — convert circle → square (side & corner loops) — recommended
(Do this if you plan to join tiles in a neat grid for garments or runners.)
- Mark four quarter points (every 2 petals = 90° apart). Rejoin at a quarter marker.
- Work each side between corners using the same numeric pattern on all four sides. Example starter distribution (adjust to motif size):
sc 10, (sc, ch 4, sc) × 3 (side loops), sc 10 — then ch 6 for the corner loop.- Important: keep the same sc counts and the same number of side loops on each side so tiles match when joining.
- Repeat for all four sides; join and fasten off (or continue to last round).
Check: motif now has 4 ch-6 corner loops and evenly spaced side loops — will block into a square.
Round 8 — scalloped picot outer edge (finish & JAYG round)
- Rejoin and work a scallop across each small side element: sc 3, (pic: ch 3 + sl st into same st), sc 4 — adjust the sc counts so the scallop sits flat across the side loops.
- Place picots at regular intervals for the dotted look. This is the round to Join-As-You-Go: when your new motif meets a finished neighbour, replace the sl st/picot with sl st into the corresponding stitch/picot of the finished motif to attach.
- Join, fasten off and weave in ends.
Check: scallops & picots even; motif lies flat after blocking.
Blocking / shaping
- Block every motif pinned to a square (if you used Round 7). Pull corner ch-6 loops outward and pin every picot and scallop peak for sharpness. Mist lightly or steam carefully and let dry fully. Blocking opens the lace and makes joins accurate.
Joining tiles
Join-As-You-Go (JAYG) — recommended
- Make one tile completely. For each new tile, crochet through Round 7 and begin Round 8. When you reach a scallop that meets an existing tile, sl st into the corresponding stitch/picot of the finished tile instead of making the picot. Continue around to join sides and corners. JAYG produces flat, tidy seams and saves sewing.
Sew-after (block then sew)
- Make and block all tiles. Layout the pattern and sew with matching yarn using mattress stitch or whipstitch through the outer sc round or side loop anchors. This lets you rearrange before final joining.
Project ideas & layout examples
Measure your blocked motif width M and compute counts:
- Narrow runner: 1 × N motifs (e.g., N = 8 for ~88–104 cm if M ≈ 11–13 cm).
- Runner (wider): 2 × N motifs.
- Shawl/throw: e.g., 6 × 10 motifs (depends on M).
- Blouse/tunic: panels of motifs; top row motifs across for half-chest = round((chest/2) ÷ M). Join with JAYG to build a one-piece pullover and leave gaps for neckline/armholes.
If you tell me your blocked motif width and finished measurement I can compute exact motif counts.
Quick stitch-count checks
- After Round 1: 16 dc.
- After Round 2: 8 ch-4 spaces.
- After Round 3: 8 petals.
- After Round 5: 8 arches.
- After Round 7: 4 corner ch-6 loops + identical side loop counts on each side.
If counts are off, rip to the last correct round and adjust before continuing — much easier to fix early.
Troubleshooting & tips
- Motif cups (edges pull up): shorten arch chains (ch-7 → ch-6) or loosen tension; try 0.5 mm larger hook for petals/arches; block firmly.
- Motif ripples/waves: reduce sc in Round 4 or shorten arch chains.
- Joins gape: use slightly firmer sl st tension when JAYG or add an extra sl st at each join point; block motifs before joining.
- Sides don’t match: make sure Round 7 side & loop counts are identical across all motifs — this is the most common cause of misalignment.
Quick variations & styling ideas
- Two-colour: change colour after Round 3 to emphasize petals vs frame.
- Smaller motif: use finer yarn & smaller hook or change petal dcs 7 → 5.
- Bigger/bolder motif: increase petal dcs 7 → 9 and arch chains ch-8/9; scale Round 7 counts proportionally.
- Simplified beginner version: replace Rounds 5–6 with ch-5 loops and 3 dc in each loop for an easier lacy tile.
- Beaded picots: slide small beads onto yarn and work one bead into each picot for sparkle.
- Edging only: omit Rounds 1–3 and adapt arch/rib repeat to run continuously as a lace border.
VIDEO: