by
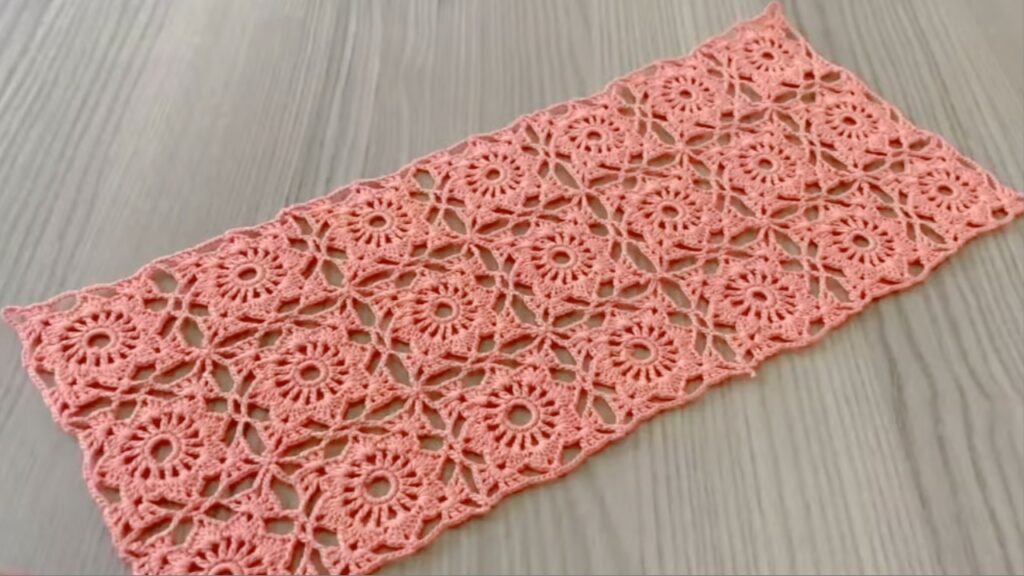
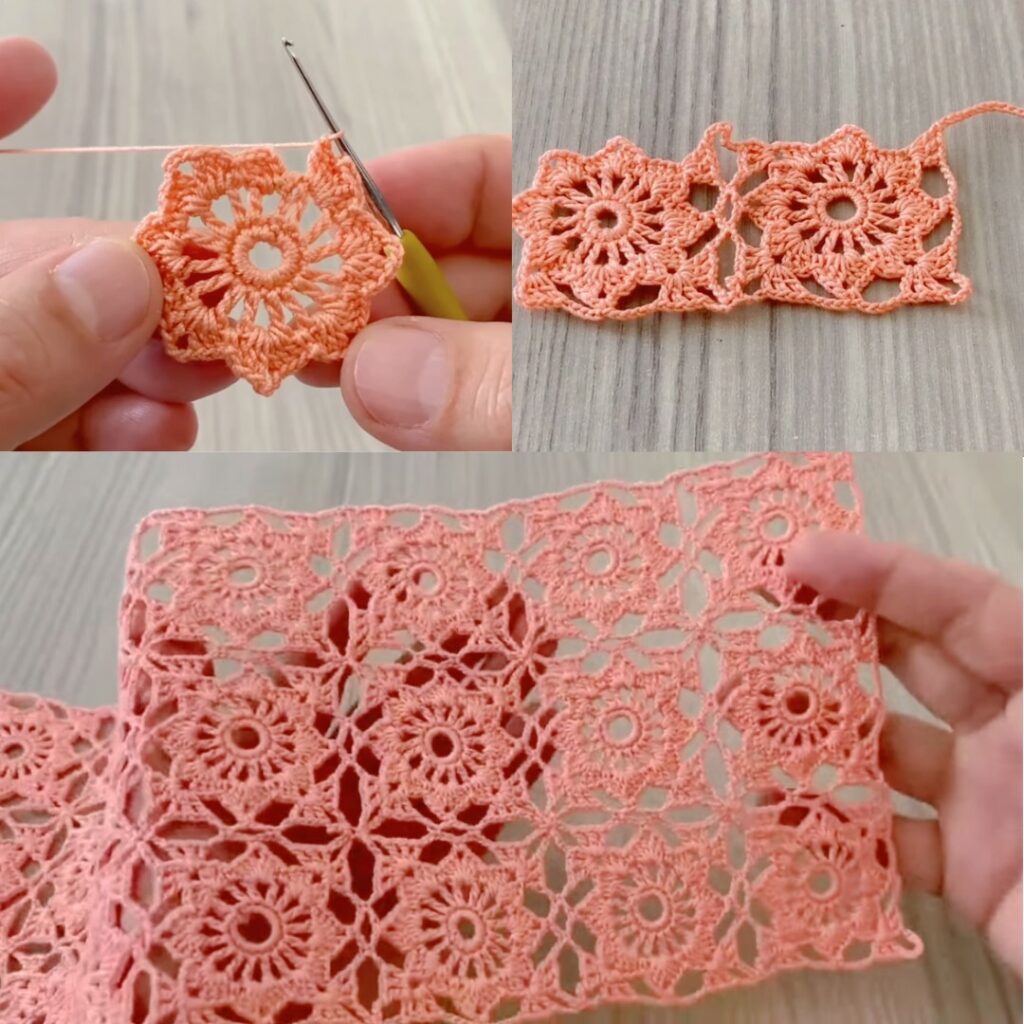
by Nice — here’s a clear, beginner-friendly, step-by-step text tutorial for “Easy One-Piece Flower Pattern” (Crochet with Nese style). This makes a single, flat flower medallion you can use as an appliqué, a center for a motif, or join into panels. All instructions use US terms and include checks, blocking/finishing, simple joins and a few quick variations.
🌼 One-Piece Flower — Step-By-Step Tutorial
Finished (unblocked) diameter: ~4–10 cm depending on yarn & hook
Yarn: cotton, cotton blend, or DK for wearable; thread or fingering for delicate appliqués
Hook: 2.0–4.5 mm (match yarn & desired size)
Notions: tapestry needle, scissors, blocking pins/towel (optional)
Abbreviations (US)
- ch = chain
- sl st = slip stitch
- sc = single crochet
- hdc = half double crochet
- dc = double crochet
- tr = treble crochet (tr)
- sk = skip
- sp = space
- st(s) = stitch(es)
- rep = repeat
Pattern idea (short)
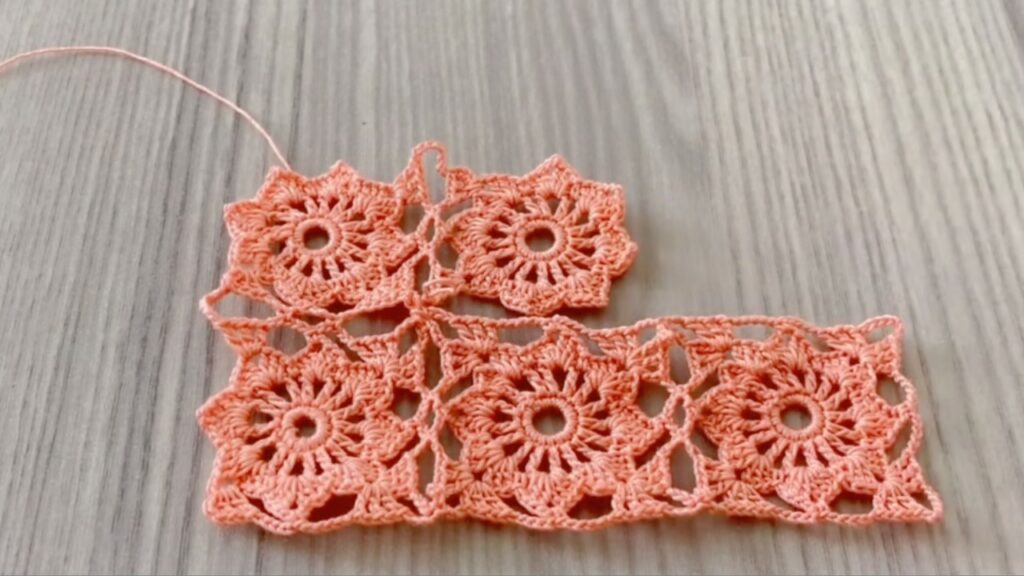
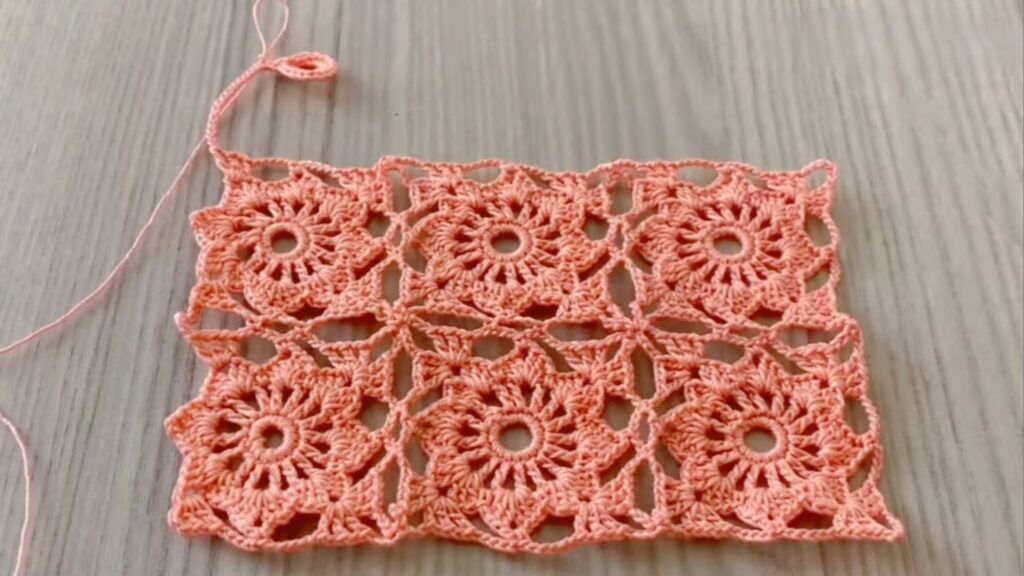
This is a one-piece flat flower worked from the center outward.
Rounds: small ring → petal loops → petal clusters → tidy round → decorative picot edge. The flower lies flat without sewing.
Round-by-round (exact — US terms)
Work rounds joined with a sl st unless otherwise noted. Check counts after each round.
Round 1 — tiny center
- Make a magic ring (or ch 4 and join to form a ring).
- ch 3 (counts as dc), work 11 dc into ring. (ch-3 + 11 dc = 12 dc total.)
- Pull ring closed; sl st to top of ch-3 to join.
Check: 12 dc.
Round 2 — loop foundation for petals
- ch 4, sk next dc, sc in next dc — repeat around until you return to start.
→ You’ll have 6 ch-4 loops (because 12 dc → every other dc). Join with sl st.
Check: 6 ch-4 spaces.
Round 3 — puffy petals (6 petals)
- In each ch-4 loop work (sc, hdc, 5 dc, hdc, sc) — all into the same ch-4 loop. This is one petal cluster.
- If you prefer larger petals use 7 dc; for smaller petals use 3 dc.
- Sl st to next ch-4 loop and repeat for all loops. Join with sl st.
Check: 6 full petals visible.
Round 4 — tidy sc round (flatten)
- Rejoin between petals. Work sc evenly around the bases of petals to flatten the flower — distribute roughly 8–10 sc across each petal area so the round lies flat. (Adjust by eye.)
- Join with sl st.
Check: flower is flat, not cupped or ruffled.
Round 5 — decorative outer row (picot/shell)
Option A (picot dotted edge — classic):
- sc in next 2 sc, sc 3 in next st (small shell), sc in next 2 sc, picot (ch 3, sl st in same st) — repeat around.
Option B (scallop edge): - sc, hdc, 3 dc, hdc, sc into spaced points across the outer round — repeat around for larger petals.
Finish: sl st to join, fasten off and weave ends.
Check: even petals/scallops around edge and flower lies flat after blocking.
Blocking & finishing
- Pin flower on a towel to desired shape. Stretch petals gently and pin. Mist lightly and let dry. For appliqués, pressing lightly after drying is fine.
- For ornaments: stiffen with diluted fabric stiffener or spray starch and let dry on pins.
Use & joining suggestions
- Appliqué: sew the flat flower to hats, bags or collars using small stitches through the back loops.
- Motif center: work the flower, then pick up stitches around the outer round to create a square medallion (I can provide that if you want).
- Join into panels: use the outer round as a join round — when making a new flower, replace some of the outer sl sts with sl sts into neighboring flower stitches to join-as-you-go (JAYG).
Quick variations
- 6-petal → 8-petal version: start Round 1 with 16 dc; Round 2 use ch 4, sk 1, sc → yields 8 loops and 8 petals.
- Layered flower: make a small 6-petal flower (Rounds 1–4) in contrast color, sew it centered on a larger flower for a layered look.
- Beaded center: before starting Round 3, thread a bead onto yarn and stitch it into the center with a few sc to secure.
- Lacy center (open): replace Round 1 with ch-6 ring and work 12 dc / 6 loops for more open centers.
Troubleshooting
- Flower cups (edges lift): loosen tension or use one hook size larger for petals; block flat.
- Flower ruffles: remove 1–2 sc in tidy round so there’s not too much fabric; shorten outer shell (use fewer dc).
- Petals won’t lie flat: adjust dc count in petal (±2 dc) so petal arc matches flower circumference.
VIDEO: