 by
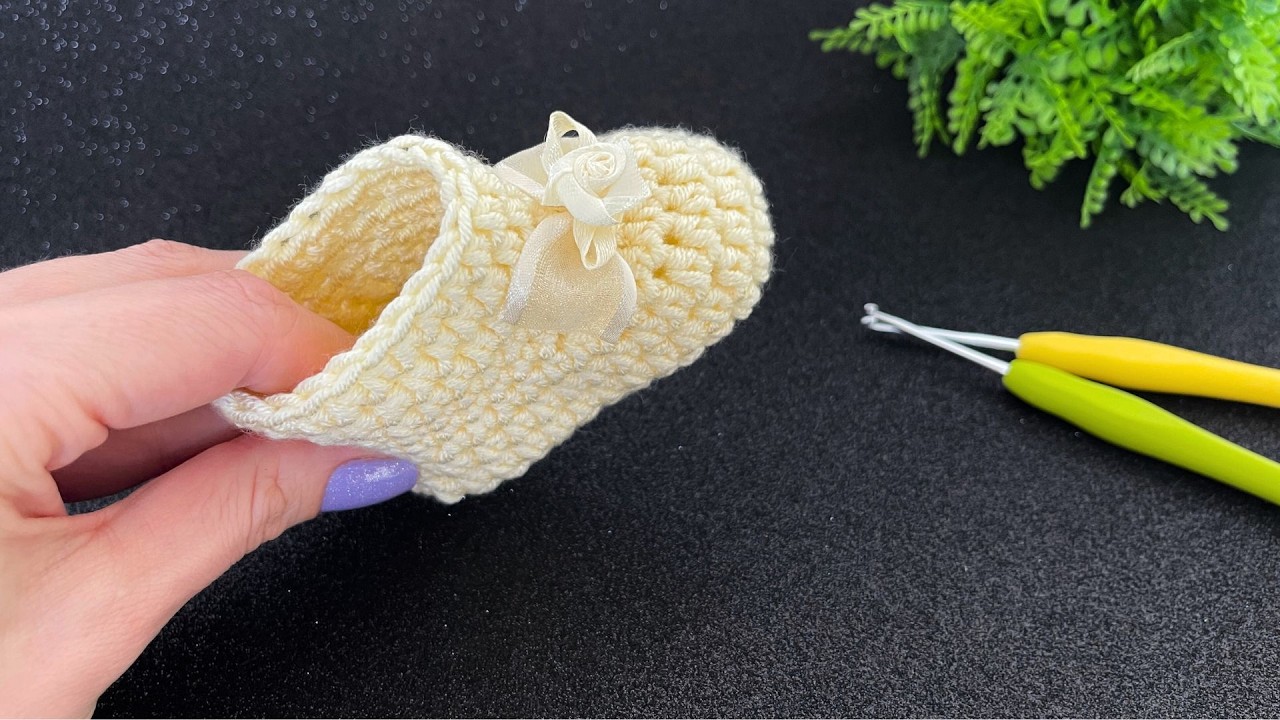
by Crocheting baby shoes is a heartwarming and satisfying project that combines creativity, functionality, and love into a tiny, wearable work of art. Whether you’re a beginner with a ball of yarn or a seasoned crocheter looking for a fast and meaningful project, crochet baby shoes are the perfect craft.
In this article, we’ll guide you through the essentials of making easy, quick, and beautiful crochet baby shoes—including the materials you’ll need, basic stitches, and step-by-step instructions for a charming pair of booties.

🌟 Why Crochet Baby Shoes?
Crochet baby shoes are more than adorable—they’re:
- Customizable in color, size, and style
- Perfect for gifts at baby showers, birthdays, or holidays
- Quick to make, often in under an hour
- Budget-friendly, using small amounts of yarn
- Comfortable and soft, ideal for delicate baby feet
🧶 Materials You’ll Need
Here’s a list of basic supplies:
- Worsted weight yarn (soft acrylic or cotton yarn is best for comfort)
- Crochet hook (usually 3.5 mm – 4.5 mm, depending on your pattern)
- Yarn needle (for weaving in ends)
- Scissors
- Stitch markers (optional but helpful for beginners)
- Buttons or ribbons (optional for decoration)
🪡 Basic Stitches to Know
Before diving in, brush up on these simple crochet stitches:
- Chain (ch)
- Slip Stitch (sl st)
- Single Crochet (sc)
- Half Double Crochet (hdc)
- Double Crochet (dc)
Most baby shoe patterns are built from these beginner-friendly stitches.
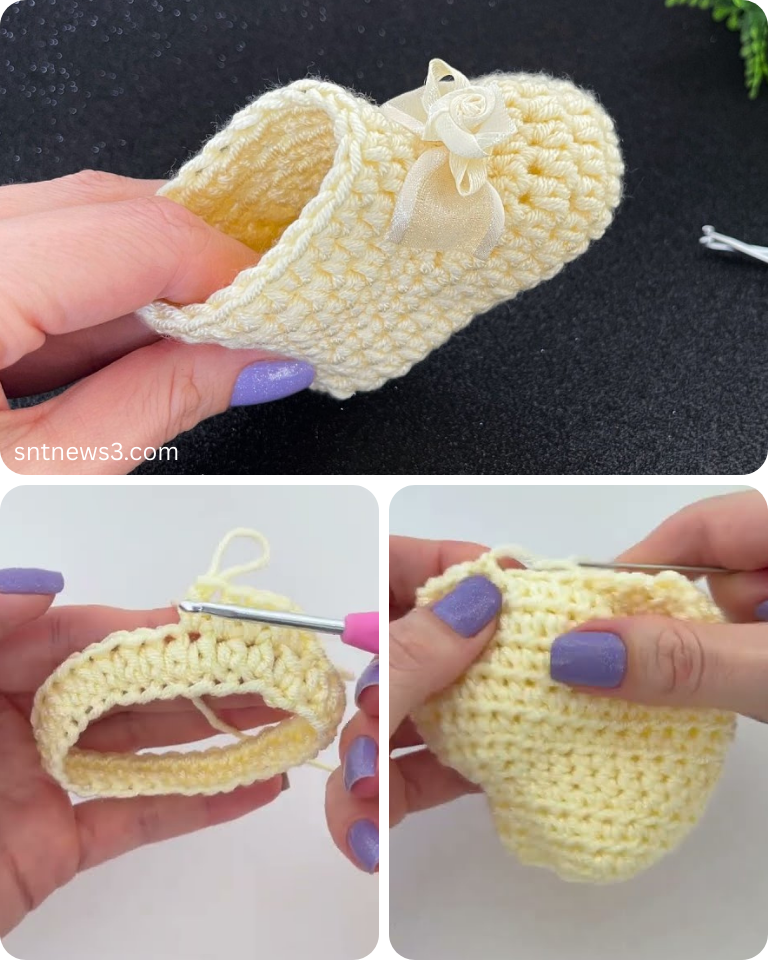
🧵 Easy Crochet Baby Shoes – Step-by-Step Pattern (0–6 Months)
🧶 Skill Level: Beginner
This pattern makes a basic pair of soft-soled booties in about 45 minutes.
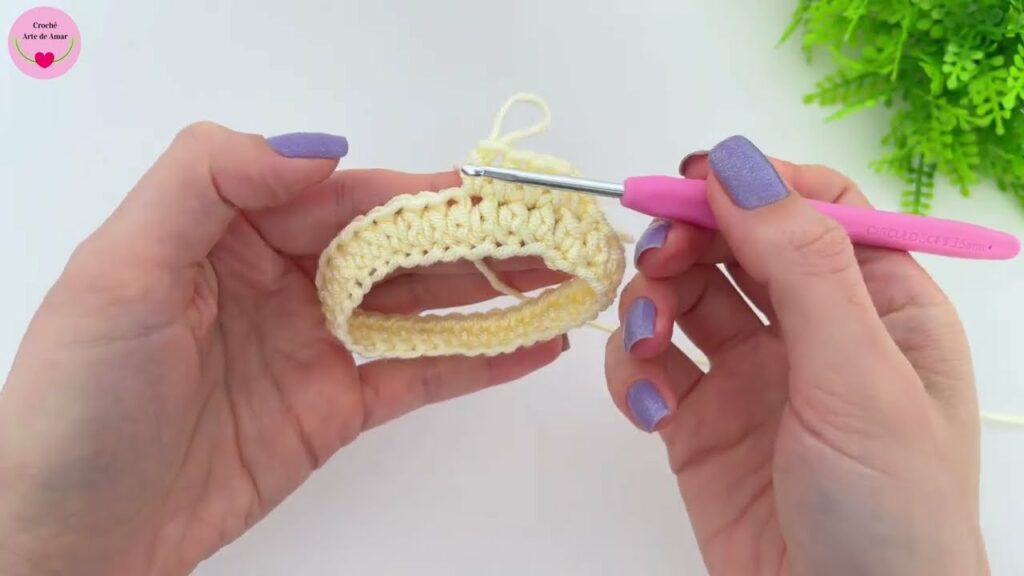
👣 Part 1: The Sole
Round 1:
- Ch 10
- 2 sc in 2nd ch from hook, sc in next 7 ch, 4 sc in last ch
- (Now work on the other side of the chain)
- Sc in next 7 ch, 2 sc in last ch (22 sts total)
Round 2:
- 2 sc in first st, sc in next 7, 2 sc in next 4 sts
- Sc in next 7, 2 sc in last 2 sts (30 sts)
Round 3 (optional for wider sole):
- Sc in each st around or add increases as needed for size
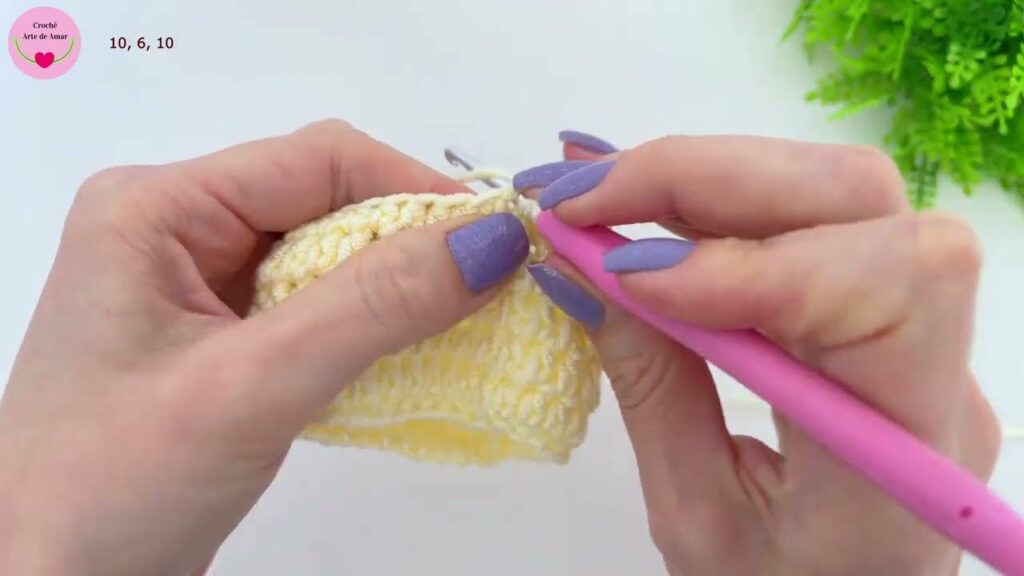
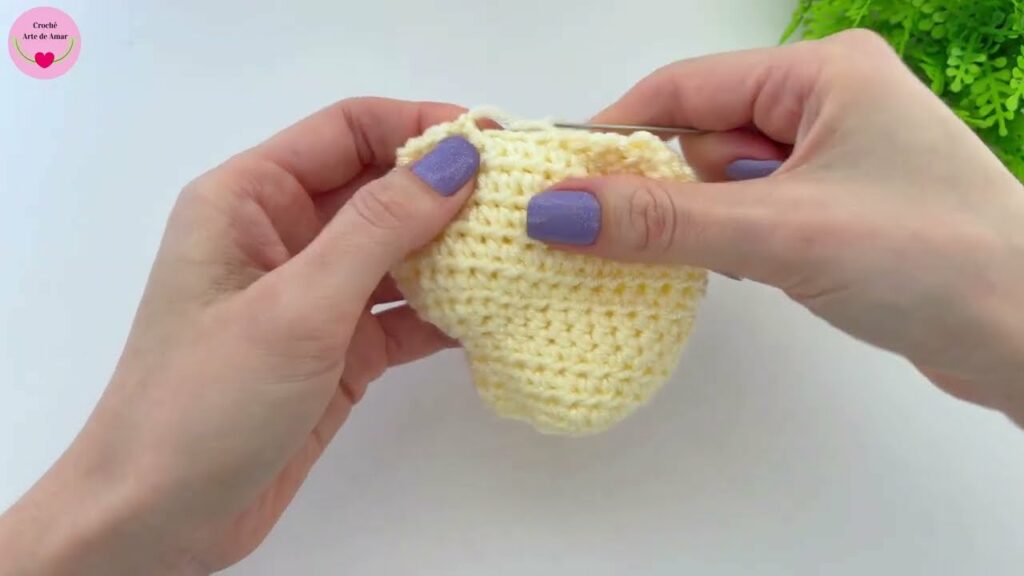
🥿 Part 2: The Upper
Round 4:
- Sc in back loops only around to create the side walls
Round 5:
- Sc around
Round 6:
- Sc 10, dec (sc2tog) 5 times across the toe, sc to end
Round 7:
- Sc 8, dec 4 times, sc to end
Round 8 (optional finishing round):
- Sc around for a neater edge or add a picot trim
🎀 Part 3: Strap (Optional)
- Join yarn to side of shoe
- Ch 8–10 (depending on desired length)
- Attach with sl st to opposite side
- Add a small button or decorative fastener
🎨 Customization Ideas
- Use multicolor yarn for a rainbow effect
- Add bows, appliqués (like flowers or stars), or pompoms
- Stitch initials on the strap or toe area
- Make animal-themed shoes (e.g., bunny ears or bear faces)
📏 Sizing Guide
To adjust the size:
- 0–3 months: 3.5–3.75” sole (ch 9 base)
- 3–6 months: 4” sole (ch 10 base)
- 6–12 months: 4.5–5” sole (ch 11–12 base)
- Use a slightly larger hook and thicker yarn for bigger sizes
🧼 Care Instructions
- Hand wash gently with baby-safe detergent
- Air dry flat to maintain shape
- Avoid bleach or heat
🎁 Perfect for Gifting
Crochet baby shoes are a beloved handmade gift for baby showers, first birthdays, christenings, or holidays. Pair them with a matching hat or blanket for an extra special touch!
Video tutorial:
🧵 Final Thoughts
Crocheting baby shoes is one of the most rewarding small projects you can undertake. They’re fast, fun, and filled with love in every stitch. With basic skills and a bit of yarn, you can create something both beautiful and practical that will be cherished forever.
Whether you’re making them for your own baby, a friend’s little one, or donating to a neonatal unit, easy and quick crochet baby shoes are a small act of love with a big impact.ials that suit your baby’s style or complement a special outfit.