 by
by Nice choice — below is a full, beginner-friendly text tutorial you can crochet right away. It uses a repeatable lacy motif → joinable square that builds into a one-piece blouse or tunic with Join-As-You-Go (JAYG). I give round-by-round instructions, counts to check, blocking, shaping notes for neckline/armholes, finishing and troubleshooting. All instructions use US terms.
Materials & finished sizes
- Yarn: Sport / DK (cotton or cotton blend for summer; softer blend for drape).
- Hook: 3.5–4.5 mm (adjust for gauge & desired drape).
- Notions: tapestry needle, blocking pins/mat, scissors, stitch markers.
- Example finished motif (blocked): ≈ 10–13 cm / 4–5 in with DK + 4.0 mm. Make a test motif to confirm.
Abbreviations (US)
- ch = chain
- sl st = slip stitch
- sc = single crochet
- hdc = half double crochet
- dc = double crochet
- tr = treble crochet
- pic = picot (ch 3, sl st into base)
- sp = space
- st(s) = stitch(es)
- rep = repeat
Pattern concept & construction
- Make square motifs (round medallion converted to square) and JAYG them on the final outer round to assemble a one-piece blouse/tunic with minimal sewing.
- Shape neckline by skipping joins or omitting motifs in the center of the top row; shape armholes by leaving side joins open for the desired depth.
- Optionally make separate sleeve strips and JAYG them into armholes.
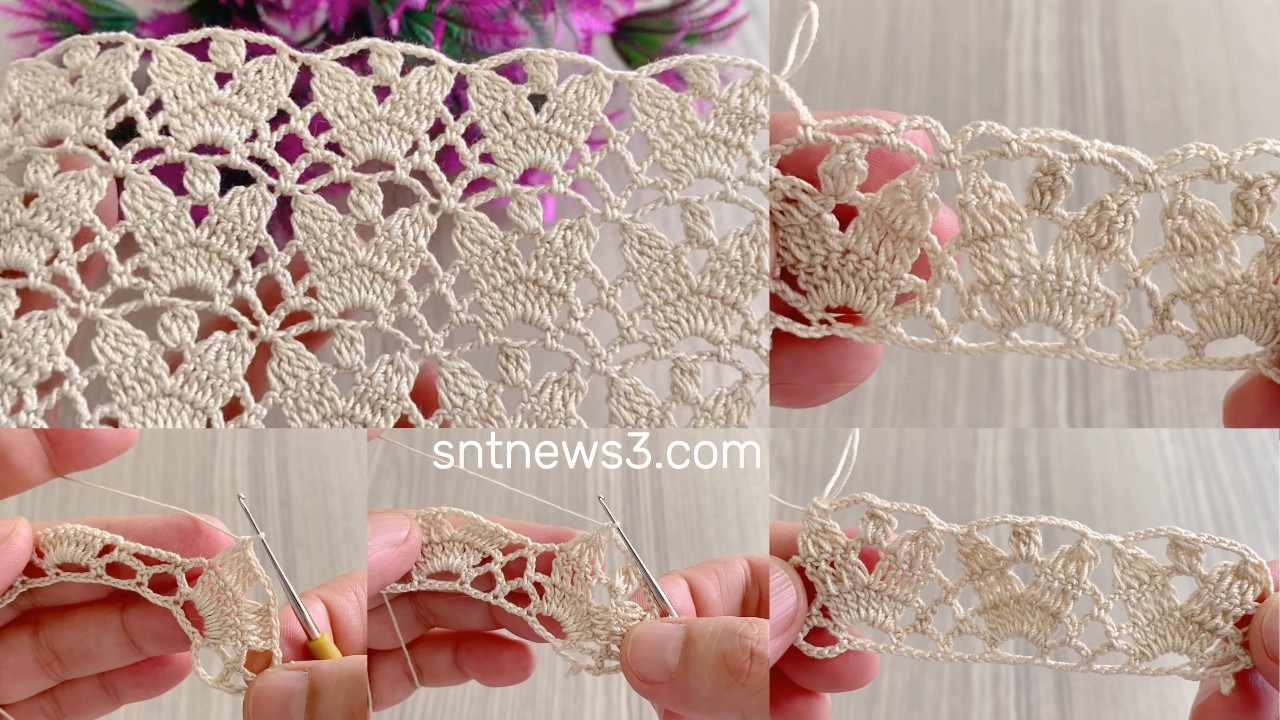
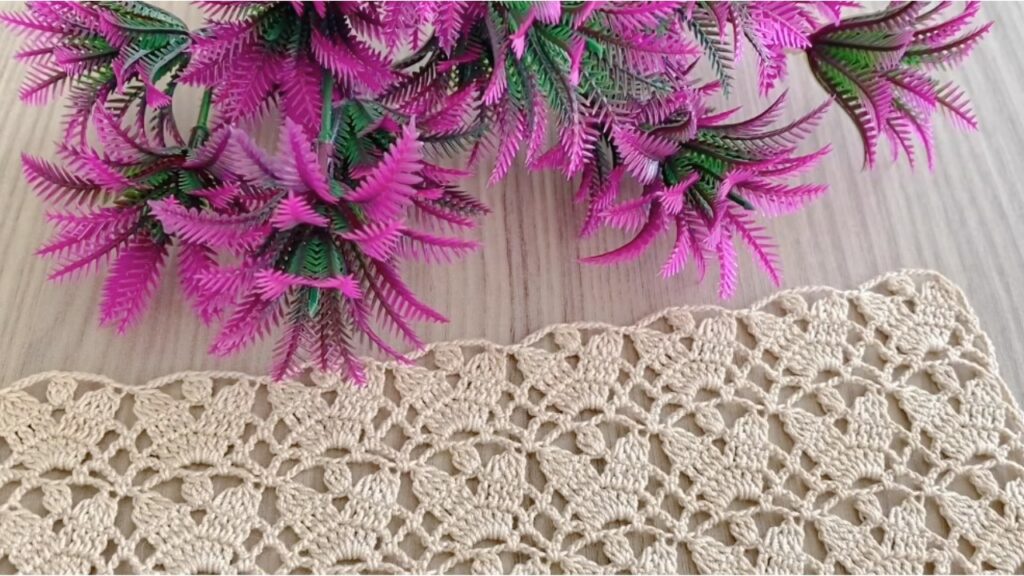
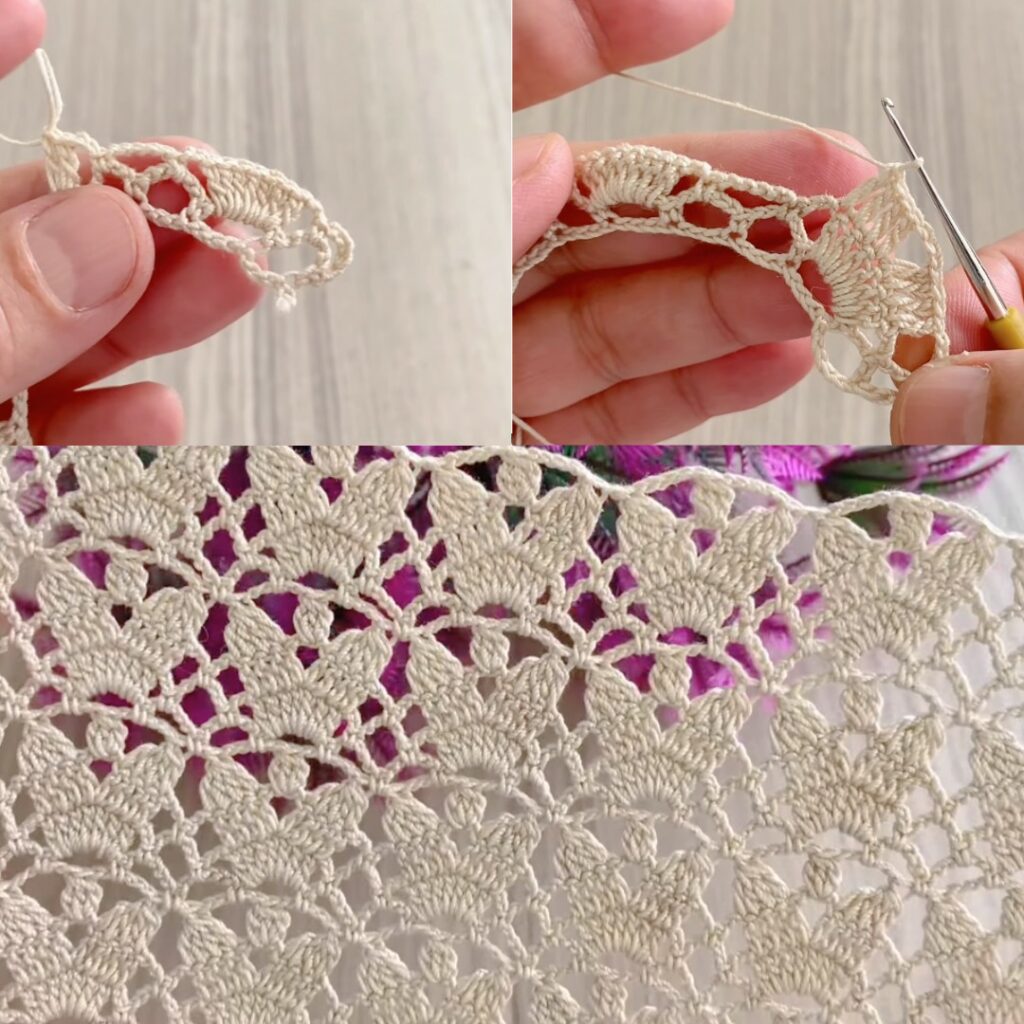
Motif — round-by-round (work rounds joined with sl st)
This motif is the core tile used to assemble garment panels. After Round 8 it blocks square and is joinable.
Round 1 — center
- Make a magic ring. ch 3 (counts as dc), work 15 dc into ring. (ch-3 + 15 dc = 16 dc.)
- Pull ring closed; sl st to top of ch-3 to join.
Check: 16 dc
Round 2 — loop foundation
- ch 4, sk next dc, sc in next dc — repeat around.
→ 8 ch-4 loops + 8 sc. Join with sl st.
Check: 8 loops
Round 3 — puffy petals
- In each ch-4 loop work: (sc, hdc, 7 dc, hdc, sc) — all into same loop (one petal).
- Sl st to next loop; repeat ×8. Join.
Check: 8 petals
(If you want smaller petals use 5 dc instead of 7 dc.)
Round 4 — tidy sc round
- Rejoin between petals. Work sc evenly around petal bases to flatten the motif — distribute about 9–12 sc per petal area so the round lies flat. Join.
Check: smooth circular boundary
Round 5 — lacy arches (frame)
- From each petal tip: sl st to tip → ch 7 → anchor into sc round between next petals with (tr, ch 2, tr, ch 2, tr) in that sc/space → sl st back to petal tip.
- Repeat around → 8 arches. Join.
Check: arches evenly spaced (adjust ch-6/8 if visuals demand)
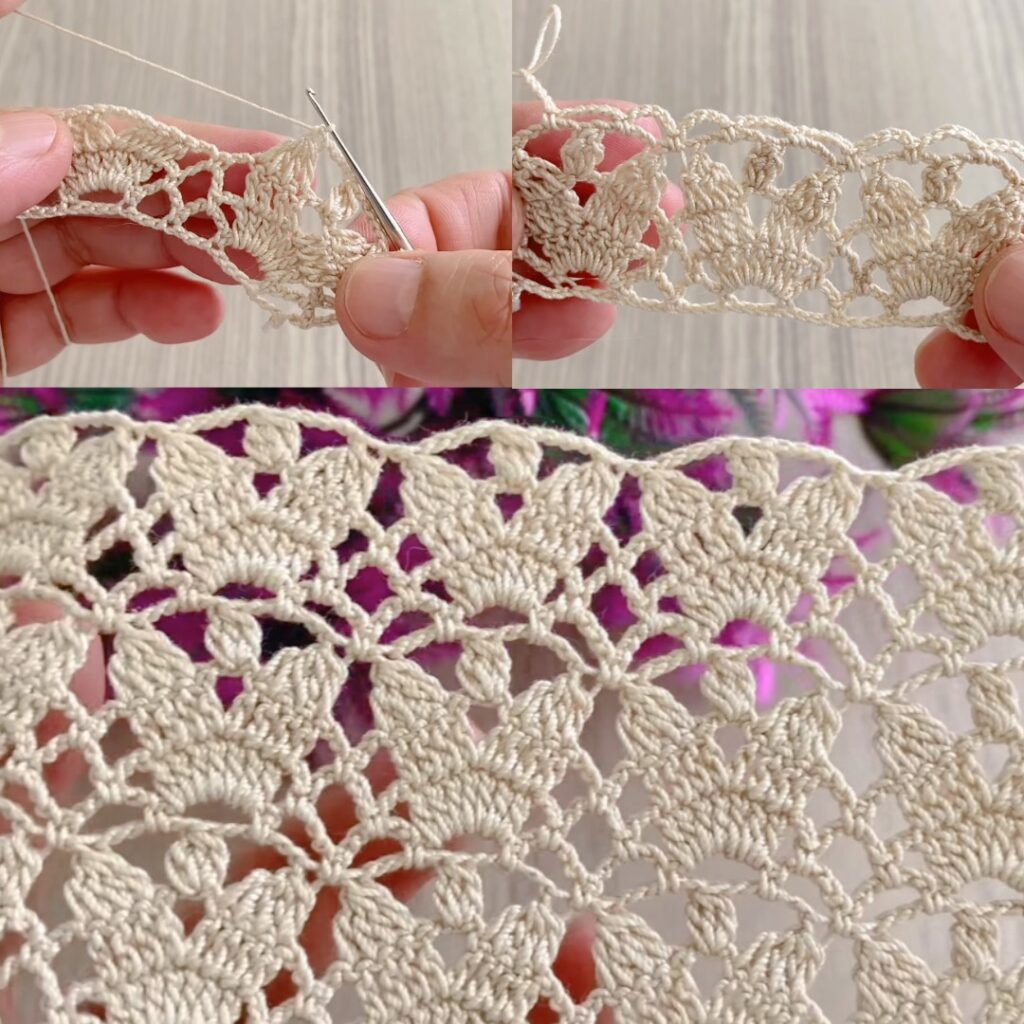
Round 6 — arch ribs
- Into each ch-7 arch: sl st to arch base → ch 3 → dc into top of first tr → ch 1 → dc into top of middle tr → ch 1 → dc into top of last tr → ch 3 → sl st into arch base.
- Repeat ×8 and join. (Simpler alternative: 3 dc separated by ch-1.)
Check: 3 ribs inside each arch
Round 7 — convert circle → square (side & corner loops)
- Mark four quarter points (every 2 petals). Rejoin at a quarter.
- Work each side between corners using a consistent distribution so all four sides match. Example starter layout (adjust to motif size):
sc 10, (sc, ch 4, sc) × 3, sc 10 → ch 6 (corner loop)
— Important: use identical sc & side-loop counts on every side so motifs align when joined. - Repeat for all 4 sides and join.
Check: 4 corner ch-6 loops + even side loops → motif blocks to square
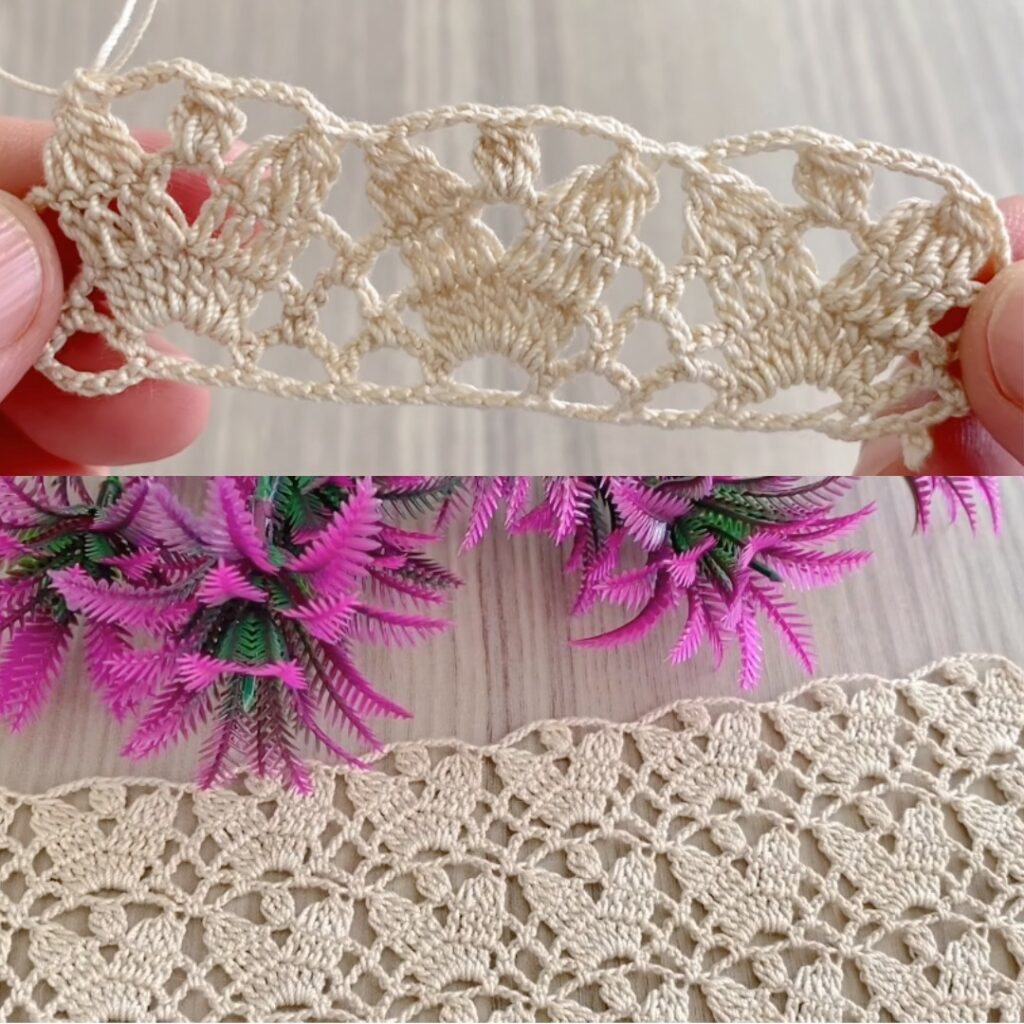
Round 8 — scalloped picot outer edge (finish & JAYG round)
- Rejoin and work final scallop: sc 3, (pic: ch 3, sl st into same st), sc 4 — adjust sc counts per small curve so scallops sit flat. Place picots regularly.
- This is the round you’ll JAYG: when a new motif meets a finished neighbor, replace that sl st/picot with sl st into the corresponding stitch/picot of the finished motif to join. Finish motif, fasten off and weave ends.
Check: scallops even; motif will lie flat after blocking
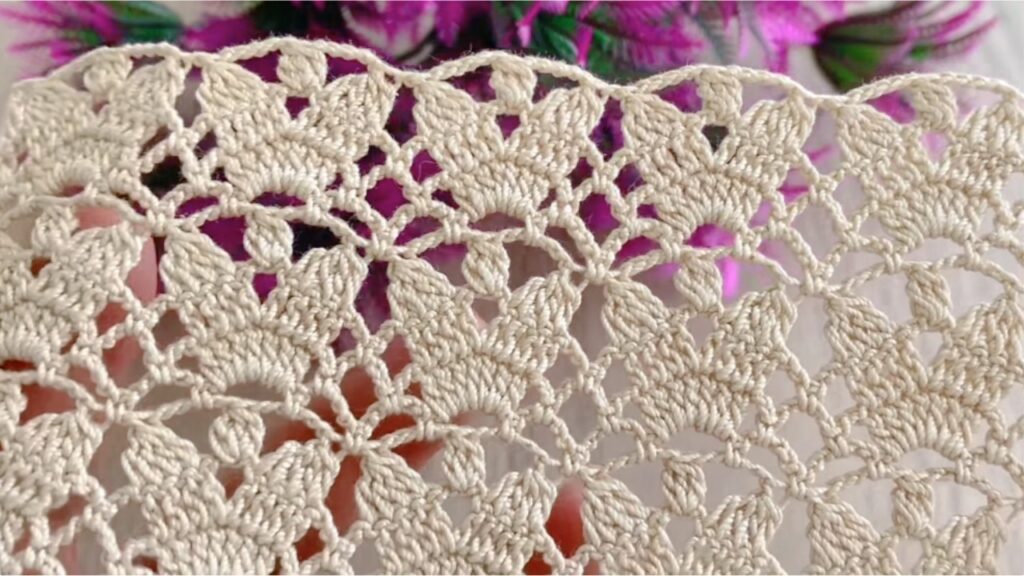
Blocking & prepping motifs
- Block every motif into a square: pin corner ch-6 loops outward, pin picots and scallop peaks. Mist with water or steam and leave to dry fully. Blocking sets motif geometry and makes JAYG easier/flat.
Assembly — Layout & sizing (no math surprises)
Step A — Determine size & motif counts
- Block one motif and measure M = motif width (cm).
- Decide desired bust (circumference) C and desired garment length L.
- Number of motifs across (half width for top row):
across_half = round((C/2) ÷ M)→ total across =across_half × 2if making front+back as one continuous sheet; for a continuous single-panel blouse you can plan full width directly. - Rows down =
round(L ÷ M).
Example: motif M ≈ 11 cm → half-chest 46 cm → across_half ≈ 4 motifs → top row ~ 8 motifs if you build a continuous front+back sheet; or build front panel 4 motifs wide then back panel separately.
Step B — Neckline shaping (simple methods)
Option 1 — Boat/round neckline (easy): build top row of motifs across chest; for center open neck, skip joining the central 1–2 motif joins (leave gap) so neckline is wider. For a smaller neck, join all motifs across then pick up around neck and add 2 rounds sc.
Option 2 — Scoop/V neckline: omit one motif (or half motif) at center and join surrounding motifs to create a V, or stop joining in the center and decrease motif count in rows under the neck.
Step C — Armhole shaping
- While JAYG joining rows, leave side joins unworked for the height of the armhole. Typical depths:
- Cap sleeve ≈ 1 motif high
- Short sleeve ≈ 2 motifs high
- Long sleeve ≈ 3+ motifs high
- After body rows are done, finish sleeve by making separate motif strips (width = number motifs around armhole if you want motifs as sleeve) and JAYG them into armhole edges.
One-piece method (recommended)
- Build top row across front (and back if working a continuous sheet) and then add rows beneath using JAYG to join each new motif to the row above as you go. Leave center gaps for neckline and leave side joins open for armholes. This yields minimal finishing.
Neck, armhole & hem finishing
- Pick up stitches around neckline & armholes and work 2 rounds sc. Add one decorative round: picot round (sc, pic, sc) or eyelet round (ch2 spaces). For hem, add 1 round dc for weight so the blouse/tunic hangs nicely.
Sleeves (options)
- Sleeveless: leave joined opening; finish edge with sc + picot.
- Cap/short sleeve: join 1–2 rows of motifs as strips and JAYG into armhole.
- Set-in style (if preferred): make motif sleeve panels and sew into armhole.
Tips for fit & adjustments
- Want looser fit? add 1–2 motifs to width or use larger hook.
- Want longer tunic? add more rows.
- For a fitted look, use slightly smaller hook or remove a motif column.
- Always block motifs before joining — JAYG on blocked motifs gives flat, accurate joins.
Troubleshooting
- Motifs curl/cup: loosen tension or go up 0.5 mm hook for petal/arch rounds; block firmly.
- Motif ripples/ruffles: shorten arch chains (ch-7 → ch-6) or reduce sc in Round 4.
- Joined seams gape: during JAYG use slightly firmer tension for join sl sts, or add an extra sl st at each join point.
- Sides not matching when joining: ensure Round 7 side loop counts are identical on every motif (this is the most common alignment problem).
Variations & styling ideas
- Two-color motifs: change color after Round 3 (petals) for contrast.
- Smaller, delicate blouse: use fingering yarn + smaller hook and 5 dc petals.
- Heavier tunic: use cotton-blend and add a dc hem for weight.
- Border options: after assembly, work a round of sc then a scallop/picot round around hem & sleeves.
Quick checklist before you start
- Make a blocked test motif and measure
M. - Decide
C(bust circumference) andL(length). - Compute motifs across and rows down (see “Assembly” above).
- Block all motifs as you make them.
- JAYG on Round 8 to assemble, leaving center and side joins open where you want neck/armholes.
VIDEO: