by
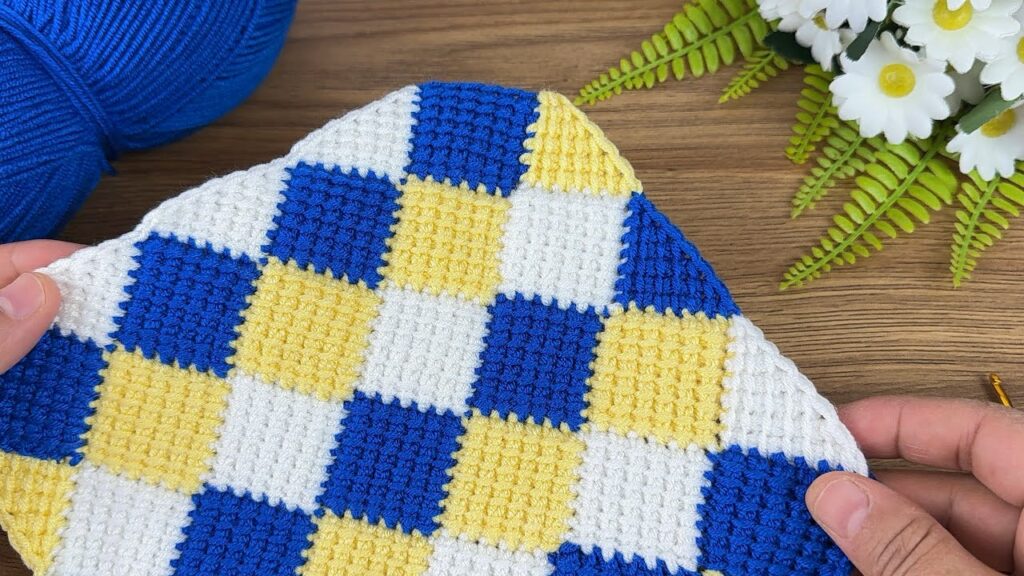
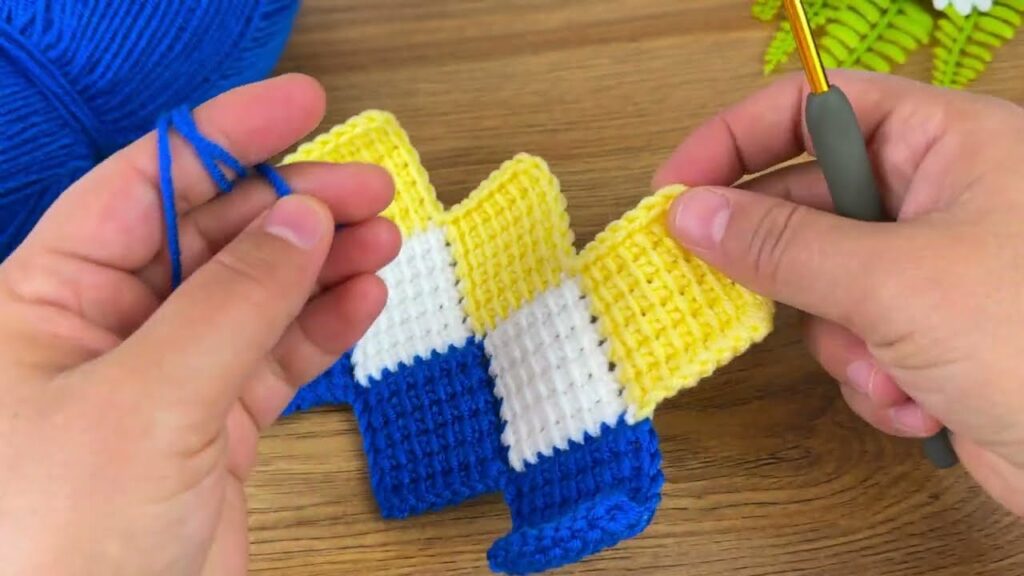
by Imagine a baby blanket that tells a story through its interlocking colors, a vibrant tapestry of geometric shapes and contrasting hues, all without the tangled mess of multiple yarn strands per row. This is the magic of Tunisian mosaic crochet, a technique that, when paired with a soft three-color palette, results in an heirloom-quality baby blanket that’s as warm and comforting as it is visually captivating.
This detailed article will guide you through the principles of creating a stunning three-color mosaic pattern using Tunisian crochet, perfectly suited for a baby blanket. We’ll demystify the process, explain the unique mechanics of Tunisian mosaic, and offer a conceptual guide to bringing your colorful vision to life.
Why Choose Tunisian Mosaic for a Baby Blanket?
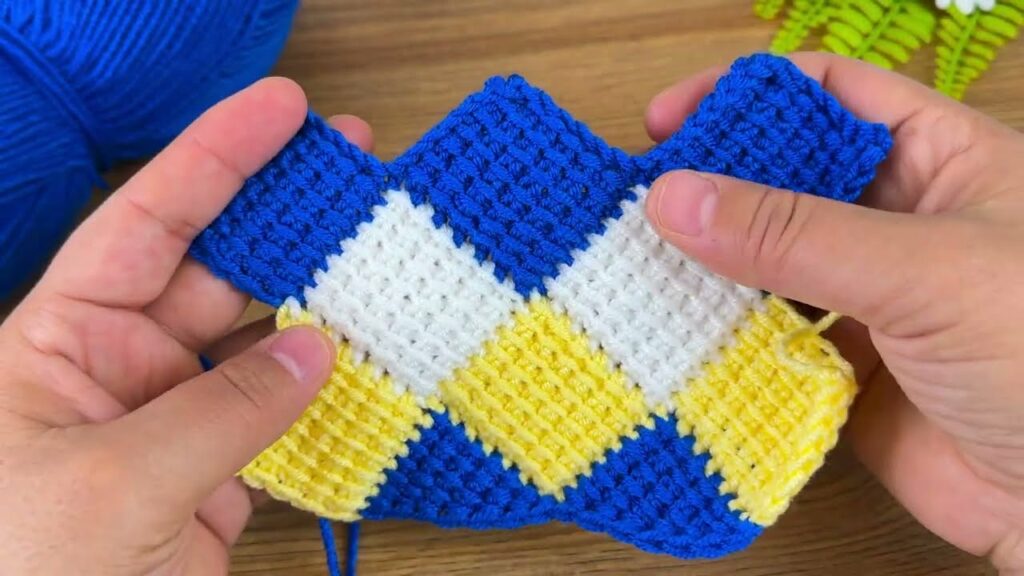
- Unique & Cozy Texture: Tunisian crochet naturally produces a dense, warm fabric that’s perfect for keeping a baby snug. The mosaic technique adds an extra layer of texture, making the blanket feel wonderfully squishy and inviting.
- Stunning Visuals with Ease: Mosaic crochet creates intricate colorwork patterns that appear to be woven together, but here’s the secret: you only work with one color per row. This eliminates the headaches of carrying multiple strands across a row or managing complicated color changes within a single pass.
- No Floats! (A Major Advantage): Unlike traditional stranded colorwork, Tunisian mosaic leaves no long yarn floats on the back of your work. The unused color is simply carried up the side edge, resulting in a cleaner, safer blanket for little fingers and toes.
- Engaging & Stimulating: The bold geometric patterns and contrasting colors in mosaic can be visually stimulating for a baby, offering an early introduction to shapes and colors.
- Skill Enhancement: This project offers a fantastic opportunity to deepen your understanding of Tunisian crochet, practicing essential stitches and learning the clever mechanics of mosaic color changes.
- Heirloom Quality: The dense, durable fabric and eye-catching design make this blanket a piece that can be treasured and passed down through generations.
Understanding Tunisian Mosaic Crochet: The Principles
Tunisian mosaic crochet is a brilliant technique that relies on two core principles:
- One Color Per Row: You only ever use a single color for an entire forward pass (FP) and its corresponding return pass (RP).
- Skipping and Covering: The pattern is created by strategically skipping stitches in one row (with one color) and then working stitches into those skipped spaces in a subsequent row (with the other color). The colors appear to interlock because the “skipped” sections are later covered by the contrasting yarn.
The Two Passes:
- Forward Pass (FP): Working from right to left, you pick up loops onto your long Tunisian hook.
- Return Pass (RP): Working from left to right, you yarn over and pull through loops on your hook to create the fabric, reducing the number of loops until only one remains (ready for the next FP).
Color Changes: Color changes happen only at the beginning of a new row (before the forward pass begins). The previously used color is dropped, and the new color is picked up from where it was carried up the side edge.
Key Considerations Before You Start:
- Yarn Choice (Softness First!):
- Fiber: For a baby blanket, softness is paramount. Opt for baby-friendly yarns like:
- Superwash Merino Wool: Exceptionally soft, warm, and often machine washable.
- Baby Acrylic: Widely available, affordable, very soft, durable, and easy to care for.
- Cotton or Cotton Blends: Breathable, good for warmer climates or sensitive skin, and durable.
- Weight: DK (Light Worsted / Category 3) or Worsted (Category 4) are ideal for blankets, offering good warmth and stitch definition.
- Colors: You’ll need three distinct colors.
- Main Color (MC): This color will typically form the “background” and be used more frequently. Choose a neutral or a color that highlights the others.
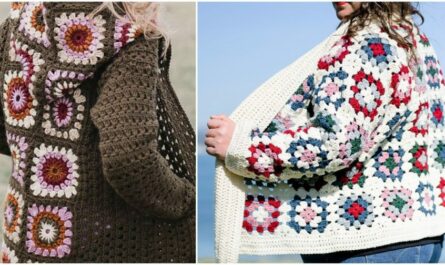
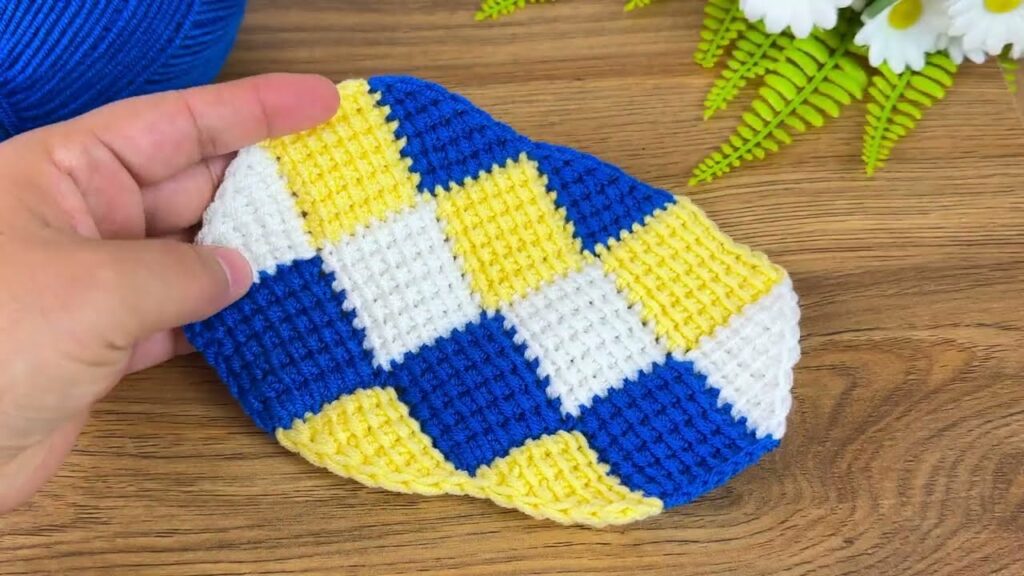
- Contrast Color 1 (C1) & Contrast Color 2 (C2): These will create your mosaic pattern. Choose colors that contrast well with the MC and with each other. A strong light/dark contrast makes the pattern “pop.” For example: MC = Cream, C1 = Dusty Rose, C2 = Sage Green. Or MC = Light Gray, C1 = Navy Blue, C2 = Mustard Yellow.
- Quantity: Estimate 2-3 skeins of your Main Color, and 1-2 skeins each of your Contrast Colors, depending on blanket size.
- Fiber: For a baby blanket, softness is paramount. Opt for baby-friendly yarns like:
- Tunisian Hook: You must use a long Tunisian crochet hook, preferably one with a cable, as it needs to hold all the stitches across the width of your blanket. The hook size should generally be 1-2 sizes larger than what you would use for regular crochet with the same yarn. This helps prevent the fabric from being too stiff and curling excessively (a common characteristic of Tunisian crochet).
- Gauge & Curling:
- Tunisian crochet has a natural tendency to curl. Using a larger hook size, maintaining a loose tension, and adding a border are crucial to counteract this.
- Making a gauge swatch is highly recommended to check stitch count and gauge before starting the full blanket.
- Pattern Repetition: Mosaic patterns are typically created by repeating a specific sequence of stitches over a set number of rows. They are often presented in charts, which are highly visual and easy to follow once you understand the mosaic principle.
- Border: An essential finishing touch for any Tunisian blanket, a border helps to stabilize the edges and prevent curling. A simple single crochet (sc) or half double crochet (hdc) border works beautifully.
Materials You’ll Need:
- Yarn:
- Main Color (MC): Approx. 600-800 yards (for 30×35 in blanket).
- Contrast Color 1 (C1): Approx. 300-400 yards.
- Contrast Color 2 (C2): Approx. 300-400 yards.
- (Amounts will vary based on yarn weight and blanket size)
- Tunisian Crochet Hook: Appropriate size for your yarn, with a cable long enough to hold all blanket stitches (e.g., 5.0mm-6.5mm / H/8-K/10).
- Regular Crochet Hook: (Optional, for border) One size smaller than your Tunisian hook.
- Yarn Needle (Tapestry Needle): For weaving in ends.
- Scissors:
- Stitch Markers: Useful for marking pattern repeats or center stitches.
Essential Tunisian Crochet Abbreviations & Special Stitches:
- ch: chain
- sl st: slip stitch
- yo: yarn over
- Lts: Last Tunisian Stitch (refers to the very last stitch of a row, worked differently for a neat edge).
- TSS: Tunisian Simple Stitch (insert hook under vertical bar, yo, pull up loop).
- TPS: Tunisian Purl Stitch (bring yarn to front, insert hook under vertical bar, yo, pull up loop).
- FP (Forward Pass): The first half of the row, picking up loops.
- RP (Return Pass): The second half of the row, working loops off the hook.
Three-Color Mosaic Pattern Tunisian Baby Blanket Tutorial (Conceptual Model)
This guide will focus on the mechanics of a three-color mosaic rather than providing a full, complex pattern, as mosaic designs can be quite intricate. You can find many free or paid mosaic charts online (e.g., on Ravelry, Pinterest, or crochet blogs) that will fit these principles.
Target Size: Approx. 30 x 35 inches (75 x 90 cm) – a common receiving blanket size. Gauge: For Worsted weight yarn and a 6.0mm Tunisian hook, aim for approx. 14 TSS stitches and 12 rows = 4 inches (10 cm). Your gauge may vary; adjust hook size as needed.
Basic Tunisian Row (TSS):
- Foundation Row: Ch desired number of stitches (e.g., 100 ch for approx. 30 inches wide, adjust based on your gauge).
- FP: Insert hook into 2nd ch from hook, yo, pull up loop. Insert hook into next ch, yo, pull up loop. Repeat from * across until you have 100 loops on your hook.
- RP: Yo, pull through 1 loop (this creates the first “chain stitch” on the edge). Yo, pull through 2 loops. Repeat from * until 1 loop remains on hook.
- Subsequent TSS Rows:
- FP: Skip the first vertical bar (already one loop on hook). Insert hook under next vertical bar, yo, pull up loop. Repeat from * until you reach the last stitch. For the Lts, insert hook under both vertical bars of the very last edge stitch, yo, pull up loop. (This creates a neat, straight edge).
- RP: Yo, pull through 1 loop. Yo, pull through 2 loops. Repeat from * until 1 loop remains.
Understanding the Three-Color Mosaic Principle:
In a three-color mosaic, you’ll typically have your Main Color (MC) serving as the “background” that connects all parts of the pattern, and two Contrast Colors (C1 and C2) that create different elements of the design.
- Each row (FP & RP) is worked in a single color.
- Colors are changed only at the start of a new row.
- The unused color is carried loosely up the side edge.
Conceptual Mosaic Sequence (Illustrative Example):
Let’s assume your pattern repeats every 4 rows and alternates C1 and C2 with your MC.
- Starting: Begin with your Main Color (MC). Make your foundation row in MC.
- Row 1 (MC): Work a full row in TSS. (Drop MC to the side, don’t cut).
- Introducing Contrast Color 1:
- Row 2 (C1): Pick up Contrast Color 1.
- FP: Work the mosaic pattern. This will involve working TSS into some vertical bars, and then
ch 1, skip next vertical barto create gaps that MC will fill. For instance:*TSS 2, ch 1, skip 1, TSS 2*repeated across the row. (Drop C1 to the side, don’t cut).
- FP: Work the mosaic pattern. This will involve working TSS into some vertical bars, and then
- Row 3 (MC): Pick up Main Color.
- FP: Work a solid row, ensuring you work into the
ch-1 spacesfrom the previous row to cover the skipped stitches. For instance:*TSS 2, TSS into ch-1 sp, TSS 2*repeated across. (Drop MC).
- FP: Work a solid row, ensuring you work into the
- Row 2 (C1): Pick up Contrast Color 1.
- Introducing Contrast Color 2:
- Row 4 (C2): Pick up Contrast Color 2.
- FP: Work a new mosaic pattern, often offset from C1’s pattern. For instance:
*Ch 1, skip 1, TSS 2, ch 1, skip 1, TSS 1*repeated, ensuring it creates a distinct shape. (Drop C2).
- FP: Work a new mosaic pattern, often offset from C1’s pattern. For instance:
- Row 5 (MC): Pick up Main Color.
- FP: Work solid, filling in the
ch-1 spacesfrom Row 4. For instance:*TSS into ch-1 sp, TSS 2, TSS into ch-1 sp, TSS 1*repeated. (Drop MC).
- FP: Work solid, filling in the
- Row 4 (C2): Pick up Contrast Color 2.
Repeat: You would then continue this sequence (or your chosen pattern’s sequence) using MC with C1, then MC with C2, then back to MC with C1, and so on, building your mosaic design.
Binding Off:
When your blanket reaches the desired length and you’ve completed your last mosaic pattern sequence (ending on a Main Color row for consistency with the border), you’ll bind off.
- Bind-off Row (Using Main Color): Insert hook under vertical bar as if to TSS, then sl st through the loop on your hook. Insert hook under next vertical bar, yo, pull up loop, sl st through loop on hook. Repeat from * across. This creates a neat, chain-like edge.
- FO, leaving a long tail to weave in.
Border (Essential for Flatness):
- Using your regular crochet hook (the one size smaller than your Tunisian hook) and your Main Color yarn, work a simple border around the entire blanket.
- Round 1: Ch 1. Sc evenly around the entire blanket, placing 3 sc in each corner. Aim for a consistent number of stitches along the sides (e.g., 1 sc per row end). Join with a sl st to the first sc.
- Round 2: Ch 1. Sc in each sc around, placing 3 sc in the middle stitch of each corner. Join with a sl st to the first sc.
- FO, weave in ends. (You can add more rounds of sc, hdc, or a decorative shell border if desired).
Tips for Success with Tunisian Mosaic:
- Practice Swatch: Before starting the blanket, make a generous swatch (e.g., 6×6 inches) of your mosaic pattern to get comfortable with the color changes and to verify your gauge.
- Tension is Key: Maintain consistent tension throughout both the forward and return passes. This is crucial for even stitches and a neat pattern.
- Yarn Management: When carrying the unused yarn up the side, try to carry it loosely to prevent the edge from puckering.
- Counting!: Mosaic patterns rely heavily on accurate stitch counts and skipping. Count your stitches and check your pattern repeats frequently.
- Reading Charts: If using a chart, understand the symbols and how to read Tunisian charts (usually from right to left for FP, then implied RP). Mosaic charts often have a key indicating when to ch 1 and skip a stitch, and when to work into those ch-1 spaces.
- Blocking is a Game-Changer: After completing your blanket, blocking it (gently wetting it and pinning it into shape to dry) will dramatically improve its appearance, flatten any curling, and open up the stitches beautifully.
Creating a three-color mosaic Tunisian baby blanket is a truly rewarding endeavor. The resulting blanket will be a unique, warm, and visually stunning piece of art, destined to be cherished for years to come. Happy hooking!
Video tutorial: