 by
by Crochet motifs are the building blocks of countless projects, from cozy blankets and stylish bags to delicate garments and charming home decor. Don’t let their intricate appearance in larger projects intimidate you – the beauty of a motif lies in its small, manageable size, making it the perfect project for beginners to learn foundational skills and for experienced crocheters to enjoy quick, satisfying makes.
This detailed article will guide you through creating a truly “super easy” solid square motif. Once you master this simple shape, you’ll unlock the potential to create an endless array of beautiful, customized items!
Why Learn This Super Easy Motif?
- Beginner-Friendly: This motif uses only the most basic crochet stitches – the chain, slip stitch, and double crochet. If you can make these, you can make this motif!
- Quick to Make: Because it’s small, you’ll complete one in minutes, offering instant gratification and a boost of confidence.
- Incredibly Versatile: The solid square is one of the most useful motifs. Alone, it makes a great coaster. Joined together, motifs transform into blankets, scarves, bags, cushion covers, and more.
- Skill Builder: Regularly making motifs helps you practice consistent tension, master working in the round, and accurately count stitches – all vital crochet skills.
- Excellent Scrap Buster: Have small balls of leftover yarn? Motifs are perfect for using them up, turning scraps into treasure.
- Perfectly Portable: A hook and a ball of yarn fit easily into any bag, making motif crocheting ideal for commuting, waiting rooms, or quiet evenings.
Key Considerations Before You Start:
- Yarn Choice:
- Fiber: Any fiber works, but for your first attempts, choose a smooth, non-fuzzy yarn. This will allow you to clearly see your stitches and avoid frustration. Cotton, acrylic, or wool blends are all great.
- Weight: Worsted weight (Category 4) is often recommended for learning, as its stitches are easily visible and it works up quickly. DK (Category 3) is also a good choice for slightly smaller, finer motifs.
- Colors: Start with a solid, light-colored yarn for your first motif. This helps you focus on stitch placement and tension without the distraction of color changes or busy patterns. Once comfortable, experiment with variegated yarns or multiple colors!
- Hook Size: Always match your crochet hook to your chosen yarn weight. The yarn label will provide a recommended hook size. For this motif, using the recommended size will create a balanced fabric – not too stiff, not too loose.
- Gauge: While not critical for a single motif, if you plan to join many together for a larger project, maintaining consistent gauge (and thus, consistent motif size) is important. Focus on keeping your tension even.
- Motif Type: There are various motif types (squares, circles, hexagons, triangles). This tutorial will focus on a Super Easy Solid Square Motif, a fundamental building block for many projects.

Materials You’ll Need:
- Yarn: One ball of Worsted weight (Category 4) yarn (or DK weight if preferred) in a solid, light color.
- Crochet Hook: To match your yarn (e.g., 5.0mm (US H/8) for Worsted weight).
- Yarn Needle (Tapestry Needle): For weaving in ends.
- Scissors:
Essential Crochet Abbreviations:
- ch: chain
- sl st: slip stitch
- dc: double crochet
- st(s): stitch(es)
- ch-sp: chain space
- (): indicates instructions to be worked into the same stitch/space
- ***…***: repeat instructions within asterisks
- []: indicates stitch counts at the end of a round
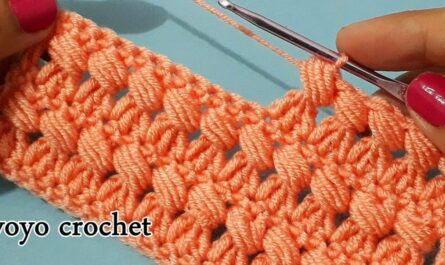
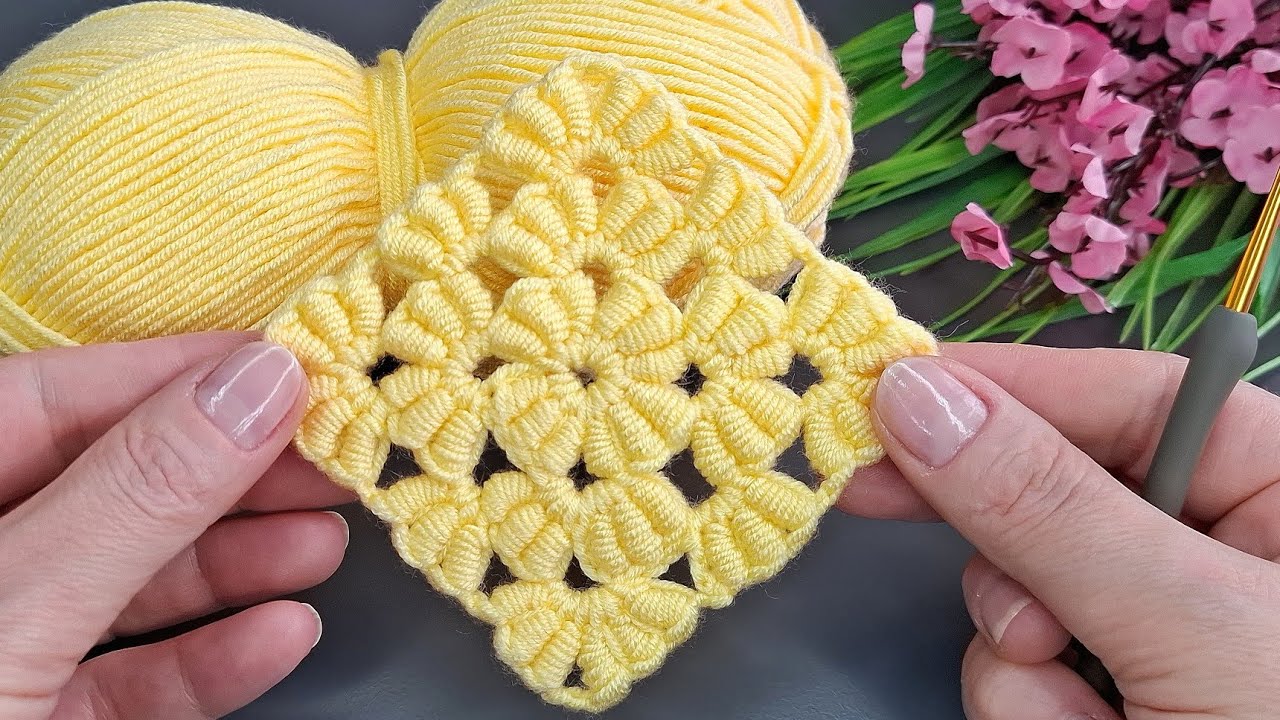
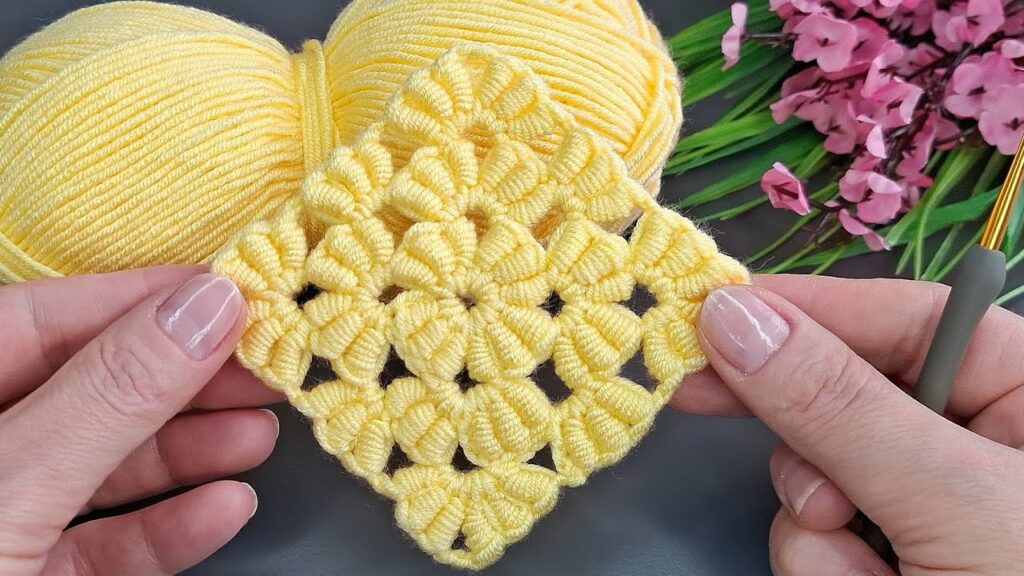
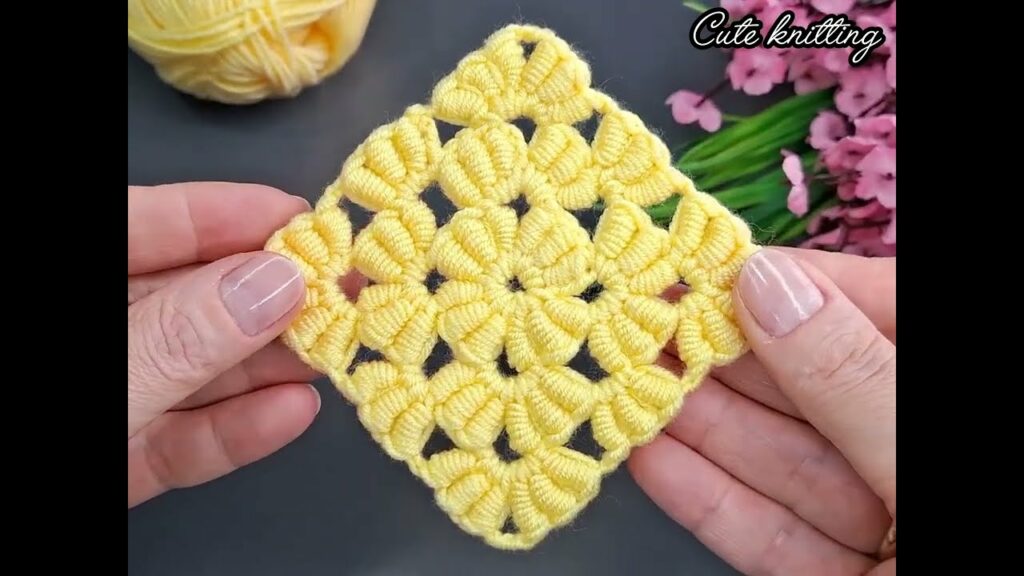
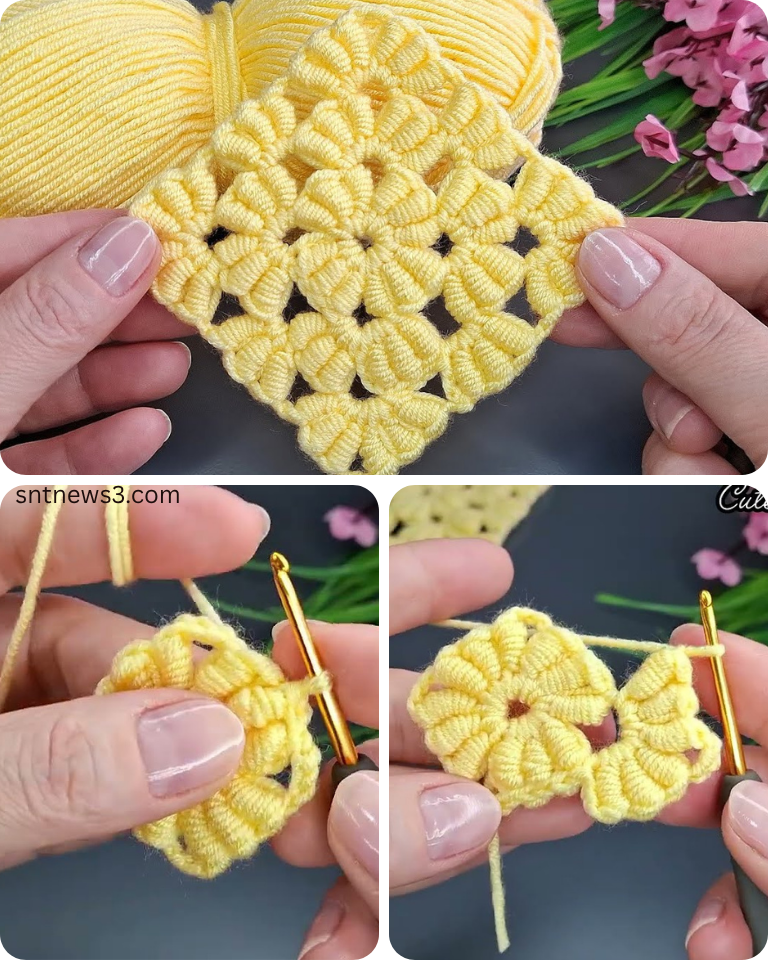
Super Easy Solid Square Crochet Motif Tutorial
This tutorial will create a motif approximately 4×4 inches (10×10 cm) using Worsted weight yarn and a 5.0mm hook. Your size may vary based on your tension and yarn/hook choice.
Getting Started: The Center Ring
There are two common ways to start a motif. We’ll use the “Chain 4 Ring” method, which is very beginner-friendly.
- Ch 4.
- Sl st into the first chain to form a ring. This ring will be the center of your square.
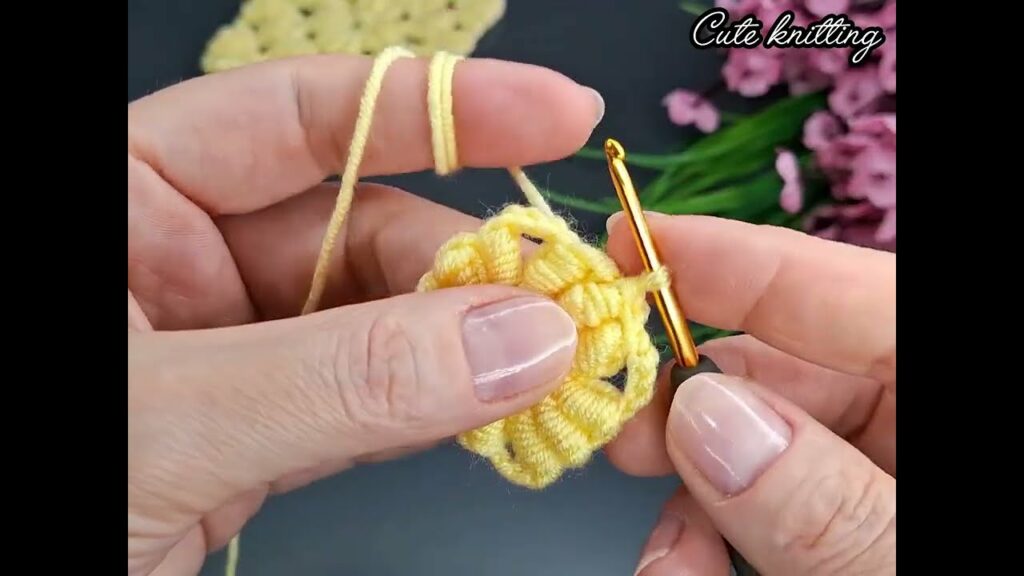
Round 1: Creating the First Square
This round establishes the four sides and four corners of your square.
- Ch 3 (counts as your first dc).
- Work 2 dc into the ring.
- Ch 2 (this creates your first corner space).
- Work 3 dc into the ring.
- Ch 2 (your second corner space).
- Work 3 dc into the ring.
- Ch 2 (your third corner space).
- Work 3 dc into the ring.
- Ch 2 (your fourth and final corner space).
- Sl st into the top of the beginning Ch 3 to join the round.
- You should now have 4 groups of 3 dc stitches, separated by 4 ch-2 spaces.
Round 2: Expanding the Square
Now we’ll build on the corners to make the square larger.
- Sl st into the next 2 dc stitches until you reach the first ch-2 corner space.
- Ch 3 (counts as your first dc).
- Work (2 dc, ch 2, 3 dc) into the same corner space. (This creates a new corner with stitches on both sides).
- Work (3 dc, ch 2, 3 dc) into the next ch-2 corner space. Repeat from * 2 more times.
- Sl st into the top of the beginning Ch 3 to join the round.
- You should now have 8 groups of 3 dc stitches, still separated by 4 ch-2 spaces. Each “side” of your square now has 2 groups of 3 dc stitches (6 dc total), not counting the corner stitches.
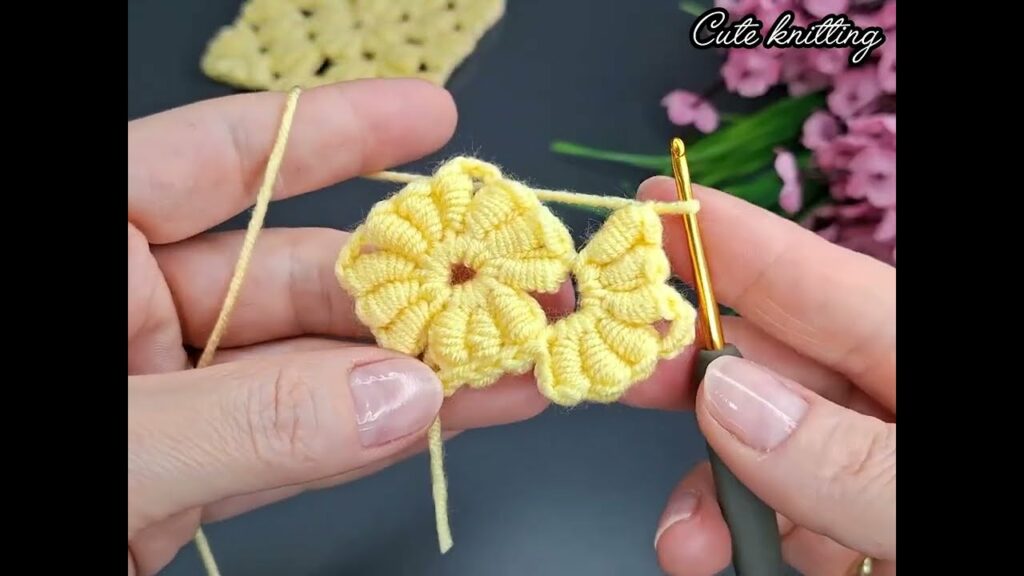
Round 3: Growing Your Motif
This round adds more stitches along the sides between the corners.
- Sl st into the next 2 dc stitches until you reach the first ch-2 corner space.
- Ch 3 (counts as your first dc).
- Work (2 dc, ch 2, 3 dc) into the same corner space.
- Work 3 dc into the space between the two 3-dc groups from the previous round (the “flat” side of the square).
- Work (3 dc, ch 2, 3 dc) into the next ch-2 corner space.
- Repeat steps 4 and 5 around the remaining sides of the square.
- After the last “3 dc” group on the final side, sl st into the top of the beginning Ch 3 to join the round.
- You should now have 4 corners (each 3 dc, ch 2, 3 dc) and 4 sides, each with 2 groups of 3 dc stitches (6 dc total) between the corners.
Round 4 (Optional, for a larger square):
You can continue to expand your square by repeating the pattern established in Round 3.
- Sl st to the next corner space.
- Ch 3, then work (2 dc, ch 2, 3 dc) into the same corner space.
- Work 3 dc into each space between the 3-dc groups along the side (there will now be two such spaces).
- Work (3 dc, ch 2, 3 dc) into the next ch-2 corner space.
- Repeat steps 3 and 4 around the remaining sides.
- Sl st to join into the top of the beginning Ch 3.
- Each side will now have 3 groups of 3 dc stitches between the corners.
Finishing Your Motif:
- Fasten Off (FO): Cut your yarn, leaving a 6-inch (15 cm) tail. Yarn over and pull the tail completely through the loop on your hook. Pull firmly to secure.
- Weave in Ends: Thread the yarn tail onto your yarn needle. Carefully weave the tail through several stitches on the wrong side of your motif to secure it and hide it from view. Trim any excess. Do the same for your starting tail in the center of the square.
Ideas for Using Your Easy Motifs:
Once you’ve made a few, you’ll see the potential!
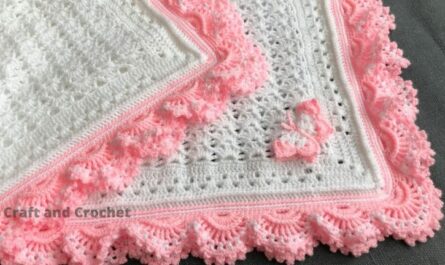
- Coasters/Hot Pads: A single motif makes a great coaster or a small hot pad (use cotton yarn for hot pads).
- Baby Blankets/Afghans: Join many motifs together. Experiment with different colors for each motif or a color-block pattern.
- Scarves/Shawls: Join motifs in a long strip.
- Bags/Pouches: Join several motifs to form panels for a simple tote bag or a small pouch.
- Cushion Covers: Create large panels by joining motifs.
- Bunting/Garlands: Make a series of motifs and join them with a simple chain.
- Garment Accents: Sew individual motifs onto denim jackets, plain t-shirts, or bags as decorative patches.
Tips for Success & Motif Mastery:
- Consistent Tension: Try to maintain the same tension throughout your work. This ensures all your motifs are the same size, which is crucial for joining.
- Counting Stitches: Don’t skip counting! It’s the key to maintaining the perfect square shape and ensuring your corners are correctly formed.
- Weave Ends Neatly: For motifs, especially those that will be joined, neatly woven ends make a huge difference in the final appearance.
- Blocking (Optional but Recommended): For perfectly flat, uniform motifs, especially if you plan to join them, wet blocking is ideal. Pin them to shape on a blocking mat and let them dry.
- Experiment with Colors: Once you’re confident with the basic square, try changing colors at the beginning of each round, or use variegated yarns to see the beautiful effects they create!
- Joining Methods: When you’re ready to join, common methods include slip stitch joining (creates a flat seam), single crochet joining (creates a raised seam), or various invisible joining techniques.
You’ve now mastered the super easy solid square crochet motif! This small accomplishment is a giant leap towards crocheting larger, more complex, and equally beautiful projects. Happy hooking!
Video tutorail: