by
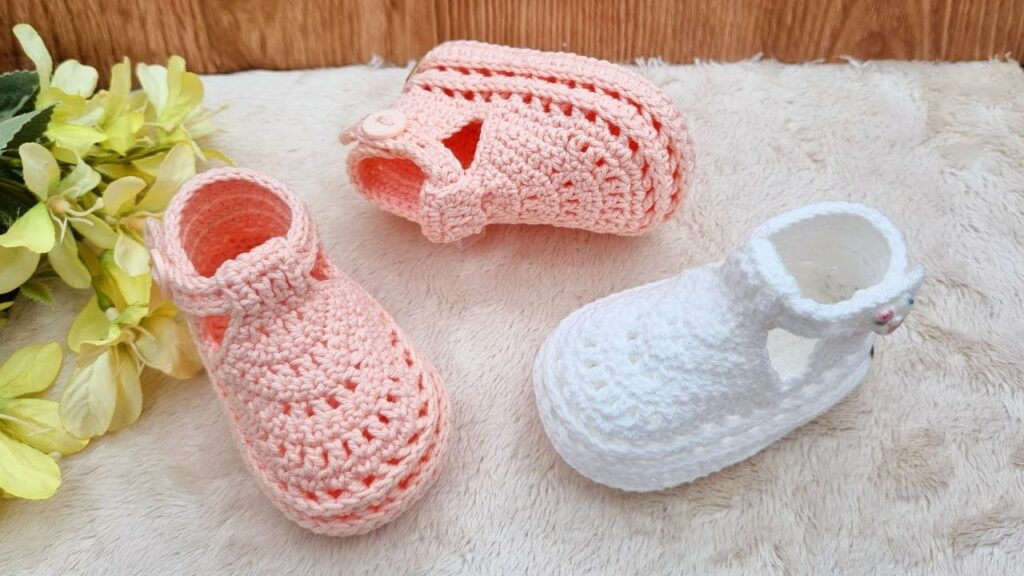
by Hello, fellow yarn lovers! Are you ready to create something absolutely adorable for the tiniest feet in your life? There’s a special kind of joy that comes from crafting for babies, and these Super Easy Crochet Baby Loafer Sandals are the perfect project to bring that joy to life. Inspired by the charming simplicity of classic baby shoes, this pattern is designed to be straightforward and quick, making it ideal for beginners or anyone looking for a satisfying, fast make.
Imagine those precious little toes peeking out of these soft, handmade sandals on a warm day. Whether you’re making them for your own little one, as a heartfelt baby shower gift, or to welcome a new arrival, these loafers are sure to be cherished. We’ll focus on a simple, comfortable design that mimics a classic loafer style with a cute, secure ankle strap.
Let’s grab our hooks and yarn and get ready to stitch some sunshine!

Why You’ll Love Crocheting These Loafer Sandals:
- Beginner-Friendly: Uses only basic stitches like single crochet (sc) and half double crochet (hdc).
- Quick to Make: Each sandal works up in just a couple of hours, perfect for last-minute gifts.
- Utterly Adorable: The finished product is incredibly cute and stylish for baby’s summer wardrobe.
- Customizable: Easily change colors, add tiny appliques, or use different buttons to personalize.
- Practical: Soft, breathable, and comfortable for delicate baby feet.
- Stash Buster: Great for using up those smaller skeins of cotton or baby yarn.
Essential Considerations Before You Start:
To ensure your baby sandals are perfect, keep these tips in mind:
- Yarn Choice is Key!
- Fiber: Always choose 100% cotton or a cotton blend. It’s breathable, soft against sensitive skin, and easy to wash. Avoid wool or synthetic yarns that might be too warm or irritate.
- Weight: DK (Light Worsted / Category 3) yarn is ideal for these tiny sandals. It creates a lovely drape and stitch definition without being bulky.
- Washability: Babies are messy! Ensure your yarn is machine washable and dryable (check the label).
- Color: Light, cheerful colors are perfect for summer. Pastels, soft neutrals, or gentle brights all work beautifully.
- Hook Size Matters for Fit: The right hook size ensures your sandals fit the intended age range.
- For 0-3 Months: Aim for a 3.0mm (US C/2) hook.
- For 3-6 Months: Aim for a 3.5mm (US E/4) hook.
- Always check your gauge! If your stitches are too loose, go down a hook size; if too tight, go up.
- Gauge Swatch: While small, a quick gauge swatch for the sole is crucial for accurate sizing.
- Safety First: If adding buttons for the ankle strap, choose flat, baby-safe buttons that are securely sewn on and large enough not to be a choking hazard. For very young babies, consider a tie closure instead.
Materials You’ll Need:
- Yarn: Approx. 60-90 yards per pair of DK (Category 3) soft cotton or cotton blend yarn.
- Crochet Hook: 3.0mm (US C/2) for 0-3 months, or 3.5mm (US E/4) for 3-6 months.
- Yarn Needle (Tapestry Needle): For weaving in ends and sewing.
- Scissors:
- Stitch Markers (optional but helpful): To mark the beginning of rounds or specific stitches.
- 2 Small, Flat Baby-Safe Buttons: (Approx. 0.5 inch / 1.25 cm diameter) OR small amount of ribbon/yarn for tie closure.
Essential Crochet Abbreviations:
- ch: chain
- sl st: slip stitch
- sc: single crochet
- hdc: half double crochet
- dc: double crochet
- sc inc: single crochet increase (2 sc in same st)
- hdc inc: half double crochet increase (2 hdc in same st)
- st(s): stitch(es)
- FO: Fasten off (cut yarn and pull through loop to secure)
- (): indicates instructions to be worked into the same stitch
- …: repeat instructions between asterisks
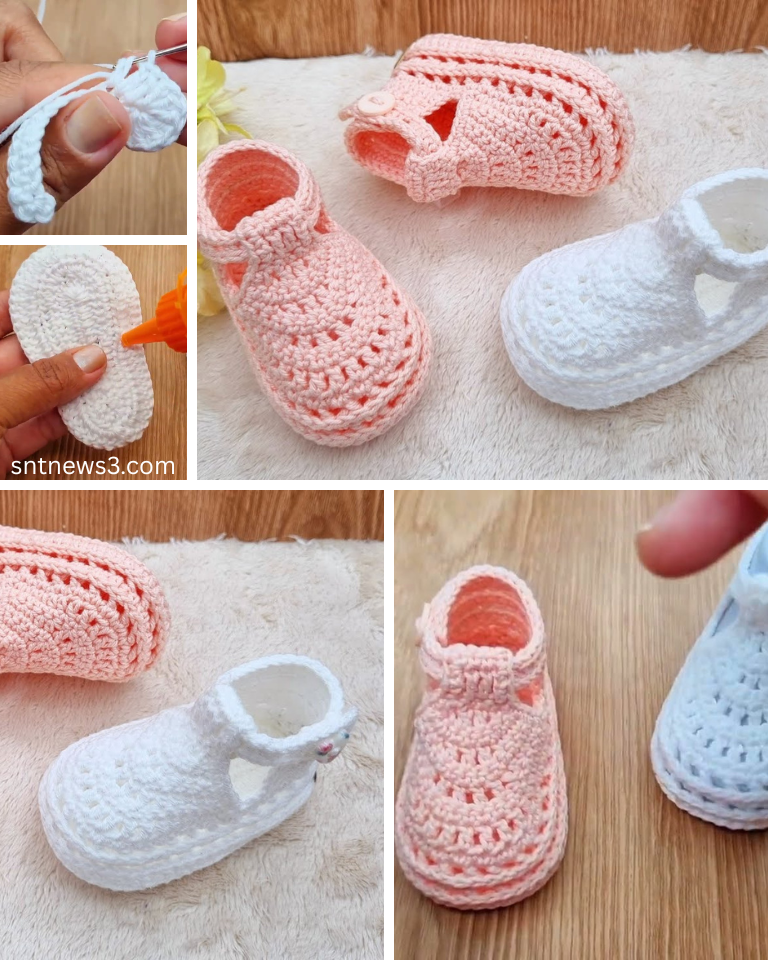
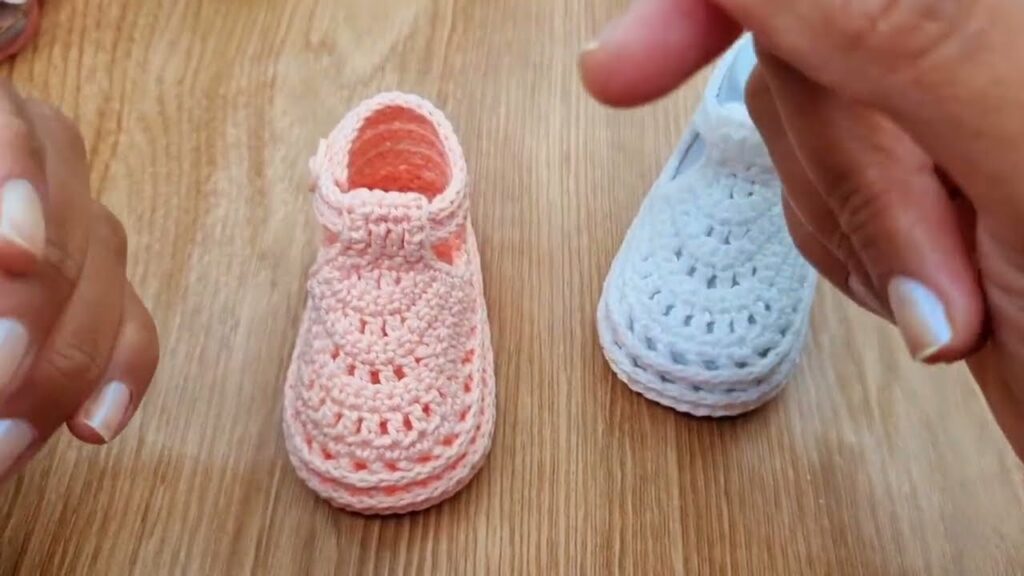
Your Super Easy Crochet Baby Loafer Sandals Pattern (Make 2)
We’ll start by creating the sole, then build the upper directly from it, and finally add the straps.
Finished Sole Lengths (approximate):
- 0-3 Months: 3.5 inches (9 cm)
- 3-6 Months: 4 inches (10 cm)
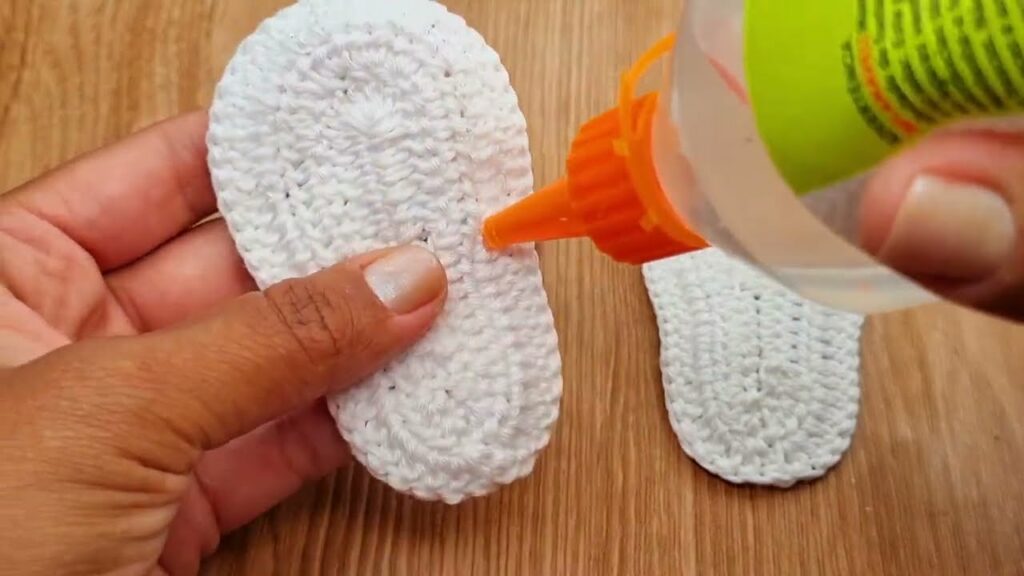
Part 1: The Sole (Make 2)
This oval base forms the foundation of your sandal. We’ll work in continuous rounds.
- Starting Chain (Adjust for Size):
- 0-3 Months: Ch 10
- 3-6 Months: Ch 12
- Round 1:
- For 0-3 Months (using Ch 10): Hdc in 2nd ch from hook. Hdc in next 7 ch. Work (5 hdc) in the very last ch (this forms the toe end). Working down the opposite side of the starting chain: Hdc in next 7 ch. Work (4 hdc) in the very first ch (where your first hdc was made). Do not join. Place stitch marker in the first hdc of the round. (24 hdc)
- For 3-6 Months (using Ch 12): Hdc in 2nd ch from hook. Hdc in next 9 ch. Work (5 hdc) in the very last ch. Working down the opposite side of the starting chain: Hdc in next 9 ch. Work (4 hdc) in the very first ch. Do not join. Place stitch marker in the first hdc of the round. (30 hdc)
- Round 2:
- For 0-3 Months: Sc inc in first hdc. Sc in next 8 hdc. (Sc inc) in next 3 hdc. Sc in next 8 hdc. (Sc inc) in next 2 hdc. Move stitch marker to the first sc of this round. (30 sc)
- For 3-6 Months: Sc inc in first hdc. Sc in next 10 hdc. (Sc inc) in next 3 hdc. Sc in next 10 hdc. (Sc inc) in next 2 hdc. Move stitch marker to the first sc of this round. (36 sc)
- Round 3: Sc in the back loop only (BLO) of each sc around. Join with a sl st to the first sc.
- FO, leaving a short tail to weave in.
- This BLO round creates a neat ridge, giving a defined edge to the sole and helping the sandal stand up.
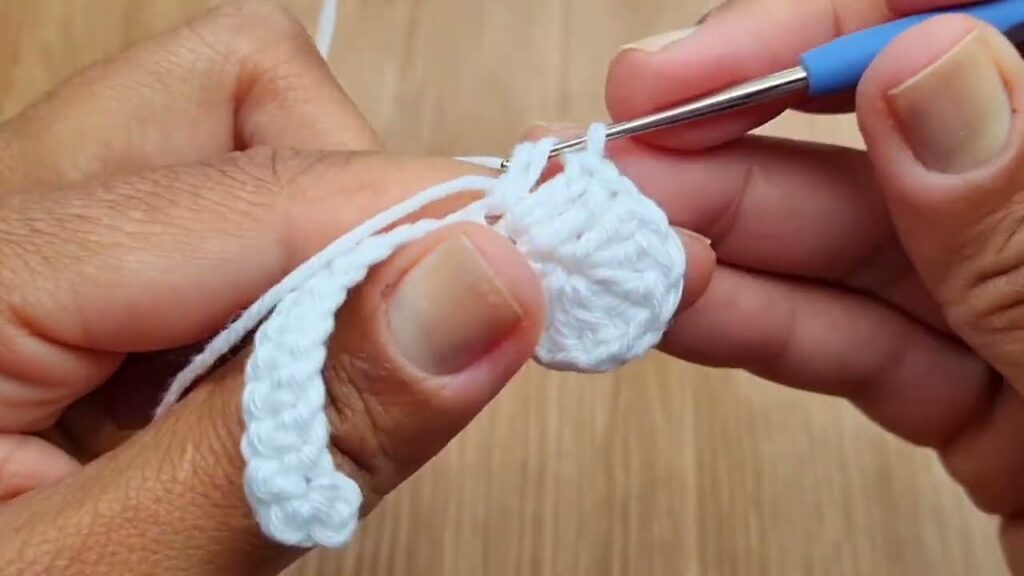
Part 2: Building the Slipper Upper (The Loafer Top)
Now we’ll work directly into the sole to create the top part of the sandal.
- Re-attach Yarn: With the sole’s RS facing up (the BLO ridge should be visible and facing you), re-attach yarn with a sl st at the very back center of the heel.
- Round 4 (Sides of the Sandal): Ch 1. Sc in each sc around, working into the unworked front loops from Round 3 (or just into the stitch if it’s easier). Join with a sl st to the first sc. (30 sc for 0-3M / 36 sc for 3-6M)
- This round starts to pull the sides of the sandal up.
- Round 5 (Start of Loafer Top): Ch 1. Sc in the first 10 sts (for 0-3M) / 12 sts (for 3-6M).
- For 0-3 Months: Hdc in next 10 sts. Sc in last 10 sts. Join with a sl st to the first sc. (30 sts)
- For 3-6 Months: Hdc in next 12 sts. Sc in last 12 sts. Join with a sl st to the first sc. (36 sts)
- This round starts to define the front opening.
- Round 6 (Shaping the Loafer Opening):
- Ch 1. Sc in the first 8 sts (for 0-3M) / 10 sts (for 3-6M).
- For 0-3 Months: Sc2tog (single crochet 2 together) 7 times. Sc in last 8 sts. Join with a sl st to the first sc. (23 sc)
- For 3-6 Months: Sc2tog 8 times. Sc in last 10 sts. Join with a sl st to the first sc. (28 sc)
- FO, leaving a long tail for sewing.
- This creates the classic loafer opening at the front.
Part 3: The Ankle Strap (Make 2)
This strap will go around the ankle for security.
- Strap: Ch 25 (for 0-3M) / Ch 28 (for 3-6M).
- Row 1: Hdc in 3rd ch from hook. Hdc in each ch across. Turn. (23 hdc for 0-3M / 26 hdc for 3-6M)
- Row 2 (Buttonhole): Ch 1. Hdc in first 2 hdc. Ch 2 (adjust chain count based on your button size). Sk 2 hdc. Hdc in remaining hdc across. FO, leaving a long tail for sewing.
Part 4: Assembly & Finishing
Bringing it all together for a polished look!
- Weave in All Ends: Before assembly, meticulously weave in every single yarn tail on the sole and upper using your yarn needle. This is crucial for a neat finish and to prevent irritation to baby’s skin.
- Attach Ankle Strap:
- Lay the sandal flat with the loafer opening facing up.
- Position the non-buttonhole end of the ankle strap to the outside arch of the sandal (the side where the foot would go out). Securely sew it to the Round 4 of the upper, making sure it’s flat and smooth.
- The buttonhole end will wrap around the back of the ankle to the other side.
- Sew on Button: Choose a baby-safe, flat button. Sew it securely to the inside arch of the sandal, directly opposite where the buttonhole loop on the ankle strap will reach. Ensure it’s very securely attached.
- Make Second Sandal: Repeat all steps to create the matching sandal!
- Blocking (Recommended!): Gently mist the finished sandals with water. You can lightly stuff them with tissue paper or a small sock to help them hold their shape. Allow them to air dry completely. This helps to even out stitches and gives a more professional, finished appearance.
Tips for a Perfect Pair of Baby Loafer Sandals:
- Try On (if possible): If you have a baby of the target age, gently try the sole on their foot to check the length, and the upper/straps to check the fit.
- Consistent Tension: This is the secret to uniform, beautiful stitches and a well-shaped sandal.
- Secure Attachments: When sewing on the strap and button, make extra stitches to ensure they are very secure and durable for baby’s safety.
- Personalize: Add a tiny crocheted flower, a small embroidered initial, or a different color for the strap for a unique touch.
- Gift-Giving: Pair these sandals with a matching crocheted headband or a cute romper for an unforgettable baby gift!
You’ve now created a charming and comfortable pair of Super Easy Crochet Baby Loafer Sandals! Enjoy seeing those tiny feet look even cuter in your handmade creation. Happy crocheting!
Video tutorial: