 by
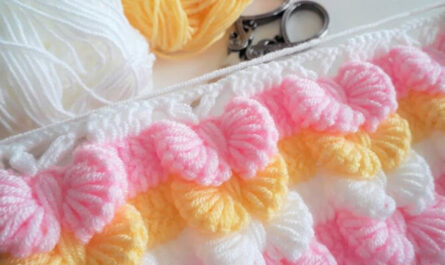
by Hello, cozy crafters! Have you ever seen those blankets with delightful little bumps and wondered how they’re made? Well, today is your lucky day! We’re diving into the wonderful world of the Bobble Stitch, and I’m so excited to share a super easy, beginner-friendly pattern for a truly irresistible Bobble Blanket.
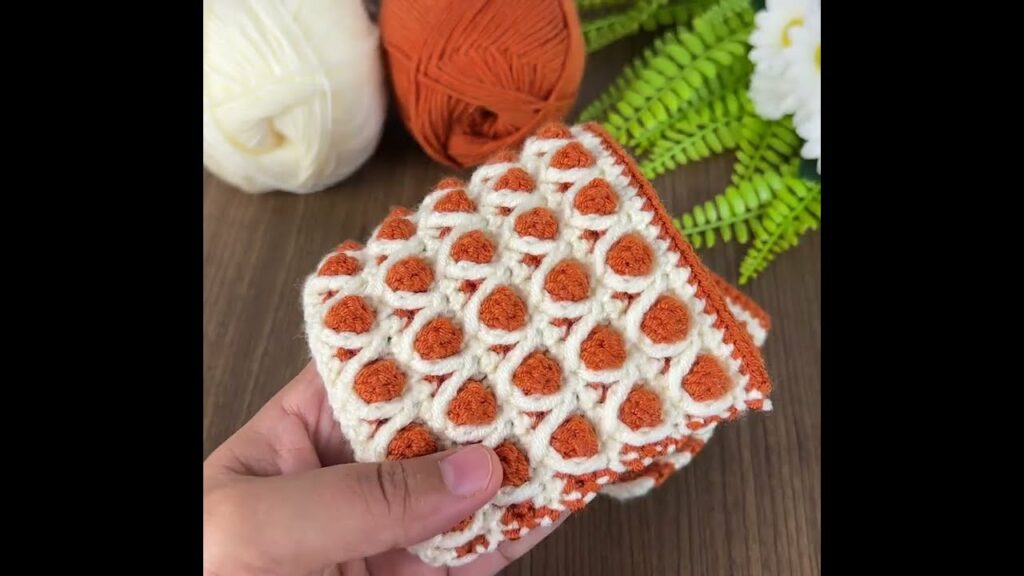
This isn’t just any blanket; it’s a tactile dream, perfect for snuggling, adding a pop of texture to your home decor, or making a truly unique baby gift. The magic lies in combining simple stitches with a clever color change, creating a reversible fabric that’s just as beautiful on the back as it is on the front. If you know how to make a chain, single crochet, and treble crochet, you’re more than ready for this!
Let’s get ready to make some beautiful bobbles!
Why You’ll Adore This Bobble Blanket Pattern:
- Texture Heaven: The bobble stitch creates incredible, squishy texture that’s so satisfying to touch.
- Visually Stunning: Alternating colors makes the bobbles really stand out, giving a modern and playful look.
- Beginner-Friendly: While the bobble stitch might look complex, it’s surprisingly simple once you get the hang of it. The rest of the blanket uses basic stitches.
- Quick to Grow: Using treble crochets on the non-bobble rows helps the blanket grow quickly.
- Versatile: Easily adjust the size to make a baby blanket, throw, or even a full-sized afghan.
- Reversible: Both sides of the blanket are attractive, offering versatility in styling.
Gathering Your Cozy Supplies:
To create your beautiful bobble blanket, here’s what you’ll need:
- Yarn:
- Color A (Main Color): A soft, medium-weight (Aran/Worsted, Category 4) yarn. This will be your “flat” rows.
- Color B (Bobble Color): A contrasting or complementary medium-weight (Aran/Worsted, Category 4) yarn. This will be your “bobble” rows.
- Yarn recommendation: Choose a smooth yarn that doesn’t split easily, as this makes working the bobbles much smoother. Acrylic or cotton blends are excellent choices for softness and washability.
- Quantity: This will depend on your desired blanket size. For a baby blanket (approx. 30×36 inches), you’ll need about 600-800 yards total (split between your two colors).
- Crochet Hook: A 5.0mm (US H/8) hook is a great starting point for worsted weight yarn. You might adjust up or down slightly to achieve your desired fabric density.
- Yarn Needle (Tapestry Needle): Essential for weaving in all those lovely ends.
- Scissors:
Essential Crochet Abbreviations:
Familiarize yourself with these common terms; you’ll see them throughout the pattern:
- ch: chain
- sc: single crochet
- tr: treble crochet (also sometimes called triple crochet)
- sl st: slip stitch
- st(s): stitch(es)
- yo: yarn over
- FO: Fasten off (cut yarn and pull through loop to secure)
- […]: indicates a set of instructions to be worked together or repeated
- …: repeat instructions between asterisks
Understanding the Bobble Stitch:
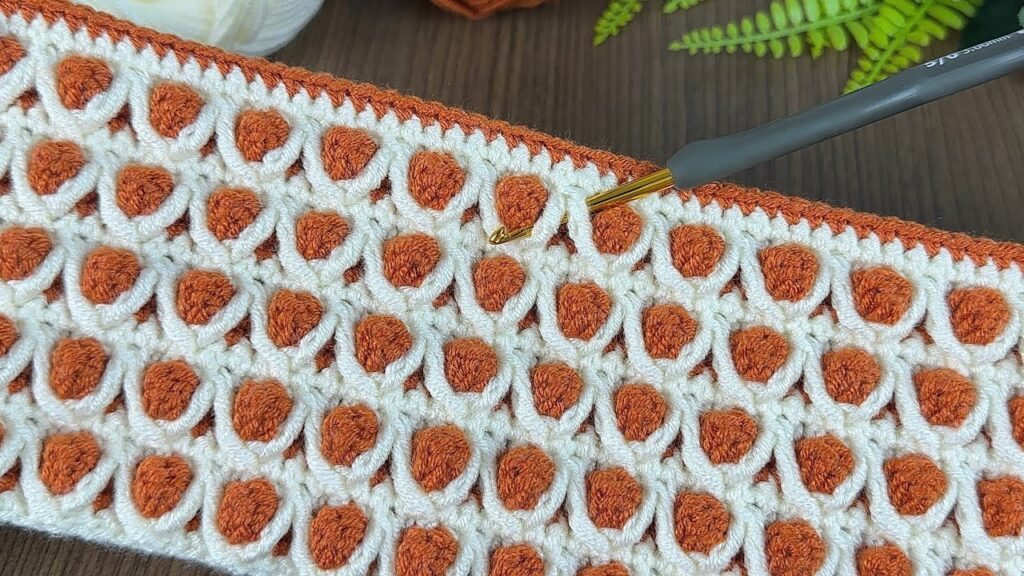
The bobble stitch is a cluster of stitches worked into the same space, then closed together, creating a raised “pop” of texture. Here’s how to make it (we’ll use 4-dc bobble for this pattern):
- Yo, insert hook into the indicated stitch.
- Yo, pull up a loop (3 loops on hook).
- Yo, pull through 2 loops (2 loops on hook). (This is the first half of a dc)
- Yo, insert hook into the same stitch.
- Yo, pull up a loop (4 loops on hook).
- Yo, pull through 2 loops (3 loops on hook). (This is the second half of a dc)
- Yo, insert hook into the same stitch.
- Yo, pull up a loop (5 loops on hook).
- Yo, pull through 2 loops (4 loops on hook). (This is the third half of a dc)
- Yo, insert hook into the same stitch.
- Yo, pull up a loop (6 loops on hook).
- Yo, pull through 2 loops (5 loops on hook). (This is the fourth half of a dc)
- Yo, pull through all 5 loops on your hook. (Your bobble is complete!)
Your Super Squishy Bobble Blanket Pattern:
This pattern uses a simple 2-row repeat, alternating colors to make those bobbles truly shine!
Gauge: Not critical for a blanket, but aim for a fabric that’s not too stiff or too loose. A 4×4 inch swatch of treble crochet should be roughly 12 tr and 6 rows.
Starting Chain: Using Color A, make a slip knot and chain a multiple of 4 + 2 stitches.
- For a baby blanket around 30 inches wide, you might chain approximately 106 stitches (104 + 2).
- For a wider blanket, simply chain more, ensuring it’s a multiple of 4 + 2.
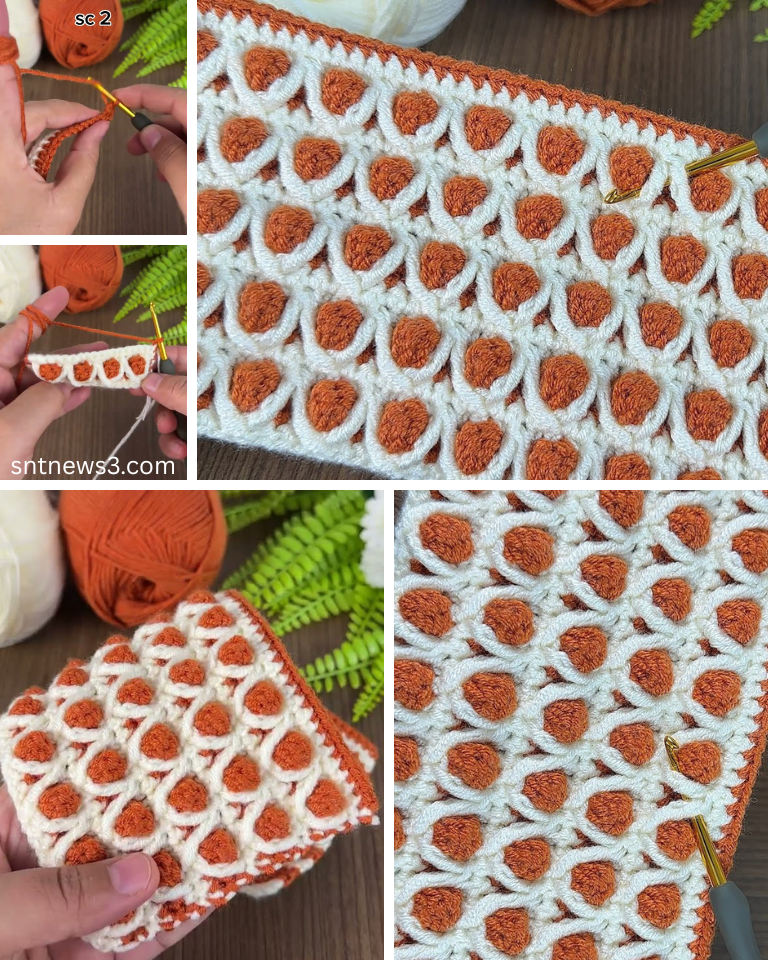
Row 1 (Color A – Foundation Row):
- In the 2nd ch from hook, sc. Sc in each ch across.
- FO Color A, leaving a tail to weave in.
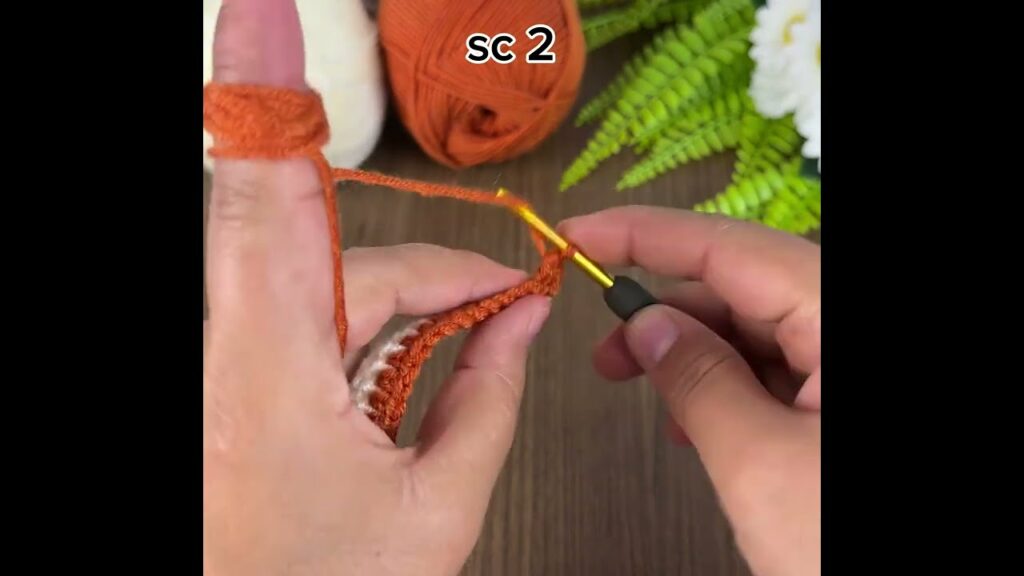
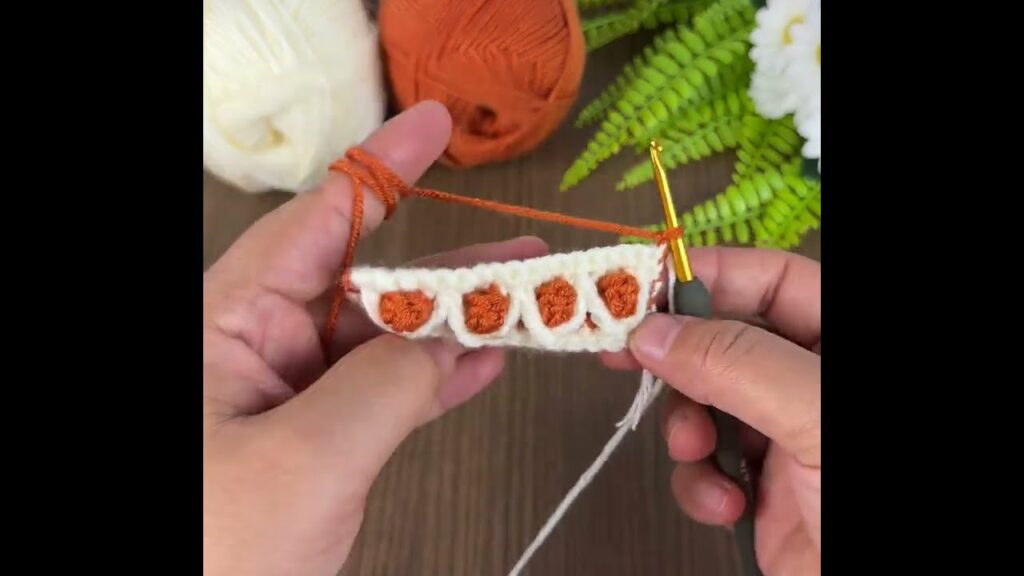
Row 2 (Color B – Bobble Row):
- Attach Color B to the first sc of the previous row.
- Ch 2 (does NOT count as a stitch).
- Sc in the first 2 sts.
- *Make 1 Bobble Stitch in the next st. Sc in the next 3 sts.*
- Repeat from * across the row until you have 2 sts remaining.
- Sc in the last 2 sts.
- FO Color B, leaving a tail to weave in.
Row 3 (Color A – Treble Crochet Row):
- Attach Color A to the first sc of the previous row.
- Ch 3 (counts as 1st tr).
- Tr in the next st.
- *Tr in the next st (this will be the top of a bobble). Tr in the next 3 sts.*
- Repeat from * across the row until you have 2 sts remaining.
- Tr in the last 2 sts.
- FO Color A, leaving a tail to weave in.
Repeating the Pattern: To continue your blanket, simply repeat Row 2 (Bobble Row with Color B) and Row 3 (Treble Crochet Row with Color A), alternating colors with each row.
Continue repeating these two rows until your blanket reaches your desired length.
Finishing:
- Weave in ALL Ends: This is the most crucial (and sometimes tedious!) part of a multi-color project. Use your yarn needle to neatly weave in every single yarn tail. Take your time to ensure they are secure and hidden.
- Blocking (Optional but Recommended): For a professional finish, gently wet block your blanket. Mist it with water (or immerse if using cotton/wool), gently squeeze out excess, lay it flat on a blocking mat or clean towel, and gently stretch/pin it to your desired dimensions. Allow it to air dry completely. This helps to even out your stitches and makes the bobbles pop even more!
Tips for a Bobble-tastic Blanket:
- Consistent Tension: Try to maintain even tension throughout your work for uniform stitches and bobbles.
- Yarn Management: When switching colors, ensure you leave long enough tails (at least 6 inches) for easy weaving in.
- Bobble Direction: The bobbles will “pop” out on the opposite side of where you are working them. So, if you want your bobbles to be on the “right side” of your blanket, make sure you’re working the bobble row with the wrong side facing you. Since this pattern alternates, the bobbles will naturally appear on both sides, creating a lovely reversible texture!
- Stitch Markers: If you’re new to this, use stitch markers to mark the first and last stitch of each row, especially when switching colors, to avoid accidentally adding or losing stitches.
- Embrace the Journey: This blanket is a rhythm. Once you get into the flow of the bobble stitch and the row repeats, it becomes incredibly meditative and enjoyable.
You’ve now got all the tools to create a wonderfully textured and cozy Bobble Blanket! Get ready to snuggle up with your beautiful handmade creation, or gift it to someone special who will surely cherish its unique charm. Happy hooking!
Video tutorial: