 by
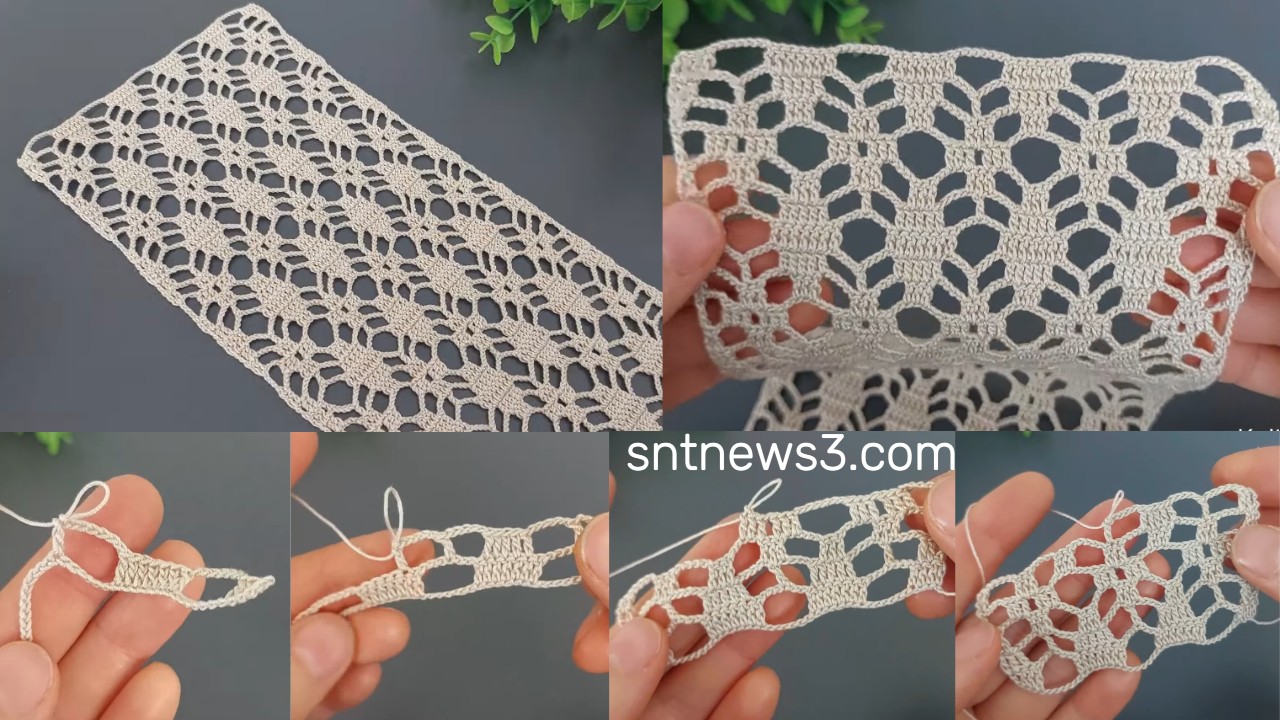
by Here’s a detailed, step-by-step written tutorial “How to Crochet a Beautiful Lace Pattern | Step-by-Step Tutorial 2025”. This pattern creates a delicate lace-panel using openwork stitches, suitable for shawls, scarves, blankets or square motifs.
🧶 Materials
- Yarn: Choose a light to medium weight yarn (e.g., DK/ sport or cotton lace) that shows open lace well.
- Crochet hook: A hook size appropriate for your yarn (for example 3.5 mm to 5 mm depending on yarn).
- Scissors, tapestry needle for ends.
- Stitch marker (optional) to mark beginning of rows or repeats.
✏️ Abbreviations (US terms)
- ch = chain
- sl st = slip stitch
- sc = single crochet
- dc = double crochet
- tr = treble (if used)
- st(s) = stitch(es)
- rep = repeat
- ( ) = work into same stitch or space
- [ … ] = repeat the instructions inside the brackets
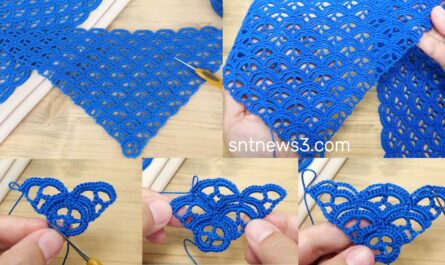
🌿 Pattern Overview
The lace pattern is built on a repeating multiple of stitches plus any border stitches. Each row alternates open chain spaces and solid stitchwork (dc, sc) to create the lace mesh effect. The result is an elegant, airy fabric suitable for many uses.
✅ Step-by-Step Tutorial
Below is a practical adaptation/tracing of the pattern shown in the video. Since exact counts in the video may vary depending on yarn/hook choice, you can adjust width and height as desired by changing foundation chain and repeating rows until size is reached.
1. Foundation Chain
- Decide your desired width (for example: 60 cm).
- Chain a number that is a multiple of the stitch repeat (for example multiple of 8 + 4).
- For example: ch (8 × 7) + 4 = ch 60 + 4 = ch 64 (adjust as needed for your yarn/hook).
- (Note: video may use different multiple; just keep your width consistent.)
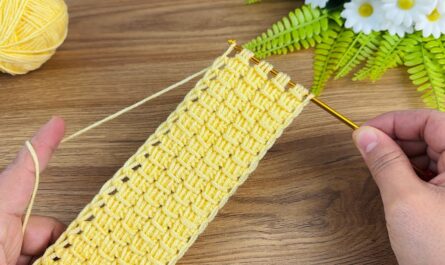
2. Row 1 – Base Row
- Work sc (or sc & dc mix) in 2nd chain from hook and across the chain.
- At end of row: ch 1, turn.
- This row stabilises the edge and prepares for the lace mesh.
3. Row 2 – Establish Mesh
- dc in next stitch, ch 3, skip 2 sts
- dc in next stitch, ch 3, skip 2 sts
- Repeat across the row.
- At end, dc in the last stitch.
- Ch 1, turn.
- This forms the openwork “mesh” of chain-spaces.
4. Row 3 – Lace Repeat Row
- Sc into first dc.
- ch 3, skip next ch-3 space, sc into next dc
- ch 3, skip next ch-3 space, sc into next dc
- Repeat across the row.
- This reverses the open space position, giving the lace offset.
- Ch 1, turn.
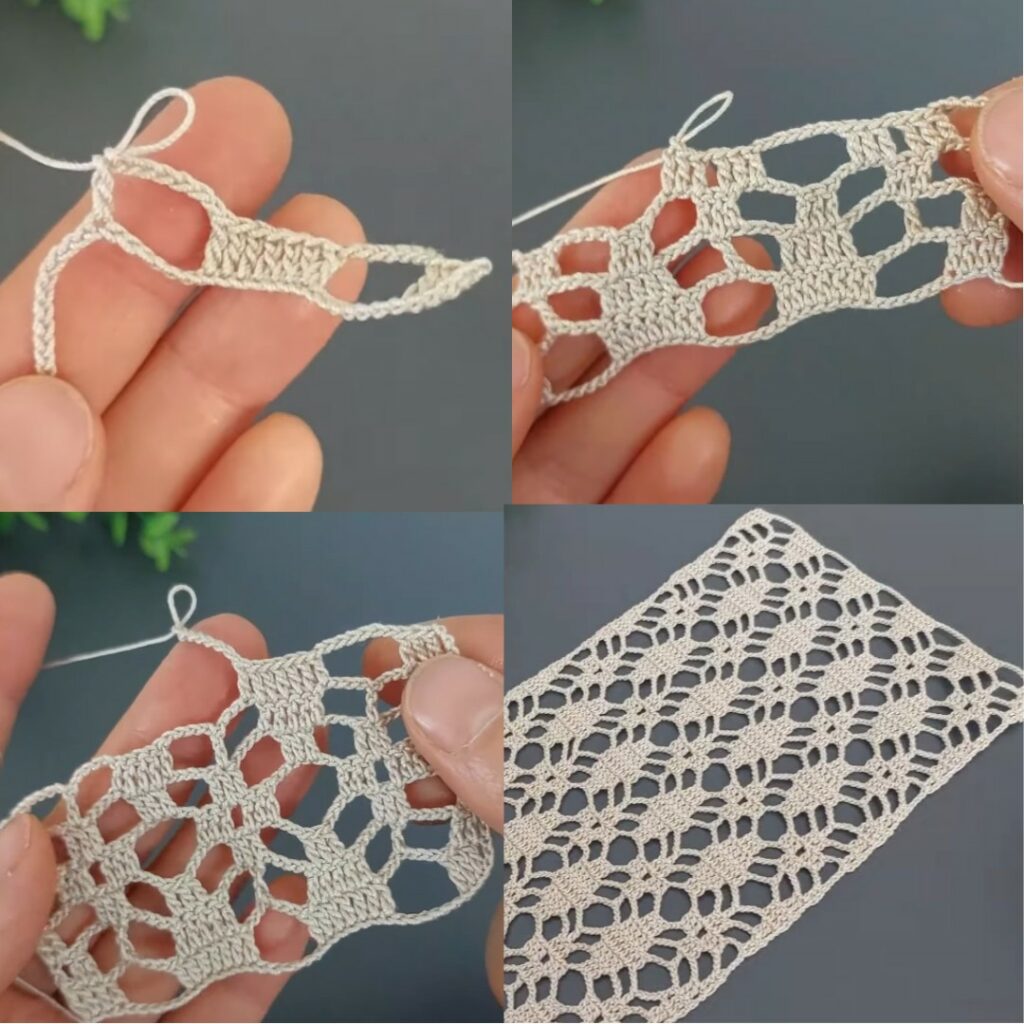
5. Row 4 – Mesh Row (again)
- Dc in first sc.
- ch 3, skip next ch-3 space, dc in next sc
- Repeat across, ending dc in last sc.
- Ch 1, turn.
6. Repeat Rows 3 & 4
- Continue alternating Row 3 (sc into dc + ch-3 spaces) and Row 4 (dc into sc + ch-3 spaces) until your piece reaches desired height.
- Because the pattern is two-row repeat, the mesh stays consistent and balanced.
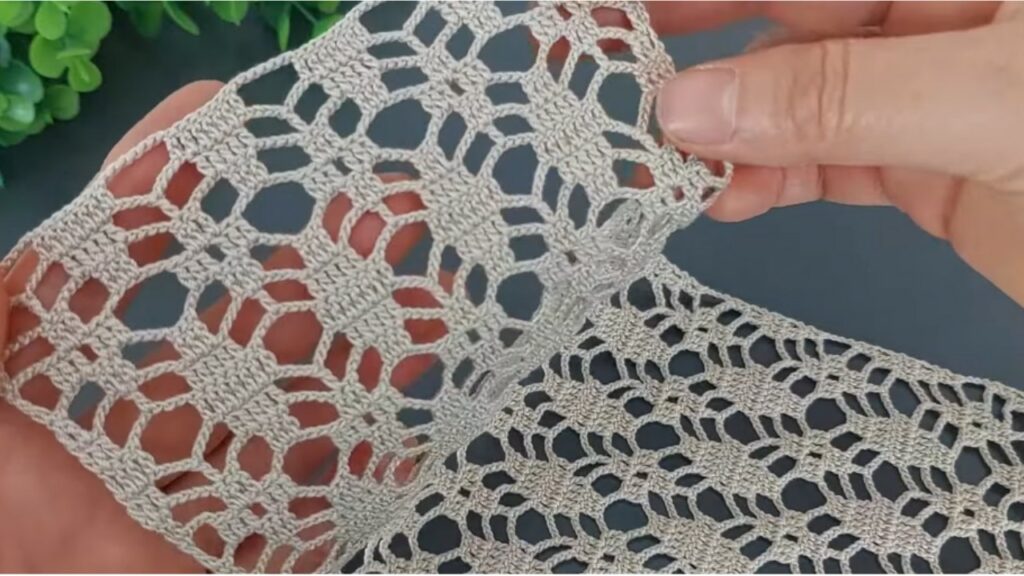
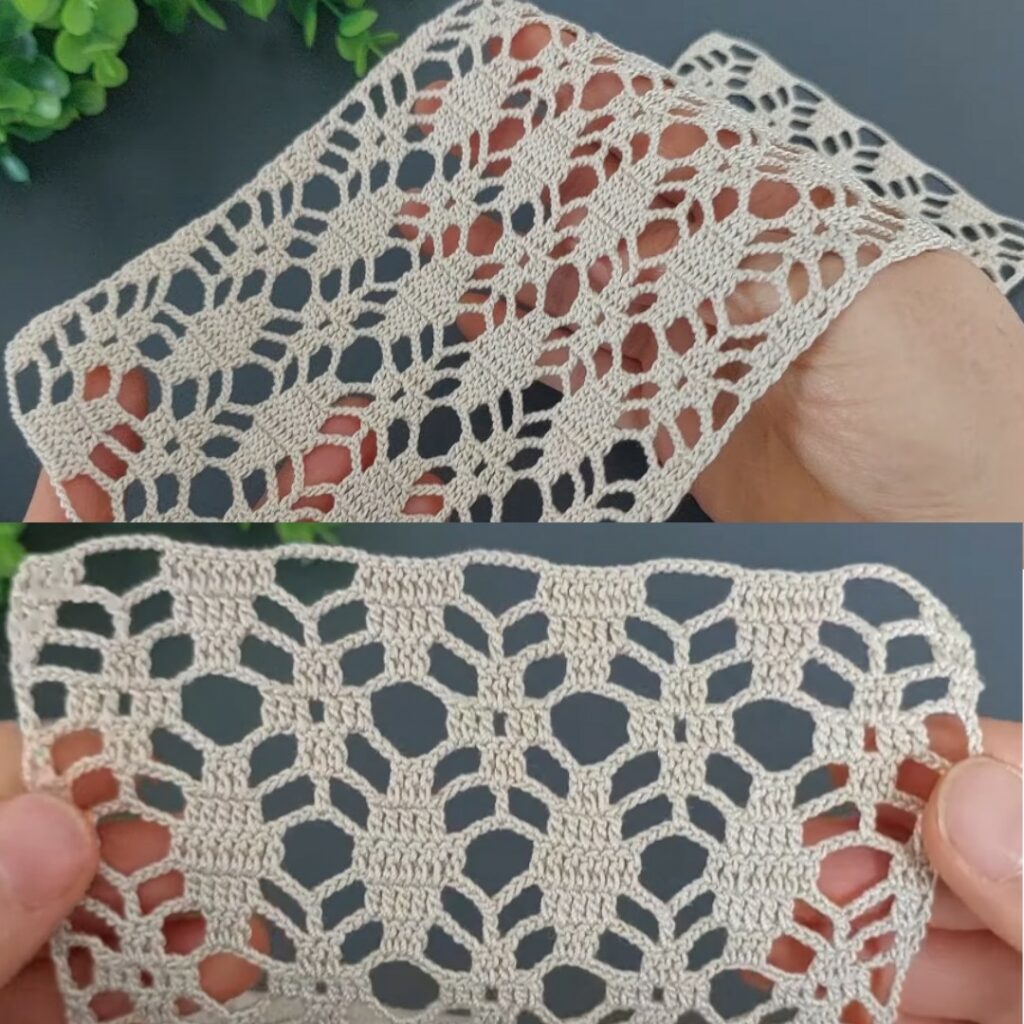
7. Edge Border-Finish
- Once the lace panel is the size you want, work 1 row sc across to clean the top edge.
- Then optionally work 1 round (or row) of sc around all edges if the panel is standalone (for example as a shawl or square).
- Fasten off, cut yarn, weave in ends with tapestry needle.
📋 Quick Reference Table
| Row # | Stitch Pattern |
|---|---|
| Row 1 | sc across foundation |
| Row 2 (Mesh) | dc, ch 3, skip 2 … repeat |
| Row 3 (Repeat) | sc into dc, ch 3, skip space … repeat |
| Row 4 | dc into sc, ch 3, skip space … repeat |
| Rows 5+ | Repeat Rows 3 & 4 until desired height |
| Finish | 1 row sc across + optional border round |
💡 Tips & Adaptations
- Adjust chain count to get your desired width; because the pattern is a multiple repeat you can scale easily.
- Use solid or lightly variegated yarn so the lace pattern shows clearly.
- For a shawl, use light lace yarn and hook, repeat many rows until long enough, then border.
- For a blanket, increase width by more chains, repeat more rows, and you may add a heavier border for stability.
- Counter-check your row counts so the open spaces align; use a stitch marker at the start of each row if needed.
- If you notice edges curling or pulling, your chain-spaces may be too tight — consider using slightly larger hook or adding a few extra chains in the mesh row.
Video Tutorial: https://www.youtube.com/watch?v=22P4Y8ZZ88M