 by
by 🧶 Materials
- Yarn: A medium-weight (#4) yarn is recommended (or adjust hook size if you use lighter/heavier yarn). The video refers to using yarn of “49% wool, 51% acrylic, 240 m/100 g” in one reference.
- Hook: For example, 4.5 mm hook (or one that gives comfortable tension with your yarn) is suggested in related posts.
- Scissors, tapestry needle for weaving in ends
- Stitch marker (optional but helpful for repeats)
✏️ Abbreviations (US terms)
- ch = chain
- sl st = slip stitch
- sc = single crochet
- hdc = half-double crochet
- dc = double crochet
- st(s) = stitch(es)
- rep = repeat
- ( ) = work into same stitch or space
- … * = repeat instructions inside
- “Super Stitch” refers to the unique cluster/loop combination shown in the tutorial
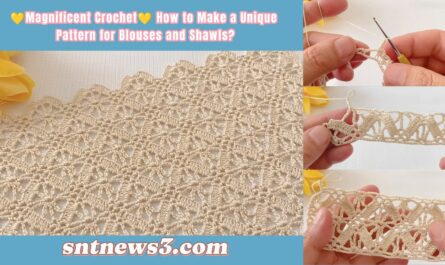
🌟 Stitch Pattern Overview
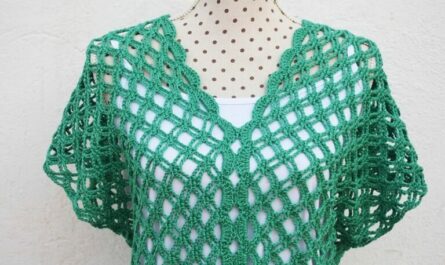
The “Super Stitch” pattern features a textured combination of chain-spaces and clusters (or tall stitches), creating a grid of raised verticals and open windows. It is worked in rows (or could be adapted to rounds) and builds a fabric that’s decorative, textured and unique.
Because this is a specially designed stitch by Elena Rugal Studio, the tutorial focuses on how to work one repeat, then how to repeat across rows, and how to adapt for different widths and lengths.
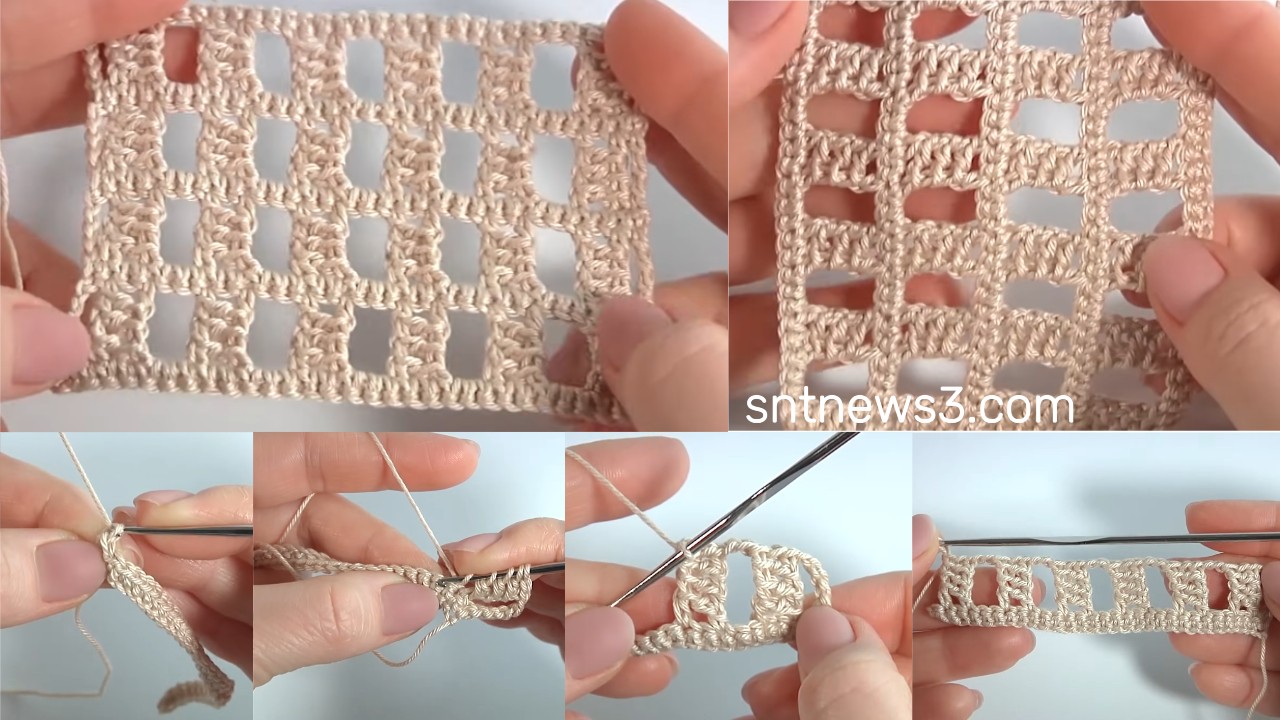
✅ Step-by-Step Instructions
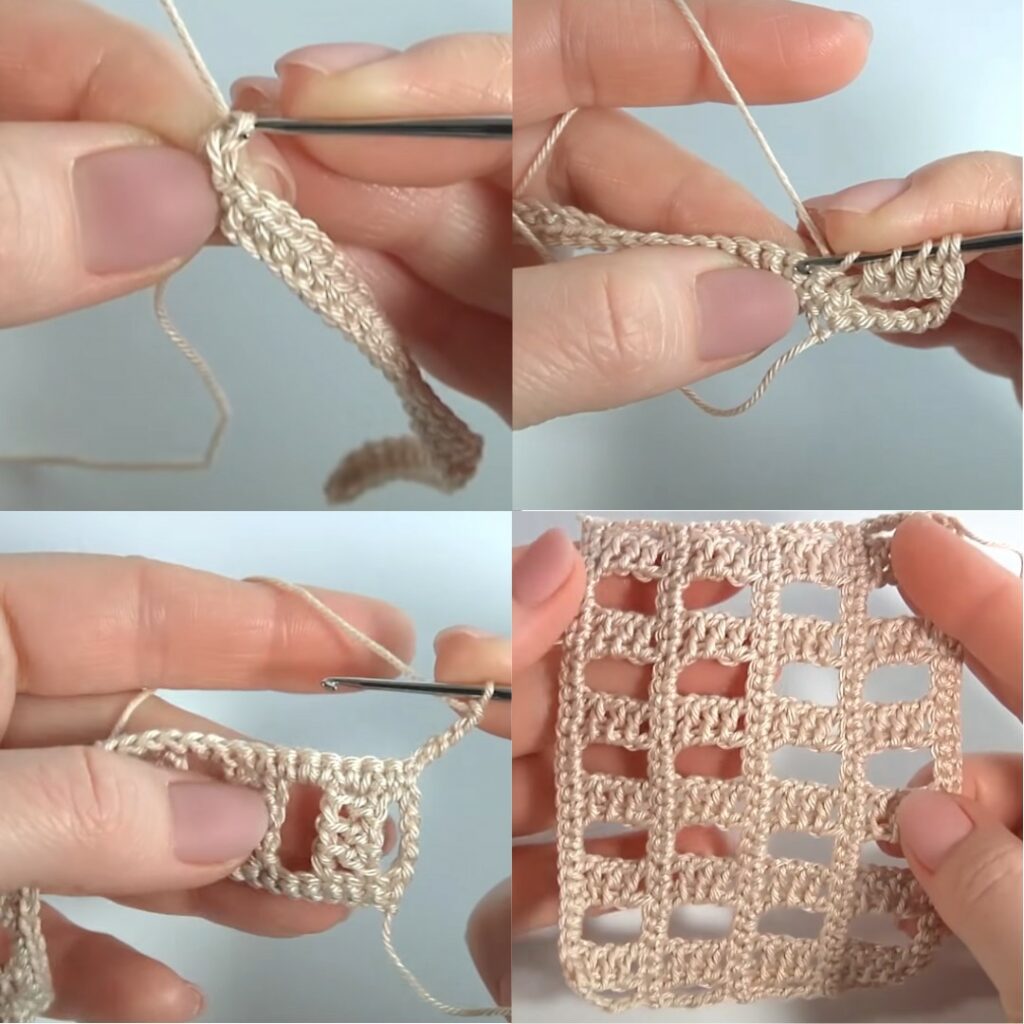
1. Foundation Chain
- Decide width of your project.
- Chain a multiple appropriate to the stitch repeat. For this tutorial, we’ll use a multiple of 4 + 3 (this fits the pattern used in the video, where a group of 4 sts forms one repeat and 3 extra chains for the edge).
- E.g., ch (4 × 10) + 3 = ch 43 for a sample width.
- Turn and proceed to Row 1.
2. Row 1 – Base Row
- Starting in the 2nd chain from hook, work sc in each chain across.
- At end of row, ch 2, turn.
- This provides a firm base and sets up for the textured pattern.
3. Row 2 – Establish Super Stitch
- Dc in next 2 sts.
- (Ch 2, skip 1 st, dc in next st) — this creates an open “window”.
- Then sc in the next st (anchoring the open space).
- Repeat across row: dc x2, (ch2, skip1, dc), sc until you reach the end.
- At the end, dc in last st.
- Ch 2, turn.
- You now have a row of alternating solid groups (dc x2) and open windows (ch2 skip1 dc) anchored by sc.
4. Row 3 – Super Stitch Row Repeat
- Sc in first dc of previous row.
- Dc in next 2 sts.
- (Ch 2, skip 1 st, dc in next st) — forming window above the previous windows.
- Sc in next st (anchor).
- Repeat across: dc x2, (ch2 skip1 dc), sc until last sts.
- At end, dc in last st.
- Ch 2, turn.
- The pattern aligns vertically, producing alternating columns and windows.
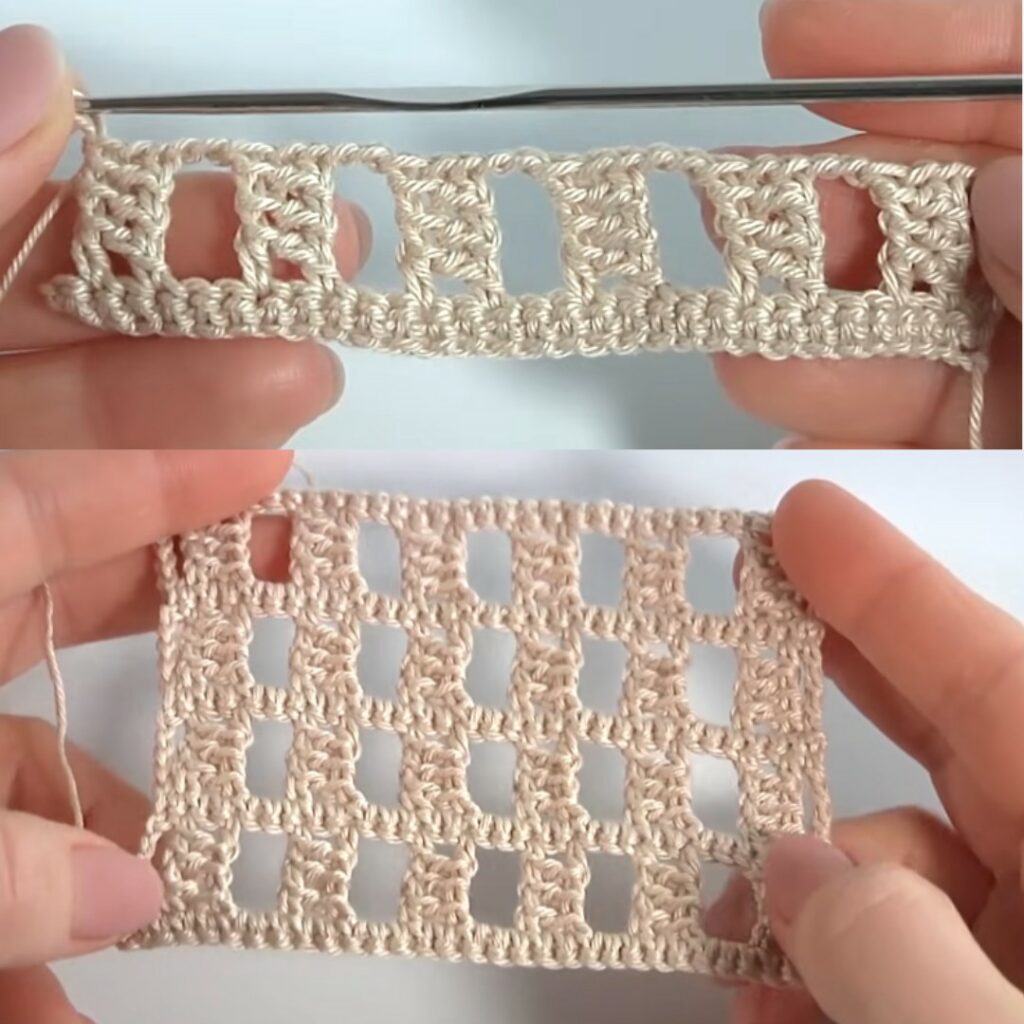
5. Rows 4+ – Continue Pattern Until Desired Length
- Repeat Row 3 for each subsequent row until your piece reaches the desired length.
- The pattern is a two-row repeat (Row 2 sets the pattern, Row 3 repeats it).
- Because of the chain-skip spaces, the fabric remains somewhat open and textured.
6. Edge/Border Finish
- After final row, work 1 row of sc across to create a neat top edge.
- Optionally, you may add a decorative border: e.g., sc in each st, 3 sc in each ch-2 space to give a scalloped edge.
- Fasten off yarn, cut, weave in all ends with tapestry needle.
📋 Quick Reference Table
| Row | Action |
|---|---|
| 1 | sc across foundation chain; ch 2, turn |
| 2 | dc x2, (ch 2 skip 1 dc), sc — repeat across; ch 2, turn |
| 3 | sc in first st; dc x2, (ch 2 skip 1 dc), sc — repeat across; dc in last st; ch 2, turn |
| 4+ | Repeat Row 3 until length achieved |
| Finish | 1 row sc across + optional decorative border |
🔧 Tips & Variations
- For wider fabric, increase number of chain multiples accordingly. Because the repeat is 4 sts + edge, chain length = (4 × n) + 3.
- To make a shawl or blanket, chain wide, then continue rows until desired length; use the texture to highlight solid vs open areas.
- Use solid color yarn to allow the texture (clusters + windows) to show clearly. Variegated yarn can obscure the details of the “Super Stitch”.
- If the fabric begins to cup or ripple, check your chain-skip spacing and tension: if too many opens or too tight stitches, adjust hook size or tension.
- Because the skip-1 spaces shift each row, the texture builds vertical lines of windows — this is especially good for accent stripes in a blanket or textured panel.
- Use a stitch marker at the start of each row to maintain consistent alignment of windows vs clusters.
Video Tutorial: https://www.youtube.com/watch?v=vRXyNGKmEb0