 by
by Materials
- Light / fingering / DK cotton or acrylic yarn (choose yarn appropriate for delicate lace).
- Hook sized for yarn (for lace look try 3.0–4.5 mm depending on yarn).
- Scissors, tapestry needle, stitch marker (optional).
- Blocking pins & mat (optional but recommended for lace shaping).
Abbreviations (US)
- ch = chain
- sc = single crochet
- hdc = half-double crochet
- dc = double crochet
- tr = treble crochet (if used)
- sl st = slip stitch
- sp = space
- rep = repeat
Pattern concept (short)
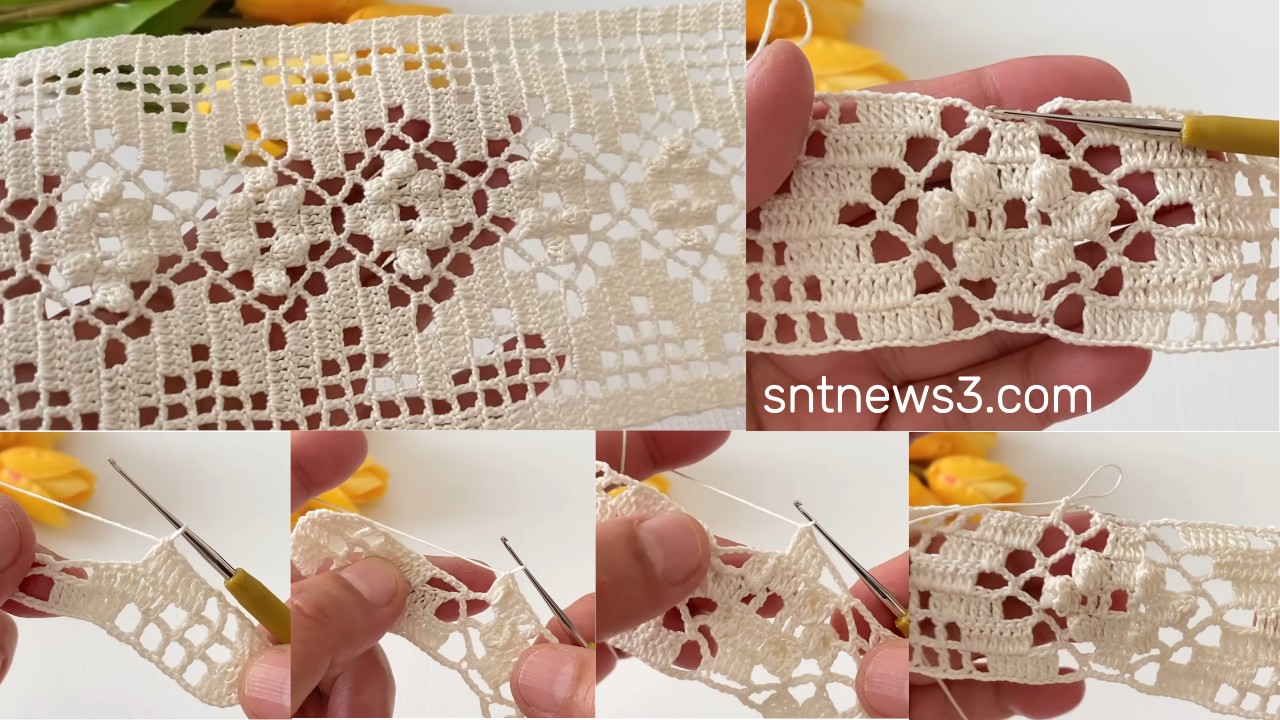
This pattern is a two-row (or three-row) repeat combining solid anchor stitches with chained arches and shell/fan clusters to form floral/lace motifs. The base is a foundation row of sc (or hdc), then alternating chain-space rows and motif rows (shells or clusters worked into chain loops). Finish with a tidy border and block.
Suggested stitch multiple & foundation
- Work a foundation chain that is a multiple of 6 + 2 (this multiple works well for the shell/arch repeats below).
- Example sample: ch 44 (gives 7 repeats of 6 + 2). Adjust multiples for wider/narrower pieces.
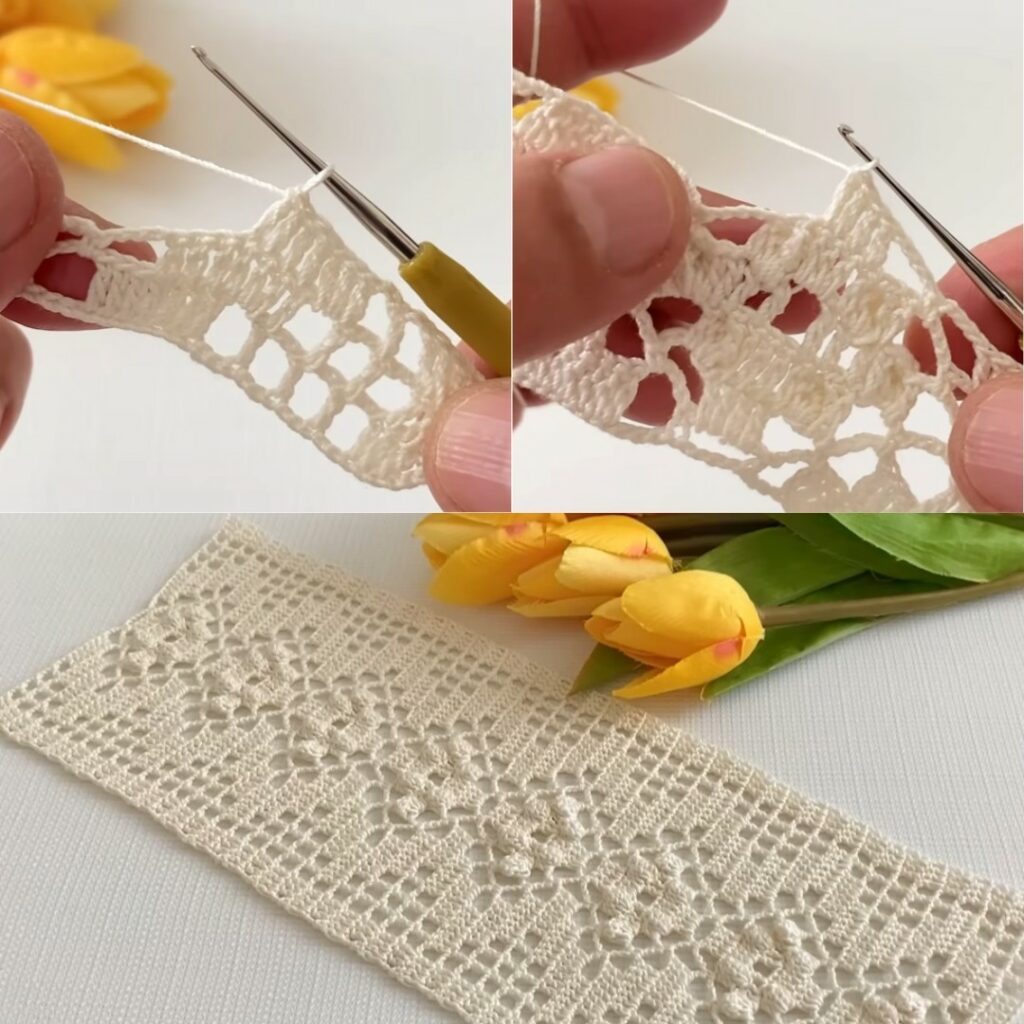
Step-by-step (sample pattern — follow and adjust to match the video visually)
Row 0 — Foundation
- Ch a multiple of 6 + 2 (example ch 44).
- Optional: work 1 row of sc (or hdc) across foundation to create a stable base: sc in 2nd ch from hook and across. Turn.
Row 1 — Loop / arch row (establish chain loops)
- sc in next 2 sts, ch 4, skip 2 sts, sc in next 2 sts — repeat across.
- End with sc in last stitch. Turn.
Result: a row with evenly spaced chain-4 loops (these will hold your shells).
Row 2 — Shell / Flower motif row
- Into each ch-4 loop: work (dc 3, ch 2, dc 3) — a fan/shell inside the loop.
- Between loops, work sc (or sl st) into the anchor stitch (the sc from previous row) to secure motifs.
- Repeat across, end with sc. Turn.
Result: shell motifs sit on top of the chain arches forming floral shapes.
Row 3 — Spacer & lift
- sc in first st.
- ch 5, sc in top of shell (or in next anchor st) — repeat across.
- Turn.
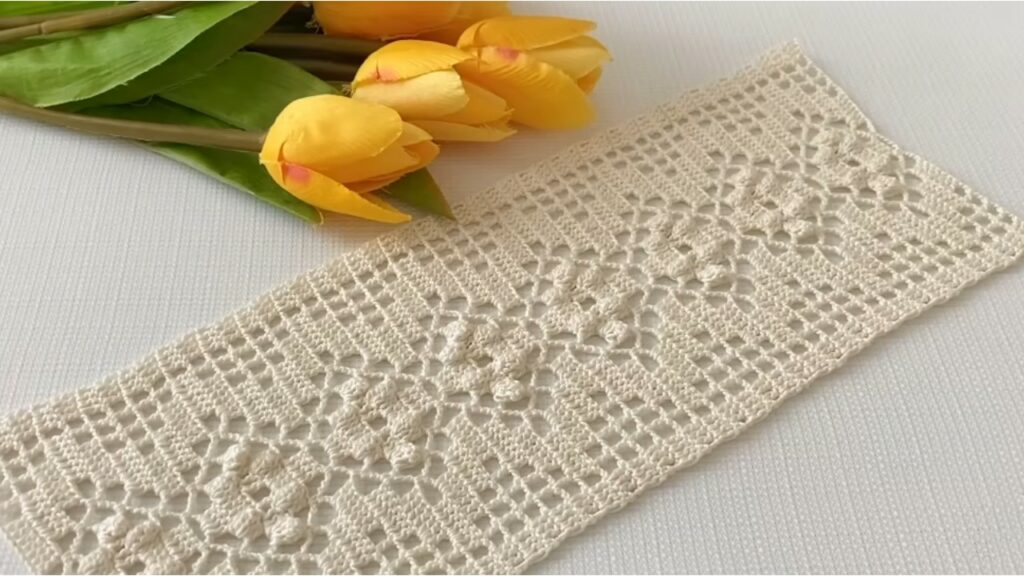
Purpose: this creates higher arches between motif rows, giving lacy openness and room for the next motif layer.
Row 4 — Second motif layer (optional, makes pattern more ornate)
- Into each ch-5 space work: (sc, dc 5, sc) or (dc 4, ch 2, dc4) depending on how full you want the petals.
- Anchor with sc in the underlying anchor stitches. Turn.
Result: larger petals/second motif layer for a richer lace.
Row 5 — Repeat pattern
- Repeat Row 1–4 sequence (or Row 1–3 if you prefer a simpler look) until your panel reaches the desired length.
- You can alternate smaller and larger motif rows for visual rhythm: e.g., small shell row, spacer row, big shell row, spacer row, repeat.
Alternate simpler one-row repeat (if you want very easy beginner version)
If you prefer a single row repeat (less counting), try:
- Row A: dc 2, ch 2, skip 2 across; ch1 turn.
- Row B: sc into each dc and in chain spaces work a small picot/loop (ch 3, sl st into base) across; ch1 turn.
Repeat A/B. This yields simpler lacy texture.
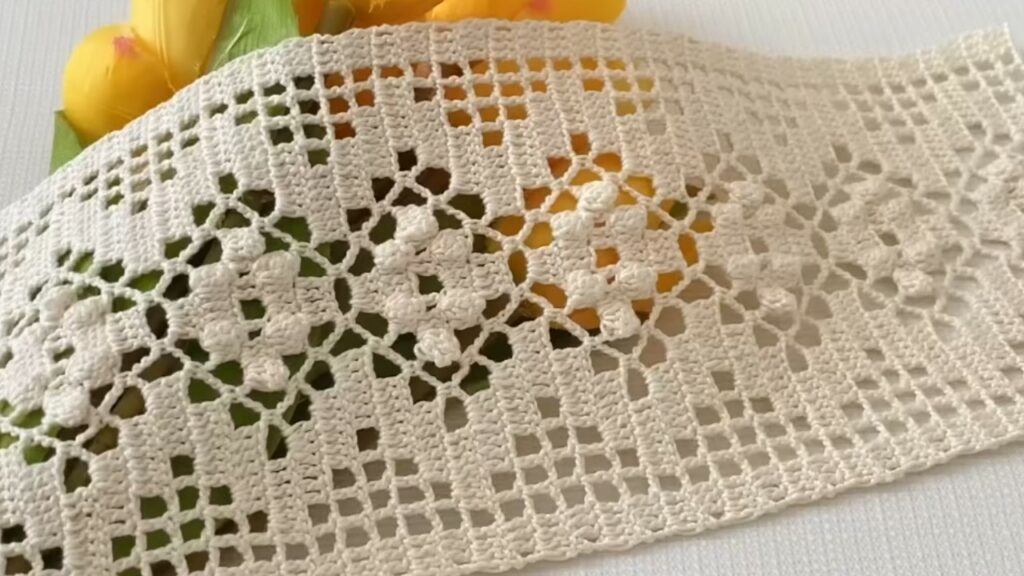
Edge finishing & borders
- When panel is complete, work one round/row of sc around the entire piece for a neat edge. If you worked in rows, join the short ends with sl st or seam them if making a tube.
- Optional decorative border: crab stitch (reverse sc), picot trims (ch 3, sl st into first chain), or a scallop (5 dc in same st, skip 1, sc next) around the edge.
Shaping into a blouse, scarf, runner
- Runner: work long strips and join motifs end-to-end or arrange in rows.
- Blouse: create a set of panels — front, back, and sleeves — using the motif panels joined with sc seams; block panels before joining so measurements stay accurate.
- Edge application: make a long lace tape and sew it onto towels, shirts, collars, or hems.
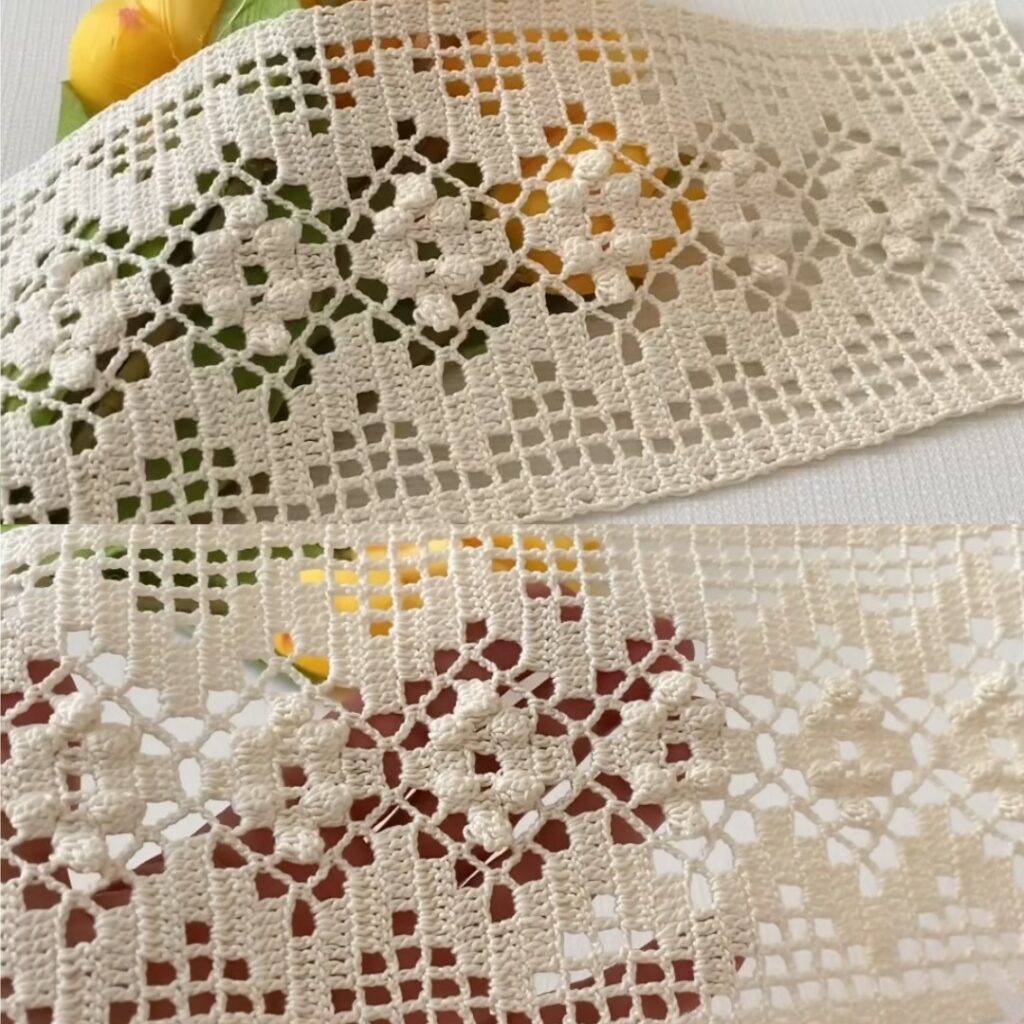
Tips & troubleshooting
- Flatness: if piece cups (edges pull up) — you added too many increases; stop increasing or reduce ch-space size. If it ruffles (wavy edges) — you increased too much; skip an increase round.
- Even loops: keep chain loops same length (ch count consistent) to avoid uneven motifs.
- Tension: lace looks best with slightly loose, even tension. If your stitches are too tight, switch to a larger hook.
- Blocking: wet/block or steam lightly and pin to shape the lace and open the motifs.
- Joining motifs: join motifs using “join-as-you-go” on the last round (sl st into corresponding chain spaces of adjacent motif) for tidy joins without sewing.
Example sample counts (for a 20×60 cm sample using DK yarn + 4 mm hook)
- Foundation: ch 44.
- Row 0: 1 row sc.
- Row 1: sc x2, ch4, skip2, sc x2 — rep across.
- Row 2: In each ch4: dc3, ch2, dc3; sc in anchor — rep across.
- Repeat Rows 1–2 eight times → sample length ≈ 60 cm (adjust repeats for your gauge).
Video: