 by
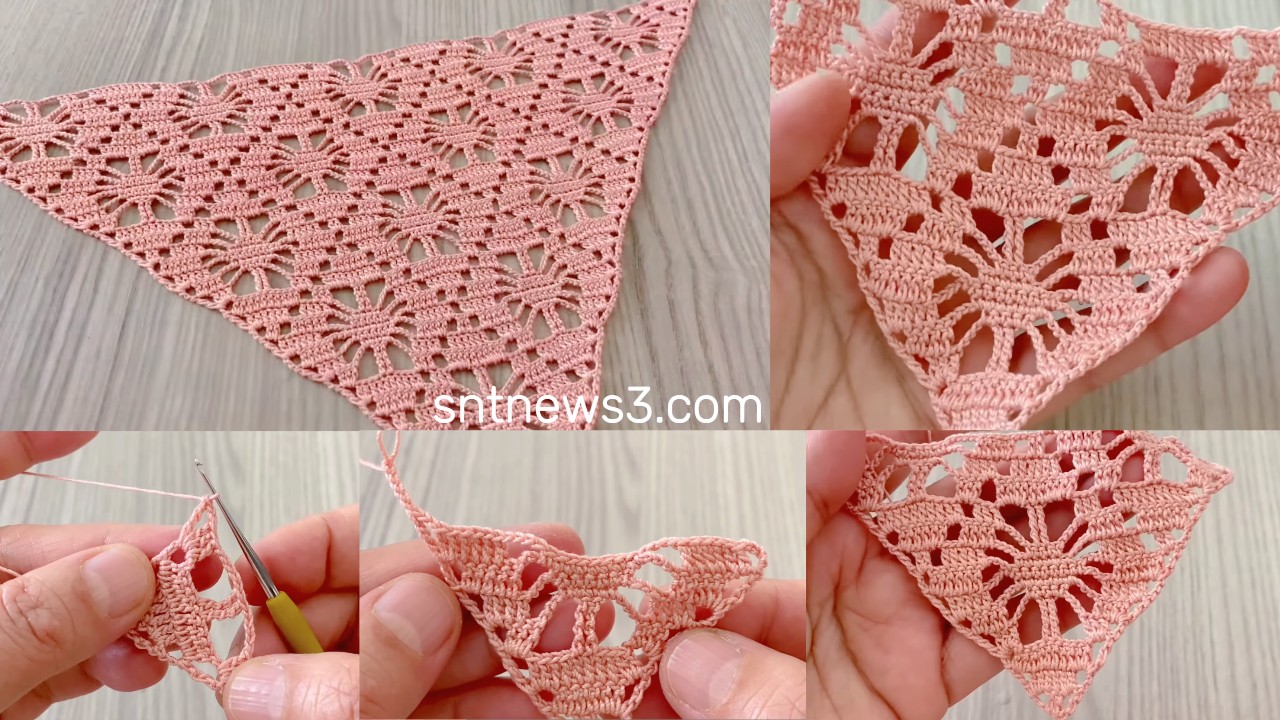
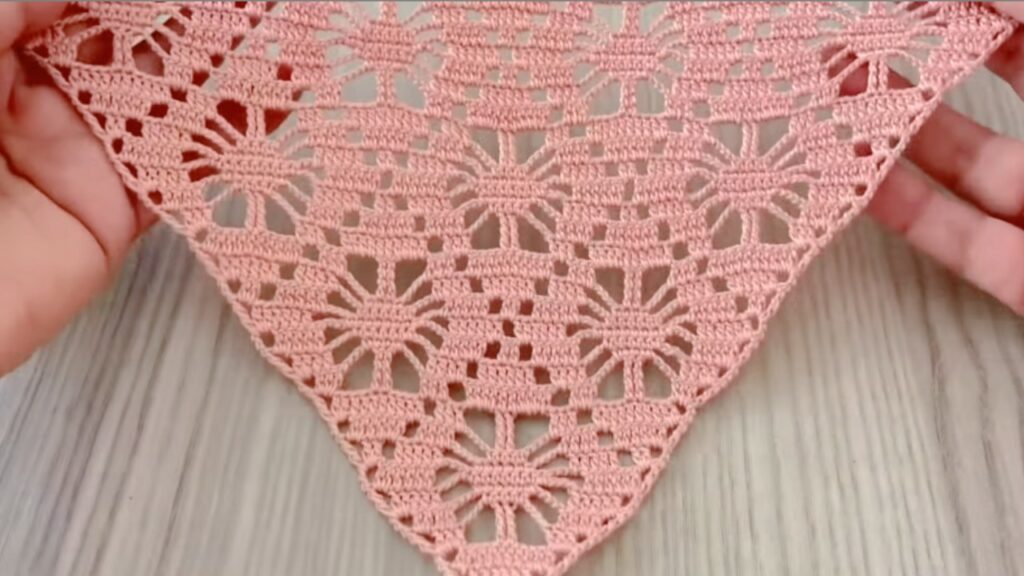
by Unique❗️Incredibly Beautiful Crochet Triangle Shawl Pattern Tutorial.
This shawl is worked top-down, increases on both sides and the center, and creates a light, elegant lace triangle.
🧶 UNIQUE & INCREDIBLY BEAUTIFUL CROCHET TRIANGLE SHAWL
Full Step-by-Step Text Tutorial (US Crochet Terms)
📌 Skill Level
Beginner – Easy
🧵 Materials
- Yarn: Fine or light-medium yarn (cake yarn works beautifully)
- Crochet hook: 3.0 – 4.0 mm (match your yarn)
- Scissors
- Yarn needle
✂️ Abbreviations (US Terms)
- ch = chain
- sl st = slip stitch
- sc = single crochet
- dc = double crochet
- tr = treble crochet
- sp = space
- rep = repeat
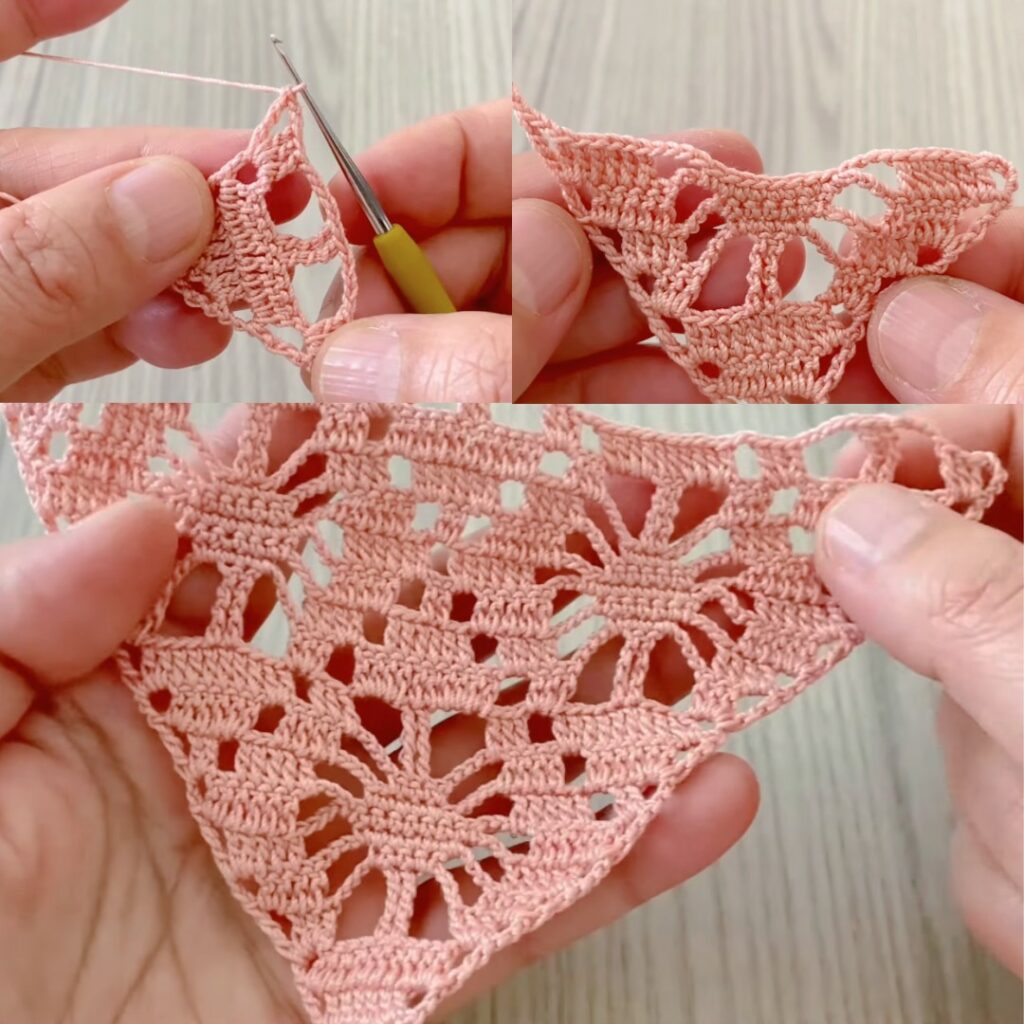
🔰 START – SHAWL CENTER (TOP POINT)
Foundation
- Make a magic ring
(or ch 4 and join with sl st). - Ch 3 (counts as first dc).
- Work 2 dc into the ring.
- Ch 3.
- Work 3 dc into the ring.
- Ch 3.
- Join with sl st to the top of ch 3.
👉 This forms the top point of the triangle.
🌼 BASIC TRIANGLE GROWTH
Row 1
- Ch 3, turn.
- Work 2 dc in the first stitch.
- Ch 2.
- In the center ch-3 space: 3 dc.
- Ch 2.
- Work 3 dc in the last stitch.
- Turn.
Row 2
- Ch 3.
- Work 2 dc in first stitch.
- Ch 2.
- In next ch-2 space: 3 dc.
- Ch 3.
- In next ch-2 space: 3 dc.
- Ch 2.
- Work 3 dc in last stitch.
- Turn.
🌸 LACE PATTERN SECTION
Row 3
- Ch 3.
- Work 2 dc in first stitch.
- Ch 3.
- In next ch-2 space: 3 dc.
- Ch 3.
- In center ch-3 space: 3 dc, ch 3, 3 dc.
- Ch 3.
- In next ch-2 space: 3 dc.
- Ch 3.
- Work 3 dc in last stitch.
- Turn.
Row 4
- Ch 3.
- Work 2 dc in first stitch.
- Ch 4.
- In next ch-3 space: 3 dc.
- Ch 4.
- In center ch-3 space: 3 dc, ch 3, 3 dc.
- Ch 4.
- In next ch-3 space: 3 dc.
- Ch 4.
- Work 3 dc in last stitch.
- Turn.
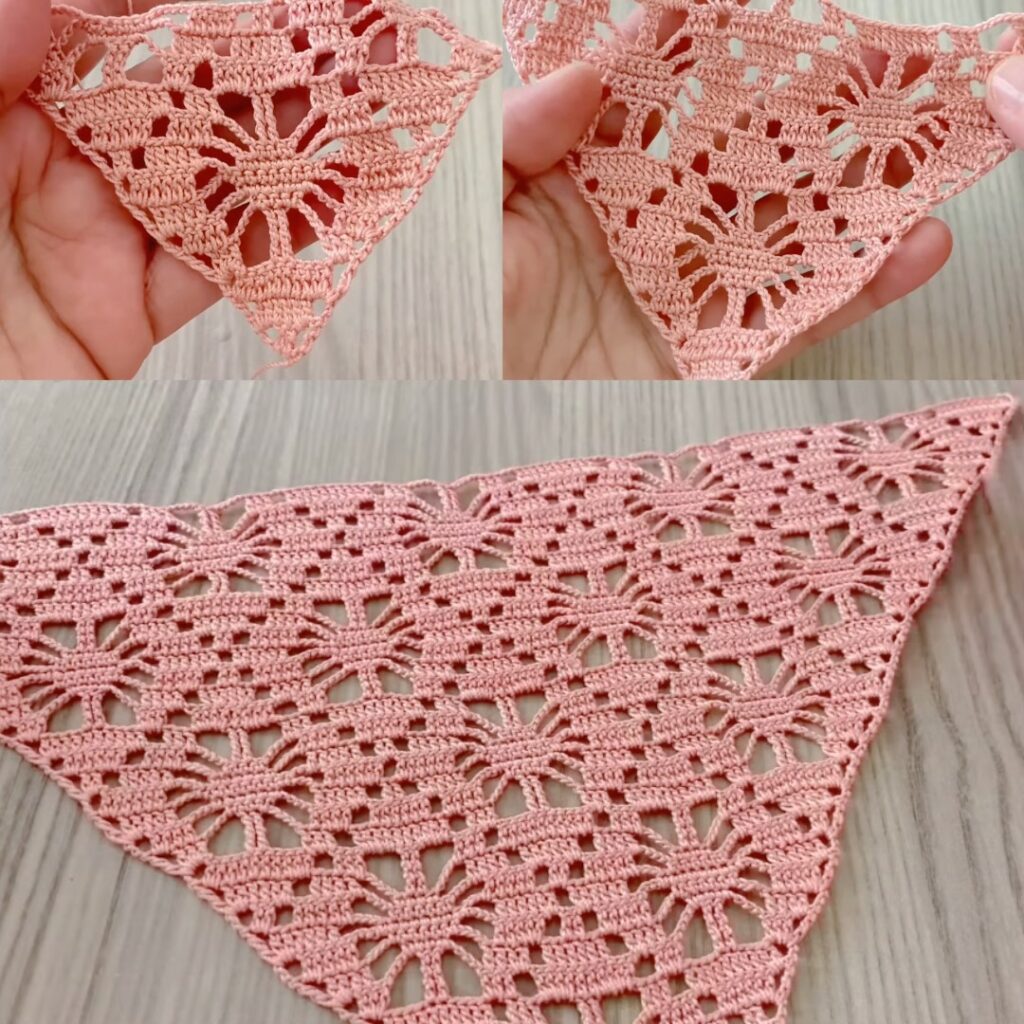
🔁 REPEAT PATTERN
👉 Repeat Rows 3 & 4 until the shawl reaches your desired size.
The triangle grows evenly because:
- Both sides increase every row
- The center always has (3 dc, ch 3, 3 dc)
✨ DECORATIVE BORDER (OPTIONAL)
Final Border Row
- Ch 1.
- Sc evenly along the top edge.
- At the triangle point: 3 sc in one stitch.
- Continue sc along the opposite edge.
- Join with sl st and fasten off.
Optional lace edge:
- (sc, ch 3, sc) in chain spaces for a delicate finish
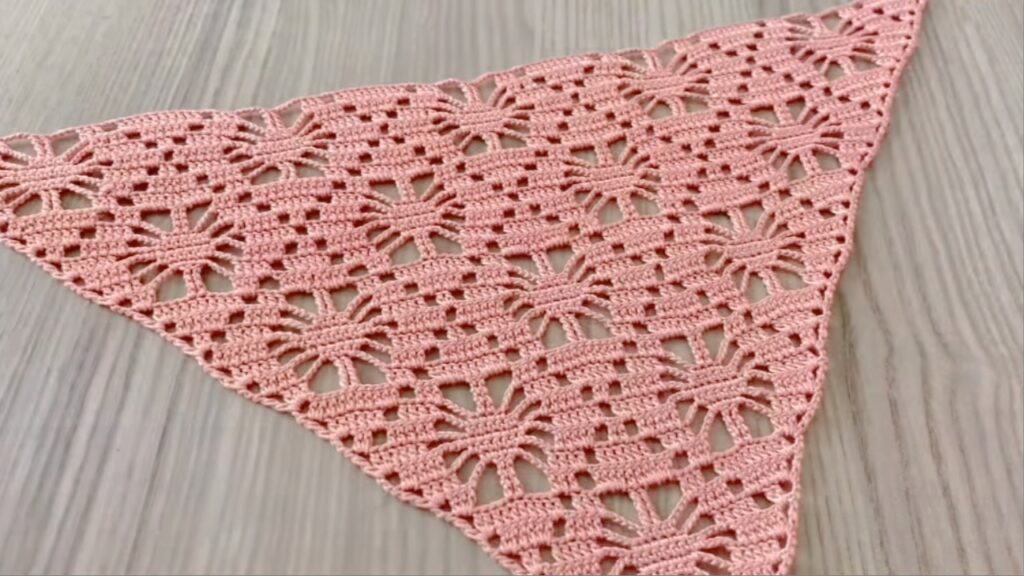
✨ FINISHING
- Cut yarn and pull through
- Weave in all loose ends
- Block lightly to open the lace and sharpen the triangle shape
🧩 PERFECT FOR
✔ Triangle shawls
✔ Neck scarves
✔ Shoulder wraps
✔ Lightweight evening shawls
✔ Gift items
VIDEO: