 by
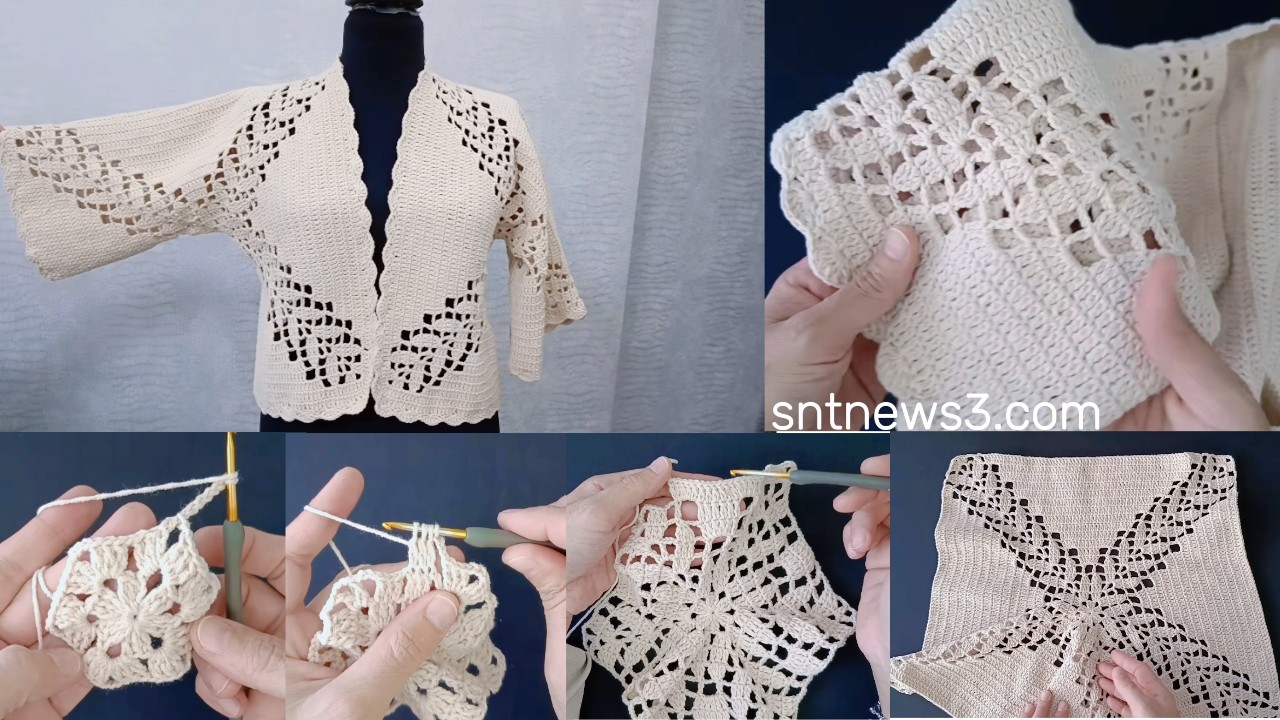
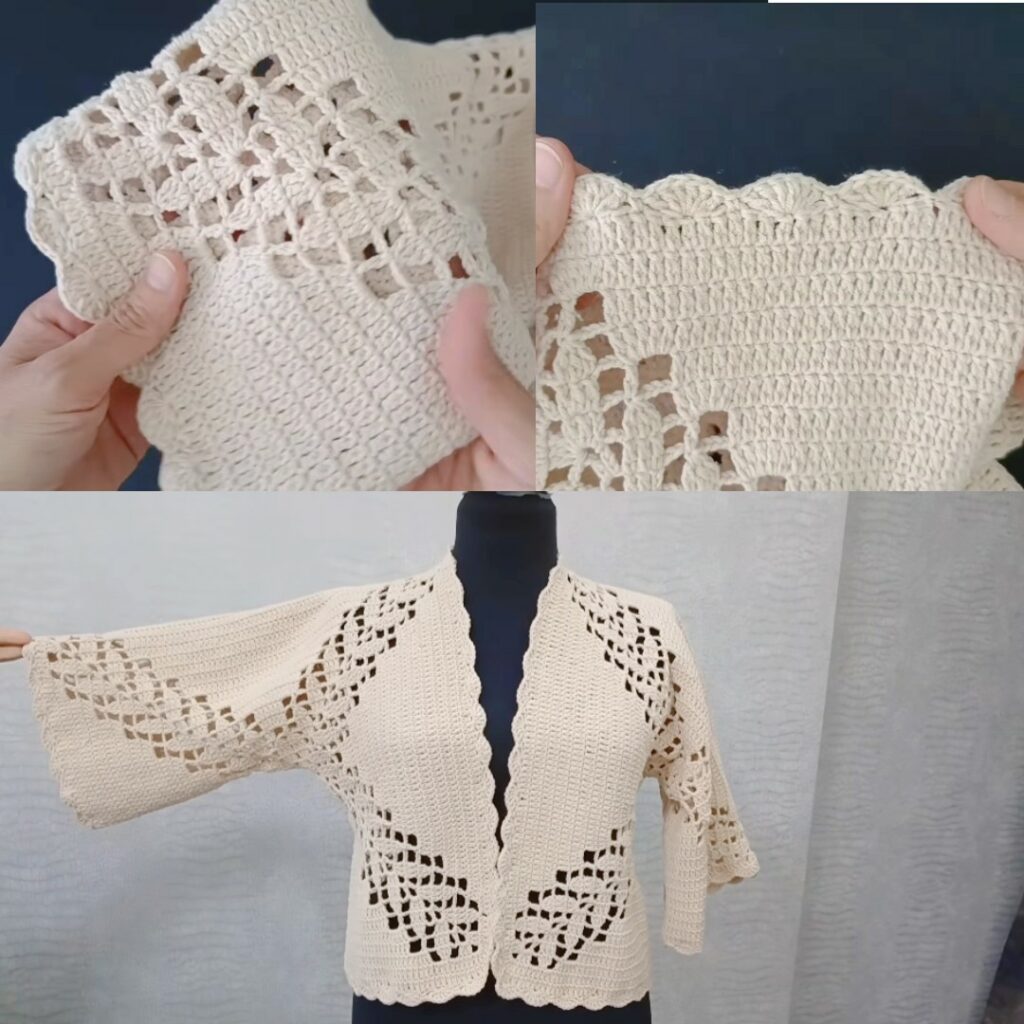
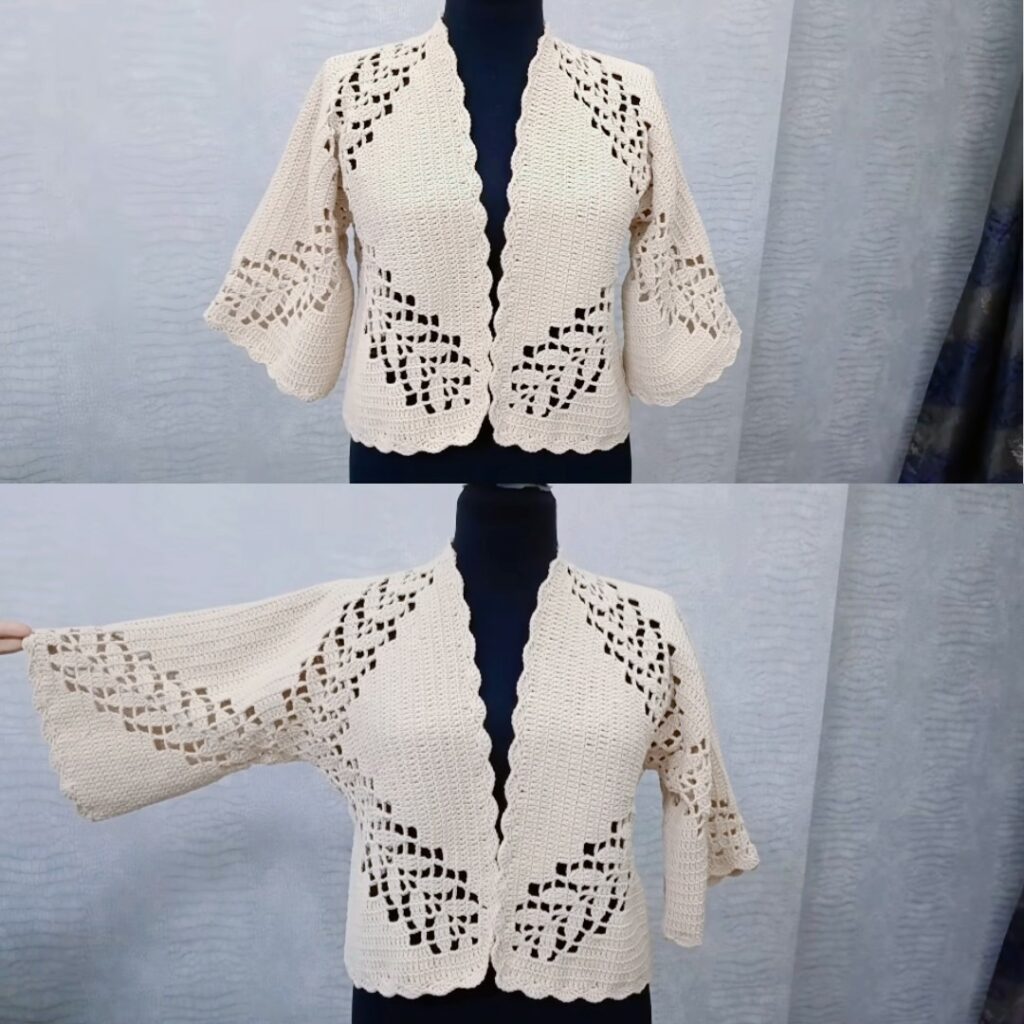
by This cardigan is made from two large hexagons, folded, and joined — no shaping required.
Pattern is written in US crochet terms.
🧶 Materials
- Medium weight (Size 3 or 4) yarn
- Suitable hook (usually 4 mm – 5 mm)
- Scissors
- Yarn needle
🪡 Stitch Abbreviations (US)
| Abbrev | Meaning |
|---|---|
| ch | chain |
| sl st | slip stitch |
| sc | single crochet |
| dc | double crochet |
| tr | treble crochet |
| sk | skip |
| sp | space |
| rep | repeat |
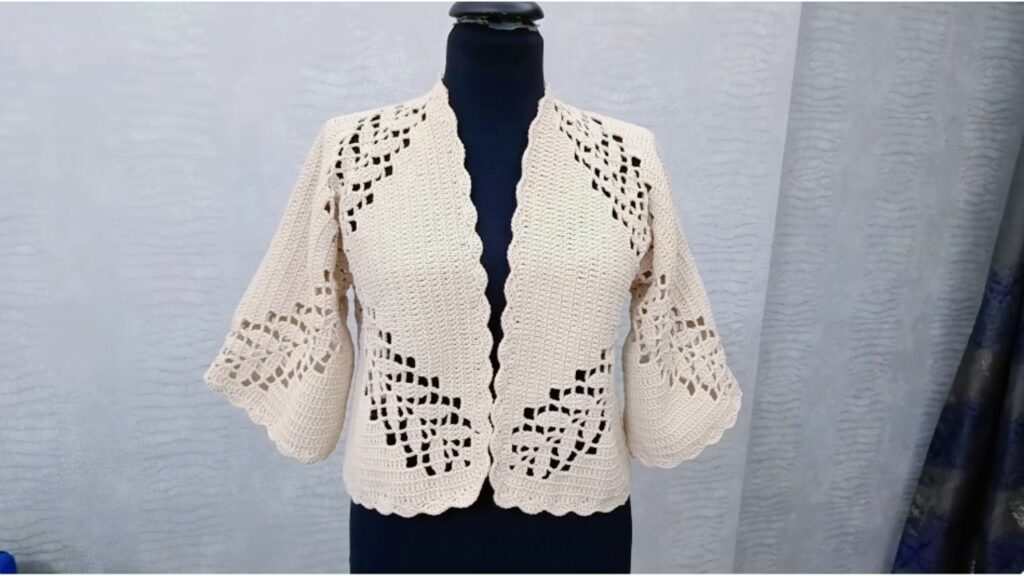
✨ CONSTRUCTION OVERVIEW
- Crochet one hexagon → Repeat rounds until it reaches shoulder-to-waist size.
- Make second hexagon identical.
- Fold each hexagon to form shoulder + sleeve shape.
- Sew the back and sides to create cardigan body.
- Optionally add sleeve length by continuing to crochet around sleeve opening.
- Add border around front edges.
🍃 LEAF HEXAGON PATTERN
Start
- Make a magic ring.
- Ch 3 (counts as dc), then work 11 dc into ring (12 total).
- Pull ring tight, join with sl st.
Round 1 – 6 Corner Bases
We will create 6 corner chain spaces.
- Ch 3 (counts as dc).
- Dc in same stitch → increase.
- ch 2, 2 dc in next stitch.
- Repeat step 3 around → you will form 6 sets of (2 dc, ch 2).
- Join with sl st to top of ch 3.
You now have 6 corners.
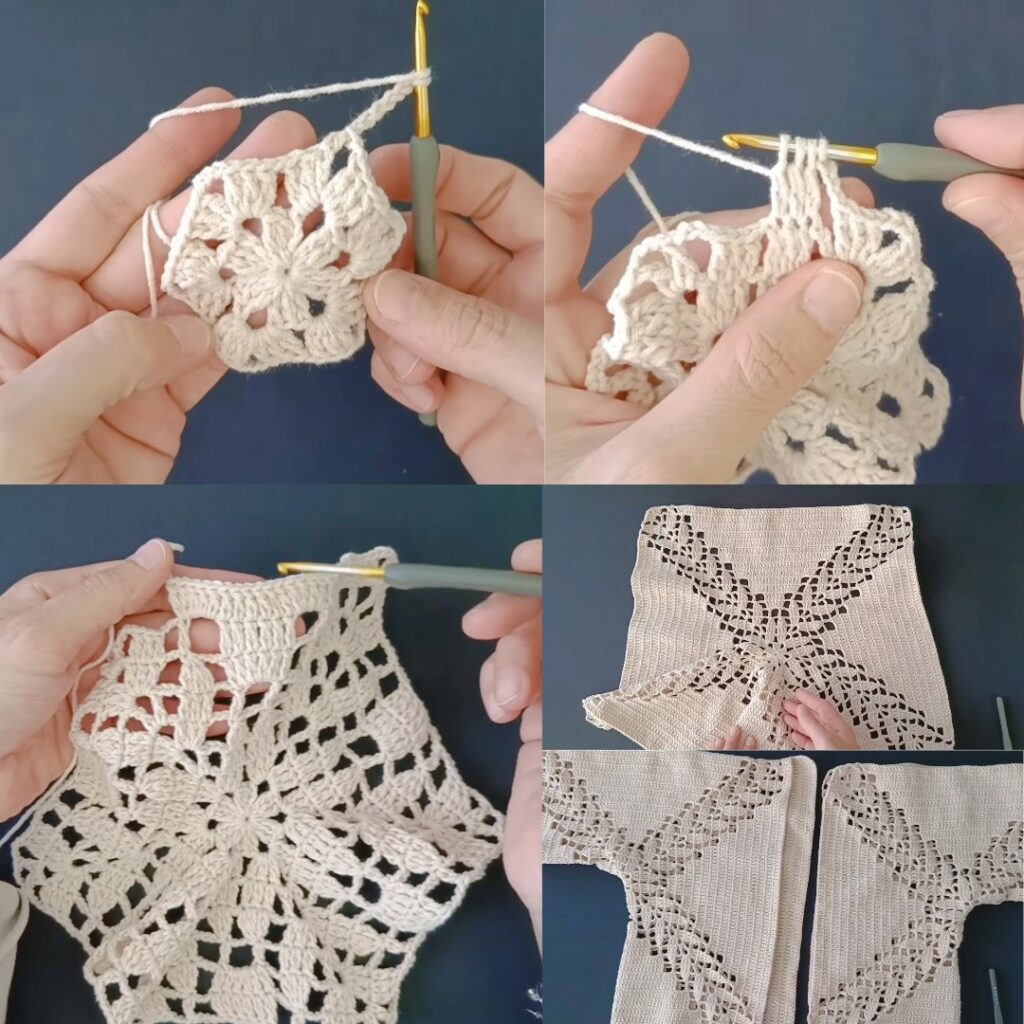
Round 2 – Leaf Petal Start
Corners always form the hexagon shape.
- Sl st into next dc.
- Sl st into corner ch-2 space.
- Corner: (2 dc, ch 2, 2 dc) into corner space.
- In next space (between groups) work 2 dc.
- Repeat around each corner.
Join with sl st.
Round 3 – Leaf Definition
- Sl st to first corner space.
- Corner: (2 dc, ch 2, 2 dc).
- In the side spaces (between corners), work:
dc in each stitch acrossuntil next corner. - Repeat the corner formula at each corner.
🍃 LEAF STITCH DETAIL (Decorative Leaf Texture)
This is the defining part:
On each side panel, repeat:
Skip 1 st, in next stitch work (dc, ch 1, dc, ch 1, dc) all in same st → leaf cluster.
Skip 1 st, dc across remainder until corner.
This creates a grouped leaf texture in the hexagon’s sides.
Repeat this leaf cluster placement in the same vertical track each round to make leaf vines.
🔁 CONTINUE WORKING ROUNDS
Repeat:
Round Type A: increase corners (2dc, ch2, 2dc in each corner)
Round Type B: form leaf clusters along each side
until hexagon width = half your desired cardigan body width.
Size reference:
| Size | Hexagon measurement (point to point) |
|---|---|
| S/M | 45–48 cm |
| L/XL | 50–55 cm |
| XXL+ | 56–62 cm |
If unsure: Hold hexagon against your body — it should cover your shoulder to your waist comfortably.
🧩 FOLDING THE HEXAGONS
Lay the hexagon flat.
Fold two opposite sides inward so straight edges form the armhole.
It will look like this:
  / \        Fold left & right
 /   \   →    \   /
 \   /         \ /
  \ /
This creates a shape with:
- Shoulder
- Armhole
- Body opening
Repeat with second hexagon.
🪡 JOINING
- Place both folded hexagons back-to-back.
- Sew the center back seam where edges meet.
- Sew the side seams, leaving armholes open.
🖐️ SLEEVES (Optional Lengthening)
Work in rounds around the armhole:
Round: dc evenly around, join
Next rounds: continue dc rows until desired sleeve length
To taper: occasionally skip 1 stitch near underarm
Stop when sleeve length is good (or leave short for kimono style).

🎀 FRONT AND BOTTOM BORDER
Work around entire cardigan opening:
Row 1: sc evenly around
Row 2: dc around
Row 3+: optional ribbing: *front post dc, back post dc* repeat
Finish neatly, weave in ends.
✅ You’re Done!
A beautiful leaf-lace hexagon cardigan — no shaping, no complicated seams.
VIDEO: