 by
by OK Now, I will describe exact stitches and repeat counts clearly.
Written in US crochet terms.

🧶 Materials
- Any yarn (cotton recommended for lace look)
- Hook size that matches yarn (usually 2.5mm – 4mm)
- Scissors & yarn needle
🪡 Abbreviations (US Terms)
| Abbrev | Meaning |
|---|---|
| ch | chain |
| sl st | slip stitch |
| sc | single crochet |
| dc | double crochet |
| tr | treble crochet |
| sp | space |
| sk | skip |
| rep | repeat |
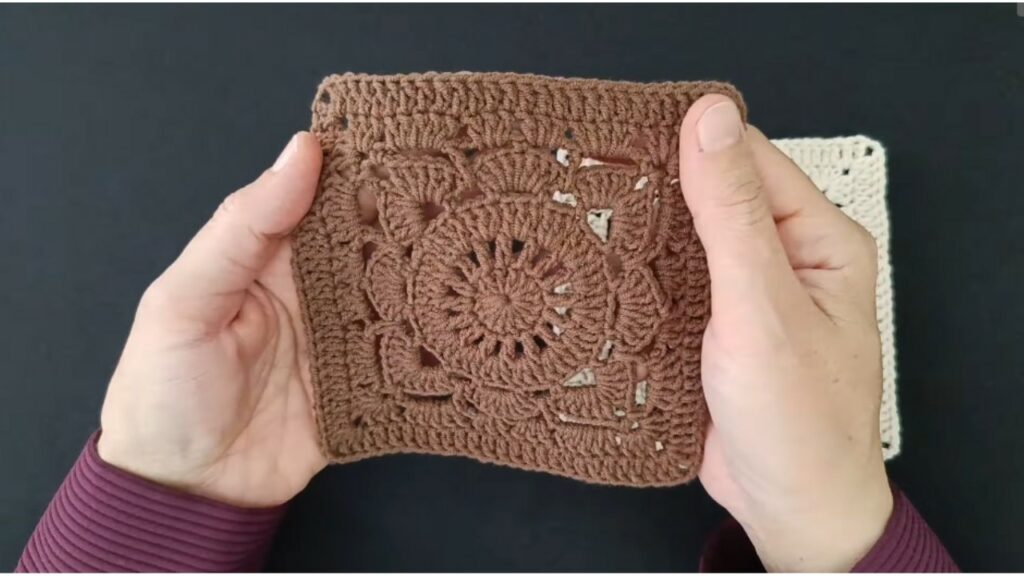
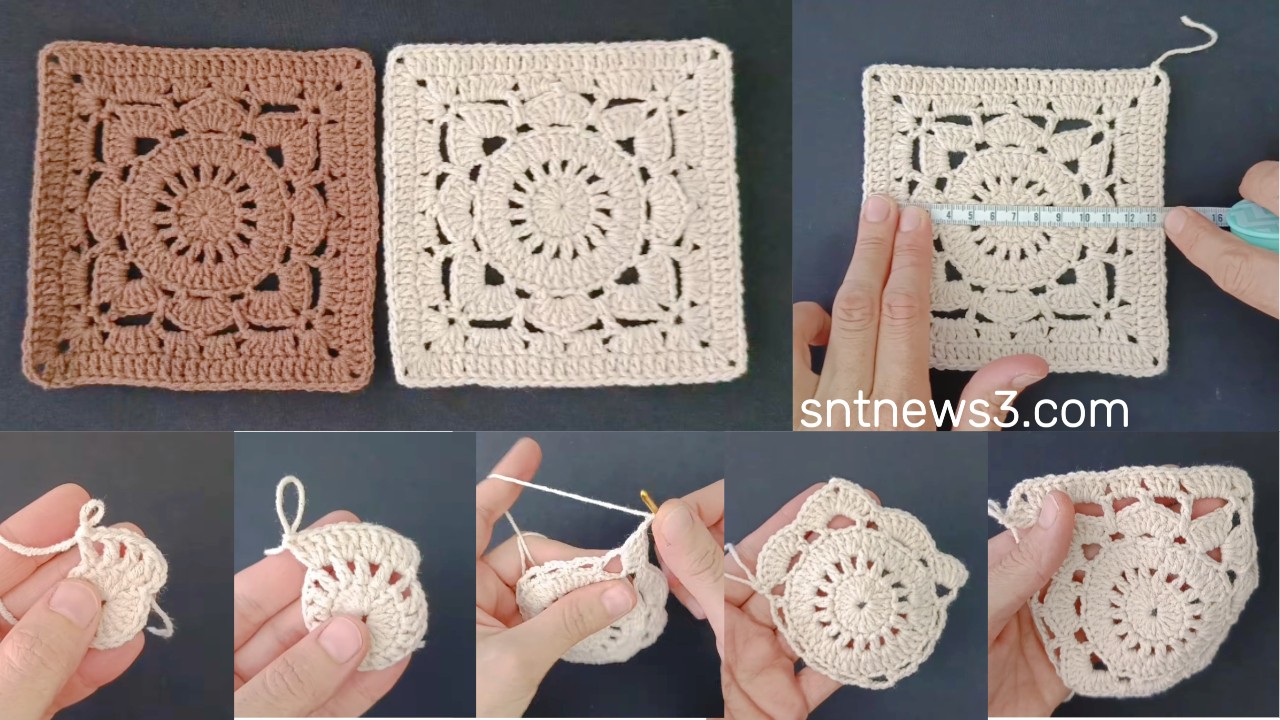
🌿 “Willow Leaf” Crochet Square Pattern
Start
- Make a magic ring.
- Ch 3 (counts as 1 dc), then work 15 dc into the ring (you will have 16 dc total).
- Pull ring tight and join with sl st to top of ch 3.
Round 1 – Forming Petal Loops
- Ch 4 (counts as dc + ch 1).
- dc in next stitch, ch 1.
- Repeat around until every stitch has dc + ch 1 above it.
- You will have 16 dc separated by ch-1 spaces.
- Join with sl st into 3rd chain of starting ch 4.
Round 2 – Petal Base
We will create groups of 3 double crochet in each chain space.
- Sl st into next ch-1 space.
- Ch 3 (counts as dc), then work 2 dc in the same space → (3 dc group).
- In next ch-1 space work (3 dc).
- Repeat this in each space around → 16 groups of 3 dc.
- Join with sl st to top of ch 3.
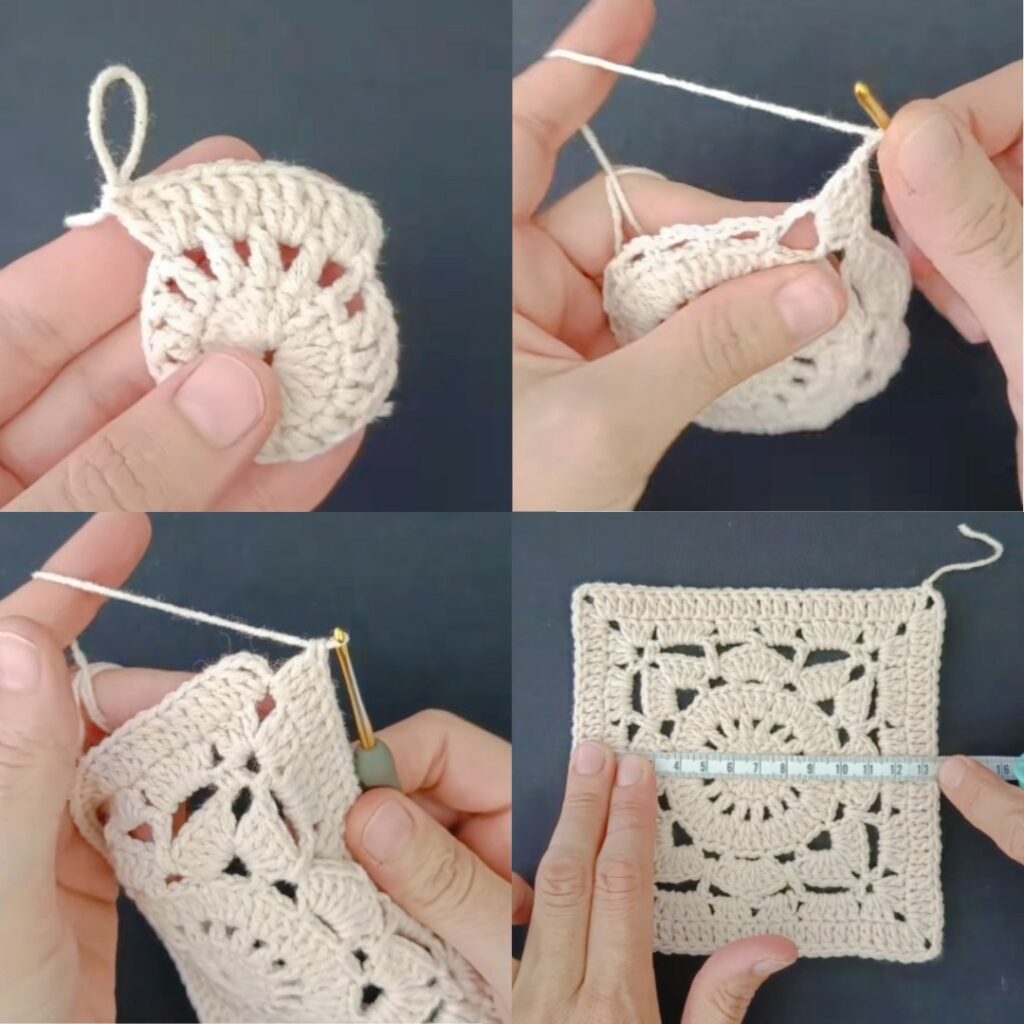
Round 3 – Leaf Clusters
This creates the willow leaf / droplet shape.
- Sl st into space between the groups (the gap between shell clusters).
- Ch 5 (this replaces one leaf cluster).
- In next space work:
(tr, ch 2, tr, ch 2, tr) → leaf cluster - Ch 3.
- In the next space work another leaf cluster:
(tr, ch 2, tr, ch 2, tr) - Alternate:
leaf cluster → ch 3 → leaf cluster → ch 3around entire round. - Join with sl st to the 3rd chain of the starting ch 5.
Round 4 – Starting to Form the Square
Now we shape the motif so it becomes square.
Corners are created by placing bigger chain spaces.
- Sl st into first ch-2 space of the leaf cluster.
- Ch 3 (counts as dc), dc in same space.
- In the next ch-2 space of the same cluster, work:
(2 dc, ch 3, 2 dc) → This forms CORNER #1 - In the next leaf cluster (move to next cluster), work:
2 dc in first ch-2 space, 2 dc in next ch-2 space.(These are side stitches, NOT corner.) - Repeat sequence:
CORNER cluster:
(2 dc in first space, 2 dc, ch 3, 2 dc in second space)

SIDE cluster:
(2 dc in first space, 2 dc in second space)
You will create 4 corners and 4 side sections.
- Join with sl st.
Round 5 – Strengthening the Square
- Ch 3 (counts as dc).
- Dc in each stitch along the side.
- In each corner ch-3 space work:
(2 dc, ch 3, 2 dc) → corner - Continue all around.
- Join with sl st.
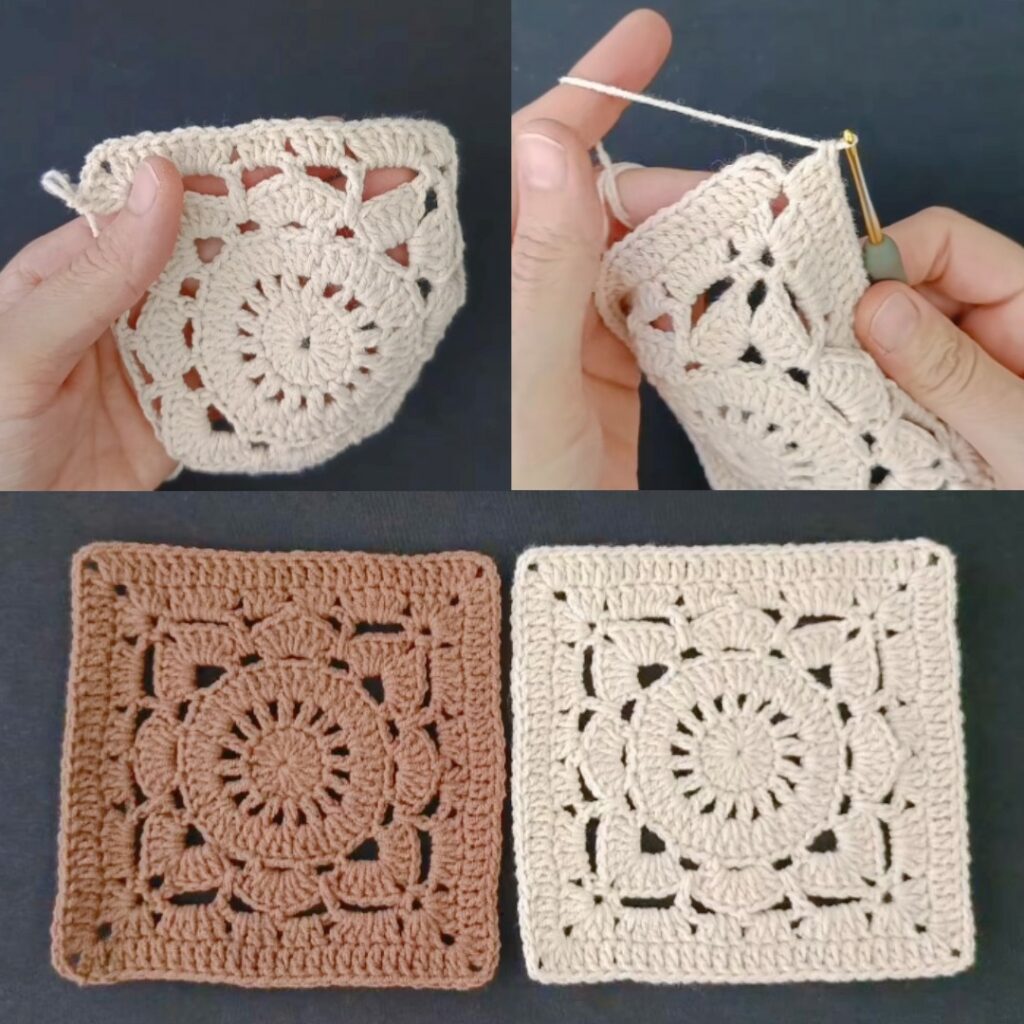
✅ Your Willow Motif Square is Complete!
You can use these motifs for:
- Cardigans
- Table runners
- Curtains
- Shawls
- Bags
- Blouses
- Doilies
They join easily corner-to-corner with slip stitch or whip stitch.
VIDEO: