 by
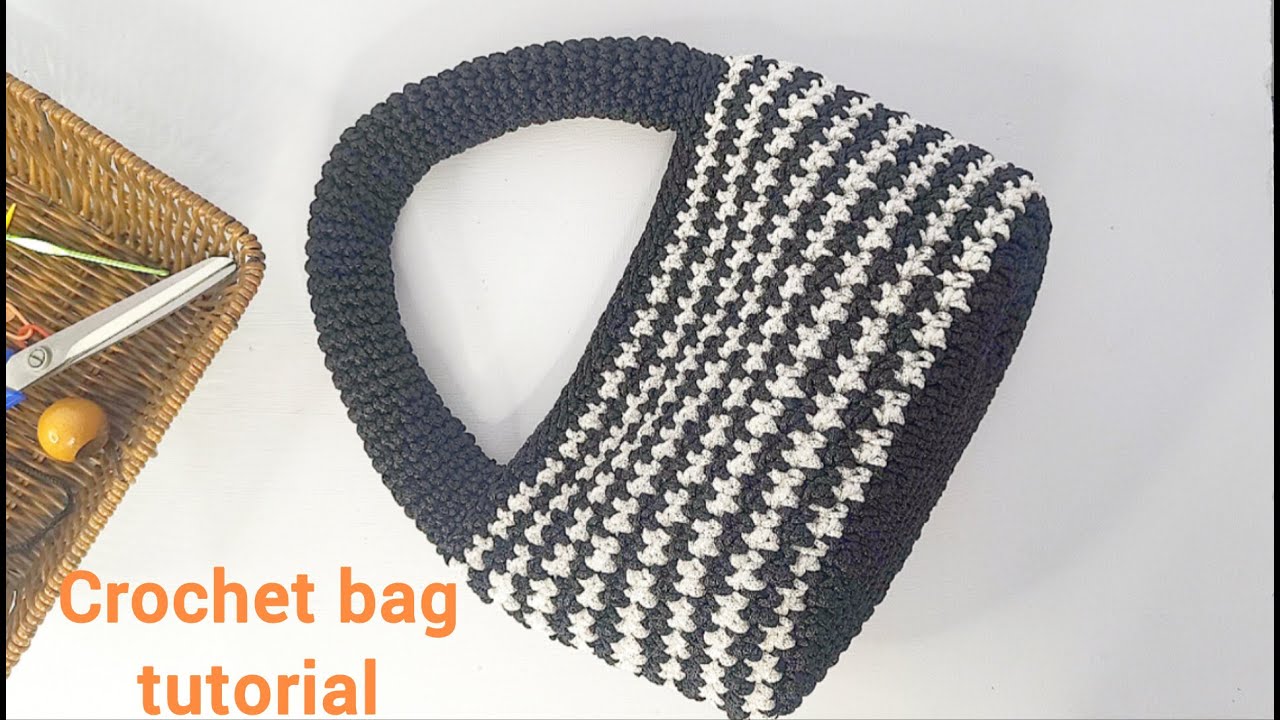
by Looking to create a stylish and functional accessory with minimal effort? A super easy crochet bag with a houndstooth pattern is the perfect project! The houndstooth pattern creates a chic, classic look with just basic stitches—ideal for beginners who want to make something impressive without complicated techniques.
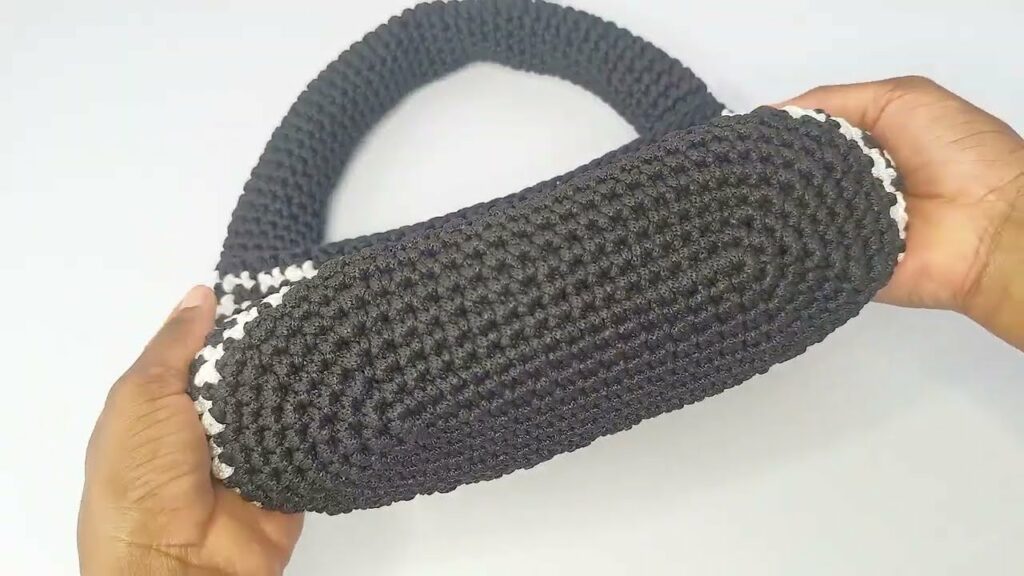
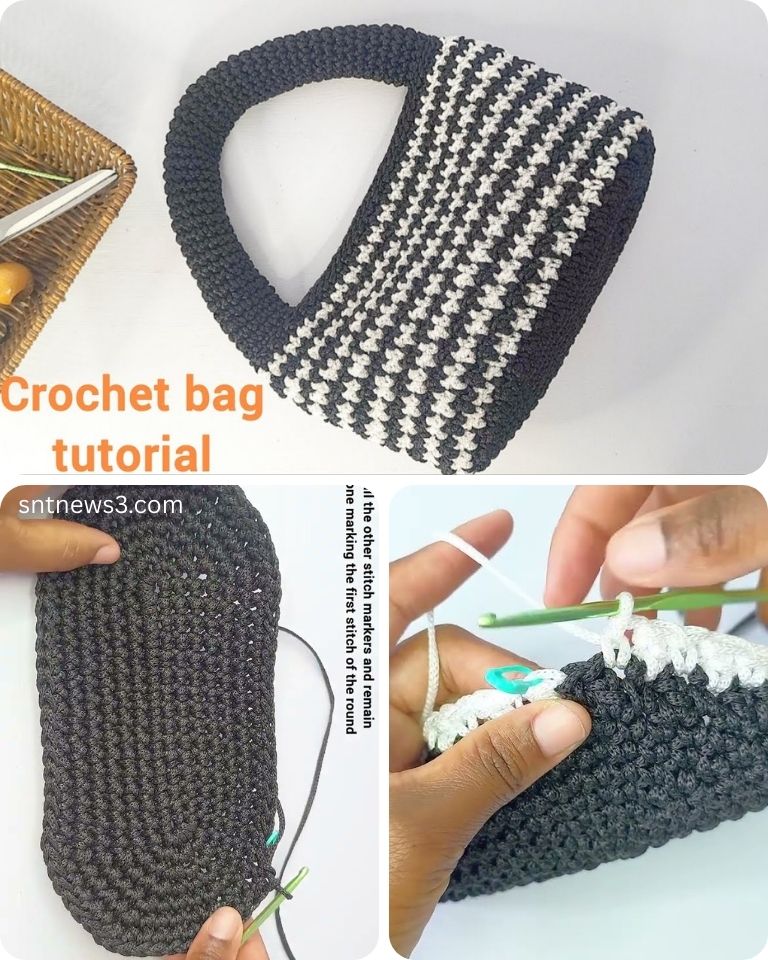
In this tutorial, you’ll learn step-by-step how to crochet a flat-bottom tote-style bag featuring the iconic two-tone houndstooth design. Let’s get started!

🧶 Materials You’ll Need
- Worsted weight yarn in two contrasting colors:
- Color A (Main) – e.g., black or navy
- Color B (Contrast) – e.g., white or cream
- Crochet Hook: Size H/8 (5.0 mm) or size to obtain a firm fabric
- Yarn needle (for weaving in ends)
- Scissors
- Stitch markers (optional)
- Optional: Lining fabric, magnetic clasp, or leather handles
✂️ Finished Size
Approximately 12″ wide x 10″ tall x 2″ deep, not including handles. Easily adjustable.
📘 Stitches & Abbreviations (US Terms)
- ch – chain
- sc – single crochet
- dc – double crochet
- sl st – slip stitch
- st(s) – stitch(es)
- RS/WS – right side/wrong side
Skill Level: 🧵 Easy / Beginner+
If you can do sc and dc, you can do this!

🔲 Understanding the Houndstooth Stitch
The houndstooth crochet pattern is a 2-row repeat using alternating single and double crochet stitches in two colors:
- Row 1: (sc, dc) repeated across, using Color A
- Row 2: (sc, dc) repeated across, but offset (sc goes into previous dc, and vice versa), using Color B
This simple switch in placement creates the distinctive houndstooth texture.
👜 Step-by-Step Pattern: Houndstooth Crochet Bag
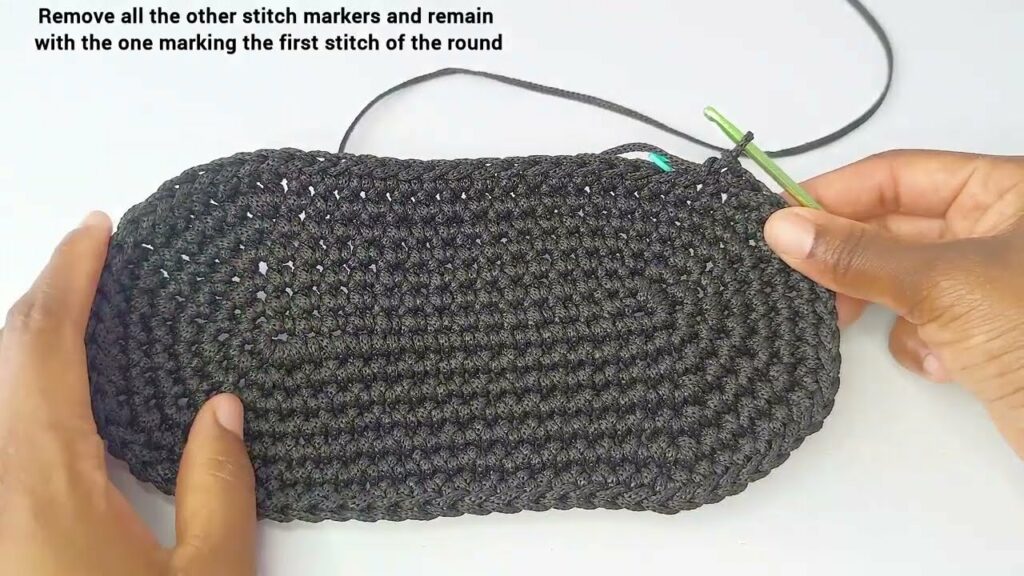
🧱 Step 1: Create the Bag Base (Optional Flat Bottom)
You can start with a chain and work in the round for a flat base, or make a flat rectangle.
- With Color A, ch 41 (or more for desired width).
- Row 1: Sc in 2nd ch from hook and in each ch across. (40 sts)
- Row 2: Ch 1, sc across. Fasten off. (This forms a stable base row.)
Optional: Work 2–3 more rows in sc for a thicker base before starting the houndstooth pattern.
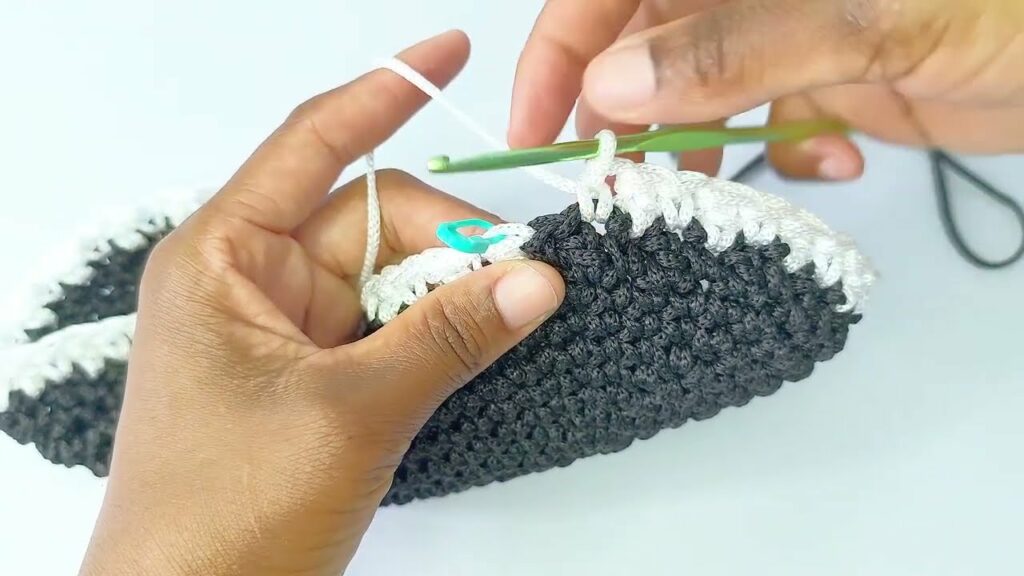
🧵 Step 2: Begin the Houndstooth Body Pattern
Switch between Color A and Color B every row.
Row 1 (RS) – With Color A:
- Ch 1, (sc in first st, dc in next st) repeat across. End with dc. Turn.
Row 2 – With Color B:
- Ch 1, (sc in dc of previous row, dc in sc of previous row) repeat across. Turn.
Repeat Rows 1–2 until the piece measures your desired height (approx. 10″).
Keep carrying the unused yarn up the side (do not cut after each row), especially if you’re adding edging or sewing the sides later.
🪡 Step 3: Seaming the Sides
Once you’ve completed the height:
- Fold the panel in half, right sides together.
- Sl st or whip stitch the sides to form the body of the bag.
- Turn right-side out.
Optional: You can create a flat-bottom look by sewing triangle corners at the base (pinch the bottom corners and sew straight across about 1–2 inches in).
🎀 Step 4: Add Handles
Option 1: Crochet Handles
- Ch 50–60 (for shoulder length).
- Attach evenly to top edges with sc or sewing.
Option 2: Attach Leather or Store-Bought Handles
- Sew or rivet in place using a strong thread or embroidery floss.
🧵 Optional Finishing Touches
- Add a fabric lining for structure and durability.
- Insert a magnetic clasp for closure.
- Edge the top of the bag with a round of sc in Color A for a clean finish.
🧺 Care & Use
- Cotton or acrylic yarn is machine washable.
- Avoid heavy stretching—line the bag if you plan to carry heavier items.
- Spot clean leather handles if used.
✅ Tips for Success
- Choose high contrast colors for a bold houndstooth effect.
- If your edges look uneven from color changes, crochet a border around the top to clean them up.
- Block your panels lightly before seaming if needed.
Video tutorial:
🌟 Final Thoughts
This super easy crochet bag with a houndstooth pattern is not only a fun and stylish project, but also a great way to learn or practice color changes and texture work. Whether you keep it simple or personalize it with linings, zippers, or embellishments, your handmade bag will be uniquely yours.
So grab your hook and yarn, and start stitching your very own houndstooth tote today!