 by
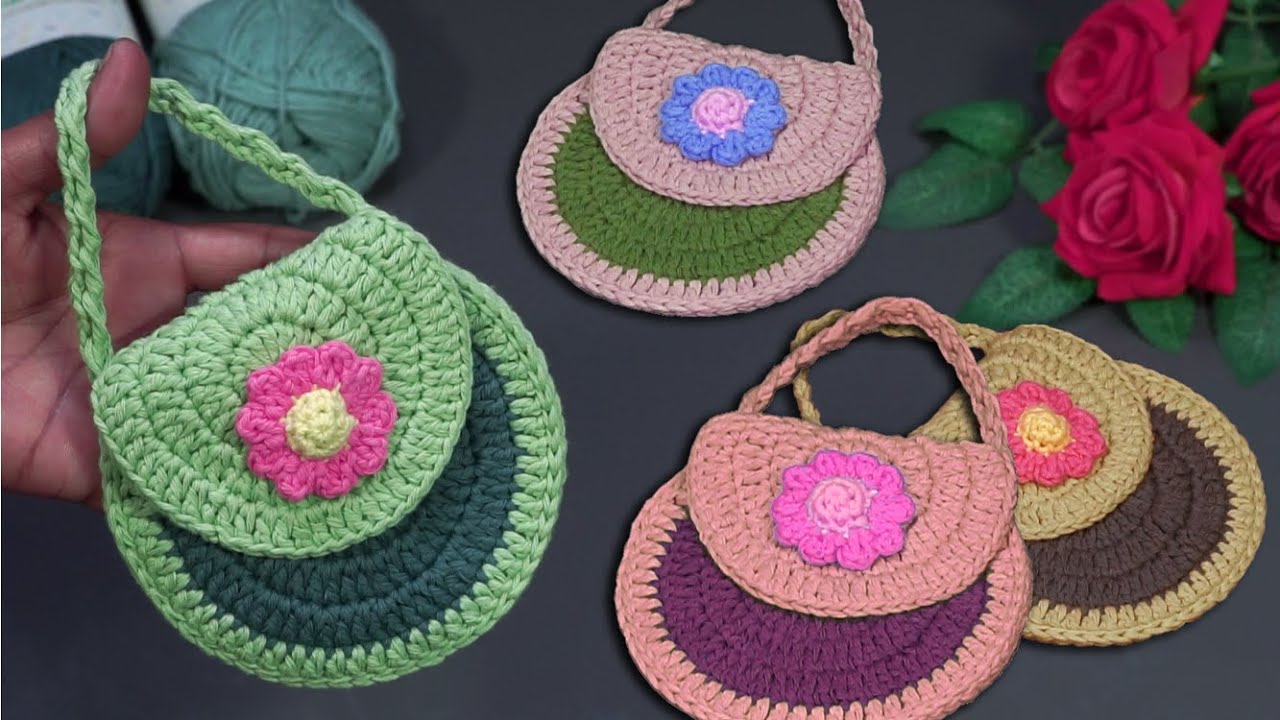
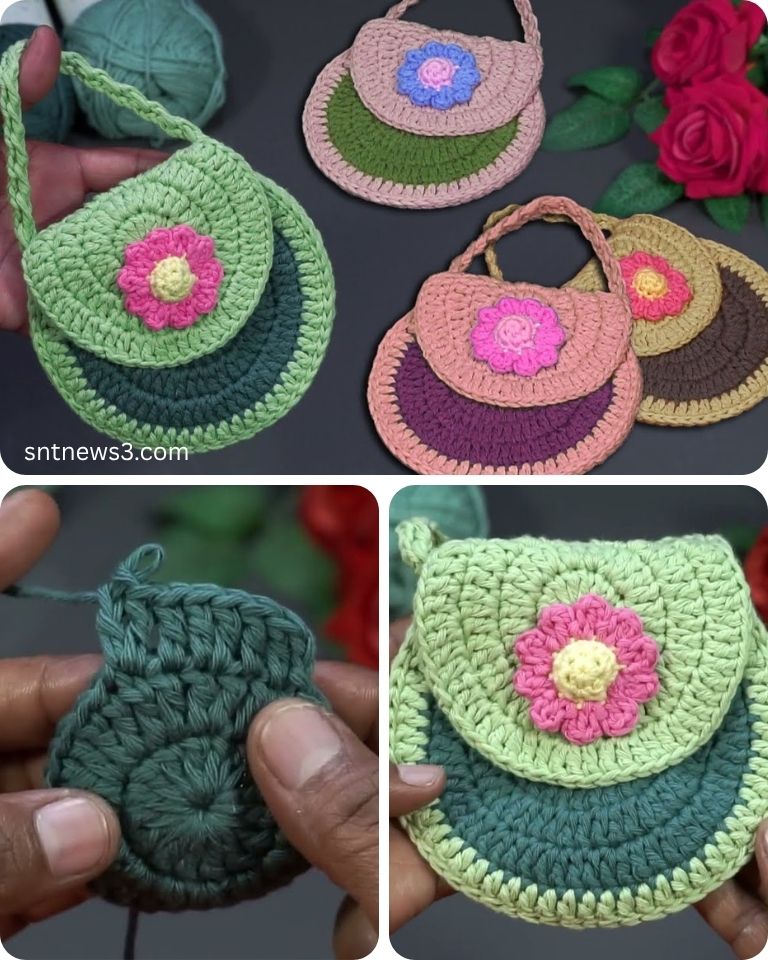
by Crocheting a mini bag is the perfect DIY project — it’s small, stylish, quick to make, and oh-so-cute! Whether you want a trendy accessory, a pouch for coins or earbuds, or a handmade gift, this mini bag is a fantastic way to show off your creativity. Best of all? You can make it even if you’re a beginner!
In this article, you’ll learn how to crochet a cute mini bag from scratch using simple stitches, basic materials, and easy techniques. Let’s dive in!

💖 Why Crochet a Mini Bag?
Mini bags are super practical and very customizable. They’re the perfect size to carry small essentials, and they can be as simple or decorative as you like.
Benefits:
- ✅ Beginner-friendly and quick to make
- ✅ Uses a small amount of yarn
- ✅ Great for gifting or selling
- ✅ Stylish and useful for any age
🧵 Materials Needed
Here’s what you’ll need to get started:
- Worsted weight yarn (medium #4) – cotton or acrylic
- Crochet hook (Size 4.0 mm or 5.0 mm)
- Yarn needle (for sewing and weaving in ends)
- Scissors
- Button, snap, or drawstring (optional, for closure)
- Stitch marker (optional, for counting rounds)
🔤 Stitches You’ll Use
This pattern uses basic crochet stitches. If you know these, you’re ready!
- Chain (ch)
- Single Crochet (sc)
- Slip Stitch (sl st)
- Optional: Half Double Crochet (hdc) or Double Crochet (dc) for decoration
👛 Step-by-Step Mini Bag Pattern
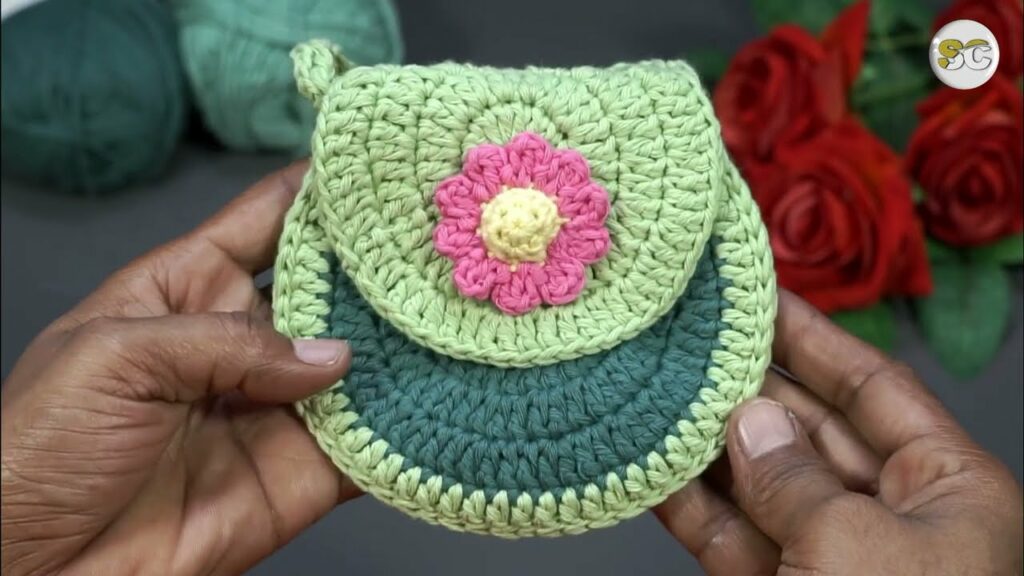
This pattern creates a cute, flat-bottomed mini bag with a flap closure. Finished size: ~4 x 5 inches.
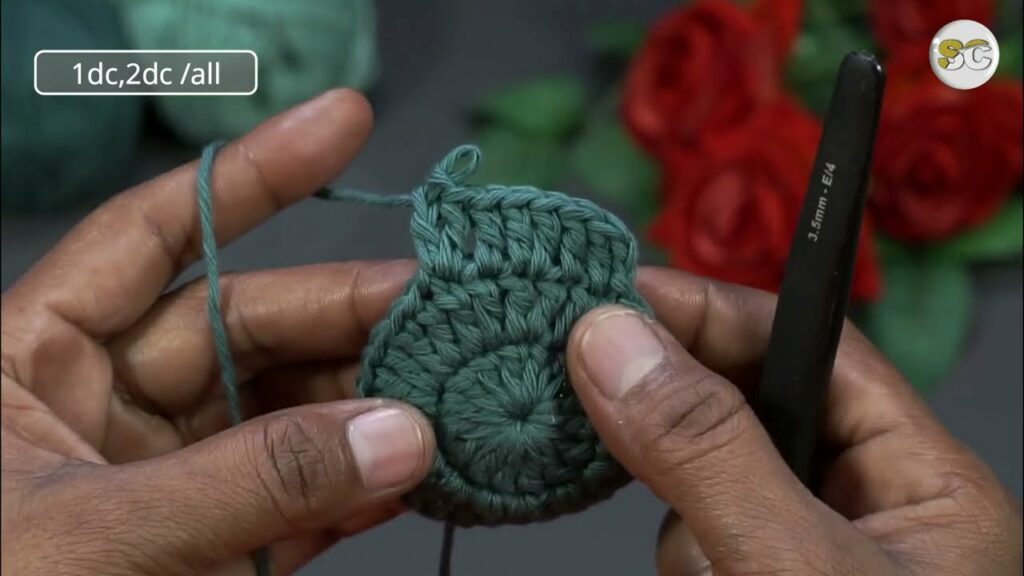
🔹 Step 1: Create the Base (Flat Oval)
Foundation Chain:
- Chain 11 (you can adjust for a wider or narrower bag).
Round 1:
- In 2nd chain from hook, work 2 sc in the same stitch.
- Sc in next 8 chains.
- In last chain, work 3 sc to turn the corner.
- Work back down the other side of the chain with 8 sc.
- In the last chain, work 1 more sc to complete the round.
- Join with a slip stitch.
Round 2:
- Chain 1.
- Work 2 sc in each of the 2 end stitches (to round the corners).
- Sc in each stitch around the sides.
- Join with slip stitch.
Repeat for 1 more round if you want a slightly thicker base.
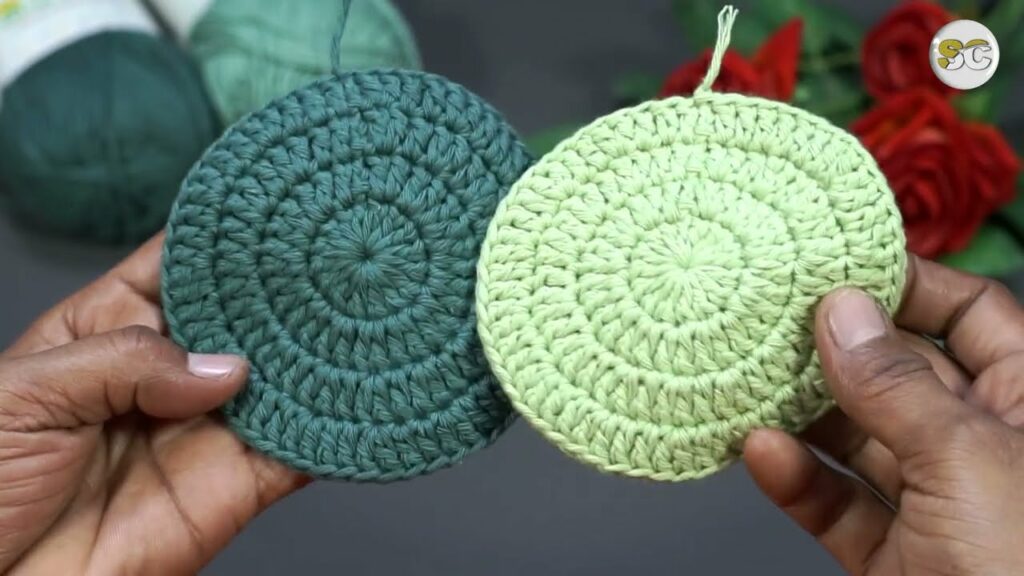
🔹 Step 2: Build the Body
Now you’ll work in rounds to build up the bag’s height.
Rounds 3–10 (or more):
- Chain 1.
- Sc in each stitch around, working in the back loops only for the first round (this creates a sharp base edge).
- Continue normal single crochet in each stitch for the next rounds.
- Join with slip stitch at the end of each round.
You can switch colors or add stripes if you want to customize your mini bag’s look.
🔹 Step 3: Create the Flap
Once your bag is the desired height (around 5 inches tall), stop working in rounds and start working in rows.
Row 1:
- Chain 1, then sc across half of the stitches on one side only (this will become your flap).
- Turn.
Rows 2–6:
- Continue working in rows of sc, decreasing 1 stitch on each end every row (use sc2tog).
- This forms a triangular flap.
Optional: Add a loop by chaining 6 and attaching to the last stitch to form a buttonhole.
🔹 Step 4: Add a Strap (Optional)
For a short handle:
- Chain 50–60, and attach each end to the sides of the bag with slip stitches or by sewing them on.
For a crossbody strap:
- Chain 90–120 for a longer length.
Tip: For extra durability, go over the chain with a row of slip stitches or single crochet.
🔹 Step 5: Finishing Touches
- Add a button and sew it below the flap.
- Weave in all ends with the yarn needle.
- Block the bag if necessary (lightly shape and steam with care).

🎨 Design Variations
Want to take your mini bag to the next level? Try these ideas:
- 🌈 Use variegated or ombré yarn for a colorful look.
- 🌸 Add appliqués, like crocheted flowers or hearts.
- ✨ Embellish with beads, sequins, or embroidery.
- 🧶 Try different textures like puff stitch, bobbles, or granny squares.
💡 Tips for Beginners
- Use light-colored yarn so you can see your stitches easily.
- Don’t worry about perfection — practice makes progress!
- Customize the size by adjusting the starting chain and the number of rounds.
Video tutorial:
✅ Final Thoughts
Crocheting a cute mini bag is not only fun but also incredibly rewarding. It’s fast, functional, and lets you flex your creative muscles with colors, patterns, and shapes. Whether you’re making one for yourself, a child, or as a thoughtful handmade gift, this project is sure to bring joy and style.
So grab your yarn, pick up your hook, and start stitching your own adorable mini bag today. Happy crocheting!