 by
by Crochet is a magical art where flat yarn turns into textured beauty — and one of the most eye-catching techniques you can learn is the 3D relief leaf stitch. This stitch creates a raised, dimensional leaf-like design that adds texture, elegance, and an organic feel to any project.
Whether you’re looking to enhance a scarf, blanket, bag, or shawl, this stitch is a stunning way to bring your crochet to life. The best part? It looks complex, but it’s totally beginner-friendly once you break it down step by step.
Let’s learn how to crochet the beautiful 3D leaf stitch — from scratch.

🍂 What Is the 3D Relief Leaf Stitch?
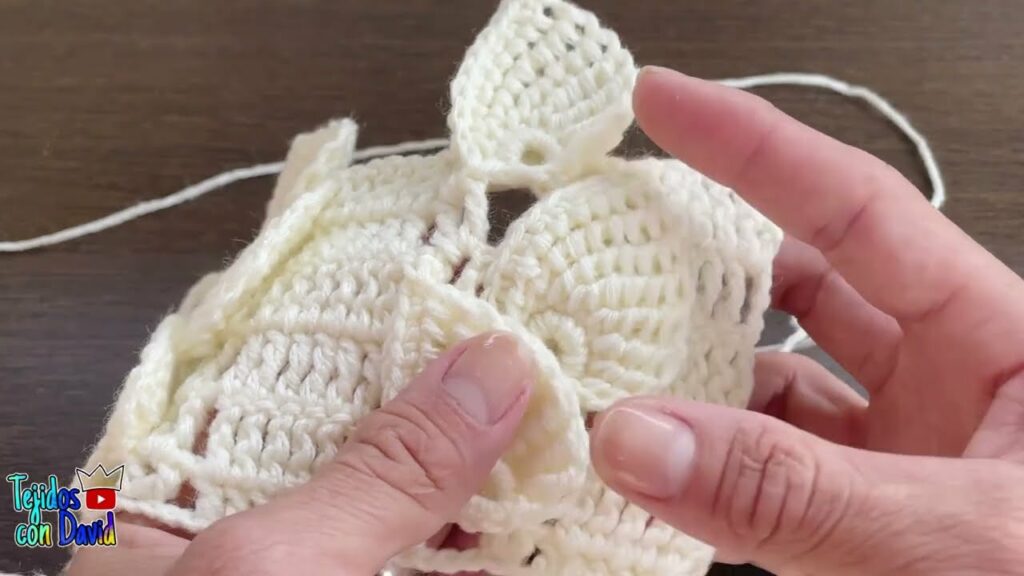
The 3D leaf stitch is a textured pattern that mimics the shape of leaves with a raised surface. It uses combinations of post stitches, chains, and double crochet clusters to create the “leaf veins” and structure.
It’s also known as:
- Relief leaf stitch
- Raised leaf stitch
- Embossed leaf pattern
🧵 Materials You’ll Need
You can practice this stitch with any yarn and hook, but for best results:
- Yarn: Medium weight yarn (Worsted or DK)
- Hook: 4.0 mm to 5.0 mm
- Scissors
- Yarn needle for weaving in ends
- Stitch markers (optional)

✨ Stitches & Abbreviations You’ll Use
Make sure you’re familiar with these basic stitches:
- ch – chain
- sc – single crochet
- dc – double crochet
- tr – treble crochet
- fpdc – front post double crochet (creates the raised effect)
- dc2tog – double crochet two together (for shaping leaves)
If you’re unfamiliar with fpdc, here’s how:
- Yarn over, insert hook around the post (front side) of the stitch below.
- Yarn over, pull through, finish like a regular dc.
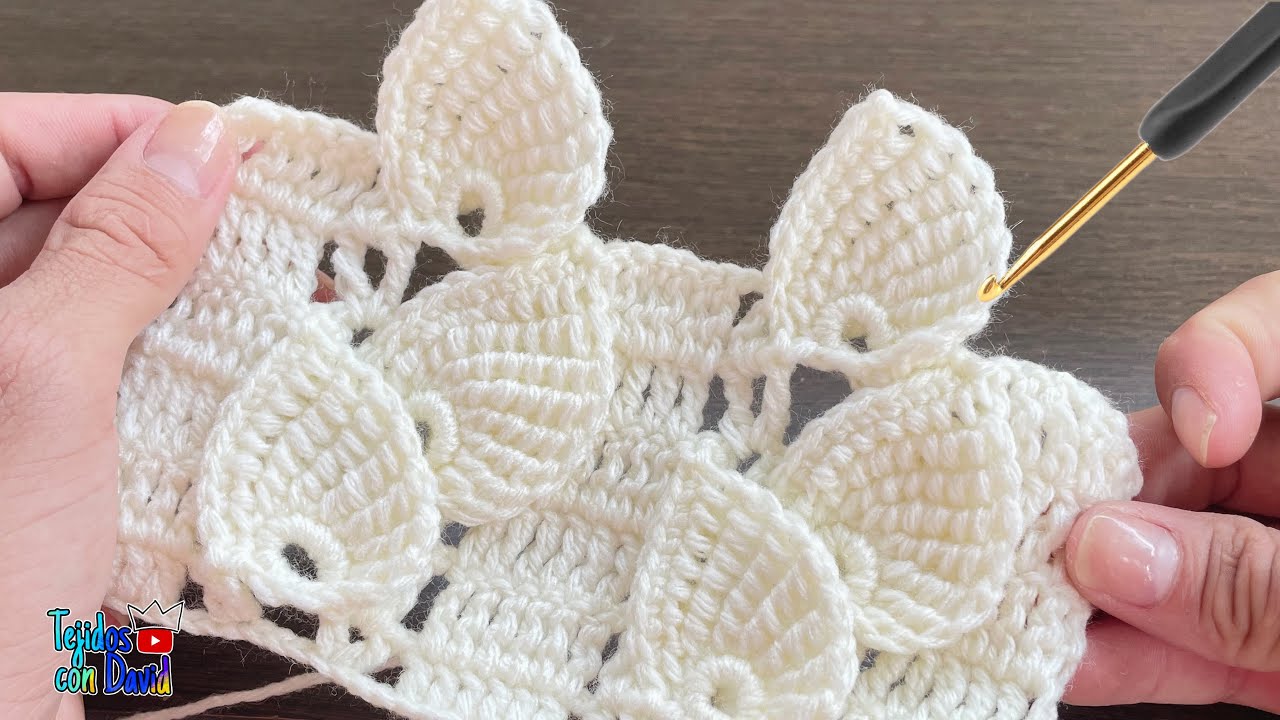
🍁 Step-by-Step: 3D Relief Leaf Stitch Pattern
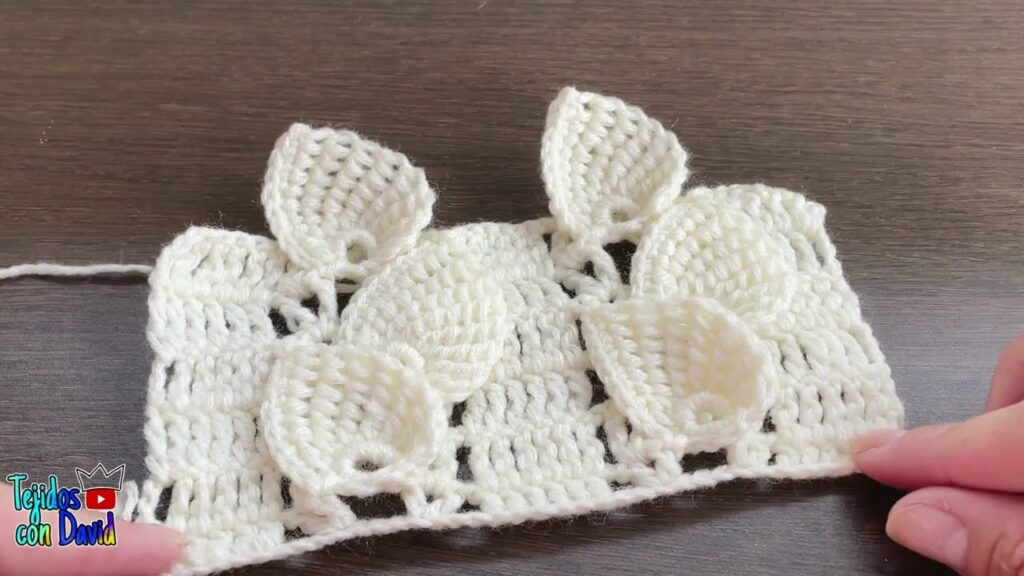
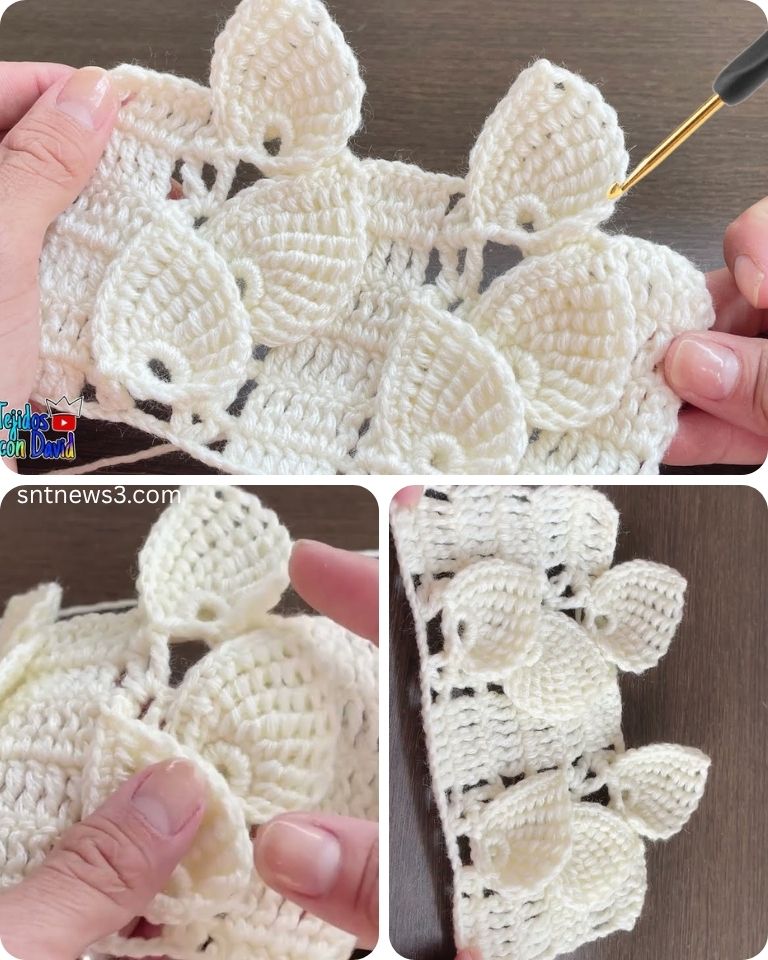
We’ll start with a small swatch to learn the basics. This version creates vertical rows of raised leaves.
🔹 Step 1: Foundation Chain
- Chain a multiple of 12 + 3 (example: 27 = 12×2 + 3)
- Row 1: dc in the 4th chain from hook and each across.
🔹 Step 2: Create the Base Rows
- Row 2 (WS): ch 3, dc in each stitch across. Turn.
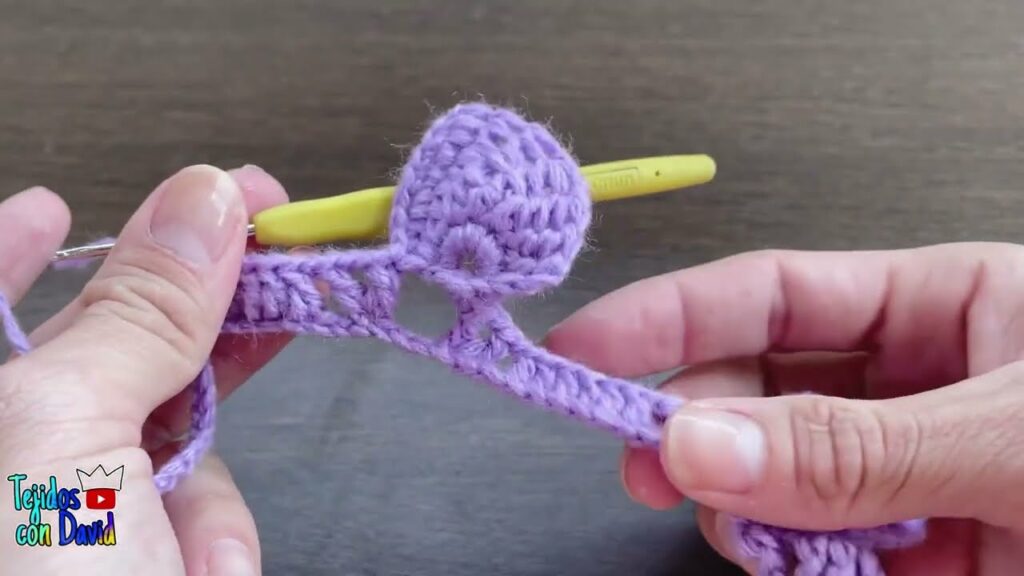
- Row 3 (RS): ch 3, dc in 5 sts, fpdc around the post 6 rows below, repeat across. This is the “spine” of your leaf.
Tip: Insert your hook around the same stitch 6 rows below each time to build the leaf spine upwards.
🔹 Step 3: Start Leaf Texture
- Row 4 (WS): ch 3, dc across.
- Row 5 (RS): ch 3, dc in 4 sts, fpdc in same post as before, dc in 1, fpdc in same post, repeat.
Now you have a V-shaped relief forming around the leaf spine.
🔹 Step 4: Build the Leaf
Continue alternating dc rows and relief rows, shaping the leaf by:
- Adding more fpdc in the same post to fan out
- Decreasing the dc between each fpdc to shape the edges inward again
Sample Leaf Row Sequence:
- Row 3: fpdc in post 6 rows below (start spine)
- Row 5: dc 4, fpdc, dc 1, fpdc (leaf expands)
- Row 7: dc 3, fpdc, dc 3, fpdc
- Row 9: dc 2, fpdc, dc 5, fpdc
- Row 11: dc 1, fpdc, dc 7, fpdc
- Row 13: dc 0, fpdc, dc 9, fpdc (full width)
- Row 15: start decreasing (dc 1, fpdc, dc 7, fpdc), etc.
You can adjust the size and shape of the leaf by adding or reducing these rows.
🔹 Step 5: End the Leaf
When the leaf is complete:
- On the next RS row, skip fpdc and continue with dc across.
- Begin a new leaf in the next section of your foundation.
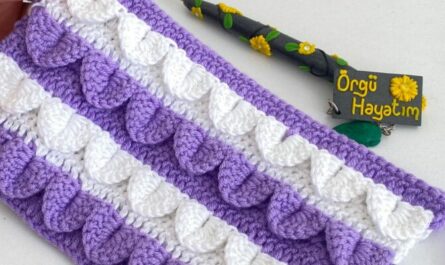
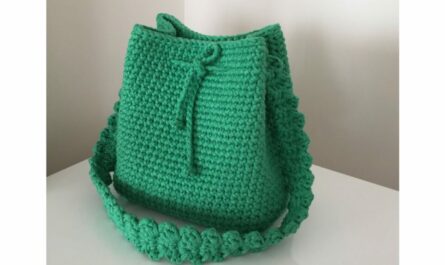
🌟 Project Ideas Using 3D Relief Leaf Stitch
This beautiful texture looks great on many projects:
- Blankets & throws – Add leafy borders or full panels
- Shawls & wraps – Place rows of leaves in vertical lines
- Bags & totes – Use leaves as a center motif
- Pillow covers – Add elegance and texture
- Wall hangings – Highlight the leaf stitch with contrasting colors
💡 Tips for Success
- Practice with solid, light-colored yarn so you can see your stitches.
- Use stitch markers to mark the beginning of each leaf.
- Count stitches carefully when making fpdc in previous rows.
- Want extra definition? Use cotton yarn or a hook 1 size smaller than usual.
✅ Final Thoughts
The 3D relief leaf stitch is a breathtakingly beautiful technique that adds depth and elegance to your crochet work. It may look complex at first glance, but with just a bit of practice and understanding of post stitches, you’ll master it quickly — even as a beginner!
So grab your yarn, hook, and creativity — and let your next project bloom with texture and charm.
Video tutorial: