 by
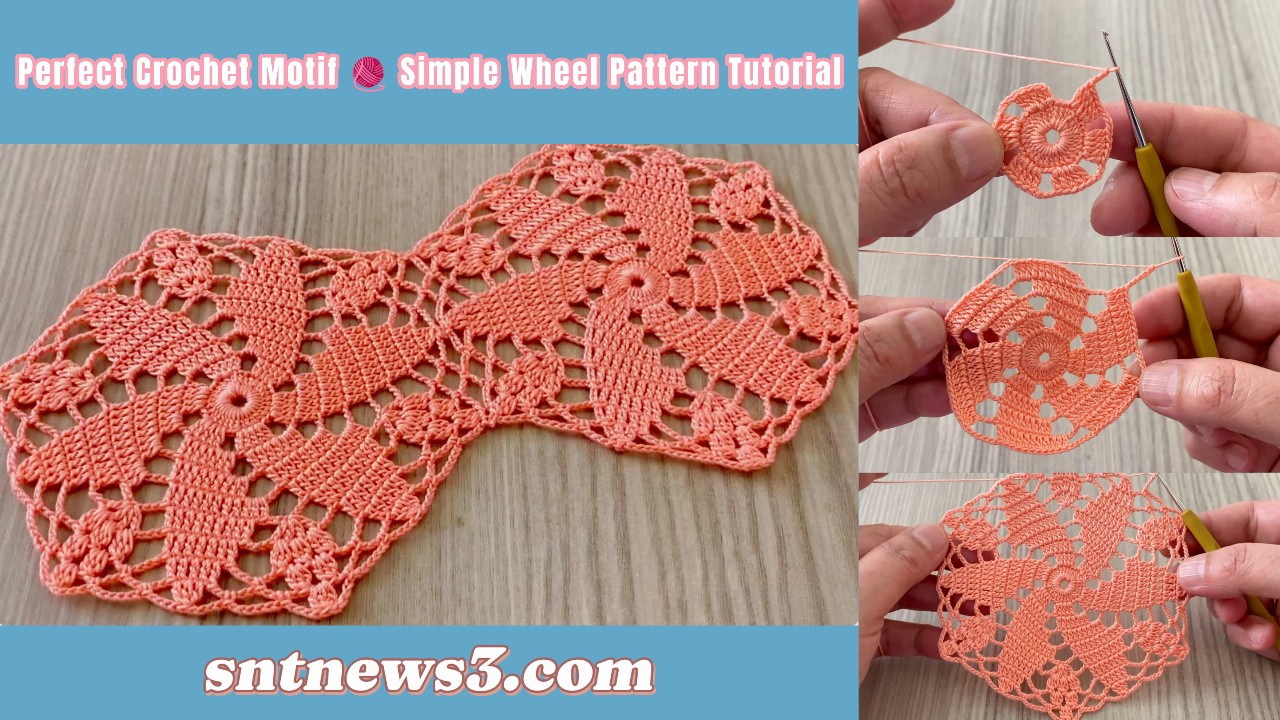
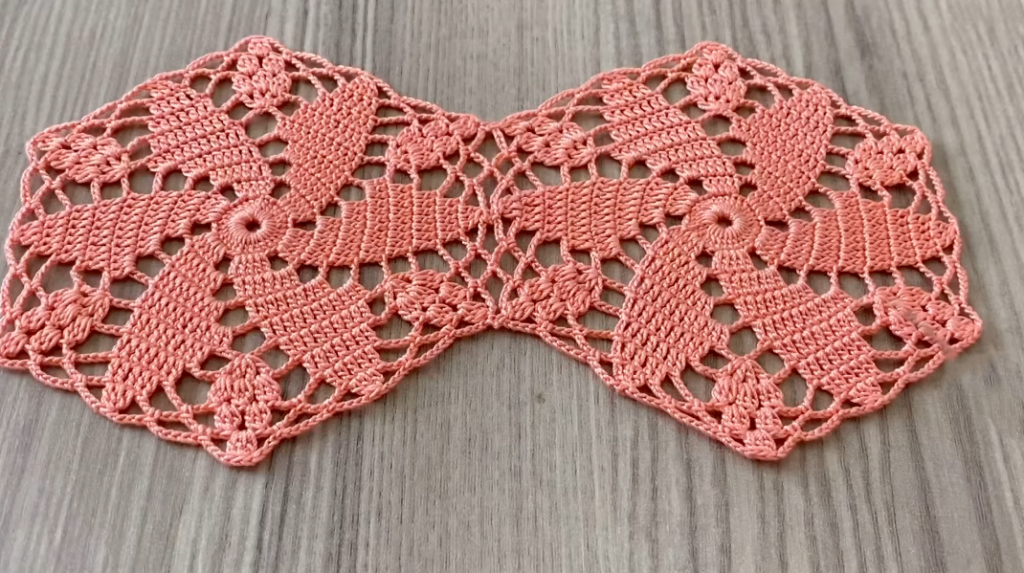
by This motif pattern works in the round and forms a decorative wheel-like shape that you can use individually or join into larger projects (blankets, scarves, tops, runners, bags, etc.).
🧵 Materials
- Light-to-medium weight yarn (e.g., DK / sport / cotton thread for a fine look)
- Crochet hook sized to yarn (e.g., 3 mm–4.5 mm)
- Scissors
- Tapestry needle for weaving ends
- Optional stitch marker
📌 Abbreviations (US Terms)
| Abbreviation | Meaning |
|---|---|
| ch | chain |
| sl st | slip stitch |
| sc | single crochet |
| hdc | half-double crochet |
| dc | double crochet |
| tr | treble crochet |
| sp | space |
| st | stitch |
| rep | repeat |
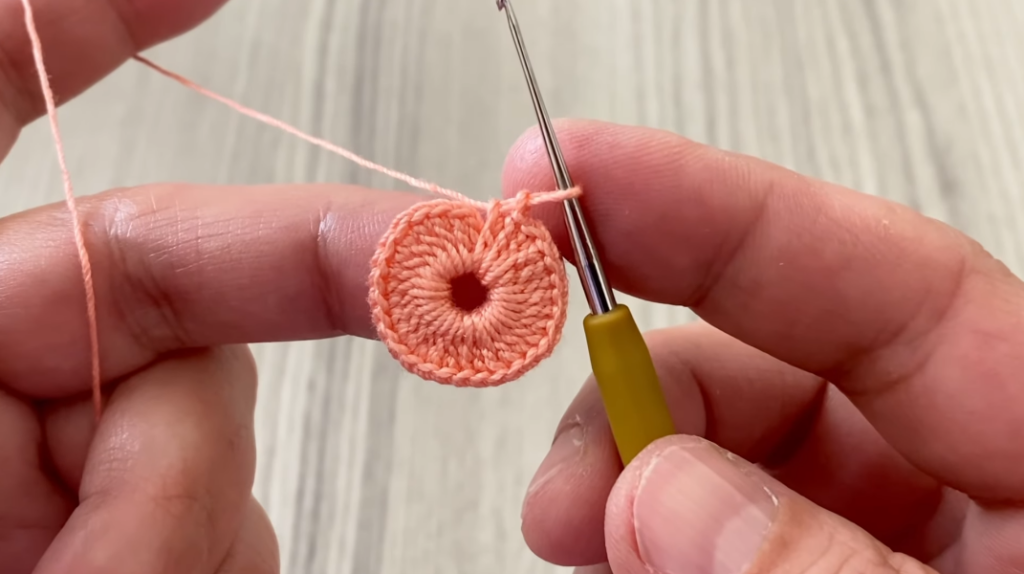
🟡 ROUND 1 — WORK THE WHEEL CENTER
- Make a magic ring (adjustable loop).
This lets you pull the center tight so no hole is left. - Ch 3 — this counts as the first dc of this round.
- Dc 11 into the magic ring. Total at end of round: 12 dc including beginning ch-3.
- Pull the tail of the magic ring to tighten the center completely.
- Join with a sl st into the top of the beginning ch-3.
✔ Your center should now be a compact circle.
🟢 ROUND 2 — FORMING SPOKES
The goal here is to create the spoke division that will make the motif a “wheel.”
- Ch 4 (counts as a tr).
- Ch 1, skip 1 st, tr in next st — repeat around.
- You should make a series of ch-1 spaces between treble stitches.
- Join with sl st to top of beginning ch-4.
✔ Round 2 gives you open chain-1 gaps for spokes.
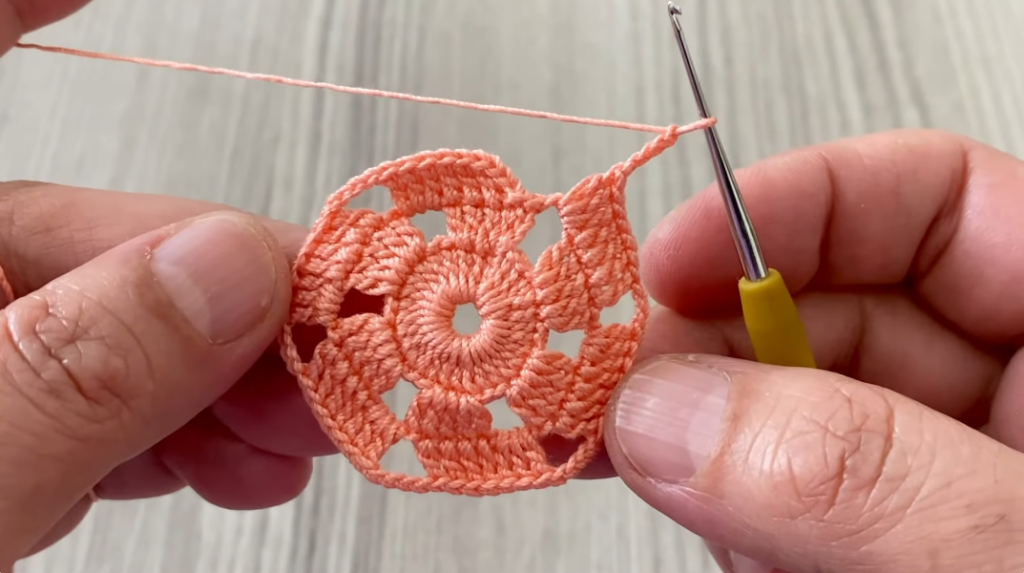
🔵 ROUND 3 — BUILDING THE WHEEL RIM
- Ch 3 (counts as dc).
- Dc into each tr and each ch-1 space around.
- This means: dc in tr, dc in chain-1 space, dc in next tr, etc.
- Join with sl st to top of beginning ch-3.
✔ The rounds begin looking like a wheel rim with spokes radiating from the center.
🟠 ROUND 4 — DECORATIVE ROUNDS
This round introduces open work for aesthetic flair.
- Ch 1 (does not count as a stitch).
- Sc in first dc.
- Ch 3, skip next stitch.
- Sc in next dc.
- Repeat: ch 3, skip, sc all the way around.
- Join with sl st to first sc.
✔ You now have airy chain-3 loops around the wheel.
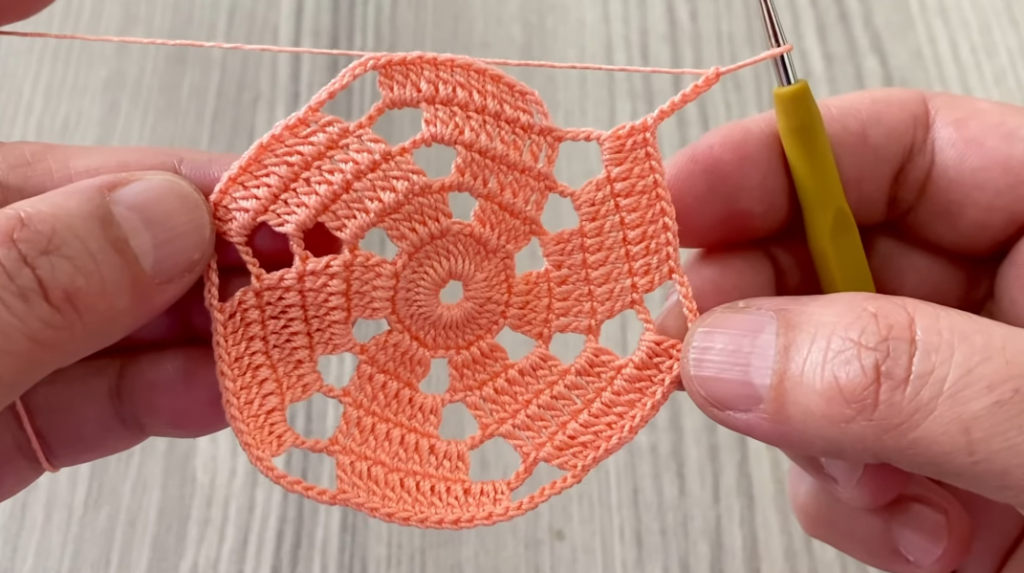
🟣 ROUND 5 — EXPAND THE WHEEL
This round gives dimension to your motif by working into both dc and ch-3 spaces.
- Sl st into first chain-3 space.
- Ch 3 (counts as dc).
- Dc 4 into the same ch-3 space.
- Sc in next chain-3 space.
- Dc 5 into the next ch-3 space.
- Repeat these groups around.
- Join with sl st at top of beginning ch-3.
✔ The motif gains beautiful height and decorative texture.
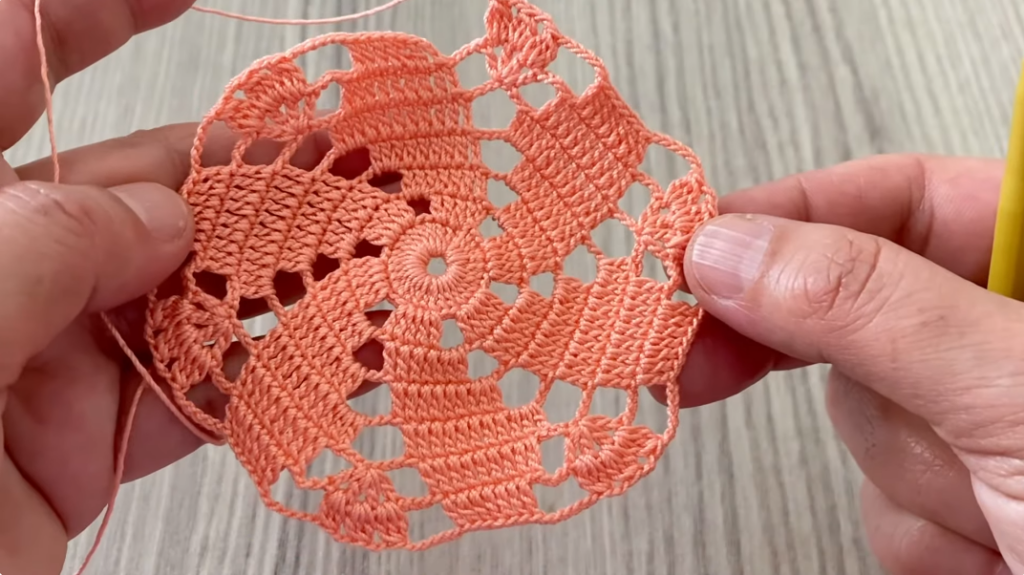
🟡 OPTIONAL ROUND 6 — LACY EXTENSION
Add an extra decorative round for more openwork:
- Ch 3 (counts as dc).
- Dc in next 4 stitches.
- Ch 5, Sc in next group.
- Ch 5, Dc in next 5 stitches.
- Repeat all around.
- Join with sl st.
✔ Chain-5 adds larger lace loops.
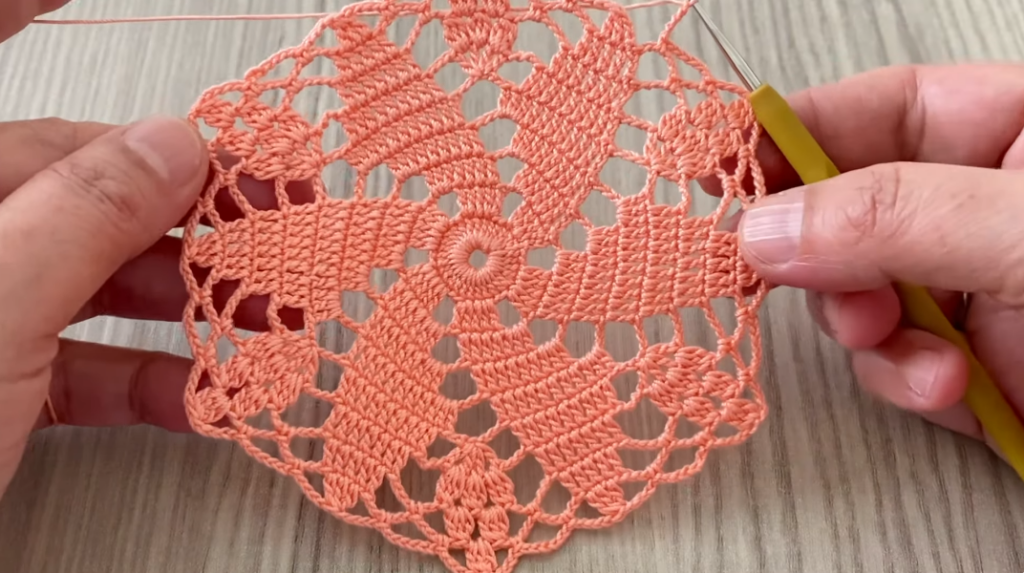
🟢 FINAL ROUND — PICOT EDGE (Optional)
This gives a pretty border that also makes joining motifs easier.
- Ch 1.
- Sc in next stitch.
- Ch 3, sl st into 2nd ch from hook — this forms a picot.
- Sl st in next stitch to anchor the picot.
- Repeat: sc + picot + sc around the motif edge.
- Join with sl st to first sc.
✔ This frame gives a neat, decorative edge.
🧵 WEAVING IN ENDS
- Trim your yarn leaving a 6-8 cm tail.
- Thread it through a tapestry needle.
- Weave the yarn tail through stitches on the back to hide ends.
🧠 BLOCKING (Recommended)
- Gently wet your motif with water or steam.
- Pin it to a blocking mat so the edges are nice and even.
- Allow it to dry completely.
🔹 Blocking opens up lace details and makes motifs consistent in size — especially useful if you plan to join multiple motifs together.
🪡 JOINING MOTIFS
To create larger projects like blankets, runners, shawls, or blouses:
Method 1 — Join-as-You-Go
- Crochet final round of a new motif until the last few stitches.
- When you reach the edge that should touch an existing motif:
- Instead of working normally, join with a sl st into the corresponding stitch of the adjacent motif.
- Continue until edges meet.
Method 2 — Sew Together
- Lay motifs adjacent.
- Use yarn and a tapestry needle to sew seams.
- Weave the joining yarn through adjacent edges to secure.

🧶 USE IDEAS
✔ Throw blankets
✔ Table runners
✔ Shawls
✔ Vest or blouse panels
✔ Decorative wall hangings
✔ Tote bag panels
Wheel motifs are versatile and work really well in repeated panels or alternating patterns.
🧠 TECHNIQUE TIPS
✔ Maintain even tension — especially in chain spaces — so motifs lie flat.
✔ Stitch Markers can help you mark each round’s start/finish.
✔ If the motif cuves inward, loosen your tension or use a slightly larger hook.
✔ If it ripples, tighten your tension or remove a few chains in lace rounds.
📝 Final Pattern Summary (Rounds)
- Center circle — 12 dc in magic ring
- Spoke round — ch4 + tr repeats
- Rim round — dc into all sts/spaces
- Lace loop round — sc + ch3 repeat
- Textured expansion — shells into ch3 spaces
- Optional lace extension — dc and ch5 spaces
- Picot border — sc + picot + sc
VIDEO: