 by
by Very Detailed Step-by-Step Teaching Text
Skill Level: Intermediate (but friendly for confident beginners)
Worked in the Round
Motif Type: Decorative Lace Square/Round
🧶 Materials
✔ Yarn — light or medium weight (cotton, acrylic, or blend)
✔ Crochet hook appropriate for yarn (for example, 3.5 mm — 4.5 mm)
✔ Scissors
✔ Tapestry needle (for weaving in ends)
✔ Optional: stitch markers (useful to mark round starts)
📌 Stitches & Abbreviations (US Terms)
| Abbrev | Meaning |
|---|---|
| ch | chain |
| sl st | slip stitch |
| sc | single crochet |
| hdc | half-double crochet |
| dc | double crochet |
| tr | treble crochet |
| sp | space |
| st | stitch |
| rep | repeat |
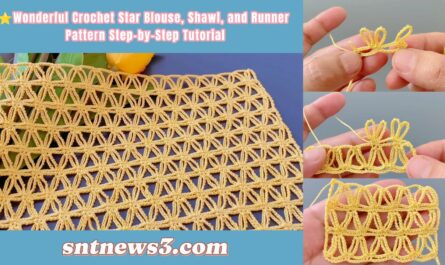
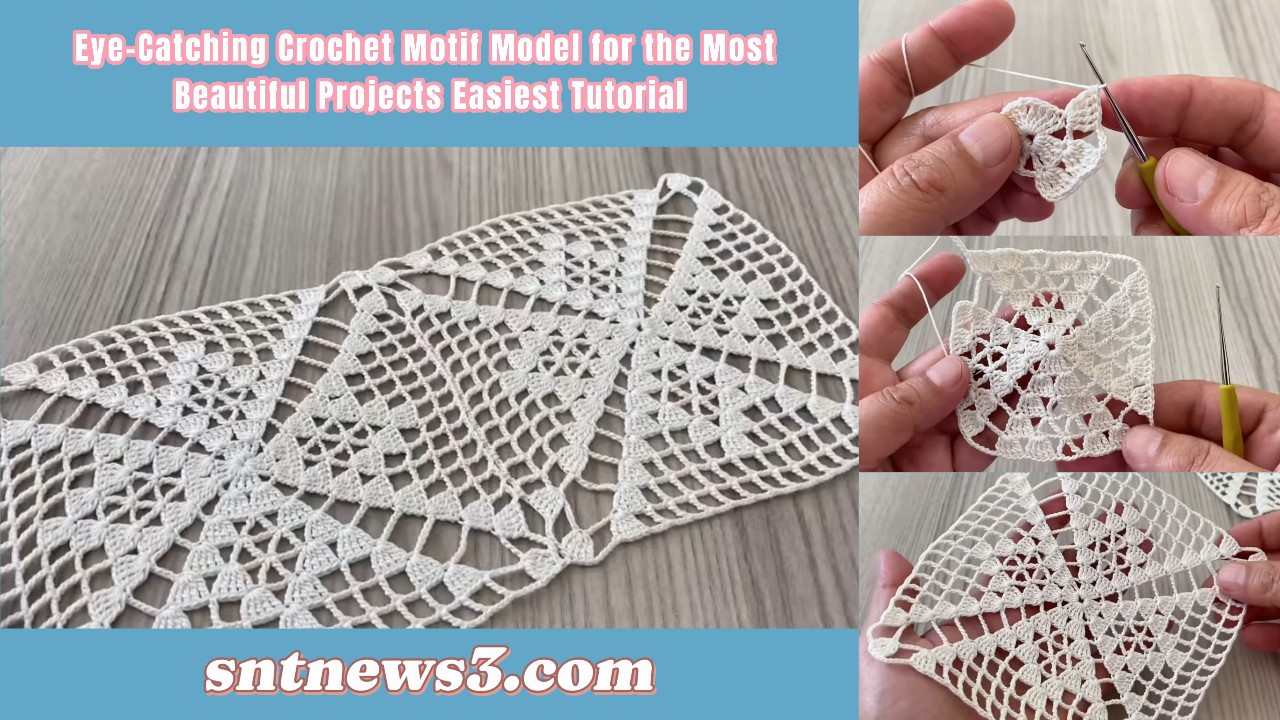
🧵 FOUNDATION — START THE MOTIF
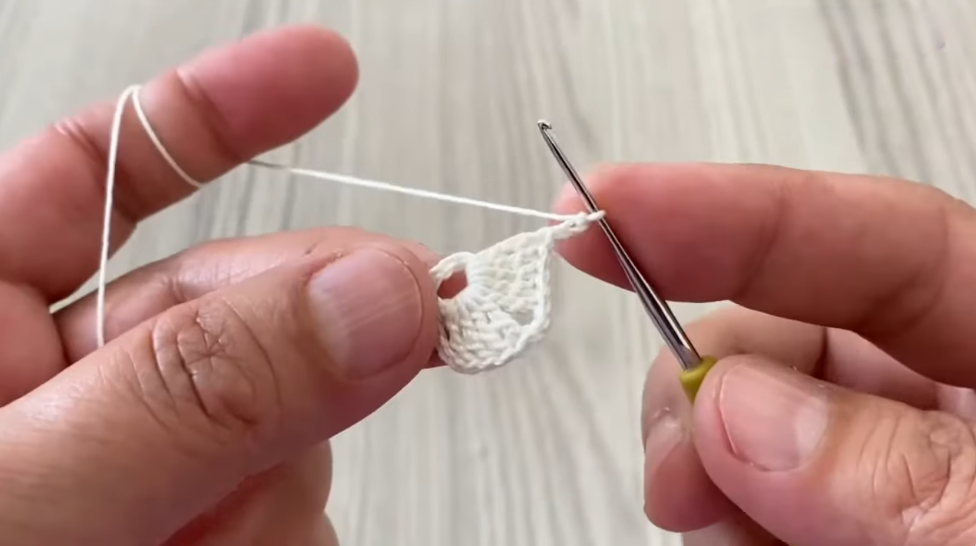
Round 1 — Center Circle
- Make a magic ring (adjustable loop).
This allows you to tighten the center neatly when finished. - Ch 3 — this counts as your first dc.
- Dc 11 into the magic ring.
– You should have 12 dc including the starting ch-3. - Pull the tail to close the circle tightly.
- Sl st to top of beginning ch-3 to join the round.
✔ This forms a neat solid center — foundation of the motif.
🟢 Round 2 — Build Arch Loops
This round creates open arches that will serve as bases for decorative clusters in later rounds.
- Ch 1, sc in the same stitch.
- Ch 5, skip 1 stitch, sc in the next stitch.
- Ch 5, skip 1 stitch, sc in next.
- Repeat ch 5 + sc all around.
- Sl st to first sc to join.
✔ There should be 6 ch-5 loops evenly spaced around the circle.
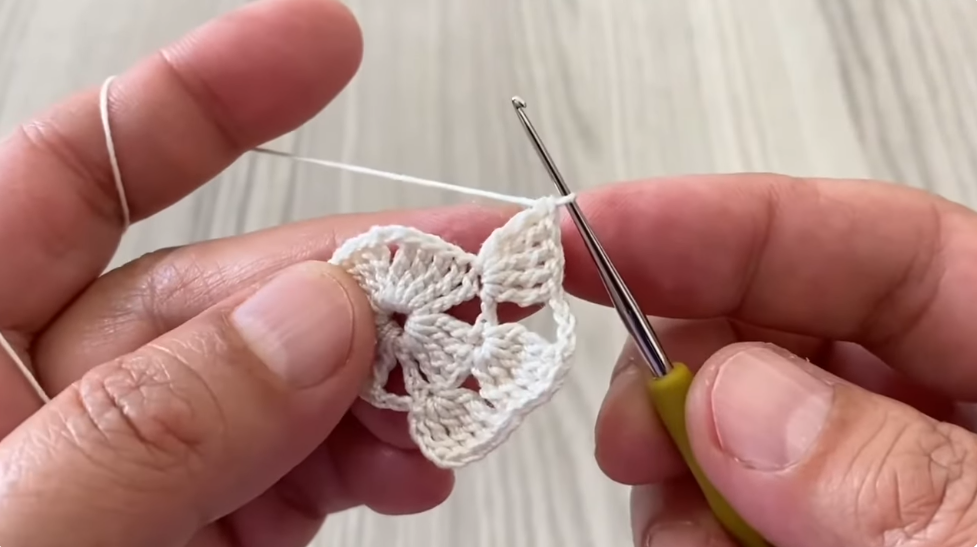
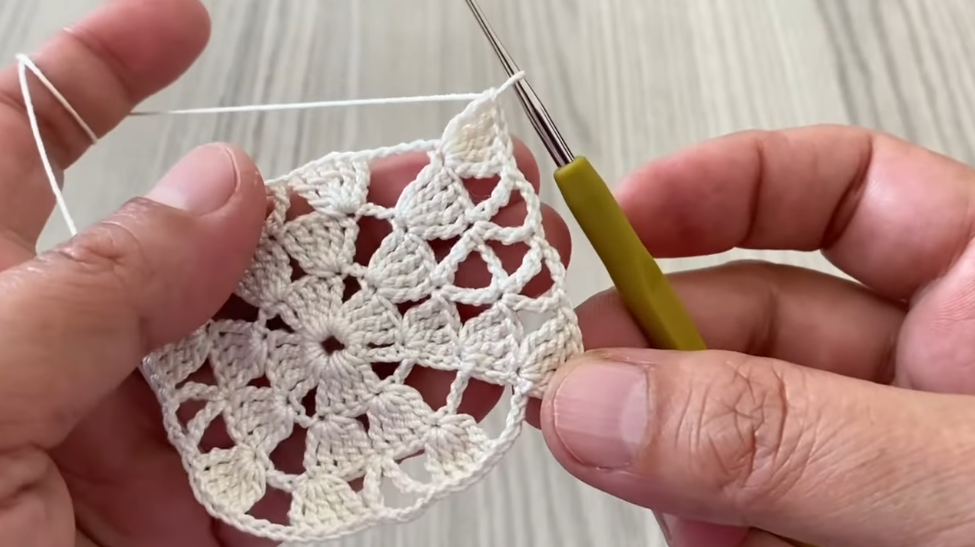
🔵 Round 3 — Shell Clusters
Shells create surface texture in motifs.
- Sl st into first ch-5 space.
- Ch 3 (counts as dc), dc 4 into same ch-5 space — that’s 5 dc total (a shell).
- Sc in the next ch-5 loop.
- Dc 5 (shell) in the next ch-5 loop.
- Repeat sc + shell around.
- Sl st to top of first ch-3.
✔ Now you have alternating shells and sc stitches around the circle.
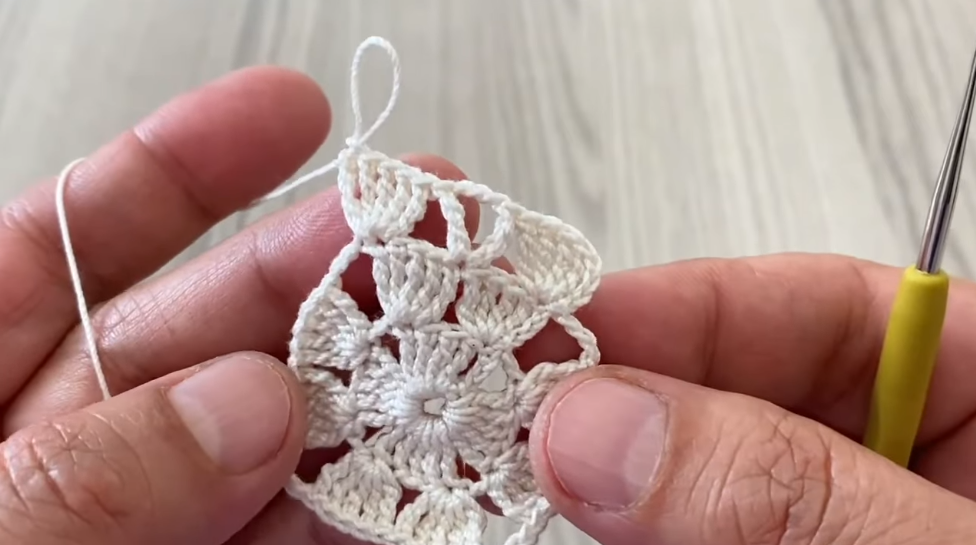
🟠 Round 4 — Open Lace Loops
This round creates airy open segments.
- Ch 1, sc in the first dc (not in shell).
- Ch 4, skip 2 dc, sc in next dc.
- Ch 4, skip 2 dc, sc — continue all around.
- Sl st to first sc to join.
✔ This creates decorative open chain loops between shell areas.
🟣 Round 5 — Second Shell Layer
Build more texture using the open loops.
- Sl st into first ch-4 space.
- Ch 3, dc 4 in the same ch-4 space (shell of 5 dc total).
- Ch 3, sc in next ch-4 space.
- Ch 3, dc 5 in next ch-4 space.
- Repeat around.
- Sl st to beginning ch-3.
✔ Two layers of shell clusters now create dimension.
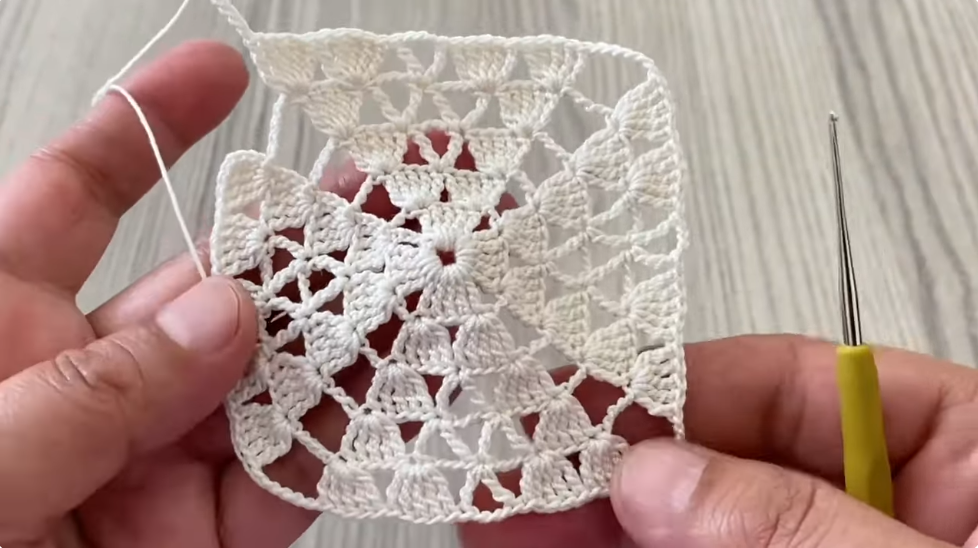
🟡 Round 6 — Motif Expansion
This round expands the motif outward.
- Ch 3 (counts as dc), dc in the next 4 stitches.
- Ch 3, sc in the chain space below.
- Ch 3, dc in the next 5 stitches.
- Repeat across the round.
- Sl st to join.
✔ Now the motif begins to take a fuller, broader shape.
🟢 Round 7 — Extended Lace
Add larger chain loops for airy lacework.
- Ch 3, dc over the next 4 stitches.
- Ch 5, sc in next chain space.
- Ch 5, dc in next 5 stitches.
- Repeat around.
- Sl st to join.
✔ Longer chain loops add openness and visual interest.
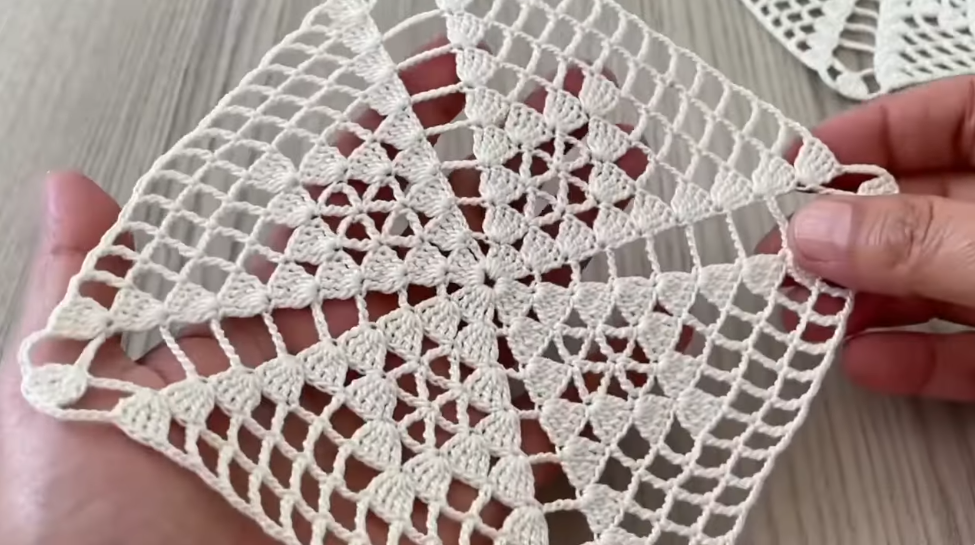
🔷 Round 8 — Final Outer Round
Giving the motif a decorative outer reach.
- Ch 3, dc in next 4 stitches.
- Ch 7, sc in next chain space.
- Ch 7, dc in next 5 stitches.
- Repeat around.
- Sl st to join.
✔ This creates a beautifully extended mesh-style lace on the edges.
✨ Optional Border — Picot Lace Edge
This border gives a clean framed finish and makes motifs easier to join.
- Ch 1, sc in next stitch.
- Ch 3, sl st back into 2nd ch from hook — this creates a small picot.
- Sl st in the next stitch to anchor.
- Sc + picot + sc around the outer perimeter.
- Sl st to join, then fasten off.
✔ The picot border adds a delicate decorative edge.
🪡 Finishing
🧵 Weaving in Ends
- Thread your loose tails through a tapestry needle.
- Weave them into the back side of your motif to hide them neatly.
📏 Blocking (Recommended)
- Lightly spray or dampen the motif.
- Pin it flat on a blocking mat, stretching slightly to open lacework.
- Let it dry completely — this helps edges relax and smooth.
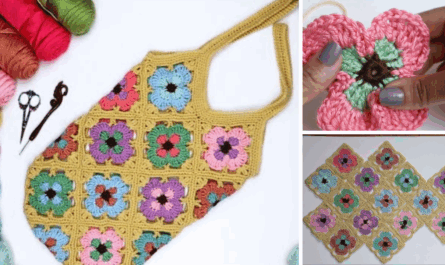
🪢 JOINING MULTIPLE MOTIFS
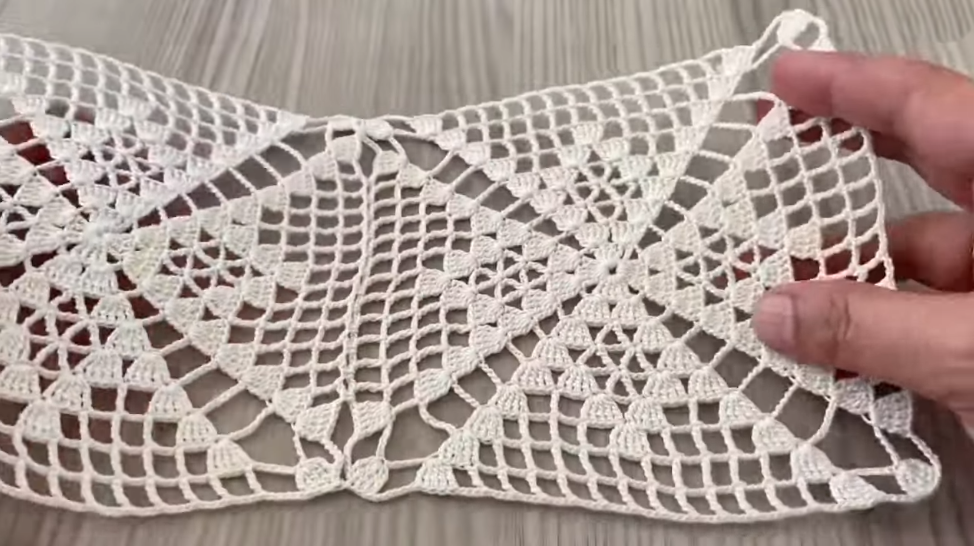
You can join motifs into larger fabrics like blankets, runners, shawls, vests, and tops using either of these methods:
➤ 1) Join-as-You-Go
- While working the last round of a new motif, slip stitch into the picots or edge spaces of an adjacent finished motif instead of working a stitch normally.
- Continue until edges meet and motifs are connected.
➤ 2) Sew Join
- Lay motifs flat in your desired layout.
- Use yarn and a tapestry needle to sew edges neatly together.
💡 Tips for Good Results
✔ Keep a consistent tension so all motifs are the same size.
✔ Use a stitch marker to mark the start of each round.
✔ If the motif curls inward, loosen your tension or use a slightly larger hook.
✔ If it ripples outward, tighten tension slightly or adjust final chain loops.
🧶 Project Ideas
✨ Blankets & Throws
✨ Table Runners & Doilies
✨ Shawls & Wraps
✨ Blouse Panels or Vests
✨ Cushion Covers & Bags
Motifs like this are highly versatile and look beautiful joined in grids, diagonal joins, or stacked panels.
VIDEO: