 by
by Step-by-Step Teaching Text (Very Detailed)
Skill Level: Intermediate (beginner-friendly with a bit of practice)
🧶 Materials
- Light or medium-weight yarn (cotton, acrylic, or blend)
- Crochet hook to match yarn (for example, 3.5 mm – 4.5 mm)
- Scissors
- Tapestry needle for weaving in ends
- Optional: stitch markers to mark round beginnings
📌 Abbreviations (US terms)
| Abbreviation | Meaning |
|---|---|
| ch | chain |
| sl st | slip stitch |
| sc | single crochet |
| hdc | half-double crochet |
| dc | double crochet |
| tr | treble crochet |
| sp | space |
| st | stitch |
| rep | repeat |
🔹 General Pattern Notes
✔ This motif is worked in rounds from the center outward.
✔ Use consistent tension for flat and even fabric.
✔ You can change colors at the beginning of a round if desired.
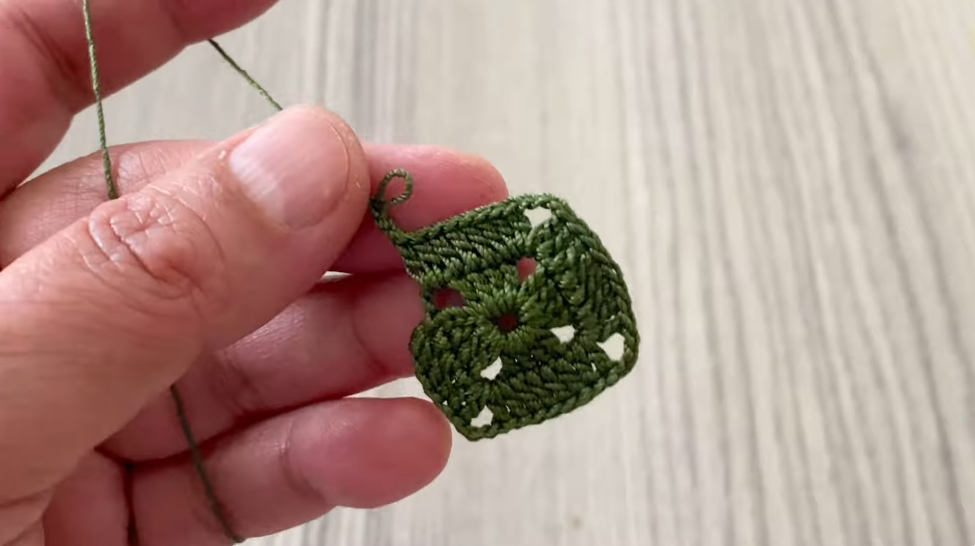
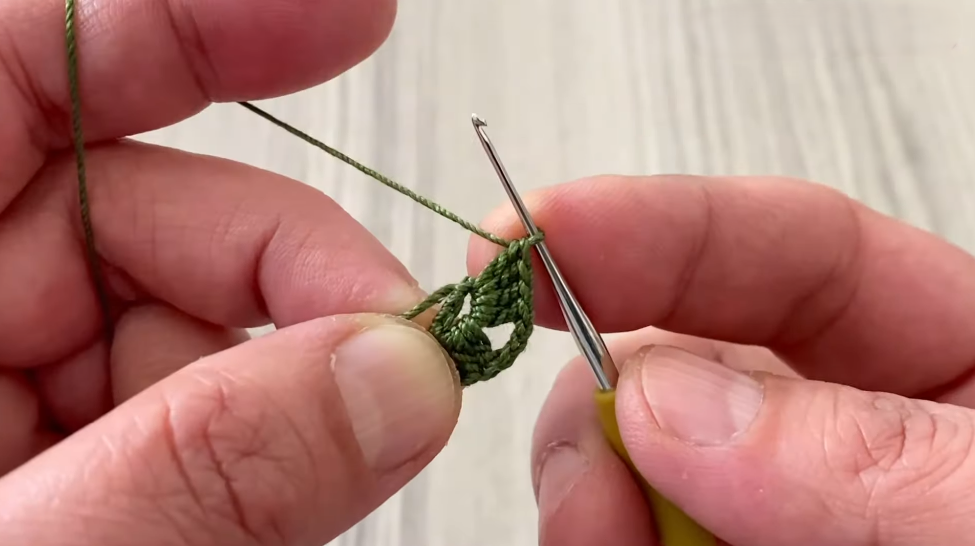
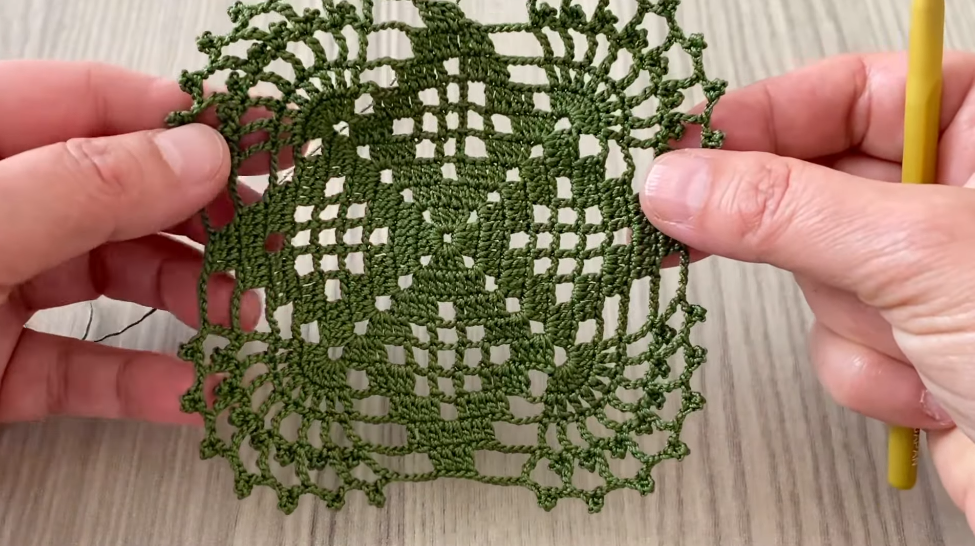
🟠 Round 1 — Center Circle
- Make a magic ring (adjustable loop).
This allows you to tighten the center hole later. - Ch 3 — this counts as your first dc.
- Dc 11 into the magic ring. You should now have 12 dc total — including the beginning ch-3.
- Pull the tail gently to close the ring tightly.
- Sl st to the top of the beginning ch-3 to join the round.
✨ This forms a solid center base for the motif.
🟡 Round 2 — Foundation Loops
- Ch 1, sc in the same stitch.
- Ch 5, skip next stitch, sc in the next stitch.
- Ch 5, skip 1 stitch, sc in the next — continue around.
- Repeat ch 5 + sc until you return to the starting point.
- Sl st to the first sc to join.
✔ You will have chain-5 loop spaces evenly spaced around the center.
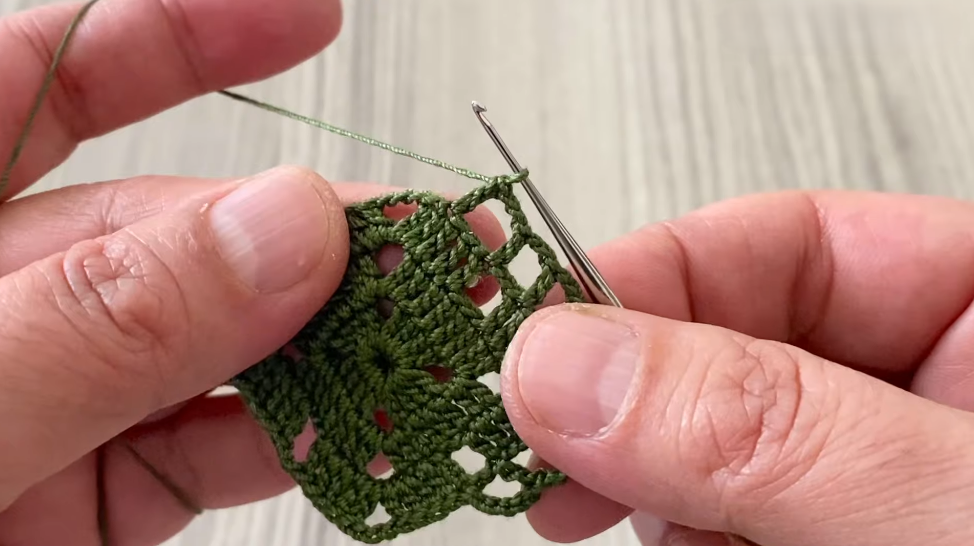
🔵 Round 3 — First Shell Layer
Shell clusters give texture and decorative shape.
- Sl st into the first chain-5 space.
- Ch 3 (counts as dc), dc 4 into the same chain-5 space — that creates 5 dc total (a shell).
- Sc in the next chain-5 space.
- Dc 5 (shell) into next chain-5 space.
- Repeat sc + shell around until all chain spaces are worked.
- Sl st to join at top of beginning ch-3.
✔ This forms alternating shell clusters and single crochet anchors.
🟣 Round 4 — Open Lace Chain Rounds
This makes airy spaces between shells.
- Ch 1, sc in the first dc from the previous round (not a shell).
- Ch 4, skip next 2 stitches, sc in next dc.
- Ch 4, skip 2 stitches, sc — repeat around.
- Sl st to join to starting sc.
✨ You now have chain-4 spaces all around creating a lacy effect.
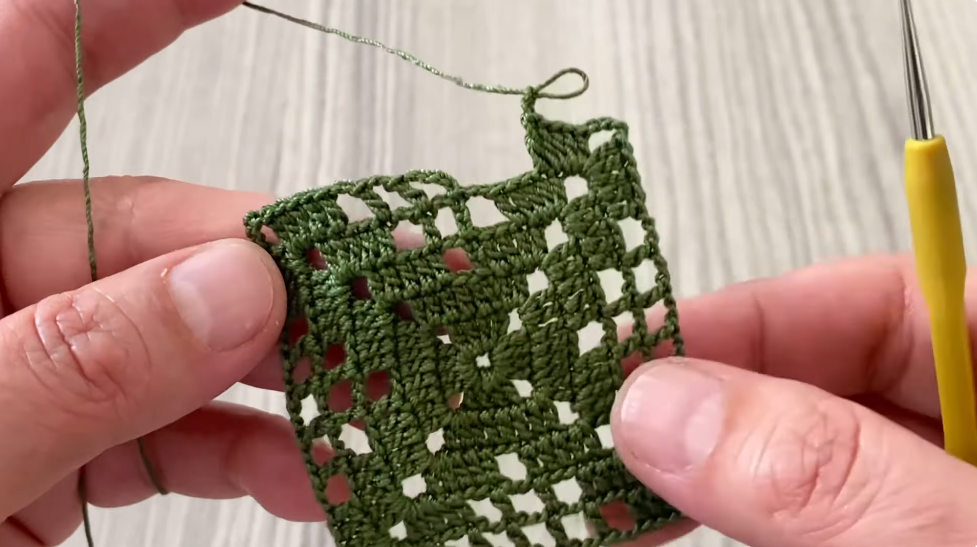
🟢 Round 5 — Second Shell Layer
Builds on the lace spaces from the previous round.
- Sl st into the first chain-4 space.
- Ch 3, dc 4 into the same chain-4 space — shell of 5 dc total.
- Ch 3, sc in next chain-4 space.
- Ch 3, dc 5 into next chain-4 space.
- Repeat these groups around.
- Sl st to join at start.
✔ A second layer of textured shells now builds outward.
🟡 Round 6 — Expanding the Motif
This round begins the outward expansion for a larger motif shape.
- Ch 3 (counts as dc), dc in each of the next 4 stitches.
- Ch 3, sc in the chain-3 space from the previous round.
- Ch 3, dc in the next 5 stitches.
- Repeat this pattern around.
- Sl st to join.
✨ Motif is taking wider shape with expanded spacing.
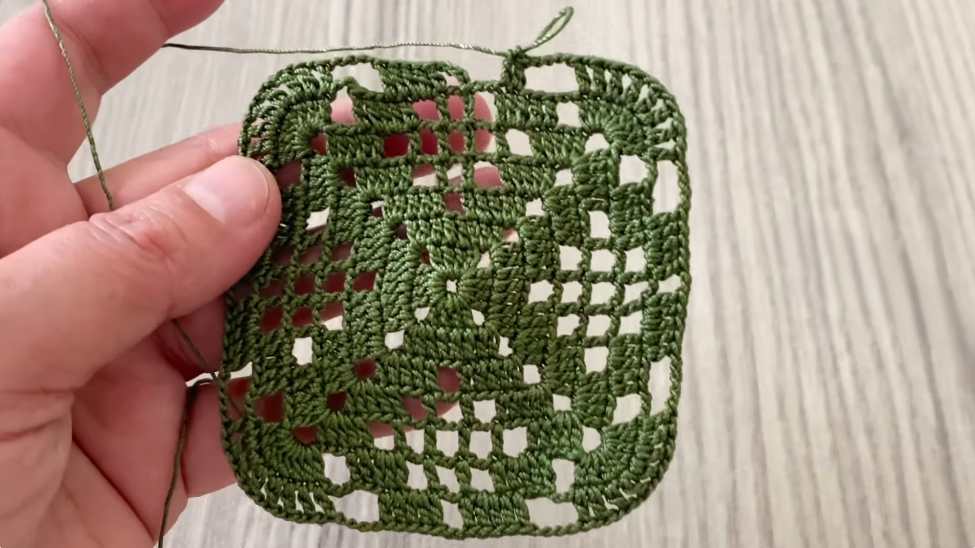
🟠 Round 7 — Lacy Chains for Texture
Adding openwork to expand airy look.
- Ch 3, dc in the next 4 stitches.
- Ch 5, sc in next chain space.
- Ch 5, dc in next 5 stitches.
- Repeat around.
- Sl st to join.
✔ Beautiful chain loops make lace texture.
🔵 Round 8 — Final Expansion
This outer round gives the motif its largest decorative reach.
- Ch 3, dc in next 4 stitches.
- Ch 7, sc in next chain space.
- Ch 7, dc in next 5 stitches.
- Repeat around.
- Sl st to join.
✨ Motif now has broad, open decorative edges.
✨ Optional Picot Border (Final Round)
This decorative border makes joining motifs easier and gives a finished look.
- Ch 1, sc in next stitch.
- Ch 3, sl st into 2nd chain from hook — this makes a picot.
- Sl st in following stitch to secure.
- Sc + picot + sc around outer edge of motif.
- Sl st to join and fasten off.
✔ Picot edging creates a soft, elegant frame.
🧵 Weaving in Ends & Blocking
🪡 Weaving Ends
Use a tapestry needle to weave all loose yarn tails into the back side of your finished motif to hide them.
📏 Blocking (Optional but Recommended)
Lightly dampen the motif, pin it flat in the shape you want, and let it dry.
➡ Blocking opens up lace details and helps motifs match in size when joining.
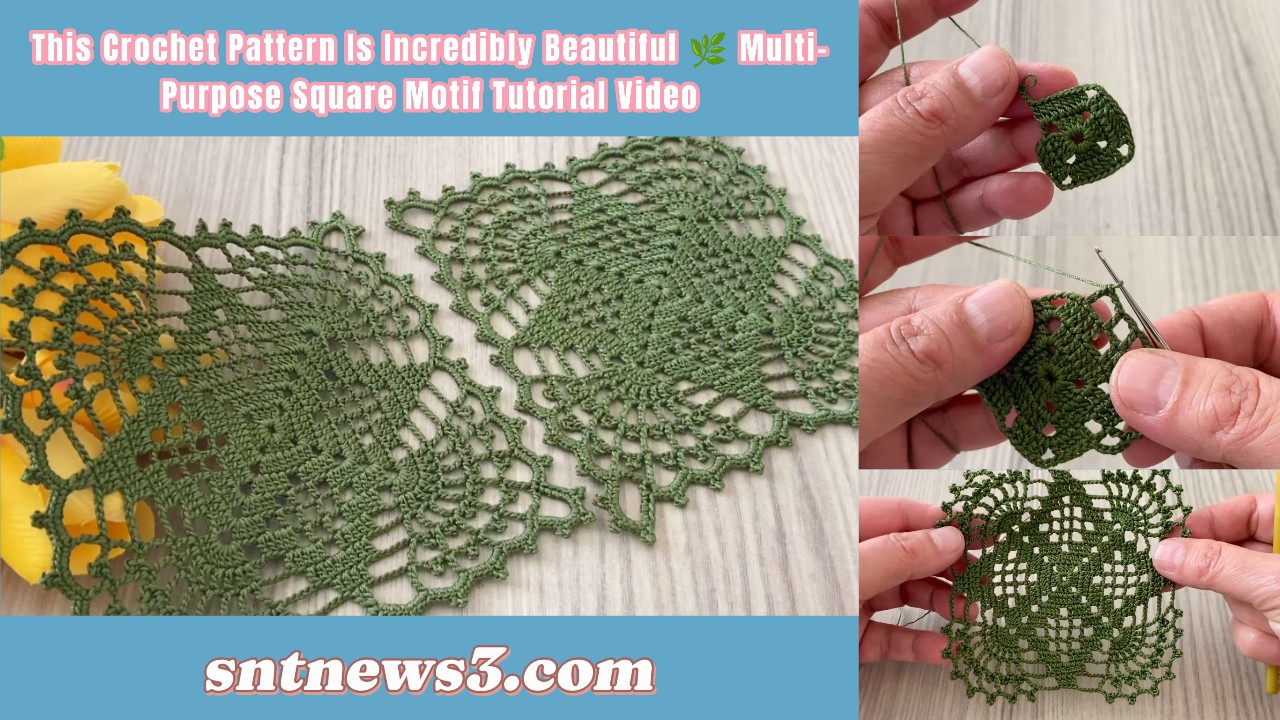
🪢 Joining Multiple Motifs
To make larger projects (blankets, runners, shawls, blouses):
🧵 Join-as-You-Go
When working the last round of a new motif:
- Instead of working a stitch normally on the connecting side, sl st into the corresponding space or picot of an already-made motif.
- This seamlessly connects motifs as you go.
🪡 Sew Join
Lay motifs side-by-side and attach them with a yarn needle:
- Use yarn and tapestry needle to sew through corresponding edge stitches or picots for a neat seam.
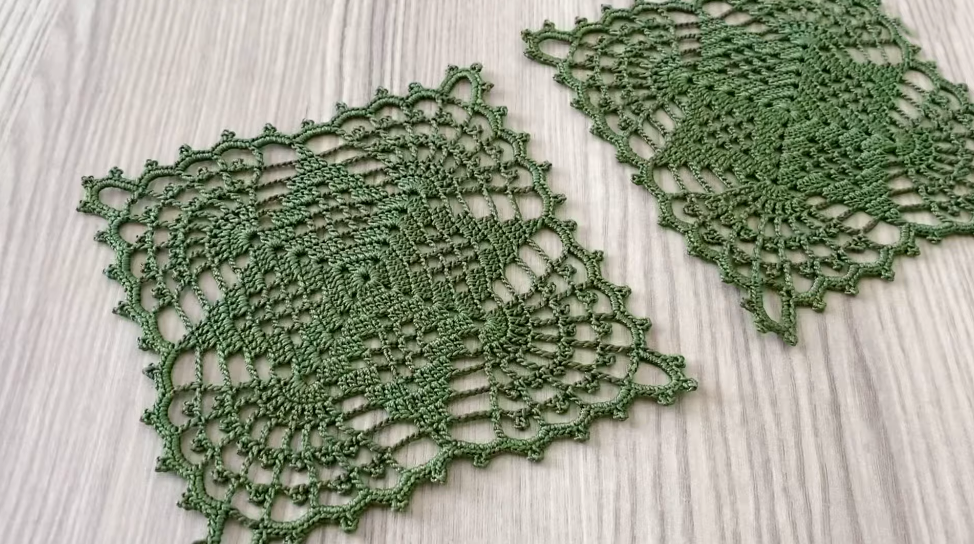
💡 Project Ideas
✨ Afghan Blanket — grid of motifs
✨ Runner or Table Centerpiece — long row or staggered layout
✨ Shawl or Wrap — join in desired shape
✨ Blouse or Vest Panels — square panels as garment pieces
✨ Bags & Cushion Covers — motifs as paneling
💡 Tips for Best Results
✔ Use stitch markers to mark round starts.
✔ Maintain even tension so motifs are consistent in size.
✔ If edges ripple or cup, adjust hook size slightly and block motifs before joining.
VIDEO: