 by
by 🧶 MATERIALS
✔ Yarn (light to medium weight)
✔ Crochet hook matched to your yarn (e.g., 4.0 mm)
✔ Scissors
✔ Tapestry needle (for weaving in ends)
✔ Optional: stitch marker to mark round start
📌 ABBREVIATIONS (US TERMS)
| Abbrev | Meaning |
|---|---|
| ch | chain |
| sc | single crochet |
| hdc | half-double crochet |
| dc | double crochet |
| tr | treble crochet |
| sl st | slip stitch |
| st | stitch |
| sp | space |
| rep | repeat |
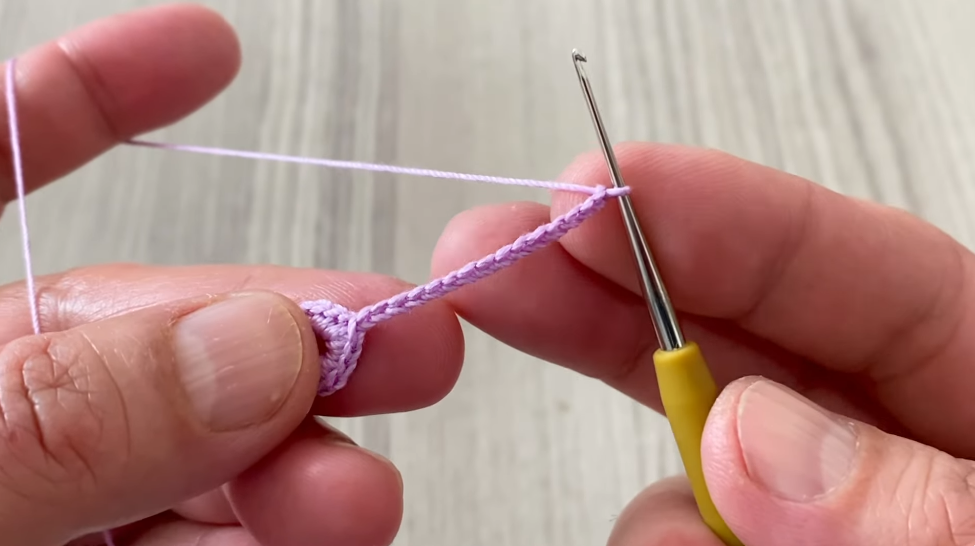
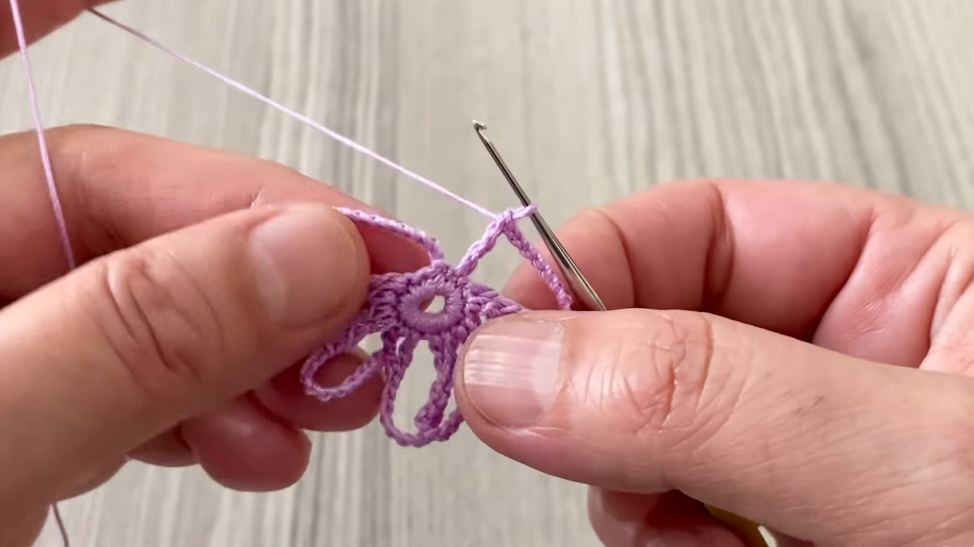
🟠 ROUND 1 — MAKE CENTER CIRCLE
- Make a magic ring (adjustable loop).
This lets you tighten the center neatly. - Ch 3 — this counts as your first dc.
- Dc 11 into the magic ring.
→ You now have 12 total dc including the beginning ch-3. - Pull the tail of the magic ring to close the center tightly.
- Join with sl st into the top of the beginning ch-3.
✔ This creates a flat circular center — the base for your motif.
🟡 ROUND 2 — FOUNDATION LOOP ARCHES
This round builds chain loops that help form the decorative motif shape.
- Ch 1, sc in same stitch.
- Ch 5, skip next stitch, sc in next stitch.
- Ch 5, skip next stitch, sc in next.
- Repeat ch 5 + sc all the way around.
- Join with sl st to first sc.
✔ You should have chain-5 arches forming loops around the center.
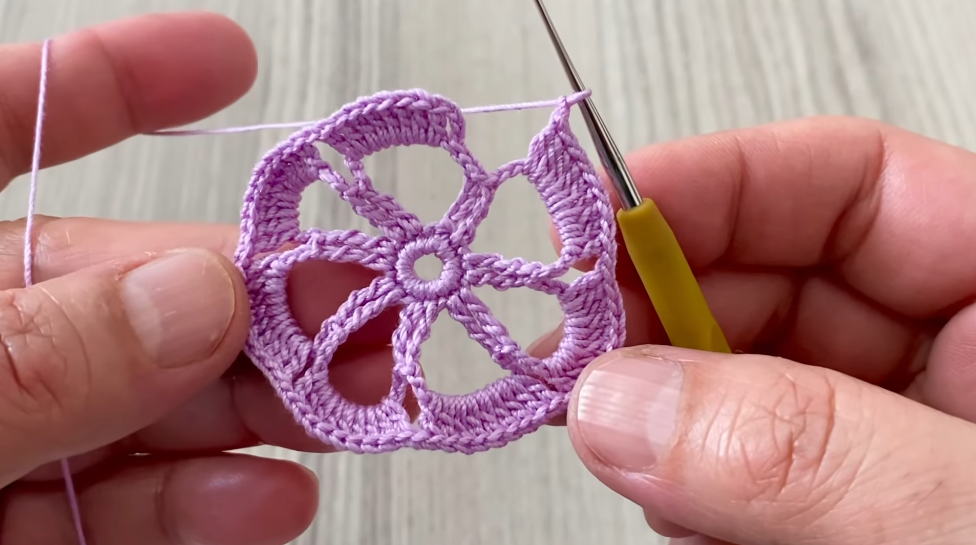
🔵 ROUND 3 — FIRST SHELL CLUSTERS
This round builds decorative shell clusters (groups of double crochets) into the chain loops:
- Sl st into first chain-5 loop.
- Ch 3 (counts as dc), then work 4 dc into same chain-5 loop — that’s a shell of 5 dc total.
- Sc in next chain-5 loop.
- Dc 5 in next chain-5 loop.
- Repeat the “sc then 5 dc” around.
- Join with sl st to top of first ch-3.
✔ You now have alternating shell clusters and single crochet anchors.
🟢 ROUND 4 — LACE LOOPING
This round introduces openwork spaces:
- Ch 1, sc in first dc (not shell).
- Ch 4, skip 2 stitches, sc in next dc.
- Ch 4, skip 2 stitches, sc in next dc.
- Repeat ch 4 + sc around.
- Join with sl st to starting sc.
✔ You now have decorative chain-4 loops around your motif.
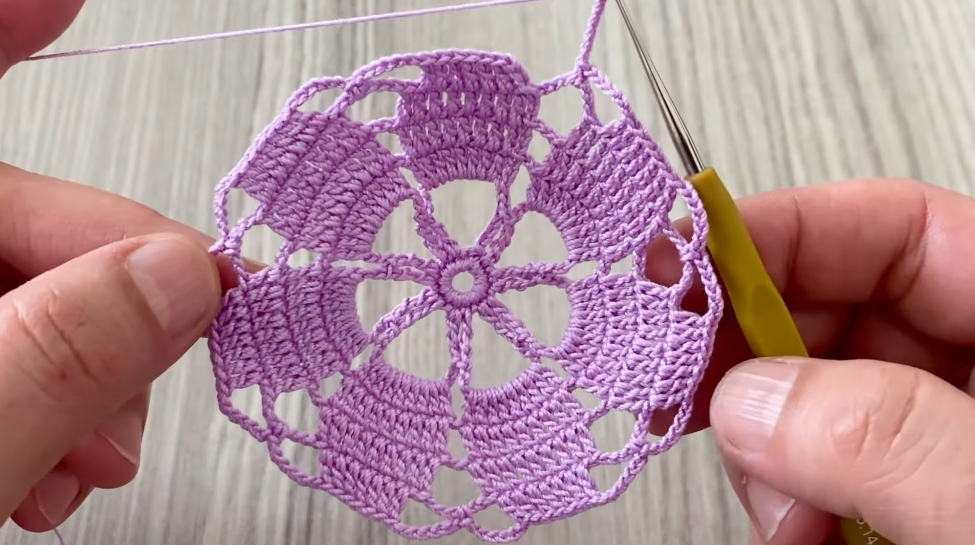
🟣 ROUND 5 — SECOND SHELL LAYER
This round adds a second layer of decorative shells into the open spaces from Round 4:
- Sl st into first ch-4 space.
- Ch 3, work dc 4 in the same space — that’s a second shell of 5 dc.
- Ch 3, sc into next ch-4 space.
- Ch 3, dc 5 in next ch-4 space.
- Repeat around.
- Join with sl st to beginning ch-3.
✔ Your motif is now deeper, more textured, and shaping nicely outward.
🟡 ROUND 6 — EXPANSION ROUND
This round begins giving structure outward for the final motif shape.
- Ch 3 (counts as dc), dc into next 4 sts.
- Ch 3, sc into chain-3 space below.
- Ch 3, dc into next 5 stitches.
- Repeat around until all sides are worked.
- Join with sl st.
✔ This forms spacing between shell clusters and begins a more solid outer edge.
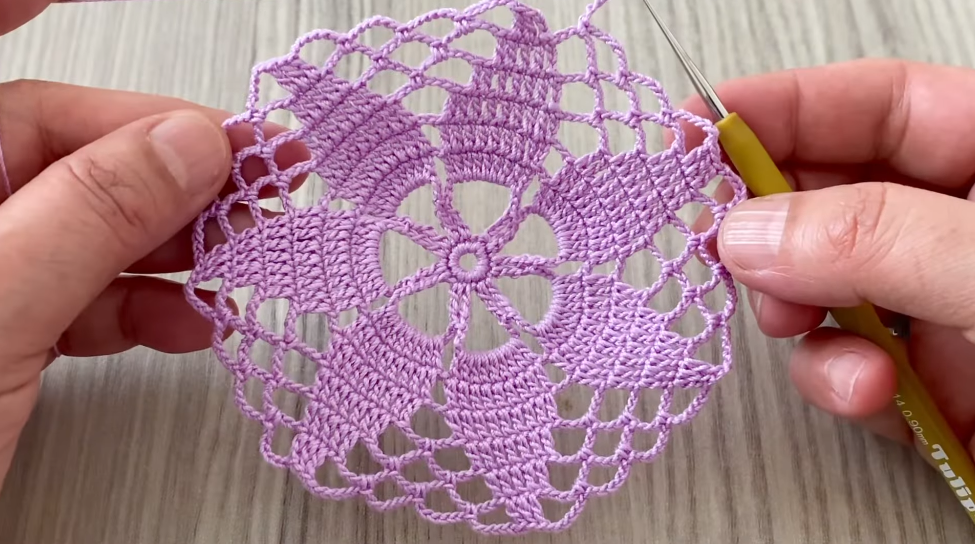
🟤 ROUND 7 — LACE EXTENSION
Optional but recommended for added beauty and edge framing:
- Ch 3, dc over next 4 sts.
- Ch 5, sc in next chain space.
- Ch 5, dc in next 5 sts.
- Repeat around.
- Join with sl st.
✔ Longer chain-5 loops make the motif open and airy.
🔷 ROUND 8 — FINAL SHAPE & WIDTH
- Ch 3, dc in next 4 stitches.
- Ch 7, sc in next chain space.
- Ch 7, dc in next 5 stitches.
- Repeat around.
- Join with sl st to complete motif.
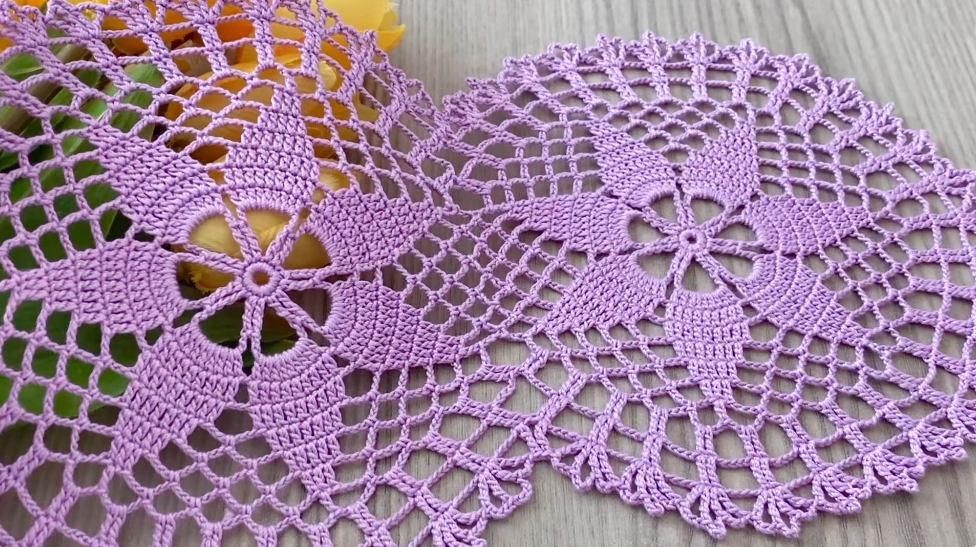
✔ This is your final outer round — now shape your motif edge beautifully.
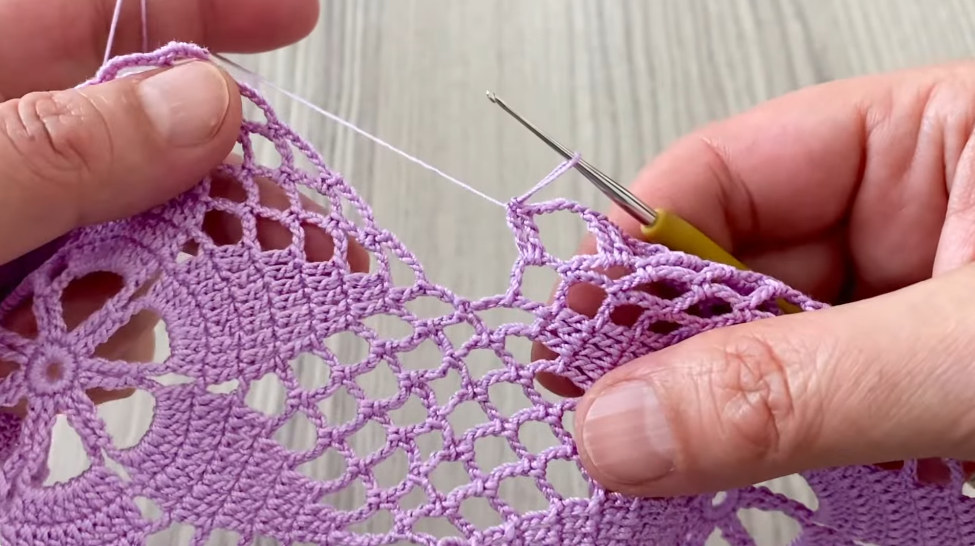
✨ ROUND 9 — EDGE LACING (DECORATIVE BORDER)
This is the feature that makes this motif unique and very beautiful — laced picot edge:
- Ch 1, sc in next stitch.
- Ch 3 — then sl st into second chain from hook (this makes a picot).
- Sl st in next stitch to secure.
- Sc in next stitch.
- Ch 3, sl st into 2nd chain from hook (second picot).
- Repeat sc + picot + sc around entire motif edge.
- Join with sl st at starting stitch.
- Fasten off and cut yarn.
This picot-lace edging gives a soft framed edge and makes joining motifs easier.
🧵 FINISHING
🪡 Weaving in Ends
Use a tapestry needle to weave in all loose yarn tails on the back side of the motif so they do not show on the right side.
🧠 OPTIONAL — BLOCKING
Blocking helps shape and open lace:
- Lightly dampen the motif with water.
- Pin it into shape (square/round/flat) on a mat.
- Allow it to dry completely.
➡ Blocking gives your motif a clean, even finish and makes edges align perfectly when joined.
🪢 JOINING MULTIPLE MOTIFS
This motif is ideal for joining into larger projects. Here are two common methods:
✅ 1) Join-As-You-Go
- When making the last round of a new motif, join through the edge picots or sc stitches of completed motifs instead of working normally.
- Use slip stitches to connect motifs side-by-side.
🔁 2) Sew Join
- Lay motifs in the layout you want (rows, grid, staggered).
- Use yarn and a tapestry needle to stitch through edges neatly.
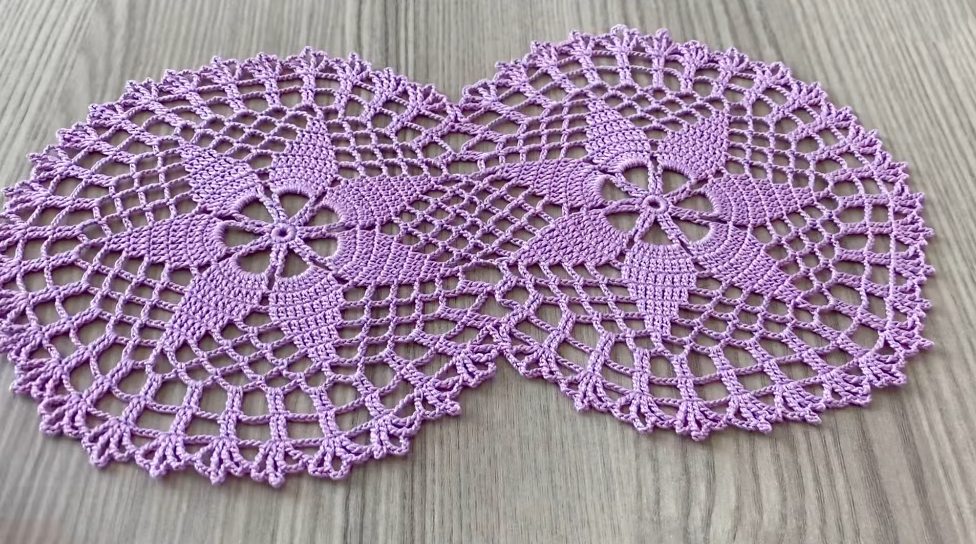
🧶 PROJECT IDEAS
✔ Blankets / throws
✔ Table runners
✔ Shawls & wraps
✔ Blouse panels
✔ Tote bags
✔ Cushion covers
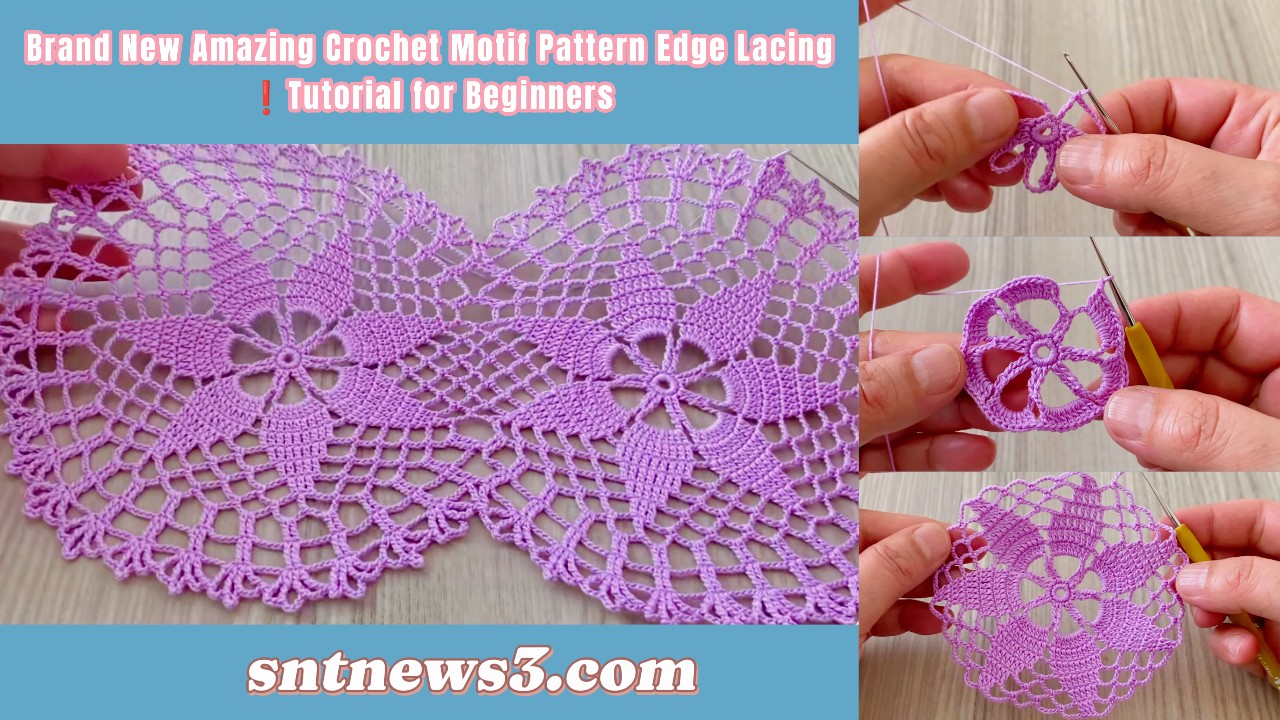
This motif with edge lacing has a delicate, elegant look whether used alone or joined into large fabrics.
💡 BEGINNER TIPS
✔ Use a stitch marker to mark the first stitch of each round — helps keep count straight.
✔ Keep tension even — especially in chain spaces — for consistent shape.
✔ If motif curls, block lightly.
✔ Practice one motif before starting a joining project.
VIDEO: