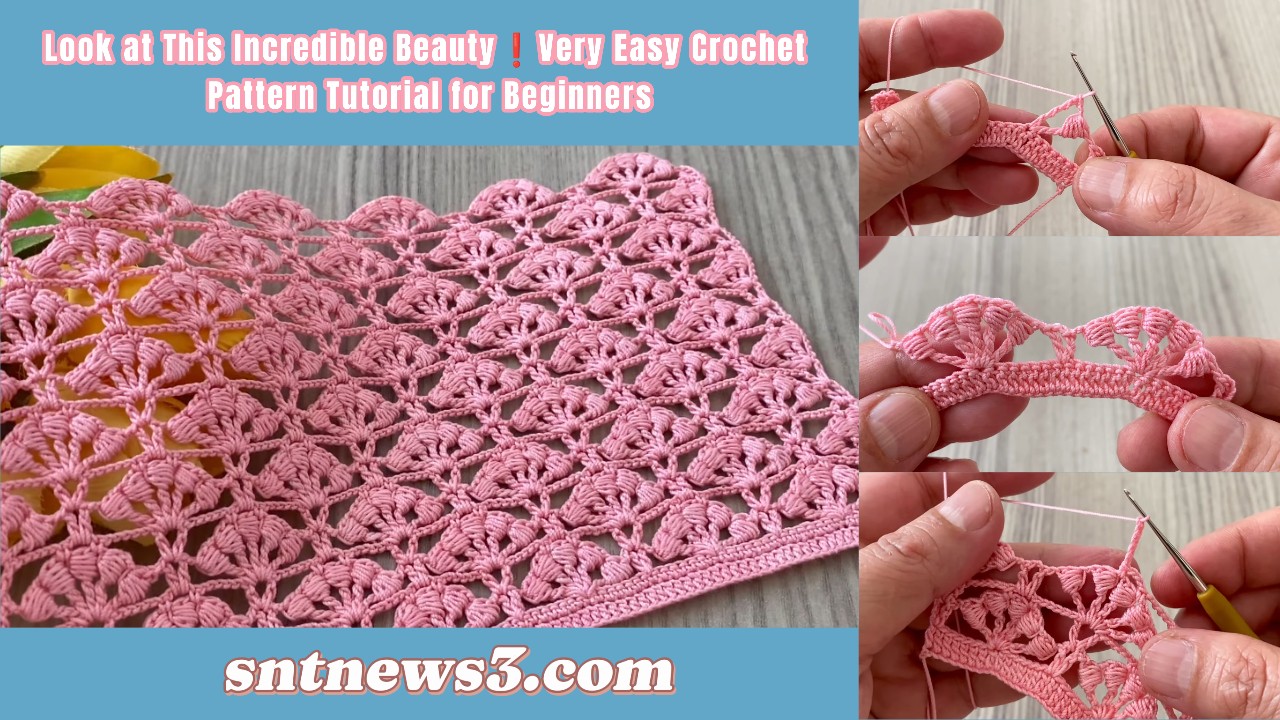
 by
by Step-by-Step Teaching Text (Very Detailed)
Skill Level: Beginner
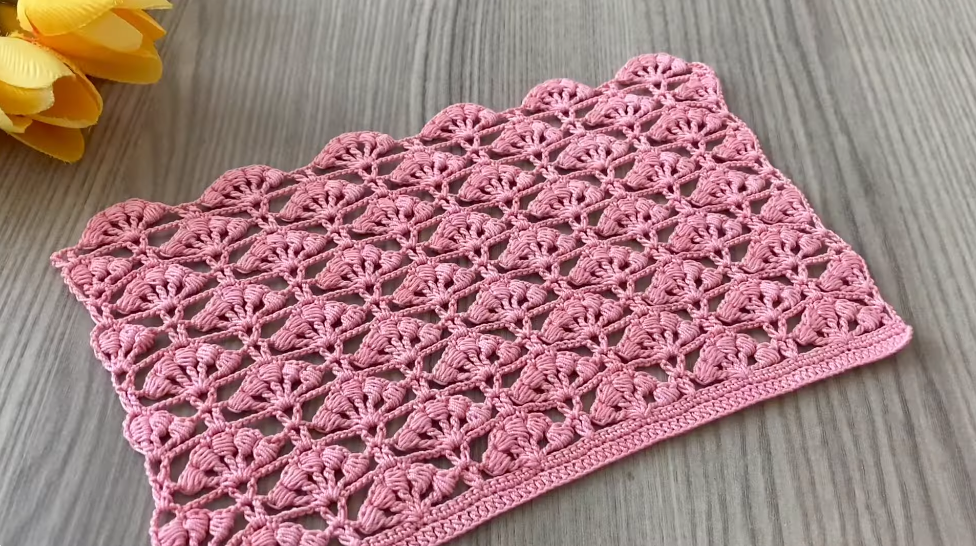
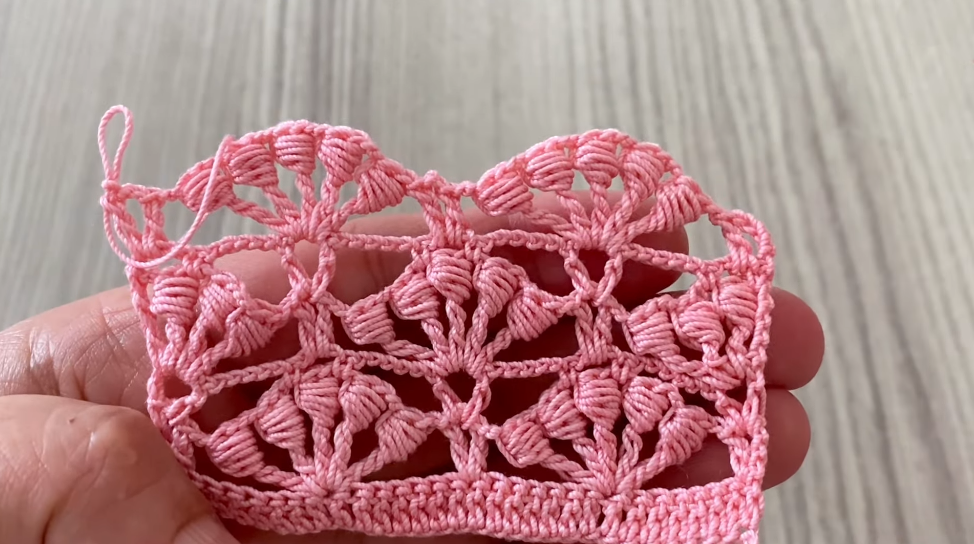
📌 This simple pattern creates a beautiful textured fabric in a repeatable stitch pattern. It’s great for scarves, blankets, shawls, and all-around crochet projects!
🧶 Materials
- Yarn: Light-to-medium weight yarn (e.g., DK, sport, or worsted weight)
- Crochet hook: Size recommended for your yarn (e.g., 4.0 mm)
- Scissors
- Tapestry needle (for weaving in ends)
📌 Abbreviations (US Terms)
| Abbrev | Meaning |
|---|---|
| ch | chain |
| sc | single crochet |
| dc | double crochet |
| hdc | half-double crochet |
| sl st | slip stitch |
| st | stitch |
| rep | repeat |
🟢 BEFORE YOU BEGIN
✔ This pattern works in straight rows.
✔ You’ll repeat a simple 4-row sequence over and over for your project length.
✔ It creates a soft textured fabric that is beginner-friendly.

🔹 STEP 1 — FOUNDATION CHAIN
- Chain any even number of stitches
- Example: ch 40 (you can make it longer if you want a wider piece).
- Turn your work — you are ready to start your first crochet row.
💠 ROW 1 — BASIC FOUNDATION
- Sc in second chain from hook.
- Sc in each chain across.
- At the end of the row, turn your work.
✔ This gives you a nice first row of single crochet that stabilizes your foundation.
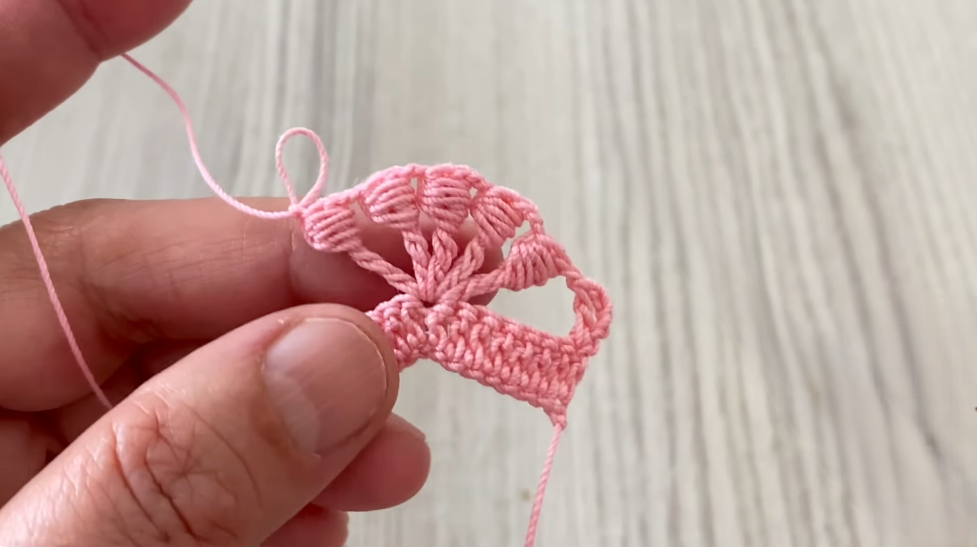
💫 ROW 2 — START TEXTURE
- Ch 3 — this counts as a double crochet (dc).
- Dc in next stitch.
- Ch 1, skip 1 stitch.
- Dc2tog (double crochet 2 together):
- Yarn over, insert hook in next st → pull up a loop
- Yarn over, insert hook in next st → pull up a loop
- Yarn over → pull through all loops on hook
- Ch 1, skip 1 stitch
- Dc in next stitch
- Repeat steps Dc, ch-1, Dc2tog, ch-1 across row.
- End with dc in last 2 stitches.
- Turn.
✔ This row creates gentle clusters and chain spaces for texture.
🌼 ROW 3 — BUILD TEXTURE
- Ch 2 — this counts as hdc (half-double crochet).
- Hdc in first chain-1 space.
- Hdc in next stitch.
- Hdc in next chain-1 space, hdc in next stitch — repeat across the row.
- Turn.
✔ Row 3 reinforces the pattern and makes the texture stable.
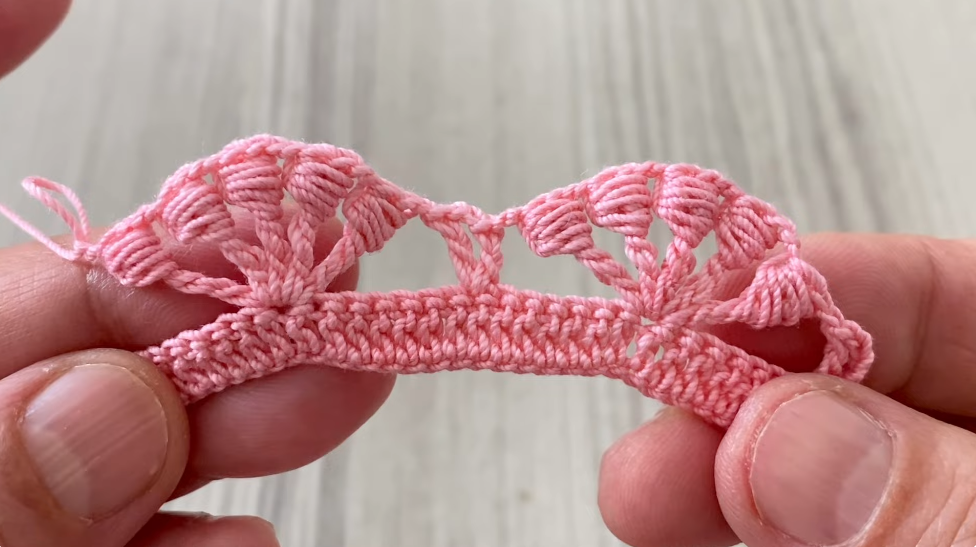
⭐ ROW 4 — SMOOTH IT OUT
- Ch 1 (does not count as a stitch).
- Sc in every stitch across.
- Turn.
✔ This row gives a tidy edge and frames the texture you’re building.
🔁 REPEAT SEQUENCE
Now you’ve completed Rows 1–4!
So you’ll just repeat these four rows in this exact order:
➡ Row 1 → Row 2 → Row 3 → Row 4 → Row 1 → …
…until your piece reaches the length you want.
🧠 TECHNIQUE TIPS (FOR BEGINNERS)
✔ Keep your tension consistent — not too tight or too loose.
✔ The chain-1 spaces make your pattern look airy and soft.
✔ When you do dc2tog, remember it’s one stitch even though it’s two worked together.
🧵 FINISHING
✂ Weaving In Ends
- After you finish your project, leave a long tail.
- Thread it onto a tapestry needle.
- Weave it through several rows on the back to hide it securely.
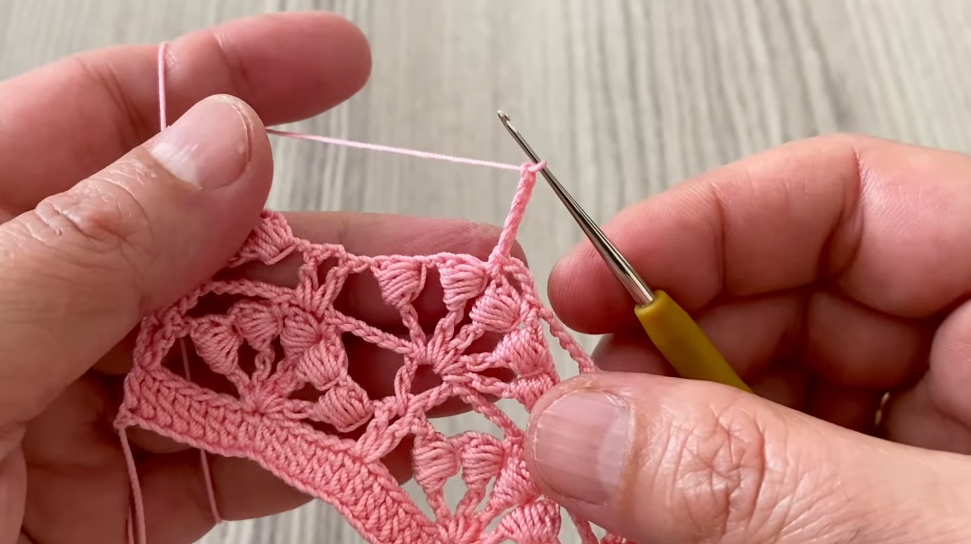
📏 Optional Edging
You can add a simple border:
- Work one round of sc around entire piece.
- For a neat look, place 2 sc in each corner if you are working a rectangle.
✨ PROJECT IDEAS
✔ Blankets — repeat pattern for full width and length
✔ Scarves — work long narrow strips
✔ Shawls — chain more for width and repeat rows long
✔ Cushion covers — square panels joined together
✔ Ponchos / Tops — work two panels and seam them
🧡 SUMMARY OF REPEAT PATTERN
| Row | Stitch |
|---|---|
| 1 | Sc across |
| 2 | Dc + textured clusters and chain spaces |
| 3 | Hdc in hdc & chain-1 spaces |
| 4 | Sc across |
✨ Repeat until you reach your desired size!
VIDEO: