 by
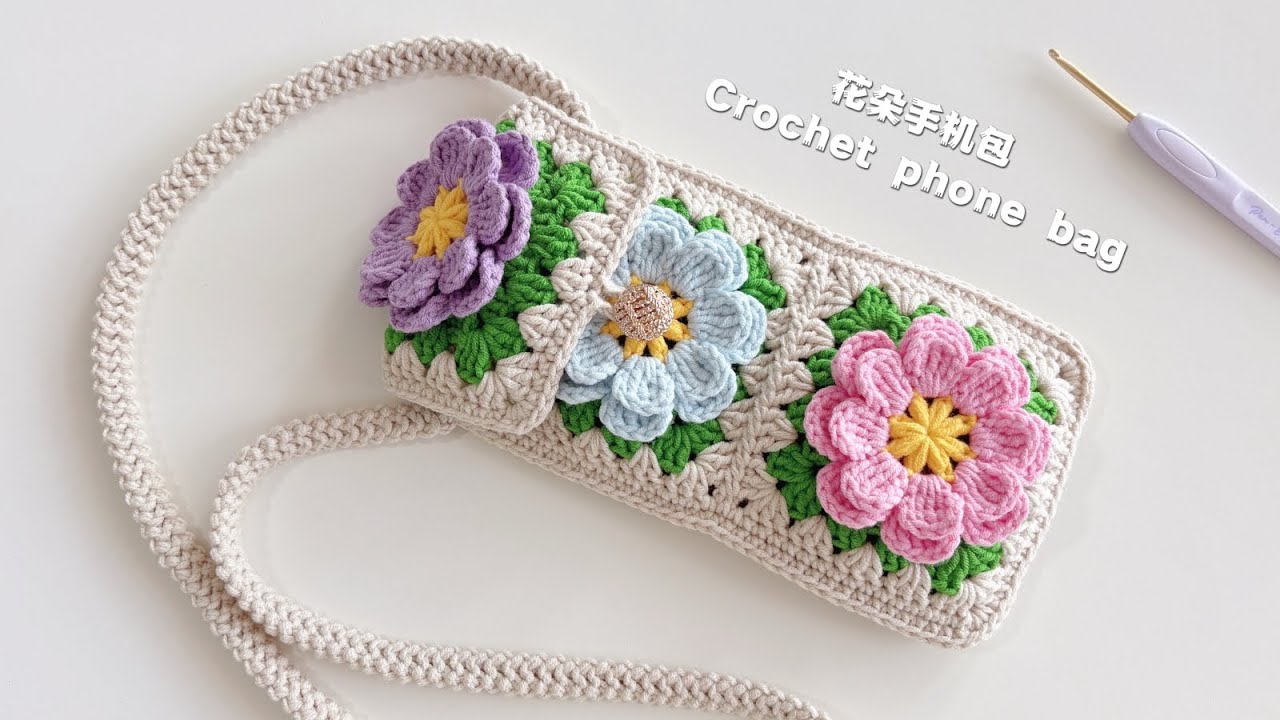
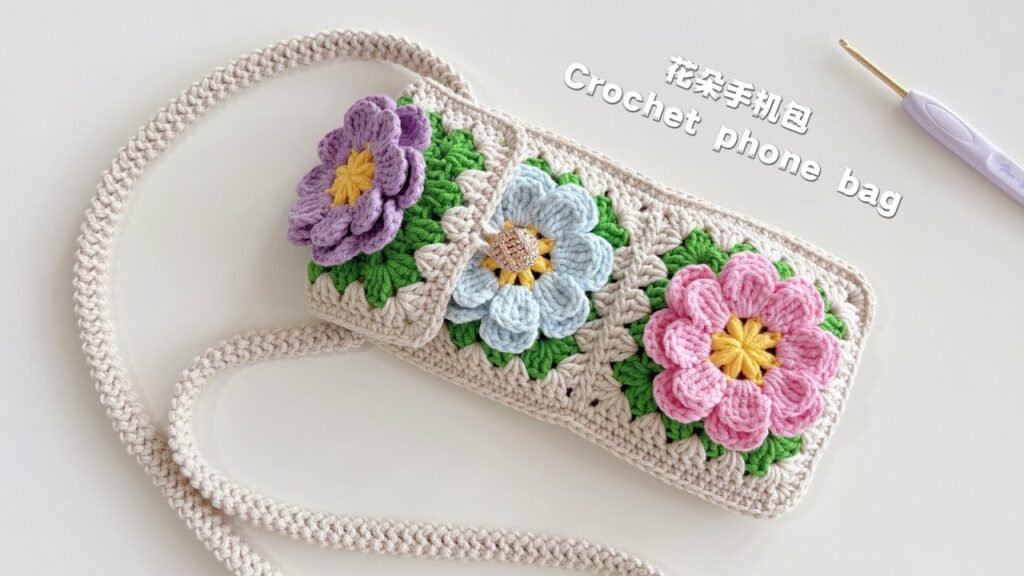
by In a world filled with mass-produced accessories, a handmade mobile phone bag offers a delightful blend of personal style, protection, and functionality. But why stop at a simple pouch when you can adorn it with intricate, three-dimensional flower stitching? This project elevates a practical item into a wearable piece of art, showcasing your creativity and adding a burst of tactile beauty.
This detailed article will guide you through crocheting a custom-fit mobile phone bag, emphasizing how to incorporate lovely 3D floral elements that truly pop. Whether you’re making it for yourself, a friend, or as a thoughtful gift, this bag is guaranteed to turn heads and keep your phone safe in blooming style.
Why Crochet a Mobile Phone Bag with 3D Flowers?
- Unique & Eye-Catching: The dimensional flowers create an unparalleled texture and visual appeal, making your bag stand out from ordinary phone cases.
- Personalized Style: Choose yarn colors, flower designs, and arrangement to perfectly match your individual taste or a specific outfit.
- Protective & Practical: A crocheted bag offers soft cushioning against everyday bumps and scratches, while keeping your phone and possibly a few small essentials (like cards or cash) secure.
- Skill Enhancement: This project is a fantastic opportunity to practice working in the round, creating sturdy fabric, and mastering a beautiful 3D crochet flower pattern.
- Thoughtful Gift: A handmade phone bag adorned with 3D flowers makes for a truly special and memorable present for any occasion.
Key Considerations Before You Start:
- Phone Dimensions (CRITICAL!):
- Measure your phone: Carefully measure its height, width, and thickness (including any existing case).
- Add Ease: You’ll want to add a small amount of “ease” (extra room) to your measurements for the bag’s dimensions – typically 0.5 to 1 inch (1.25-2.5 cm) for both height and width, depending on how snug you want the fit. This prevents the bag from being too tight or difficult to get your phone in and out of.
- Yarn Choice:
- Bag Body: Choose a yarn that’s durable, has good stitch definition, and creates a sturdy fabric.
- Cotton or Mercerized Cotton: Excellent choices, as they are strong, don’t stretch much, and produce crisp stitches. Mercerized cotton has a lovely sheen.
- Acrylic: Durable, widely available, and comes in a vast array of colors. Choose a non-pilling, sturdy acrylic.
- Weight: DK (Light Worsted / Category 3) or Worsted (Category 4) are ideal. DK will create a finer, more delicate bag, while Worsted will be quicker and more substantial.
- Flowers: Use yarn of similar weight to the bag body. Contrasting colors are key for the flowers to stand out. Consider lighter shades for petals and a darker shade for the flower center.
- Quantity: Approx. 50-100 yards for the bag body (depending on phone size), and small amounts (5-10 yards per color) for the flowers.
- Bag Body: Choose a yarn that’s durable, has good stitch definition, and creates a sturdy fabric.
- Hook Size:
- Match your hook size to your yarn weight, but consider going down half a size from the yarn label’s recommendation. This helps create a denser, firmer fabric for the bag body, which offers better protection and less stretch.
- For DK yarn, try 3.5 mm (US E/4) or 4.0 mm (US G/6).
- For Worsted yarn, try 4.0 mm (US G/6) or 4.5 mm (US 7).
- Gauge (Important for Fit):
- Make a small rectangular swatch (e.g., 4″ x 4″ in sc or hdc). Measure your stitches and rows per inch/cm. Compare this to your desired bag dimensions (based on your phone + ease). Adjust hook size if needed.
- Construction Method: We’ll create an oval base, then work up in continuous rounds to form the body of the bag. The flowers will be crocheted separately and then sewn onto the bag.
- 3D Flower Stitching Techniques: We’ll focus on a layered petal flower, which gives great dimension. Other options include puff stitch flowers, popcorn stitch flowers, or surface crochet flowers.
- Closure:
- Button & Loop: Simple and classic.
- Magnetic Snap: Sew-in snaps are neat and secure.
- Zipper: More advanced, requires sewing skills.
- Strap/Handle:
- Crocheted Strap: Simple chain, flat sc/hdc strap, or a twisted cord.
- Chain Strap: A pre-made metal chain for a more elegant look.
- Wristlet: A short loop for carrying on the wrist.
Materials You’ll Need:
- Yarn:
- Main Color (for bag body): Approx. 70 yards of DK or Worsted weight cotton/acrylic.
- Flower Petal Color(s): Small amounts of DK or Worsted weight yarn (e.g., pink, purple, blue).
- Flower Center Color: Small amount of yellow or contrasting yarn.
- (Optional) Green yarn for leaves.
- Crochet Hook: Size G/6 (4.0 mm) or H/8 (5.0 mm) (adjust for gauge).
- Yarn Needle (Tapestry Needle): For weaving in ends and sewing flowers.
- Scissors: For cutting yarn.
- Stitch Marker: Essential for working in continuous rounds.
- Button (Optional): One decorative button (approx. 0.75-1 inch / 2-2.5 cm).
- (Optional) Magnetic Snap: Sew-in type.
- (Optional) Beads/Pearls: For flower centers.
Essential Crochet Abbreviations:
- ch: chain
- sl st: slip stitch
- sc: single crochet
- hdc: half double crochet
- dc: double crochet
- sc inc: single crochet increase (2 sc in same st)
- hdc inc: half double crochet increase (2 hdc in same st)
- dc inc: double crochet increase (2 dc in same st)
- st(s): stitch(es)
- BLO: back loop only
- MR: magic ring (or magic circle)
- (): indicates instructions to be worked into the same stitch/space
- ***…***: repeat instructions within asterisks
- []: indicates stitch counts at the end of a round/row
Crochet Mobile Phone Bag with 3D Flower Stitching: Step-by-Step Tutorial
This pattern is designed for a smartphone roughly 6.5″ H x 3″ W x 0.4″ D (16.5 cm H x 7.5 cm W x 1 cm D). Adjust stitch counts as needed for your phone’s dimensions.
Gauge Swatch: Using Main Color yarn and your chosen hook, ch 15. Row 1: Sc in 2nd ch from hook and in each ch across. (14 sc) Rows 2-10: Ch 1, turn. Sc in each sc across. Your swatch should be approx. 4 inches wide and 3.5 inches tall. Adjust hook size if significantly different.
Part 1: The Bag Body (Base & Sides)
We’ll create an oval base and then work straight up. Use Main Color yarn.
- Base – Round 1 (Oval): Ch 19.
- Sc in 2nd ch from hook. Sc in next 16 ch.
- (3 sc) in last ch (this forms one end of the oval).
- Now, working along the opposite side of the foundation chain: Sc in next 16 ch.
- (2 sc) in the very first ch where you made your first sc (this forms the other end).
- Join with a sl st to the first sc.
- [38 sc]
- Base – Round 2 (Oval Continued): Ch 1. Sc in first st. Sc in next 16 sts.
- (3 sc) in next st (center of the 3 sc from previous round).
- Sc in next 18 sts.
- (3 sc) in next st.
- Sc in next st.
- Join with a sl st to the first sc.
- [42 sc]
- Check if your base is slightly larger than your phone’s width. Adjust by adding/removing starting chains or increase rounds if needed.
- Sides – Round 3 (Establish Wall): Ch 1. Sc in the back loop only (BLO) of each sc around. Join with a sl st to the first sc.
- [42 sc]
- This BLO round creates a neat ridge that defines the bottom of the bag.
- Sides – Rounds 4 – 28 (Body Height): Ch 1. Sc in both loops of each sc around. Join with a sl st to the first sc.
- [42 sc]
- Continue working these rounds until your bag reaches just below the desired height of your phone (e.g., about 6 inches / 15 cm).
- Try fitting your phone inside as you go to ensure proper height.
- FO, leaving a short tail to weave in.
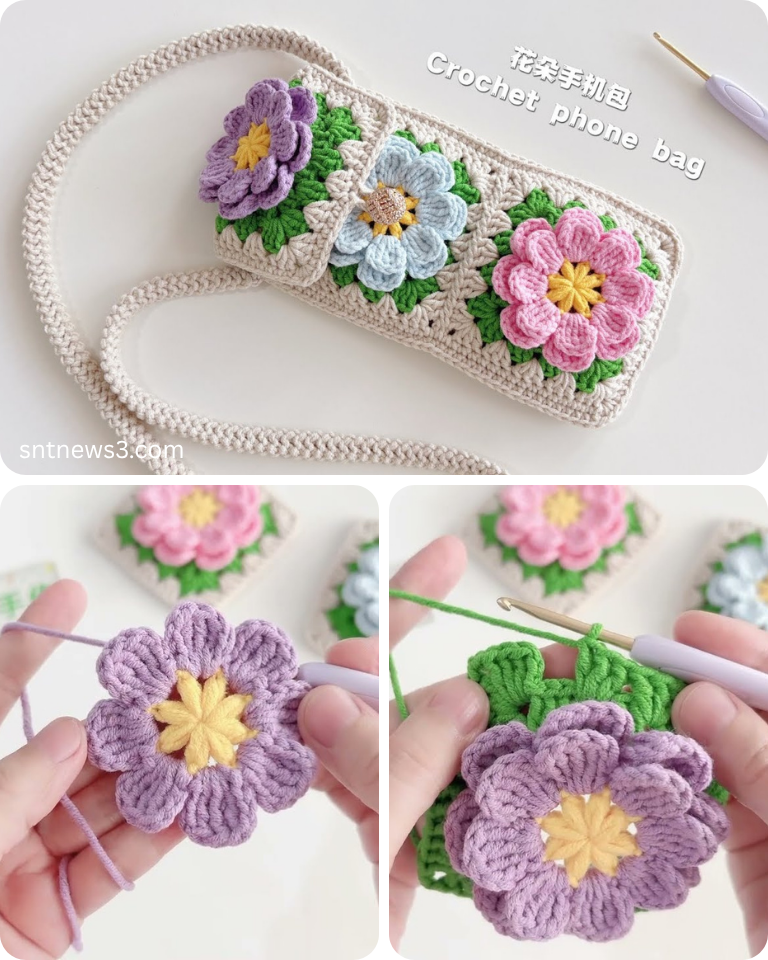
Part 2: The Three-Dimensional Flowers (Make several – 3-5 recommended)
We’ll make a simple layered petal flower.
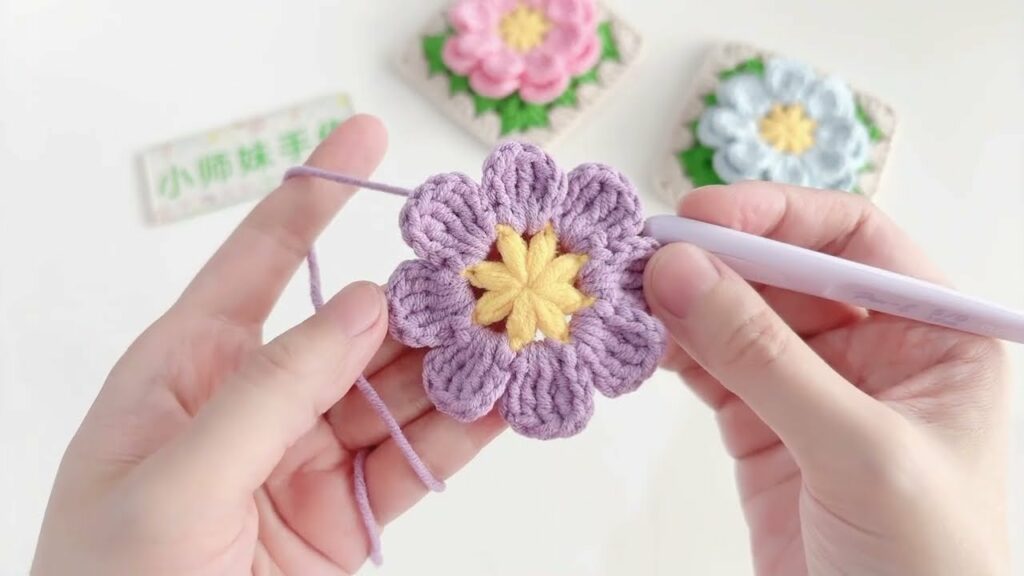
- Flower Center (Yellow yarn):
- Round 1: Make a MR. Sc 6 into MR. Pull tail tight. Sl st to first sc.
- FO, leaving a tail for sewing.
- Inner Petals (Petal Color 1 – e.g., Pink):
- Join Petal Color 1 to any sc of the flower center with a sl st.
- (Ch 2, dc, ch 2, sl st) into the same sc.
- Sl st into next sc. Repeat from * around for 6 petals.
- FO, leaving a tail for sewing.
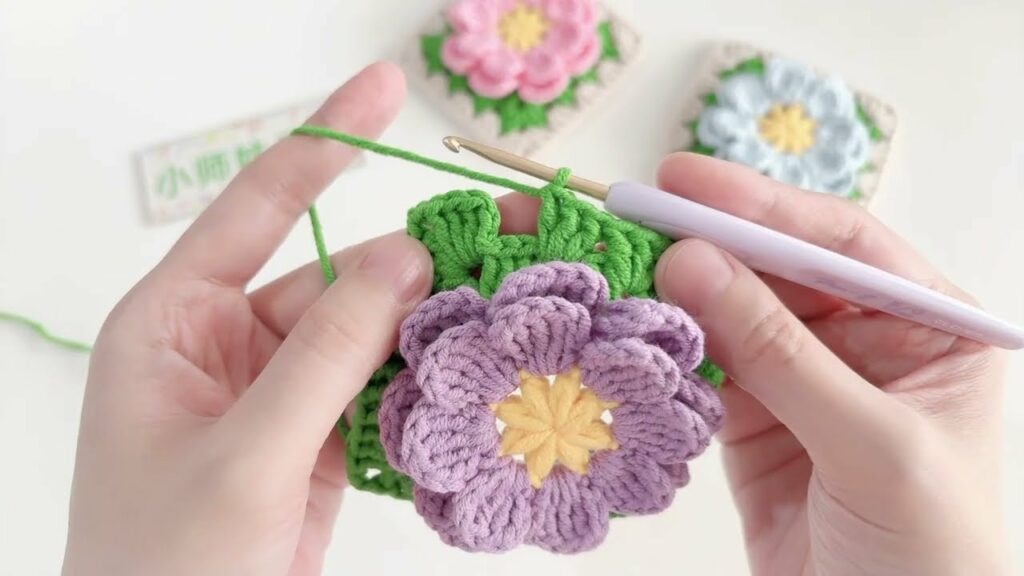
- Outer Petals (Petal Color 2 – e.g., Purple, or same as Petal Color 1):
- Working behind the inner petals, join Petal Color 2 into any unused loop or space on the back of the flower center (e.g., the base of the previous sc where you joined).
- (Ch 3, 2 dc, ch 3, sl st) into the same space.
- Sl st into the base of the next sc. Repeat from * around for 6 larger petals.
- FO, leaving a long tail for sewing.
- Optional Leaves (Green yarn):
- Ch 5. Sl st in 2nd ch from hook. Sc in next ch. Hdc in next ch. Dc in last ch.
- FO, leaving a tail for sewing. Make 2-3.
Part 3: Attaching the Flowers
- Arrange your crocheted flowers and leaves onto the front panel of the phone bag. Consider varying sizes, colors, and overlapping them slightly for a natural, blooming effect.
- Using the long tails and your yarn needle, carefully sew each flower securely to the bag. Stitch down the very center of the flower and a few points on each petal to create the 3D effect.
- Sew leaves in place under or beside the flowers.
- (Optional) Add a small bead or embroidered French knot to the center of some flowers for extra detail.
Part 4: The Flap/Closure (Optional)
If you want a flap over the top of your phone, crochet this.
- Flap: Attach Main Color yarn to the center back top edge of the bag (find the middle of the 42 stitches, approx. st 21).
- Row 1: Ch 1. Sc in the next 10 sts. Turn.
- [10 sc]
- Rows 2 – 8: Ch 1. Sc in each sc across. Turn.
- [10 sc]
- Adjust number of rows for desired flap length.
- Row 9 (Buttonhole Row): Ch 1. Sc in first 4 sts. Ch 2 (skip 2 sts). Sc in last 4 sts. Turn.
- [8 sc, 1 ch-2 sp]
- Row 10: Ch 1. Sc in each sc and in ch-2 sp across.
- [10 sc]
- Edging (Optional): Ch 1. Sc evenly around the entire flap (including the sides and bottom edge). Sl st to join.
- FO, weave in ends.
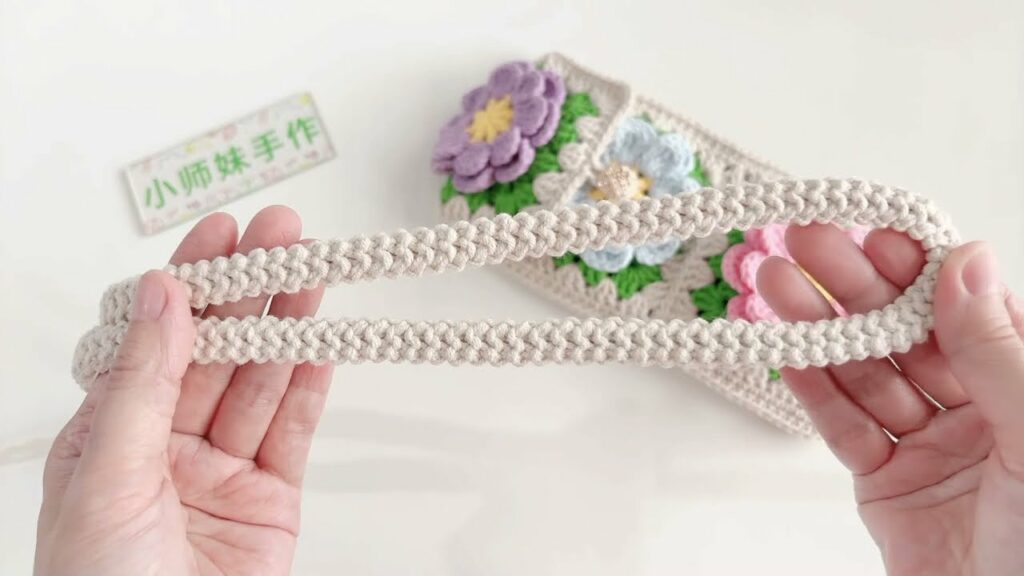
Part 5: The Strap/Handle
- Simple Strap: Ch 70 (or desired length for wristlet, shoulder strap, or crossbody).
- Sl st in 2nd ch from hook. Sl st in each ch across. (This creates a thin, sturdy strap).
- Alternative Flat Strap: Ch 4. Sc in 2nd ch from hook and in next 2 ch. Turn. Ch 1, sc in each st across. Repeat until desired length.
- Attaching Strap: Securely sew each end of the strap to the top side edges of the phone bag using your yarn needle. Stitch multiple times for durability.
Part 6: Finishing Touches
- Weave in All Ends: Meticulously weave in all remaining yarn tails. This is essential for a professional look and to prevent unraveling.
- Attach Button/Snap: If using a button, sew it onto the front of the bag, aligning with your buttonhole. If using a magnetic snap, sew both halves securely inside the flap and on the front of the bag opening.
- (Optional) Add a Fabric Lining: For extra protection and durability, you can sew a simple fabric lining for your bag. Measure the finished crocheted bag, cut two fabric pieces, sew them, and hand-stitch the lining inside.
Your Crocheted Mobile Phone Bag with 3D Flower Stitching is Complete!
You’ve created a truly unique, functional, and beautiful accessory that showcases your crafting skills and adds a touch of blooming charm to your everyday life.
Tips for Success & Customization:
- Fit is Key: Regularly try your phone in the bag during construction, especially after the first few body rounds, to ensure the fit is perfect.
- Yarn & Hook Choices: A slightly tighter tension (by going down a hook size) ensures a sturdy bag. Using mercerized cotton can add a beautiful sheen.
- Flower Variations: Explore other 3D flower patterns like puff stitch flowers, popcorn flowers, or even basic roses for different looks.
- Color Play: Don’t be afraid to experiment with bold or subtle color combinations for your flowers and bag body. Ombre yarn can also create interesting effects.
- Lining Benefits: A lining protects your phone from the yarn fibers, prevents stretching, and ensures small items don’t slip through stitches.
- Care Instructions: Always refer to your yarn label for specific care instructions. Hand washing and laying flat to dry are generally recommended for handmade crochet items to maintain their shape and integrity.
Enjoy your beautiful, personalized, and functional floral phone bag!
Video tutorial: