 by
by 🧵 Materials Needed
- Yarn of your choice (worsted/aran weight recommended for a bag)
- Crochet hook appropriate for your yarn (e.g., 5 mm)
- Scissors and tapestry needle
- (Optional) Fabric lining and sewing supplies if you’re doing a sewn “bag within a bag” finish
✏️ Abbreviations (US Terms)
- ch = chain
- sc = single crochet
- hdc = half-double crochet
- dc = double crochet
- sl st = slip stitch
- st(s) = stitch(es)
- rep = repeat
🧶 Overview of the Project
In the video, the creator shows a pattern which works as a baby blanket texture but then converts or uses that panel design to make a bag. The tutorial is described as super-easy and eye-catching, making it beginner-friendly. The bag uses basic stitches and a repeating motif, then the panel is sewn or folded into bag shape.
✅ Step-by-Step Instructions
Step 1: Foundation Chain
- Decide the width of the panel (which will be the width of your bag). For example, chain 40 (adjust higher for larger bag).
- Make an extra chain if needed for turning – e.g., ch 40 + 2.
Step 2: Row 1 – Base Row
- Start in the 2nd chain from the hook, work sc in each chain across.
- At end of row, turn your work, ch 1.
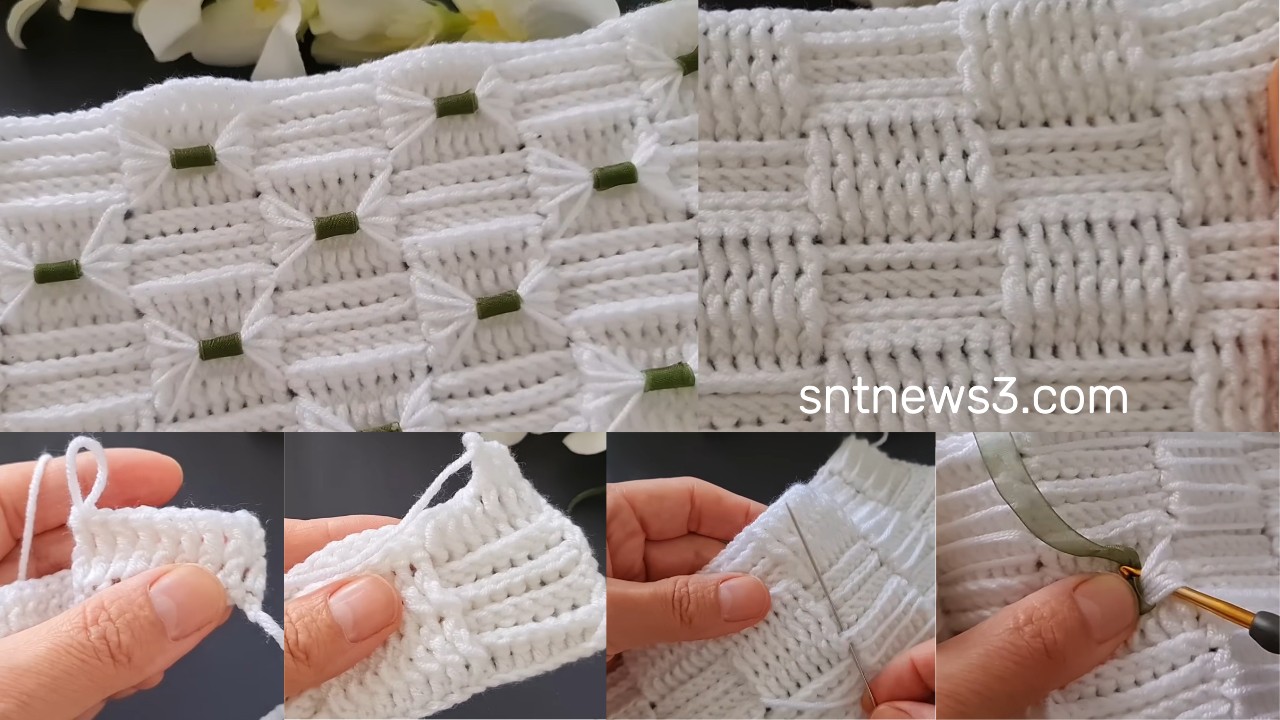
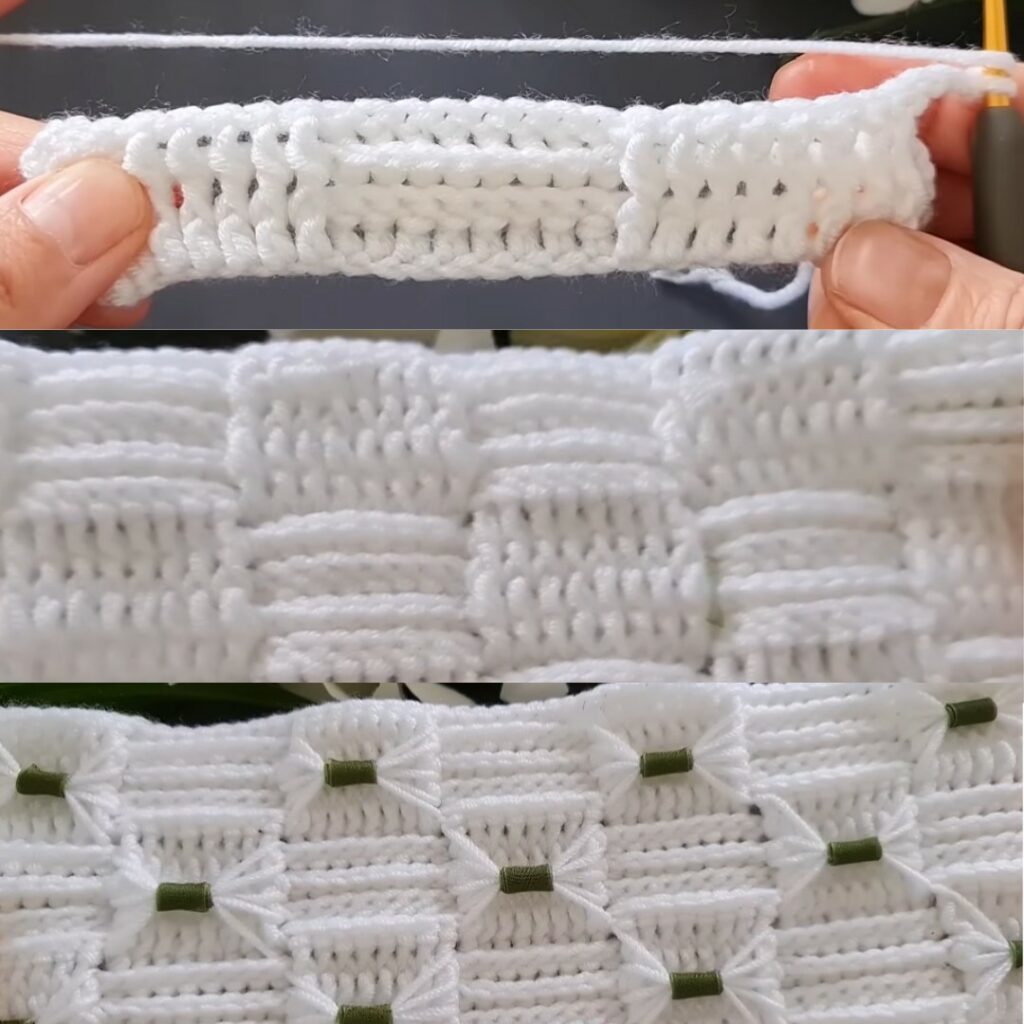
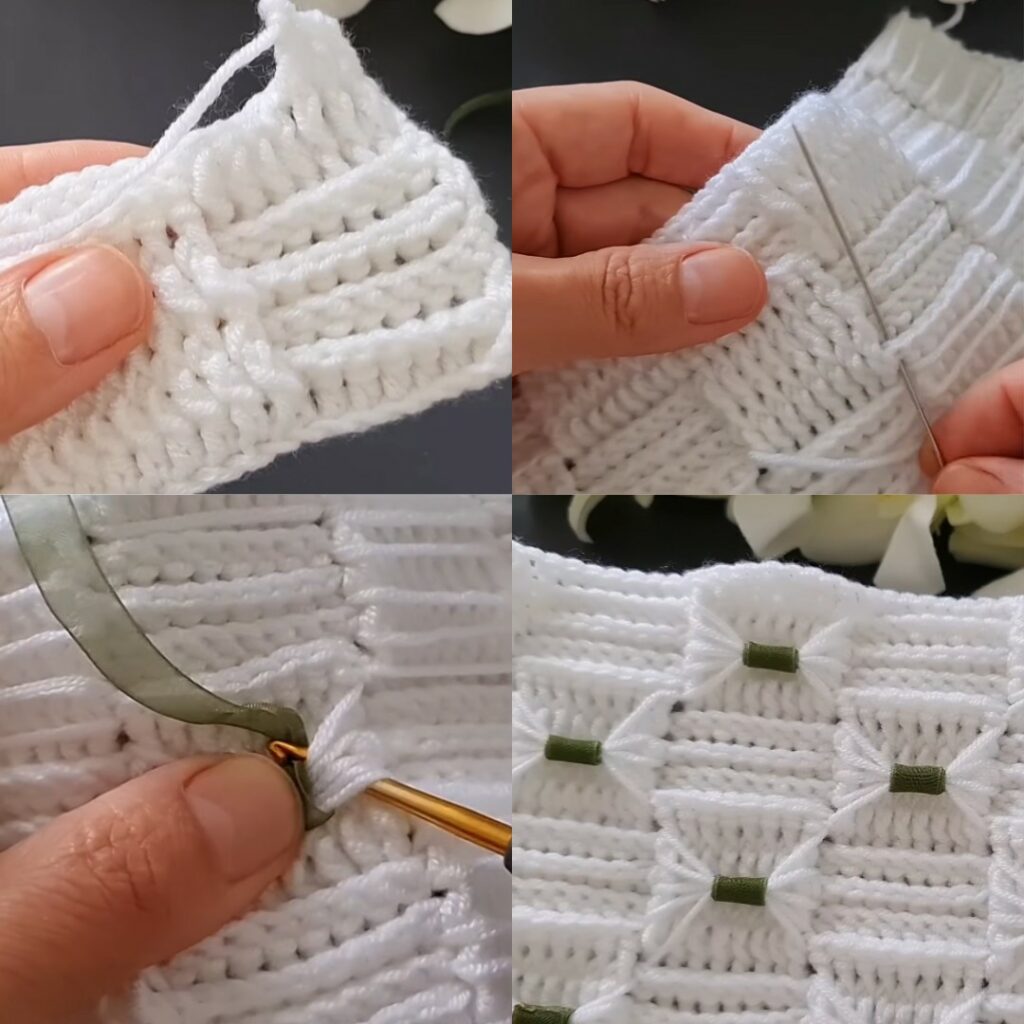
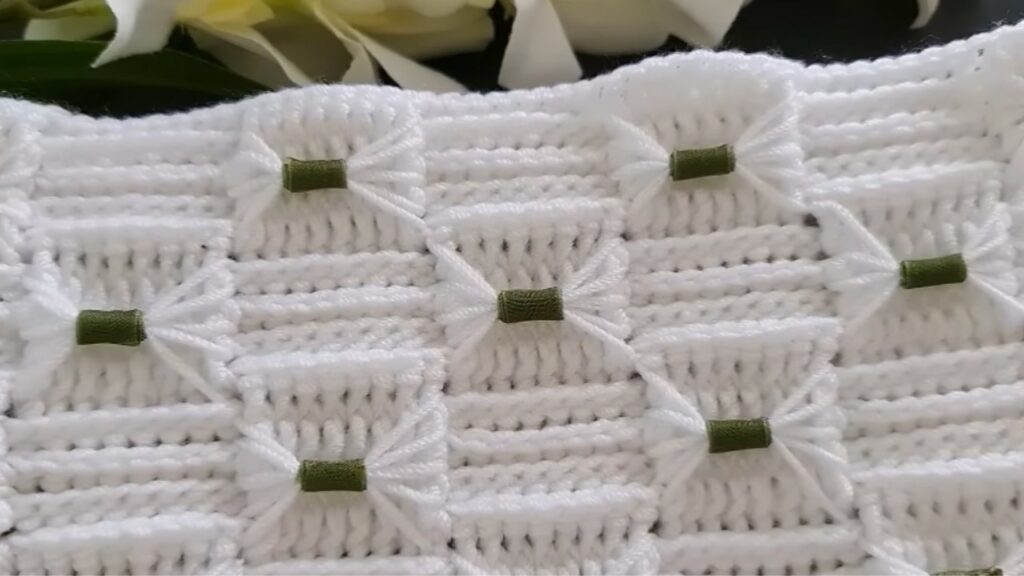
Step 3: Row 2 – Establish the -Eye-Catching Texture
- Work hdc or dc stitches as per the video – typically: dc in next 2 sts, skip 1 chain, dc in next st, etc.
- Then work a contrasting stitch or chain space to form the textured motif. (Video shows some chain-spaces or skip sts creating texture).
- At end, ch 1 and turn.
Step 4: Row 3 and Onwards – Repeat the Texture Pattern
- Align the pattern so that the texture is repeated: for example, skip 1 st, work dc in next st, ch 1, skip 1 st, dc in next st — repeat across the row.
- At the end of each row, ch 1 turn.
- Continue these rows until your panel reaches the desired height (for example, about 30 cm for medium bag).
Step 5: Folding & Bag Assembly
- Once you have your panel, fold it in half (width-wise) so the textured side is outside and the panel forms front and back of bag.
- Seam the sides by working sc or whip-stitch along the side edges from bottom up to top (leaving the top open).
- (Optional) Add a bottom panel if you want a boxed bottom: you can crochet a rectangle or oval and attach it to the folded panel’s bottom edge.
Step 6: Add Handles / Strap
- Decide where you want your handles (for example, 6 chains in from side edge).
- Attach yarn at the top edge, ch a desirable length for handle (e.g., ch 60 for shoulder strap), skip the same number of top-edge stitches, sl st to anchor.
- Reinforce the strap by sc around the chain loop and top edge for 1 round.
Step 7: Finishing Border
- Work 1–2 rounds of sc around the top edge of the bag (and through handle loops if made) to create a neat border.
- Add any decorative border if you like (for example, “crab stitch” reverse sc).
- Fasten off the yarn, cut and weave in all ends neatly.
Step 8: Optional Fabric Lining
- If you want a lining: cut fabric to the interior size of bag (allow for seam allowance).
- Hem top edge, then hand-sew or machine-sew the lining into place inside the bag.
- You may also sew in a small zip pocket or leather base if desired.
📝 Quick Reference Table
| Step | Action |
|---|---|
| Foundation | ch approx width + turning chain |
| Row 1 | sc across, ch 1, turn |
| Row 2 | Establish texture: dc/hdc + skip/ch-spaces |
| Row 3–End | Repeat texture pattern until panel is tall enough |
| Assembly | Fold panel, seam sides, add bottom if desired |
| Handles | Chain strap, anchor, reinforce |
| Border | 1–2 rounds sc around top |
| Finish | Weave ends, add lining if desired |
💡 Tips from the tutorial
- Keep your tension consistent so the fabric doesn’t flare or cave in.
- Use contrasting color for texture row if you want the pattern to “pop”.
- When adding handles, make sure both sides are measured and placed equally so the bag hangs evenly.
- If using the panel for blanket version instead of a bag, simply keep going until you reach desired size and add a border.
Video Tutorial: https://www.youtube.com/watch?v=SM1fqUrnRcE