 by
by Materials
- Yarn of your choice (the video suggests a middle-weight yarn; you could use cotton for a blouse or worsted for a runner).
- Crochet hook appropriate to your yarn (for example 4.0-5.5 mm depending on yarn).
- Scissors and tapestry needle to weave in ends.
- Stitch marker (optional, for marking rounds or motifs).
Abbreviations (US Terms)
- ch = chain
- sl st = slip stitch
- sc = single crochet
- hdc = half‐double crochet
- dc = double crochet
- tr = treble crochet (if used)
- st(s) = stitch(es)
- rep = repeat
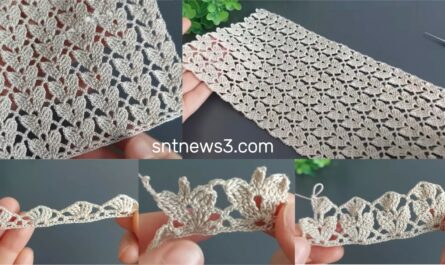
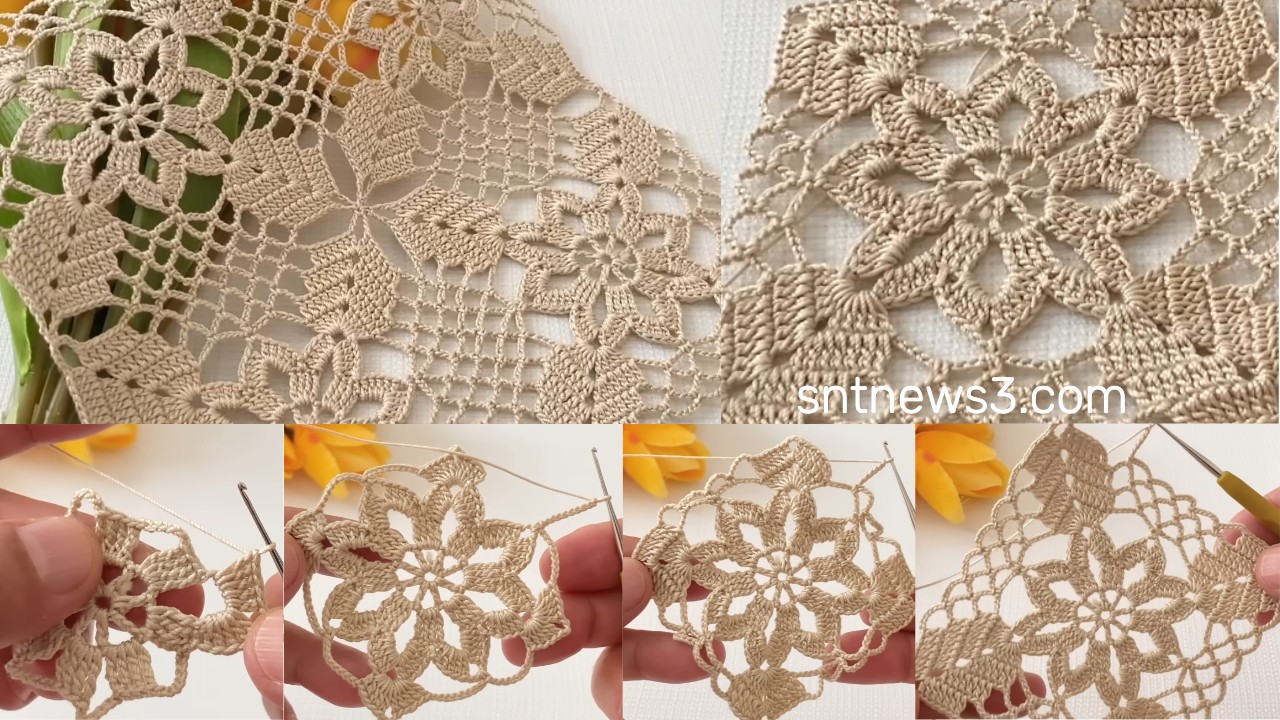
Overview of the Motif Pattern
The motif is a repeated unit built around chains and shell/cluster stitches. The video shows how you can repeat the motif across a piece to make a flat fabric, and you can adapt it into a runner, blouse, or other shape. The repeat is versatile — you’ll establish a foundation row of motifs, then continue rows repeating the motif pattern.
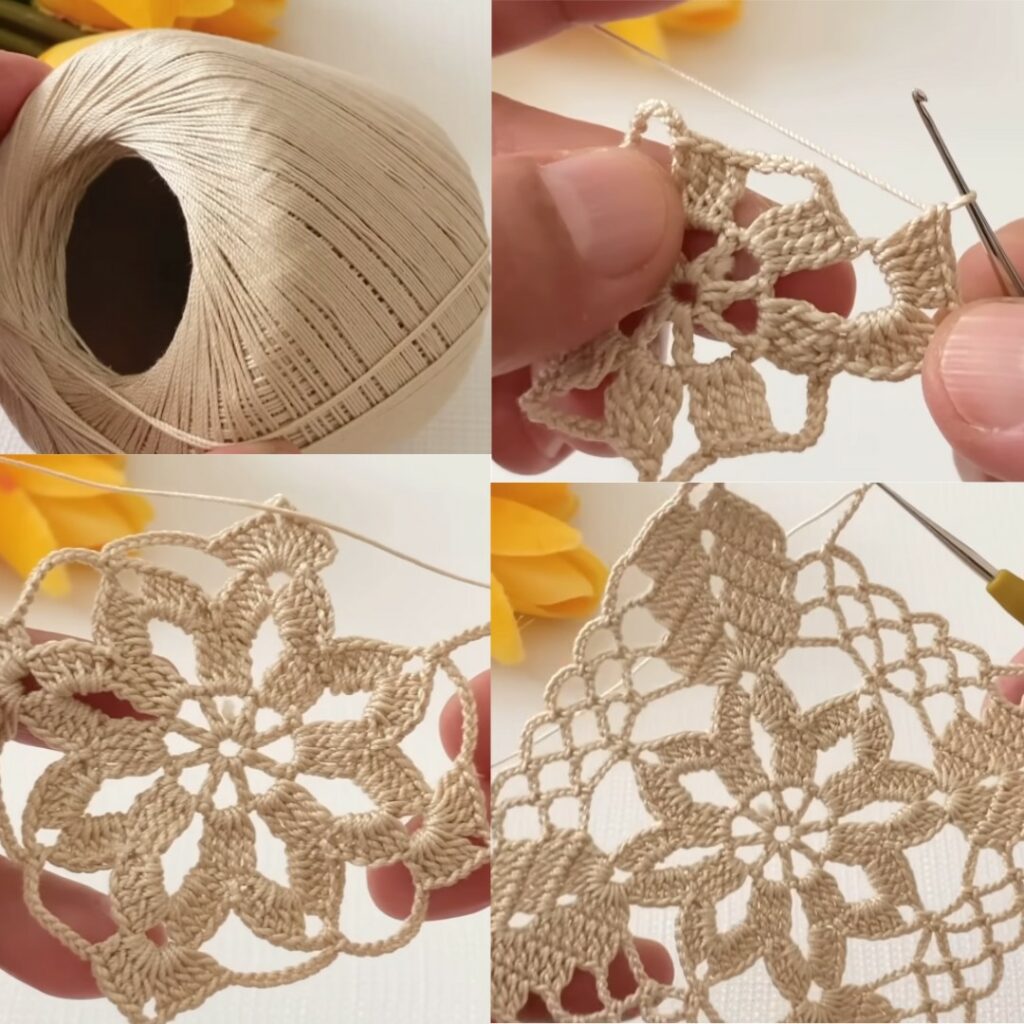
Step‐by‐Step Tutorial
Step 1: Foundation chain
- Decide how wide you want your piece (for a blouse front, runner width, etc.).
- Make a chain that is a multiple of the motif repeat number + any extra chains for turning or edge. The video likely uses a repeat multiple of x (for example 8 or 12) + maybe + 2 chains for border—so chain accordingly (e.g., if repeat is 12, you might chain 12 × n + 2).
- Chain the desired length. Then turn and work the first row as described next.
Step 2: Row 1 – Establish motifs
- In the 2nd chain from hook, work sc (or whatever the video uses) to start. The video likely begins with a row of sc or hdc to set a base.
- Then you’ll work the first motif units: for example, chain a certain number, skip chains, make a cluster or shell, chain again, etc. (Since I don’t know the exact motif from the video, I’ll give you a motif version you can follow and adapt).
- Work across the row repeating: shell / cluster in chain space, chain skip, shell / cluster, etc. At the end work sc into the last chain or according to edge instructions.
Step 3: Row 2 – Repeat motif and build texture
- Turn your work. Chain 3 (counts as first dc) or chain 1 depending on pattern.
- In each “chain space” from previous row, work the motif: for example (shell of 3 dc, ch2, 3 dc) into the chain space; skip some stitches; sc in next shell top, etc.*
- Between motifs you might chain 1 or 2 to separate them. Repeat across the row.
- At the end, sc (or whatever edge stitch) into the turning chain or last stitch. Turn.
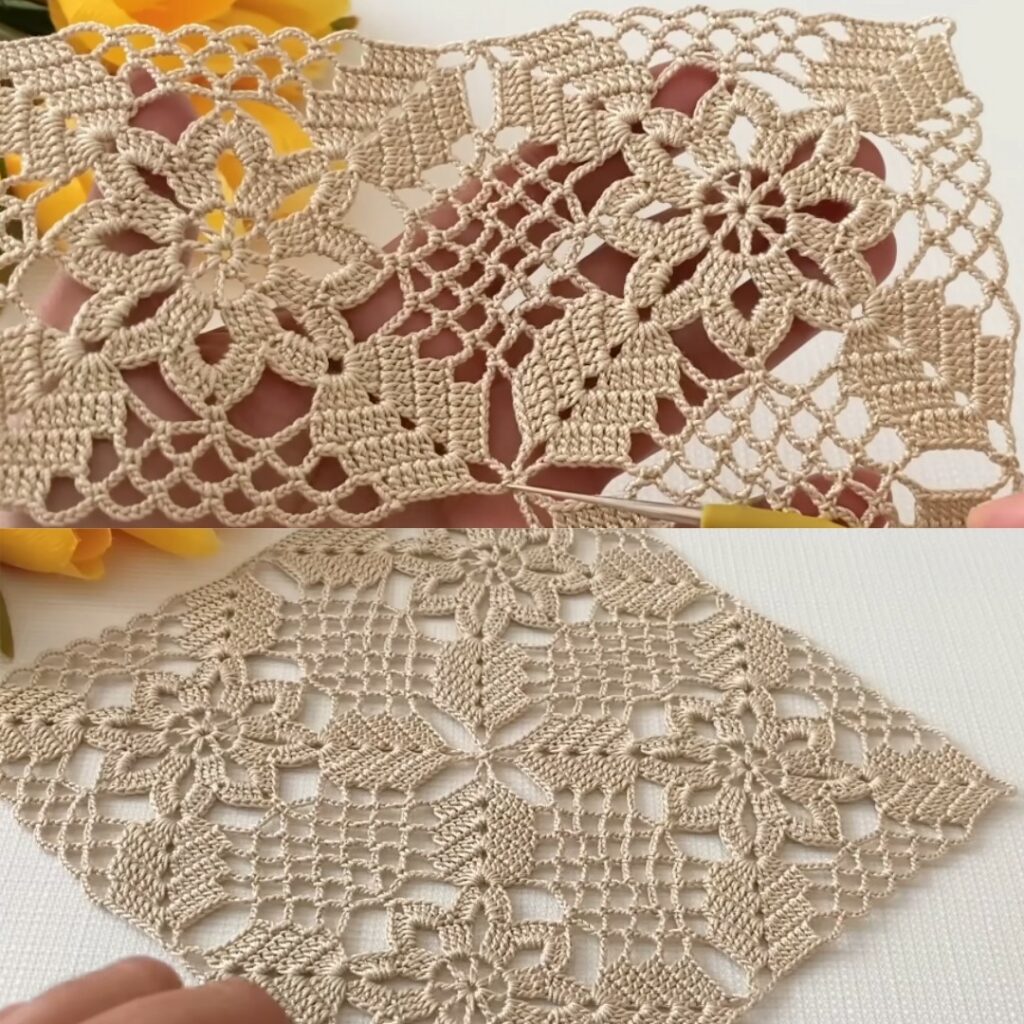
Step 4: Subsequent rows – build and repeat until desired length
- Continue repeating Row 2 (the motif row) for each row, making sure motifs line up vertically or are staggered depending on look.
- If you want a blouse, stop when your piece reaches underarm height; if a runner, stop when you reach desired length.
- If you want the motif to shift, you might do an offset row periodically: begin with chain skip, sc into chain space of previous row, then motif in next space, etc. This gives a staggered look.
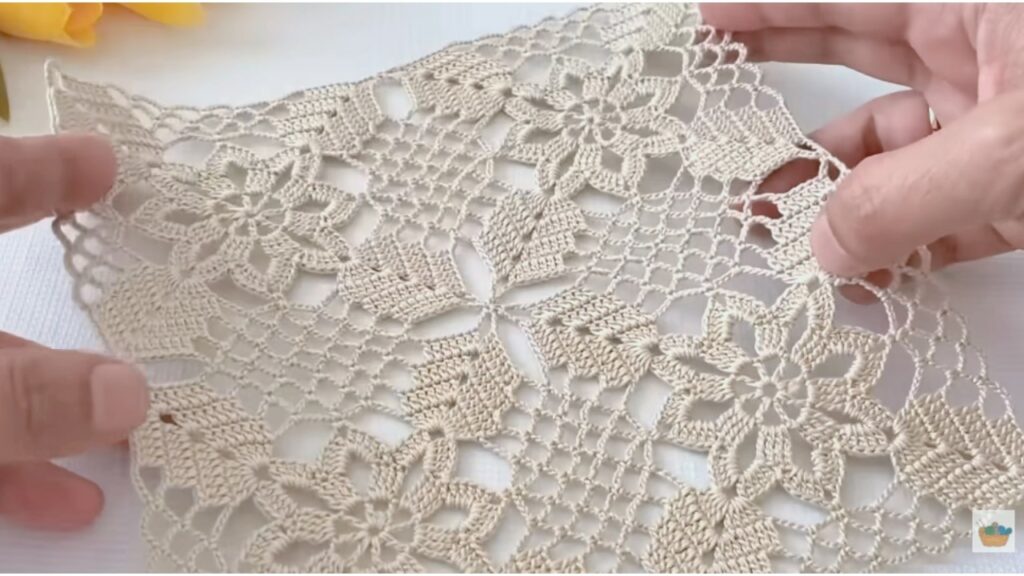
Step 5: Edging / finish
- Once you’ve reached your desired length, work one or two rows of simple stitches (sc or hdc) across to create a neat border.
- You may add a decorative edge: chain 3, sl st in same st, sk one, then sc in next, or a picot edge if the fabric calls for it.
- Fasten off, cut yarn, and weave in all ends securely with tapestry needle.
- If you’re making a blouse, you’ll then join side seams or sew straps. If a runner, block the piece and optionally add a backing to protect furniture.
Quick Reference Table
| Step | What to do |
|---|---|
| Foundation | Chain multiple of motif + edge chains |
| Row 1 | Work base row (sc/hsc) establishing motif setup |
| Row 2 | Work motif repeat across row |
| Repeat | Continue motif row until desired length |
| Edge | Add 1–2 rows simple stitches + decorative edge |
| Finish | Fasten off, weave in ends, block or sew as needed |
Tips & Adaptations
- This motif pattern is multipurpose: you can use it for a blouse by stopping at width + turning for sleeves; use it for a runner by continuing longer width; or for a square cushion by working fewer repeats width/length.
- If you use fabric strips or bulky yarn, increase hook size and chain fewer repeats—this motif works well with chunky textures too.
- Use stitch markers to mark the start of each row or edge so your motif stay aligned.
- Check your width after a few repeats to ensure the piece isn’t too wide or narrow. Adjust your foundation chain if needed.
- To get a clean edge, especially if you join pieces (like front/back for a blouse), make your edge rows identical on both sides so join lines match.
Video Tutorial: https://www.youtube.com/watch?v=QzhtMn8E4zw