 by
by 🧶 Materials You’ll Need
- Yarn or fabric strips suitable for your project — the pattern works with “many fabrics,” meaning you can use standard yarn, chunky yarn, or even fabric/fabric-yarn strips.
- Crochet hook appropriate to your yarn/fabric size.
- Scissors, tapestry needle for finishing.
- Optional: stitch marker to mark start of rounds or repeats.
✏️ Abbreviations (US terms)
- ch = chain
- sc = single crochet
- hdc = half-double crochet
- dc = double crochet
- st(s) = stitch(es)
- rep = repeat
- Pattern unit = the number of sts that repeat across row/round.
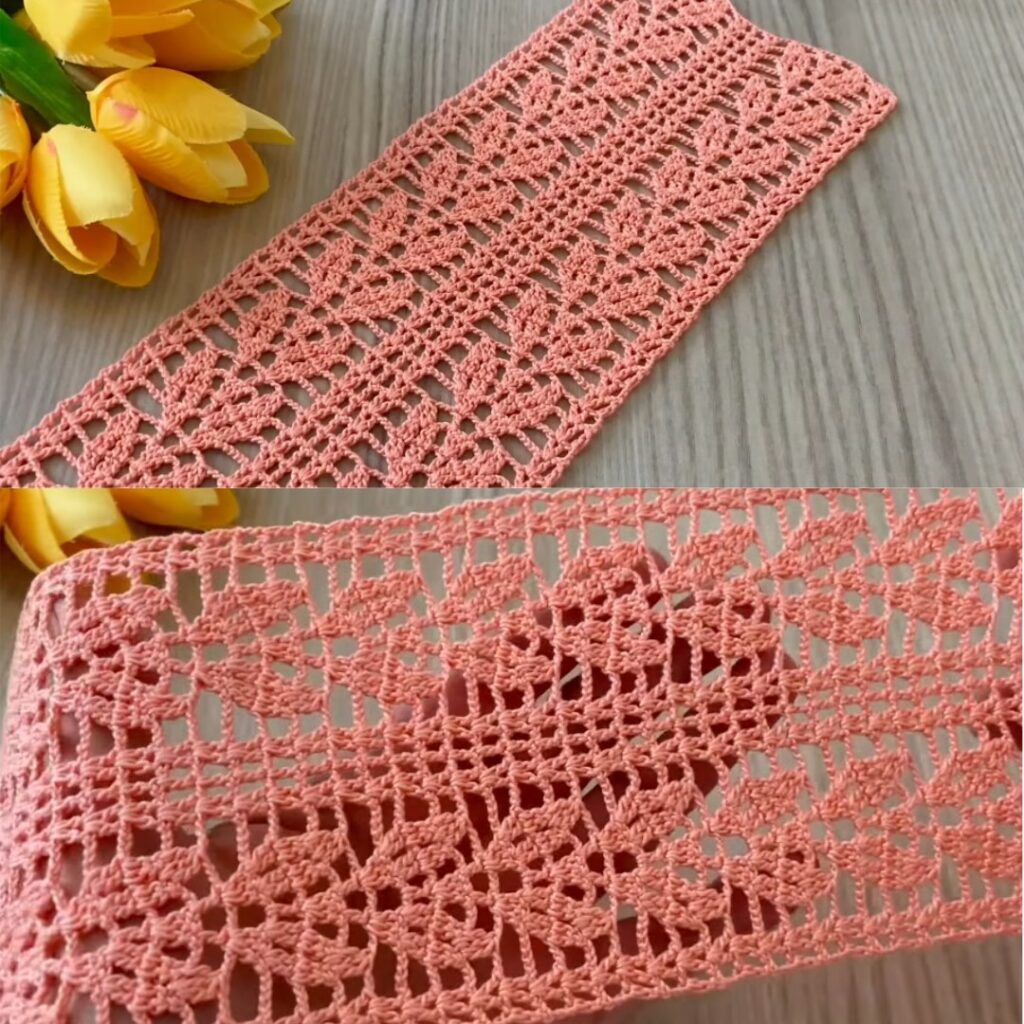
🔍 Overview of the Pattern
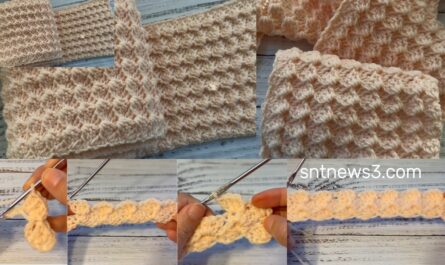
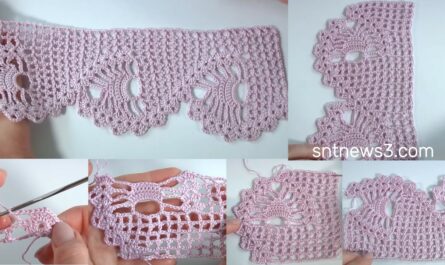
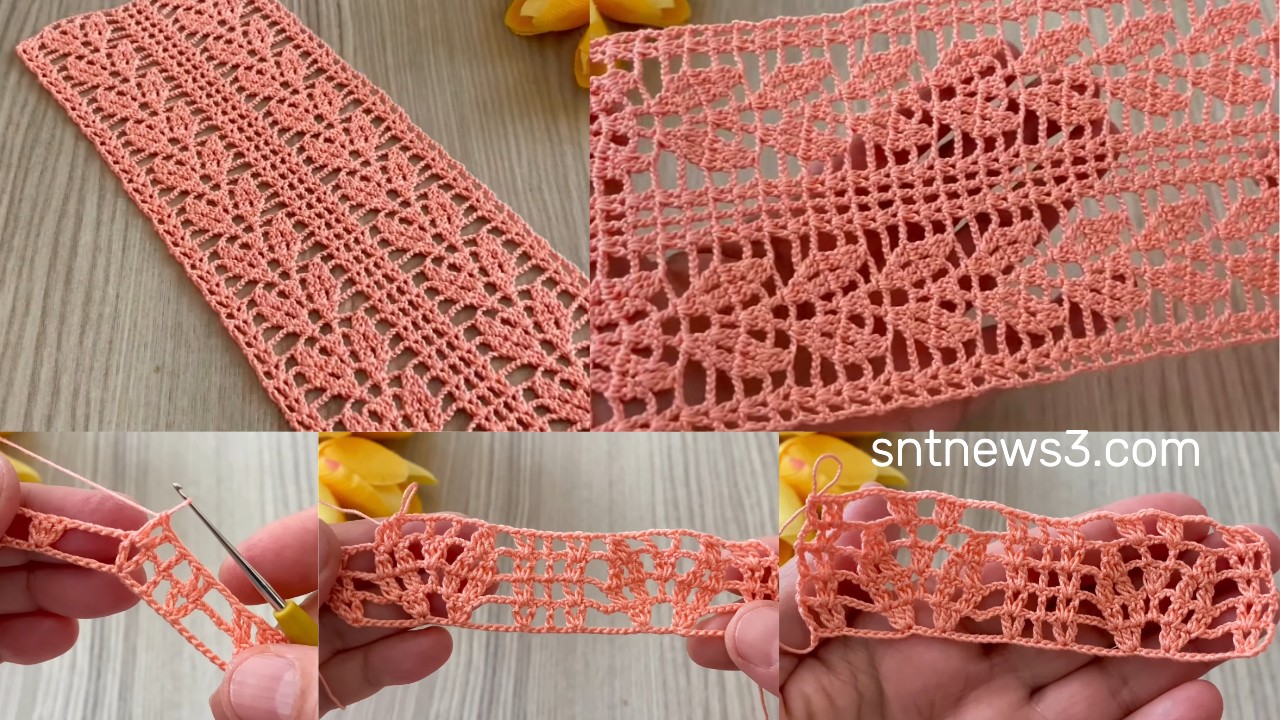
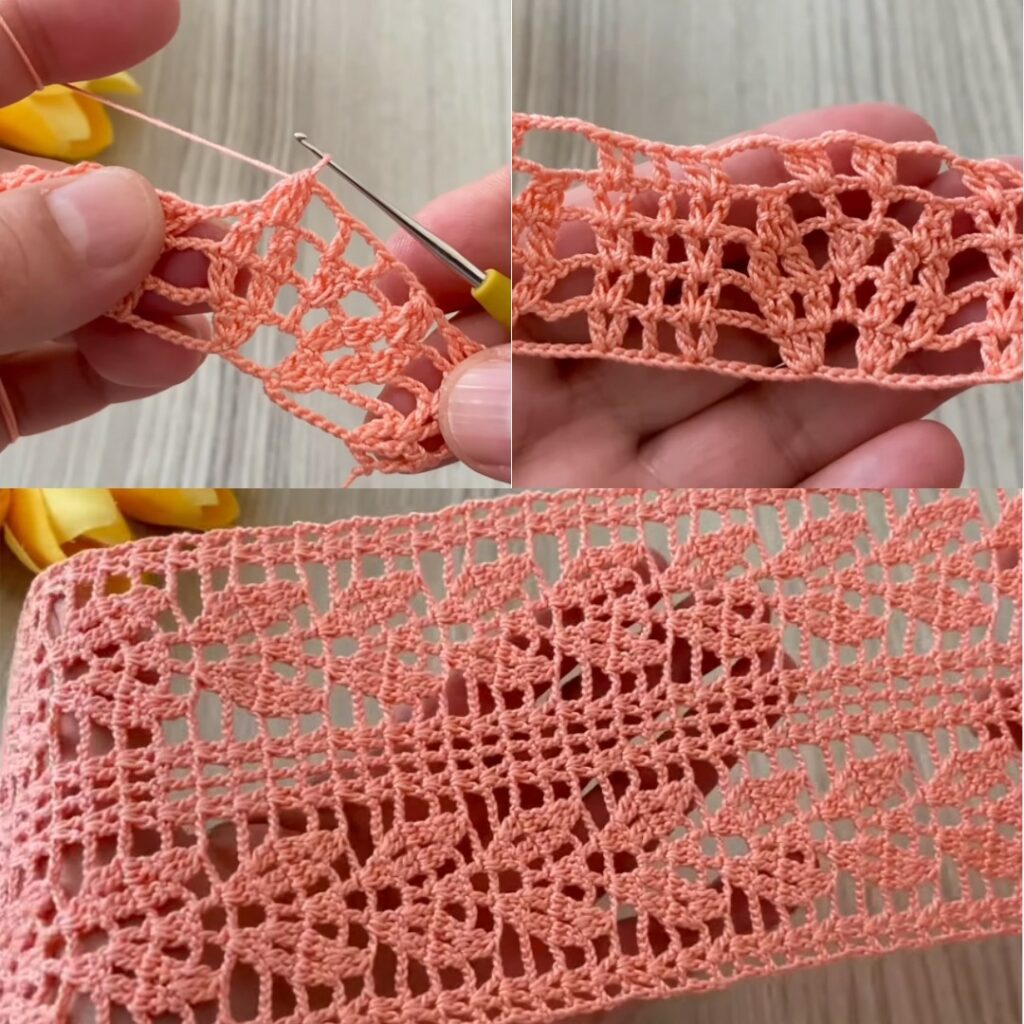
The video presents a textured stitch pattern (likely built on a multiple stitch count) that can be repeated across rows/rounds, producing an interesting fabric. Because you can “apply with many fabrics”, the stitch is flexible: you can use it for flat fabric pieces, round worked items, or other shapes.
Below is a generic, tailored tutorial of how to work the stitch pattern, plus how to apply it to a project (say a square/rectangle). If you’re doing a round project, the same repeat applies — you’ll just join at each round.
✅ Step-by-Step Tutorial
Step 1: Setup & Foundation
- Decide your width or size of the piece (for example: 40 cm wide).
- Make a foundation chain of a multiple that fits the stitch repeat described below. (For example, if the repeat is multiple of 4 + 2, chain “4 × n + 2” where n is number of repeats).
- Let’s assume the pattern uses a multiple of 4 + 2 for this tutorial.
- So if you want approx 10 repeats, chain = 4×10 + 2 = 42 ch.
- Chain 1 (for turning) if needed, or begin your first row as per instructions.
Step 2: Row 1 – Establish Base
- In the 2nd ch from the hook, sc (or hdc) across all chains. (If you chained 42, you’d have 41 sc).
- At the end of the row, ch 1 and turn (if working flat).
- This gives you a solid base row and aligns the stitches for the texture.
Step 3: Row 2 – Texture Row A
- sc in next 2 sts, skip 1 st, dc in next st, skip 1 st; then sc in next 2 sts, skip 1 st, dc in next st, skip 1 st — rep from * to * across until last 2 sts, then sc in last 2 sts.
- Ch 1, turn.
- This creates alternating sc blocks and single dc “holes” or gaps, producing texture and openness.
Step 4: Row 3 – Texture Row B
- dc in first skipped “gap” from previous row (i.e., the skipped st of Row 2), sc in next 2 sts, dc in next skipped gap, sc in next 2 sts — so you shift the pattern by 2 stitches to offset the texture.
- Ch 1, turn.
- This row offsets the pattern, giving it a woven‐look or fabric effect.
Step 5: Repeat Rows 2 and 3
- Continue repeating Row 2 then Row 3 (i.e., A-B-A-B) until your piece reaches the desired length.
- Because you offset every other row, the fabric will build width and length evenly and remain relatively flat.
Step 6: Finishing Edges
- When you reach the size you want, work one or two rows of plain sc (or hdc) across to create a neat edge.
- You may also do a decorative border (for example: sc every stitch, then sk 1 st, 5 dc in next st (shell), sk 1 st, sc repeat around).
- Fasten off, cut yarn/strip, and weave in all ends with tapestry needle.
🔧 Adapting and Applying the Pattern
- Different fabrics / yarns: Because the pattern only uses sc and dc plus skip stitches, you can substitute bulky yarn (fewer chains for width) or fine yarn (more chains). Keep the multiple correct.
- Project types: Use this for blankets, scarves, shawls, cushions, even bags. For bags you may add lining or reinforce bottom.
- Working in rounds: If you want a round piece, make a multiple chain, join to form a loop, then work rounds using the same repeat (instead of turning). Mark the join and ensure skip/dc pattern aligns as you work around.
- Color changes: For multi-fabric look, switch yarn/fabric every few rows. The skip/dc pattern shows off color changes nicely.
📝 Quick Reference Table
| Row | Action | Notes |
|---|---|---|
| 1 | sc across foundation chain | Base row |
| 2 | sc x2, skip 1, dc 1, skip 1 across | Texture row A |
| 3 | dc in skip gap, sc x2 across | Texture row B (offset) |
| 4+ | Repeat rows 2 & 3 until desired length | |
| Last | 1–2 rows plain sc + finish border | Neat edge + optional decorative finish |
✨ Tips from the Video & Pattern best practices
- Use even tension so the fabric stays balanced; large holes or puckers mean chain/skip counts need adjusting.
- Always count stitches in each row so the skip/dc pattern remains consistent and fabric doesn’t skew.
- When changing yarn/fabric types, keep your hook size consistent or adjust if gauge changes too much.
- If working with fabric strips, flatten or press strips so they feed smoothly and avoid twisting.
- For round applications, choose a starting loop size that makes the round lay flat before working the skip/dc texture.
Video Tutorial: https://www.youtube.com/watch?v=Qff2Hq0X-b8