 by
by 🧶 Materials
- Yarn of your choice (DK or worsted weight works nicely for lace/relief detail)
- Crochet hook to match yarn gauge (e.g., 4 mm for DK, 5 mm for worsted)
- Scissors and tapestry needle for weaving in ends
- Stitch marker (optional but helpful)
- (Optional) contrasting color for leaves/flowers if you want them to pop
✏️ Abbreviations (US terms)
- ch = chain
- sl st = slip stitch
- sc = single crochet
- hdc = half-double crochet
- dc = double crochet
- tr = treble crochet (if used)
- fpdc = front-post double crochet
- bpdc = back-post double crochet
- st(s) = stitch(es)
- rep = repeat
🌿 Overview of the Relief Pattern
The key elements:
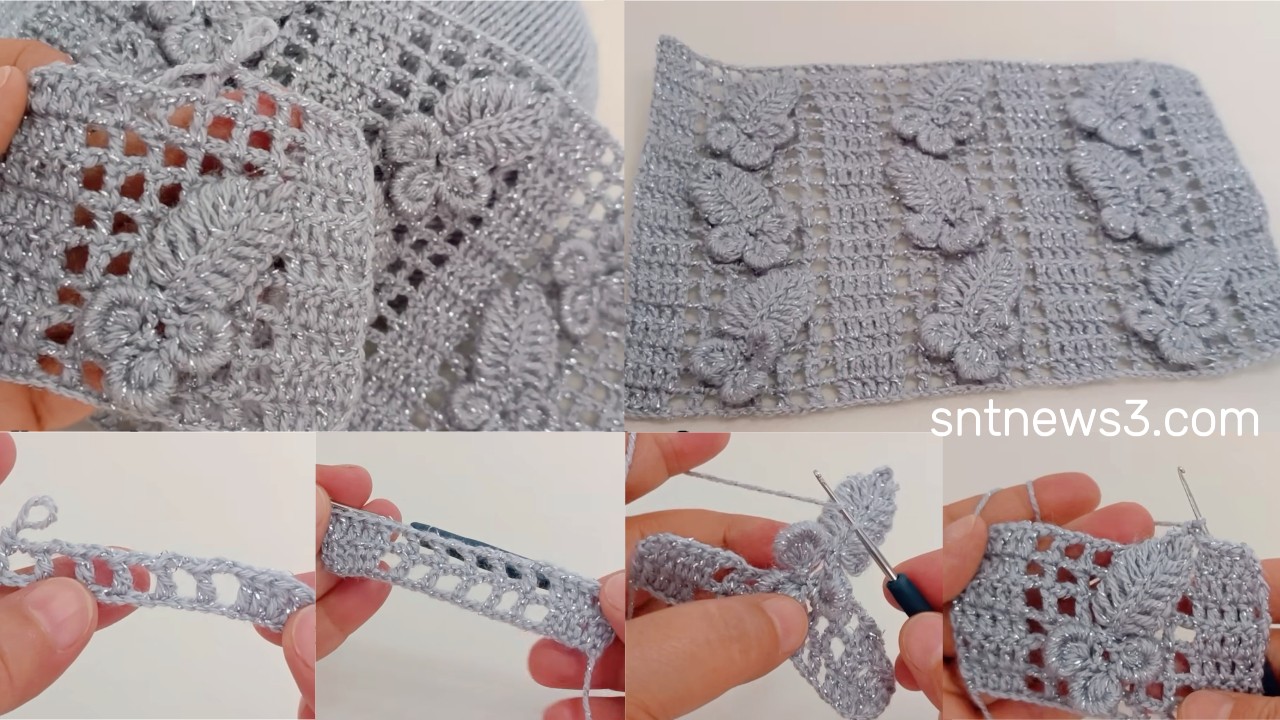
- Raised “leaf” motifs and “flower” motifs worked in relief (post or surface stitches) on top of a base fabric.
- A base row/rows of regular stitches, then overlay of leaves/flowers by building up relief stitches.
- The result is a textured fabric where leaves and flowers appear to “sit on” the surface of the piece (rather than flat).
- According to the video description: “a unique leaf and flower embossed crochet pattern … you can use this pattern in any blouse, etc.”
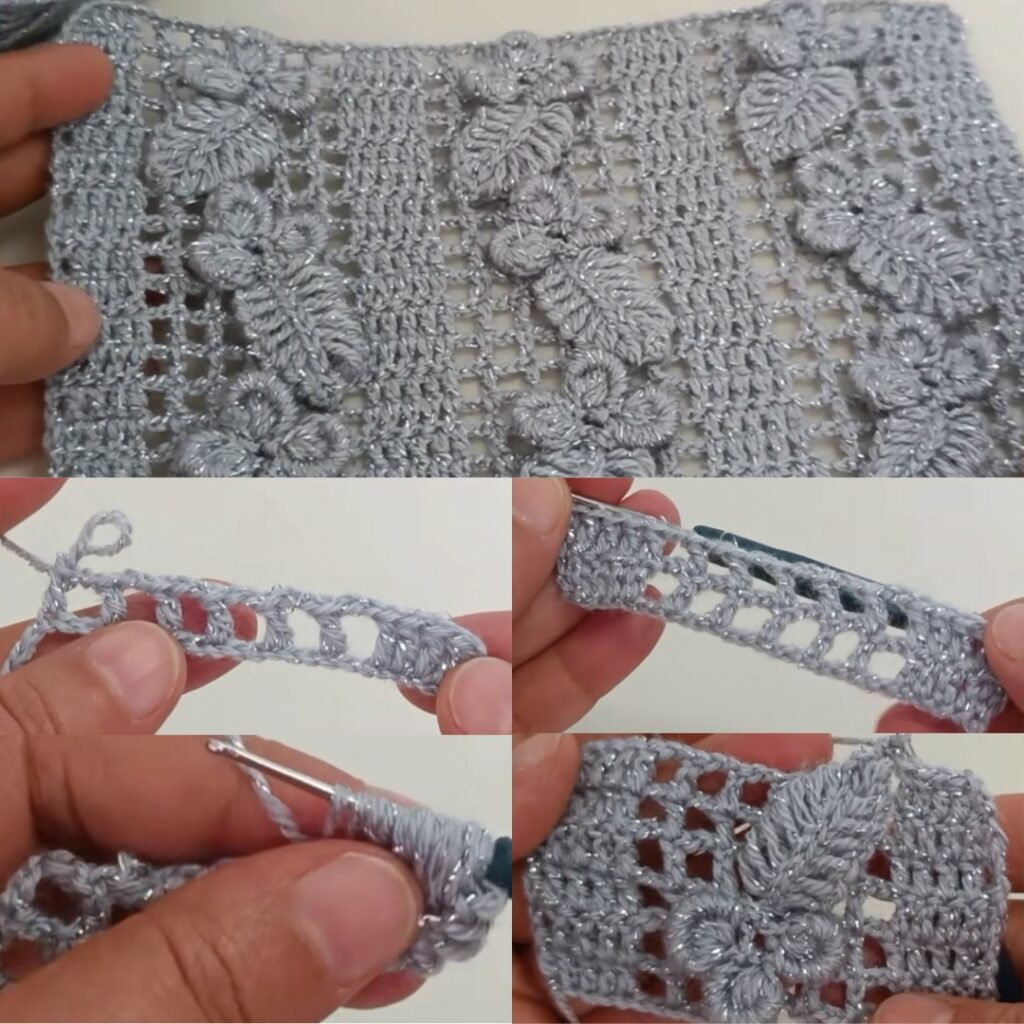
✅ Step-by-Step Tutorial
1. Foundation / Base Panel
- Chain a multiple for your width + extra for edge stitches. For example: chain 30 + 2.
- Row 1: Starting in 2nd chain from hook, sc in each chain across. (If chain=32, you’ll have 31 sc).
- Turn, ch 1.
- Row 2: sc in each stitch across. Turn, ch 1.
- Work a few rows (e.g., 4–6) of plain sc to create a stable base before beginning the relief motif.
2. Begin Relief Leaf & Flower Row
- Turn to start the row. Chain 1 (does not count as st).
- Sc in the next 3 sts.
- In the next stitch, (or next chain-space) begin the “leaf” relief:
- Insert hook around the post of a stitch from the row below (or around an earlier stitch) to create a front‐post double crochet (fpdc) so that the stitch stands up.
- Then chain 1 (for leaf tip).
- Then around the next stitch’s post do fpdc (to complete the leaf shape).
- Continue: sc in next 3 sts, leaf relief (fpdc-ch1-fpdc) in next st.
- Rep across row until the motif area; finish with sc across remaining regular sts.
- Turn, ch 1.
3. Flower Motif Row (overlay on next row)
- Row starts on right side, ch 1.
- Sc in next 2 sts.
- Begin flower relief: In next stitch, do (tr, ch 2, tr) all around the post of the stitch from two rows below (or an anchoring stitch) to form a “petal” cluster.
- Then sl st into the next stitch to anchor.
- Sc in next 2 sts.
- Repeat: flower (tr-ch2-tr) around anchor st, sl st to next regular st until across.
- Turn, ch 1.
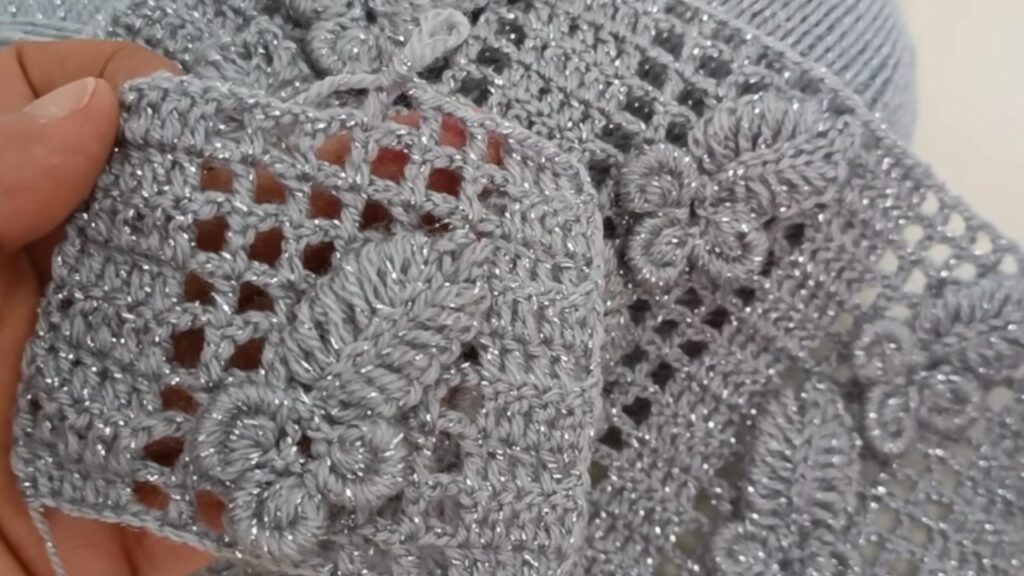
4. Continue Alternating Rows for Texture
- On the next row you might return to leaf relief row, then follow with flower relief row, depending on the design in the video.
- Keep working: one row of regular sc base, then a row of relief motifs (leaf or flower).
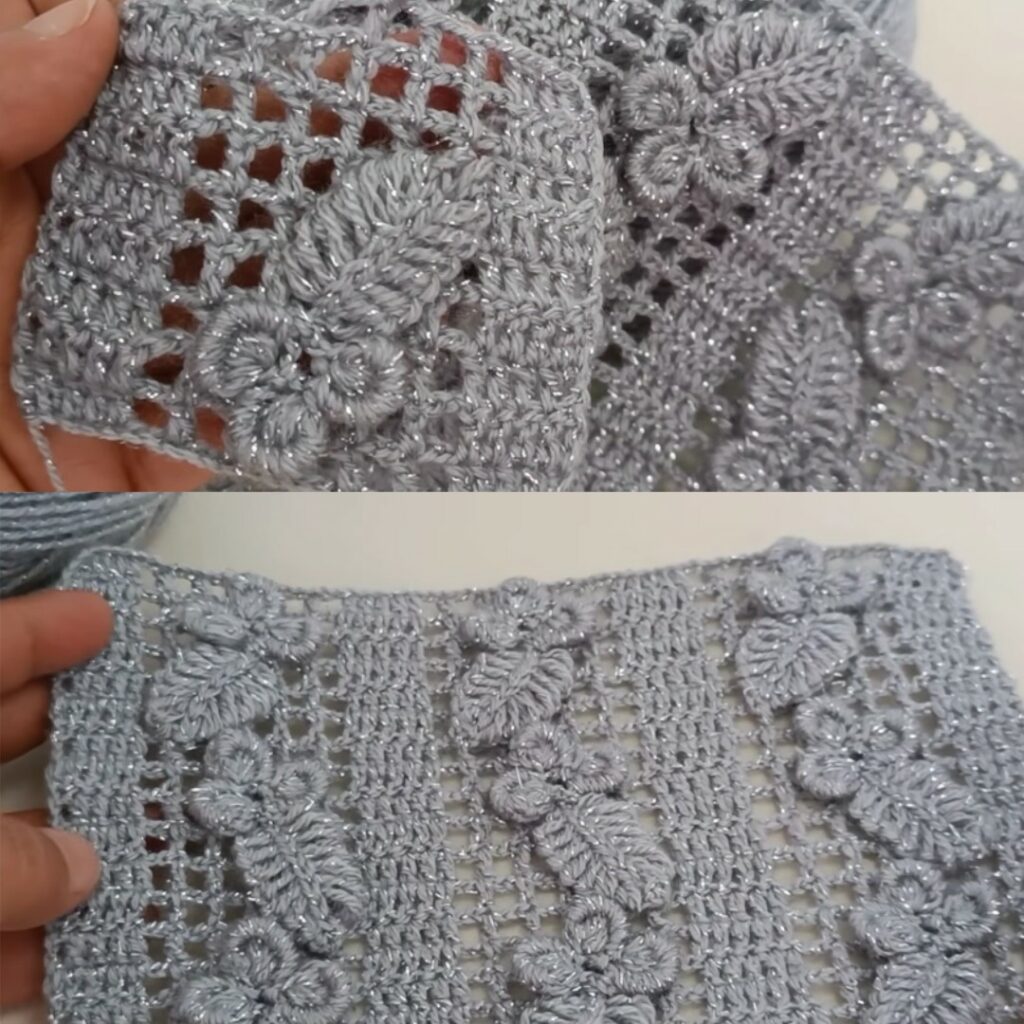
- After repeating for desired length, you’ll have a chain of raised leaves + flowers against the flat background.
5. Finishing & Edging
- After your last motif row, work 1–2 rows of sc across for a clean edge (ch 1, turn each row).
- For a decorative finish, work a round of shells or picots around edges if the piece is a motif panel for blouse or shawl.
- Fasten off, and weave all ends into back of work with tapestry needle.
- (Optional) Lightly block the piece to open the motifs and flatten background.
📋 Quick Reference Table
| Step | Action |
|---|---|
| Foundation | ch multiple +2, work 4–6 rows sc |
| Row A (Leaf relief) | sc x3, fpdc-ch1-fpdc in next st, repeat |
| Row B (Flower relief) | sc x2, tr-ch2-tr around anchor st, sl st next |
| Repeat motif rows | Alternate leaf & flower rows as desired |
| Edge rows | 1–2 rows sc for finish |
| Border | Optional shell or picot round |
✨ Tips & Adaptations
- Use contrasting yarn colour for leaves/flowers to make motifs stand out.
- If you want flatter fabric, use hdc instead of sc for base rows.
- For blouse panels: scale width by using more chains, use smaller hook/yarn for finer fabric.
- Use stitch markers to mark beginning of row or anchor points for relief stitches so alignment stays correct.
- When repeating motif rows, keep track of which row is “leaf” and which is “flower” so pattern repeats evenly.
- Because these are relief stitches (fpdc, tr around posts), keep tension slightly loose to allow motifs to stand up without pulling the background.
Video Tutorial: https://www.youtube.com/watch?v=dh8d9Bn0DZw&t=38s