 by
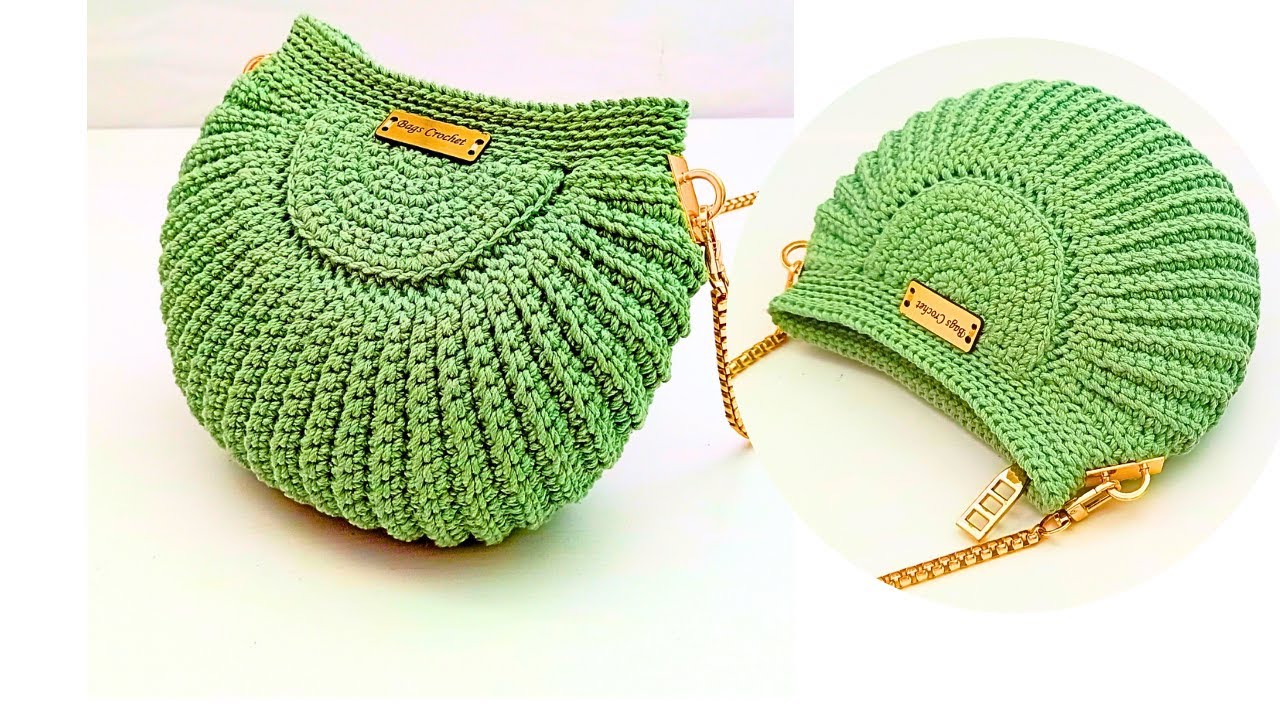
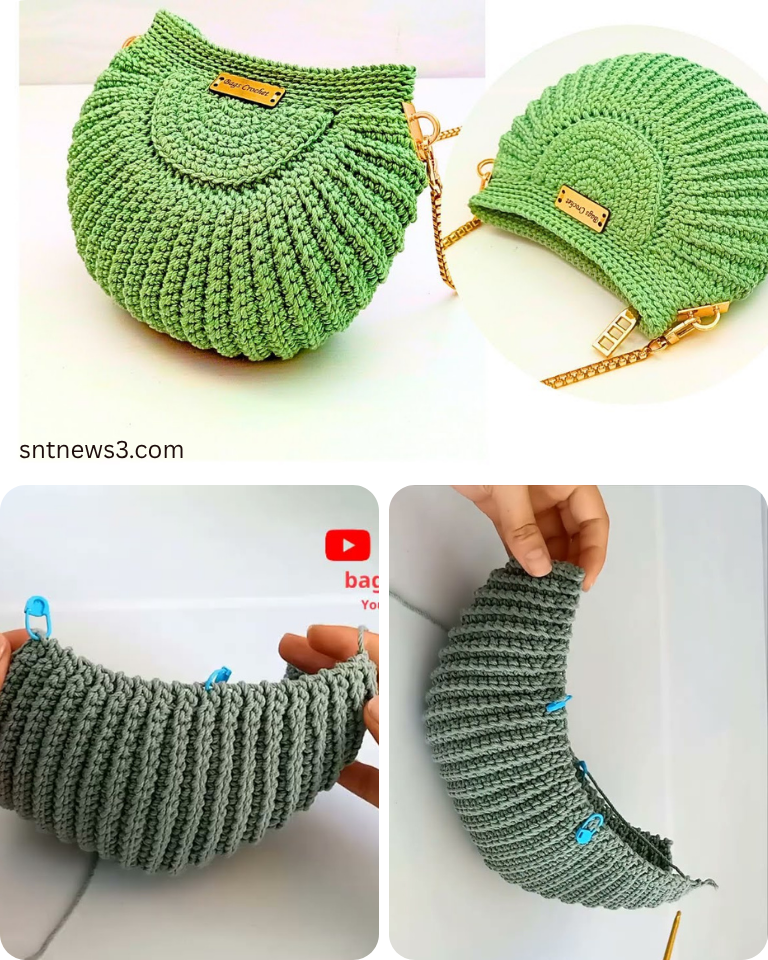
by In the realm of accessories, a small, elegantly crafted bag holds a special place. It’s not just about carrying essentials; it’s about adding a refined touch, a subtle statement of sophistication to your ensemble. A crocheted small rounded bag, made with careful attention to yarn choice and stitch detail, can be a stunning and versatile piece for an evening out, a formal event, or simply to elevate your everyday style.
This detailed article will guide you step-by-step through crocheting an elegant small rounded bag, emphasizing techniques that contribute to its refined appearance. We’ll focus on achieving a beautiful shape and a polished finish, proving that handmade can indeed be luxuriously chic. Get ready to crochet an accessory that will be admired for its grace and unique charm!

Why Crochet an Elegant Small Rounded Bag?
- Timeless & Versatile Style: The rounded shape is a classic that never goes out of fashion. It can be dressed up for formal occasions or used to add a chic touch to a casual outfit.
- Sophisticated Accessory: Your handmade creation will be a unique and personal statement piece, setting you apart from mass-produced items.
- Perfect for Essentials: It’s the ideal size for carrying just what you need: phone, keys, cards, lipstick – without being bulky.
- Skill Refinement: This project encourages precision in shaping, consistent tension, and meticulous finishing, enhancing your overall crochet skills.
- Thoughtful & Luxurious Gift: A handcrafted elegant bag is a deeply personal and cherished present that speaks volumes of your care.
- Sustainable Fashion Choice: Create a durable, lasting accessory that reduces reliance on fast fashion and celebrates artisan craft.
Key Considerations Before You Start:
- Size & Functionality:
- We’ll aim for a bag with an approximate diameter/height of 7-8 inches (18-20 cm). This size is ideal for a small evening bag or a minimalist everyday purse.
- Consider what you intend to carry; the smaller the bag, the more critical efficient packing becomes!
- Yarn Choice (Paramount for Elegance!):
- Fiber: This is where elegance truly begins. Choose fibers that offer a beautiful drape, subtle sheen, and excellent stitch definition. Avoid overly fuzzy, thick, or stretchy yarns.
- Mercerized Cotton: Has a lovely subtle sheen, crisp stitch definition, and is durable. Excellent for structure.
- Silk Blends/Fine Merino: For a truly luxurious feel and drape.
- Linen Blends: Offer a natural, sophisticated texture.
- High-Quality Acrylic (Smooth Finish): Look for acrylics known for their smooth, non-pilling texture.
- (Optional) Fine Metallic Thread: Can be held together with your main yarn for a touch of subtle sparkle.
- Weight: DK (Light Worsted / Category 3) or Sport (Category 2) are perfect. They allow for intricate stitch work and create a refined fabric.
- Colors: Opt for sophisticated hues: classic black, ivory, pearl gray, deep jewel tones (emerald, sapphire, ruby), soft blush, or elegant metallics (gold, silver).
- Fiber: This is where elegance truly begins. Choose fibers that offer a beautiful drape, subtle sheen, and excellent stitch definition. Avoid overly fuzzy, thick, or stretchy yarns.
- Hook Size:
- Match your hook to your yarn, but go down one half to a full size from the yarn label’s recommendation. This is crucial for creating a dense, firm fabric that will hold the bag’s rounded shape beautifully without sagging.
- For DK yarn, try 3.0 mm (US D/3) or 3.5 mm (US E/4).
- For Sport yarn, try 2.5 mm (US C/2) or 3.0 mm (US D/3).
- Gauge (Essential for Shape & Structure!):
- Make a test swatch (e.g., 4×4 inches in the chosen stitch pattern like Moss Stitch). The fabric should feel firm and hold its shape well. If it’s too loose, go down a hook size.
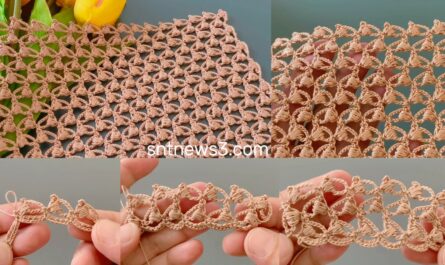
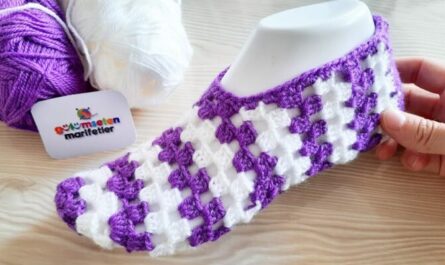
- Stitch Pattern:
- We will use the Moss Stitch (or Linen Stitch), which is a simple combination of single crochet and chain spaces. It creates a beautiful, dense, and elegant woven-like texture that’s perfect for bags.
- Construction Method: We will start with an oval base, work the body in continuous rounds using the elegant Moss Stitch, and then introduce gradual decreases at the top to achieve the distinct rounded shape. This method minimizes seaming for a cleaner finish.
- Handles/Straps:
- Delicate Crocheted Strap: A simple chain of slip stitches (for extreme thinness) or a very narrow flat sc strap.
- Metal Chain Strap: Purchase a thin, elegant metal chain with clasps for a sophisticated touch.
- Wristlet: A short loop for carrying by hand.
- Lining (Highly Recommended for Elegance!):
- A fabric lining is almost mandatory for an elegant bag. It prevents stretching, adds durability, ensures small items don’t slip through stitches, and gives the bag a truly luxurious, finished interior.
- Closure:
- Magnetic Snap: Sew-in magnetic snaps are discreet, secure, and easy to use.
- Decorative Button: A beautiful button with a simple crocheted loop.
- Kiss-lock Clasp: (More advanced, requires frame attachment).
Materials You’ll Need:
- Yarn: Approx. 150-250 yards of DK (Category 3) or Sport (Category 2) mercerized cotton, silk blend, or high-quality acrylic.
- Crochet Hook: Size D/3 (3.0 mm) or E/4 (3.5 mm) (adjust for desired fabric firmness and elegance).
- Yarn Needle (Tapestry Needle): For weaving in ends and sewing.
- Scissors: For cutting yarn and fabric.
- Stitch Marker: Essential for working in continuous rounds.
- For Lining (Highly Recommended):
- Matching or contrasting elegant fabric (e.g., satin, silk, quilting cotton).
- Matching sewing thread.
- Sewing machine (or hand-sewing needle, thimble, pins).
- Magnetic Snap: One set (approx. 0.75 inch / 1.8 cm diameter).
- Strap/Handle: Choose one:
- Approx. 40-50 inches (100-125 cm) of delicate metal chain with clasps.
- Or, extra yarn for a crocheted strap.
Essential Crochet Abbreviations:
- ch: chain
- sl st: slip stitch
- sc: single crochet
- sc2tog: single crochet 2 together (decrease)
- st(s): stitch(es)
- ch-sp: chain space
- BLO: back loop only
- FO: fasten off
- (): indicates instructions to be worked into the same stitch/space
- ***…***: repeat instructions within asterisks
- []: indicates stitch counts at the end of a round
Elegant Small Crochet Rounded Bag: Step-by-Step Tutorial (Approx. 7.5″ Diameter/Height)
We will use the Moss Stitch (sc, ch 1, skip 1) for the bag body. This creates a dense, elegant fabric.
Gauge Swatch (Moss Stitch): Ch 16. Row 1: Sc in 4th ch from hook, ch 1, skip next ch, sc in next ch. Repeat from * across. (8 sc, 7 ch-1 sps) Rows 2-10: Ch 2 (counts as sc, ch 1), turn. Sc in first ch-1 sp, ch 1, skip next sc, sc in next ch-1 sp. Repeat from * across, ending with sc in the ch-2 sp of previous row. Your swatch should be about 4 inches (10 cm) square. The fabric should feel firm and dense. Adjust hook size if needed.
Part 1: The Base (Achieving the Rounded Foundation)
This oval base forms the bottom of your bag. Use your Main Color yarn.
- Round 1: Ch 21.
- Sc in 2nd ch from hook. Sc in next 18 ch.
- (3 sc) in last ch.
- Working along the opposite side of the foundation chain: Sc in next 18 ch.
- (2 sc) in the very first ch where you made your first sc.
- Join with a sl st to the first sc.
- [42 sc]
- Round 2: Ch 1. Sc in first st. Sc in next 18 sts.
- (3 sc) in next st.
- Sc in next 20 sts.
- (3 sc) in next st.
- Sc in next st.
- Join with a sl st to the first sc.
- [46 sc]
- Round 3: Ch 1. Sc in first st. Sc in next 19 sts.
- (3 sc) in next st.
- Sc in next 22 sts.
- (3 sc) in next st.
- Sc in next st.
- Join with a sl st to the first sc.
- [50 sc]
- Your base should measure approx. 7.5 inches (19 cm) long and 2.5-3 inches (6-7.5 cm) wide. It should lay perfectly flat.
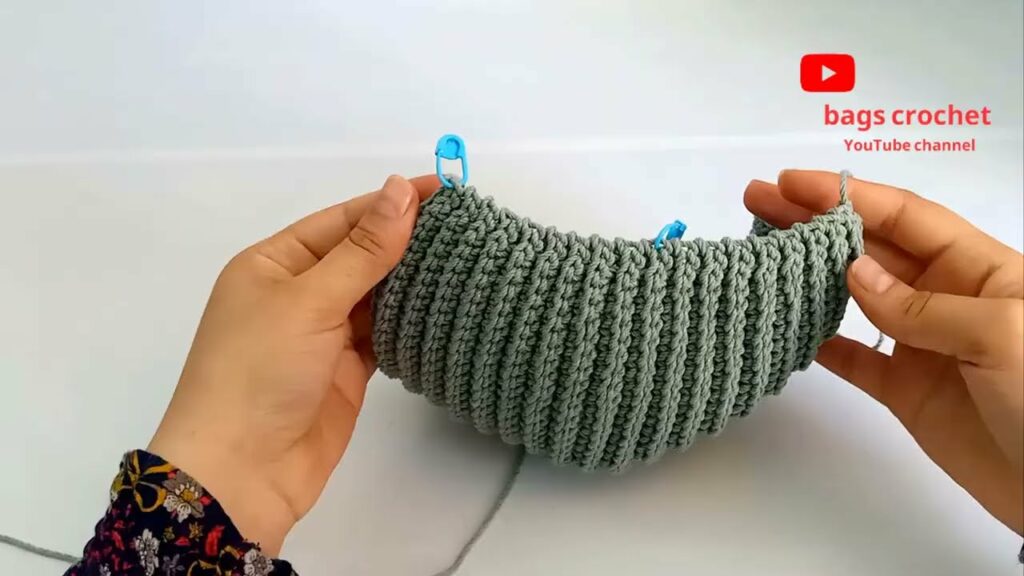
Part 2: Building the Bag Body (Elegant Texture – Moss Stitch)
This creates the main body of the bag with its beautiful texture.
- Round 4 (Establish Wall – BLO): Ch 1. Sc in the back loop only (BLO) of each sc around. Join with a sl st to the first sc.
- [50 sc]
- This BLO round creates a crisp edge that defines the bottom of the bag.
- Round 5 (Moss Stitch): Ch 2 (counts as sc, ch 1). Sc in first ch-1 sp. Ch 1, skip next sc, sc in next ch-1 sp. Repeat from * around. You will end with a ch 1. Join with a sl st to the 1st sc of the ch 2.
- [25 sc, 25 ch-1 sps]
- Note: When working in the round with Moss Stitch, the ‘sc’ stitches will be worked into the ‘ch-1 sps’ of the previous round.
- Rounds 6 – 20 (Body Height): Ch 2. Sc in first ch-1 sp. Ch 1, skip next sc, sc in next ch-1 sp. Repeat from * around, ending with ch 1. Join with a sl st to the 1st sc of the ch 2.
- [25 sc, 25 ch-1 sps]
- Continue working these rounds until your bag reaches approx. 6 inches (15 cm) in height from the base. Try to hold it to your phone to check height.
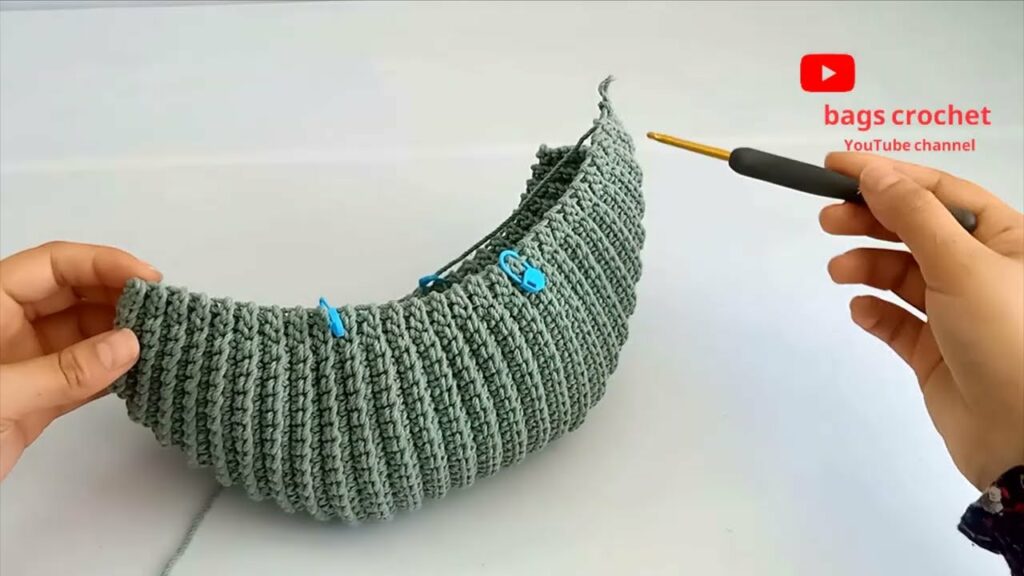
Part 3: Shaping the Rounded Top
Now, we’ll gradually decrease stitches to create the graceful rounded top.
- Round 21 (Decrease 1): Ch 1. (Sc in ch-1 sp, sc in sc, sc in ch-1 sp, sc2tog over next sc and ch-1 sp, then sc in sc). Repeat from * around. (Aim for 5 decreases evenly spaced). Join with a sl st to the first sc.
- [Approx. 45 sc] (Exact count may vary depending on how you make the decrease over ch-sp, but aim for roughly 5 decreases).
- Transitioning from Moss Stitch: For decreases, it’s easier to switch to all single crochet for a few rounds.
- Round 22 (Decrease 2): Ch 1. (Sc in next 7 sts, sc2tog). Repeat from * around. (Aim for 5 decreases evenly spaced). Join with a sl st to the first sc.
- [Approx. 40 sc]
- Round 23 (Final Top Shaping): Ch 1. Sc in each sc around. Join with a sl st to the first sc.
- [Approx. 40 sc]
- This creates the smooth curve of the top opening.
Part 4: The Finishing Edge & Closure
A neat edge and discreet closure maintain elegance.
- Round 24 (Final Edge): Ch 1. Sl st in each sc around. Join with a sl st to the first sl st.
- FO, leaving a short tail to weave in.
- Attach Magnetic Snap:
- Position the two halves of your magnetic snap to the inside top edges of the bag, ensuring they align perfectly when the bag closes.
- Using a needle and matching thread, sew the snaps very securely to the fabric. Make sure your stitches don’t show through to the outside.
Part 5: The Strap (Delicate Detail)
Choose either a crocheted strap or a metal chain.
- Option A: Slim Crocheted Strap (Approx. 45-50 inches / 115-125 cm for shoulder/crossbody)
- Ch 120 (adjust for desired length).
- Sl st in 2nd ch from hook and in each ch across.
- FO, leaving long tails (6-8 inches) at both ends.
- Attach Strap: Using your yarn needle, securely sew each end of the strap to the top side edges of the bag (roughly centered on the side). Stitch multiple times for durability, hiding stitches.
- Option B: Metal Chain Strap:
- Attach the clasps of your purchased metal chain strap to the top side edges of the bag. You can either directly hook them into the crochet fabric (if the chain links are fine enough) or create small crocheted loops on the inside top edges for the clasps to attach to.
Part 6: Adding the Lining (The Mark of Elegance)
This is crucial for durability, shape, and a luxurious feel.
- Measure: With your bag laying flat, measure its width, height (from base to top opening), and depth (at the base). You’ll essentially be creating a fabric box that fits perfectly inside.
- Cut Fabric:
- Cut two main rectangular pieces for the body: (Bag Width + 1 inch seam allowance) by (Bag Height + 2 inches for top hem allowance).
- Cut one rectangular piece for the bottom: (Bag Base Width + 1 inch seam allowance) by (Bag Base Depth + 1 inch seam allowance).
- Example for our bag: (7.5″ W + 1″) = 8.5″ W x (7.5″ H + 2″) = 9.5″ H for body pieces. Base: 7.5″ L x 2.5″ D + 1″ = 8.5″ L x 3.5″ D.
- Sew Lining:
- With right sides together, sew the two main body pieces together along their side seams using a 1/2-inch (1.25 cm) seam allowance.
- Press seams open.
- Create box corners at the bottom: For each bottom corner, flatten the side seam against the bottom fold. Stitch across to create a triangular shape, measuring the width of your bag’s base depth (e.g., 2.5 inches / 6 cm) across the flattened corner. Trim excess.
- Sew the bottom rectangle piece to the main body, aligning edges.
- Hem the top edge by folding it over twice (e.g., 1 inch fold, then 1 inch again) and stitching down.
- Insert & Hand Stitch: Carefully insert the finished fabric lining into your crocheted bag, ensuring it fits snugly. Hand-stitch the top hem of the fabric lining securely to the inside top edge of your crocheted bag, just below the opening, using very fine, invisible stitches.
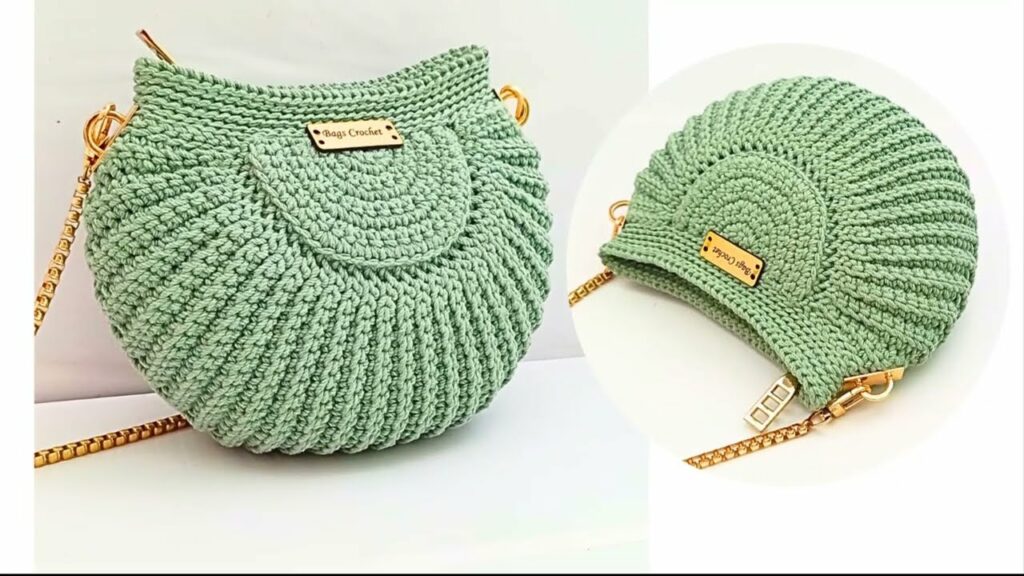
Your Elegant Small Crochet Rounded Bag is Complete!
You’ve created a truly graceful, versatile, and beautifully finished accessory that is both functional and a testament to your refined crafting skills.
Tips for Success & Elevating Elegance:
- Yarn Selection is Paramount: The feel, drape, and subtle sheen of your yarn will significantly impact the bag’s elegance. Don’t compromise on yarn quality for this type of project.
- Tension & Stitch Definition: Consistent tension is crucial for the Moss Stitch to appear uniform and for the bag to hold its elegant rounded shape. Practice your gauge swatch until you achieve a dense, even fabric.
- Blocking (Critical for Shape): After completing the crocheted part (before lining), wet block your bag. Gently stuff it to maintain its rounded shape (e.g., with plastic bags or a balloon), mist it generously, and allow it to dry completely. This will open up the stitches and set the shape beautifully.
- Lining is the Finishing Touch: A well-sewn lining elevates a handmade bag from “crafty” to “couture.” Take your time with this step for a truly professional result.
- Subtle Hardware/Embellishments: For an elegant bag, less is often more. Choose hardware (snaps, chain straps) in classic finishes like gold, silver, or gunmetal. Avoid excessive or overly bulky embellishments.
- Care: Always refer to your yarn label for specific care instructions. Most crocheted bags are best hand washed and laid flat to dry (perhaps gently re-stuffed for shape) to maintain their beauty and integrity.
Carry your beautiful, handmade creation with pride and enjoy the compliments!
Video tutorial: