 by
by Handmade coasters are more than just practical items to protect your furniture from drips and heat; they’re tiny canvases that add a pop of color, texture, and handmade charm to any space. They’re quick to make, perfect for using up leftover yarn, and make incredibly thoughtful gifts. Even if you’re a beginner, you can create stunning coasters that look far more intricate than they are.
This detailed article will guide you through crocheting a beautiful, functional coaster that will impress with its simplicity and elegance. Get ready to add a touch of handmade artistry to your home!

Why Make Your Own Gorgeous Coasters?
- Practicality: The primary function – protecting your tables and surfaces from condensation rings, heat marks, and spills.
- Decorative Flair: Instantly adds personality, color, and texture to coffee tables, bedside tables, or office desks.
- Quick Project: Most coasters can be crocheted in under an hour, offering immediate gratification and a sense of accomplishment.
- Skill Builder: Excellent for practicing fundamental stitches, working in the round, achieving consistent tension, and reading patterns.
- Stash Buster: Coasters are ideal for using up those small, leftover skeins of yarn from larger projects.
- Thoughtful Gifts: Handmade coasters make fantastic housewarming gifts, holiday presents, or thoughtful tokens for friends and family.
- Endless Customization: Experiment with different colors, stitch patterns, shapes, and edgings to create unique sets.
Key Considerations for a Gorgeous Coaster:
To ensure your coaster is both beautiful and functional, keep these points in mind:
- Yarn Choice (Crucial for Functionality!):
- Fiber: 100% Cotton is highly, highly recommended. Cotton is naturally absorbent, can withstand heat from hot beverages without melting (unlike acrylic), and is easy to wash. While acrylic yarn is soft and comes in many colors, it’s not ideal for hot drinks as it can melt or deform with heat. Wool can be used but might felt with repeated wetting/drying.
- Weight: Worsted weight (Category 4) is perfect for a sturdy, quick-to-make coaster. DK (Category 3) will result in a slightly finer, perhaps more delicate coaster.
- Colors: Unleash your creativity! Solids make stitches pop, contrasting borders add visual interest, and variegated yarns create their own unique patterns.
- Hook Size: Always choose a hook size that matches your yarn, but consider going down half a size from the yarn label’s recommendation. This creates a denser fabric with fewer gaps, making the coaster more effective at absorbing moisture and helping it lie flat without curling.
- Stitch Pattern: For the body of the coaster, simple, dense stitches like single crochet (sc), half double crochet (hdc), or double crochet (dc) are best. The “gorgeous” aspect often comes from a decorative edging applied to a simple, solid base.
- Shape: Round and square are the most common and easiest. This tutorial will focus on a classic round coaster with a pretty edge.
- Flatness: The key to a good coaster is that it lies perfectly flat. This is achieved by following the correct increase pattern when working in the round.

Materials You’ll Need:
- Yarn: Approx. 20-30 yards of 100% cotton yarn (Worsted weight recommended).
- Crochet Hook: To match your yarn (e.g., 4.0mm (US G/6) or 4.5mm (US 7) for Worsted weight cotton).
- Yarn Needle (Tapestry Needle): For weaving in ends.
- Scissors:
- Stitch Marker (optional): To mark the beginning of rounds if you’re a beginner.
Essential Crochet Abbreviations:
- ch: chain
- sl st: slip stitch
- sc: single crochet
- hdc: half double crochet
- dc: double crochet
- inc: increase (e.g., sc inc = 2 sc in same st)
- st(s): stitch(es)
- ch-sp: chain space
- (): indicates instructions to be worked into the same stitch/space
- ***…***: repeat instructions within asterisks
- []: indicates stitch counts at the end of a round
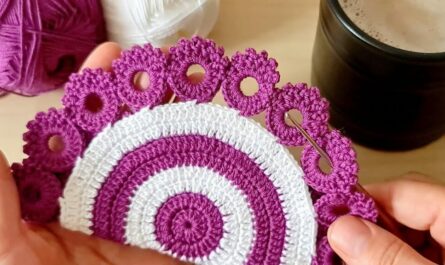
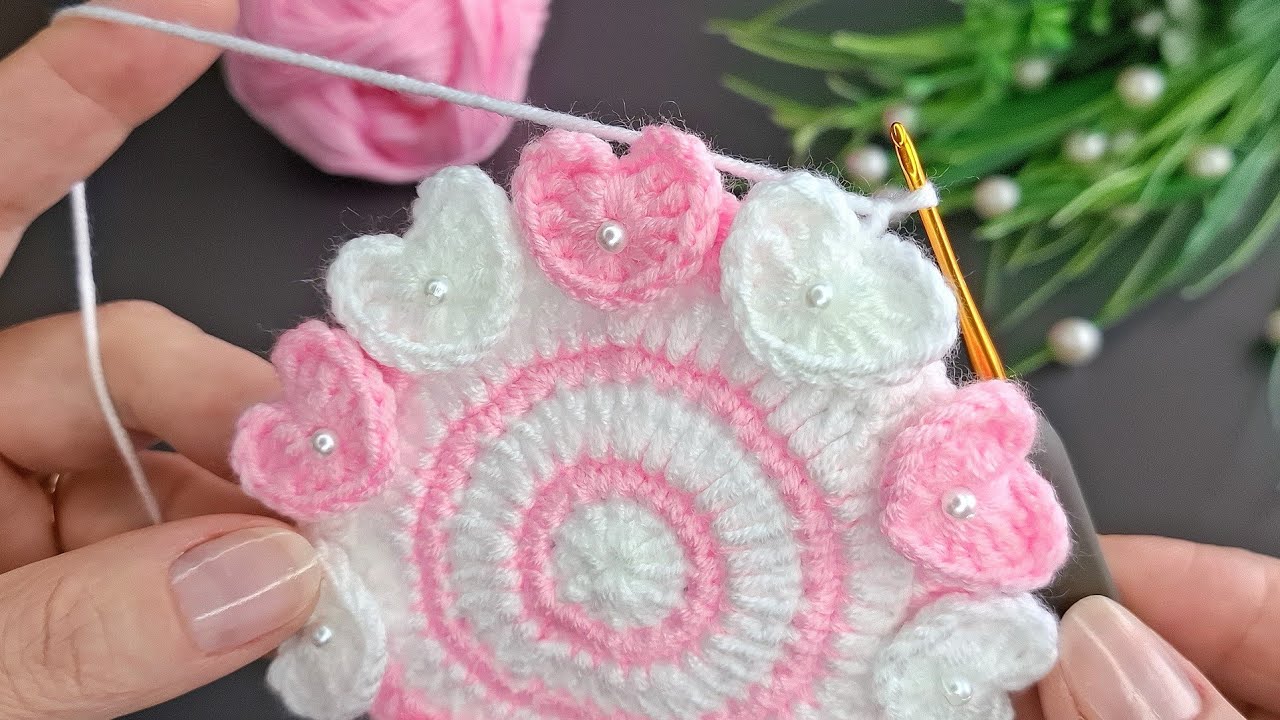
Gorgeous Round Coaster Tutorial (Solid Base with Scallop Edge)
This tutorial will create a coaster approximately 4.5-5 inches (11-12 cm) in diameter. We’ll use half double crochet (hdc) for the main body for speed and density, and a simple scallop edge for elegance.
Getting Started: The Magic Ring (Recommended for a Tight Center)
The Magic Ring (also called Magic Circle or Adjustable Ring) creates a tight center hole, which is ideal for coasters. If you find it tricky, you can use the Ch 4 method (Ch 4, sl st into 1st ch to form a ring).
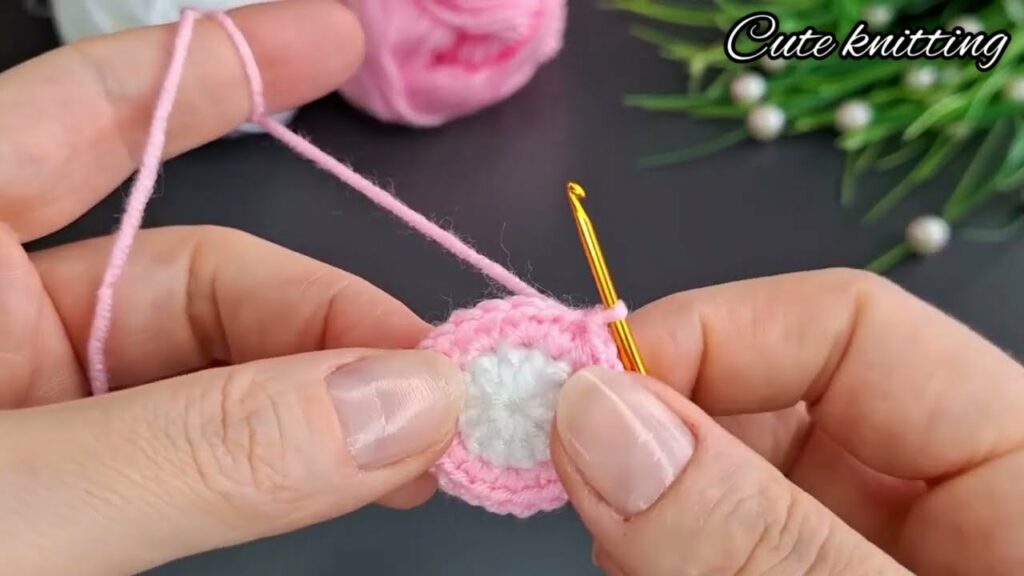
- Create a Magic Ring.
- Round 1: Ch 2 (does NOT count as a st). Work 10 hdc into the Magic Ring. Pull the tail of the Magic Ring tight to close the center hole. Join with a sl st to the top of the first hdc. [10 hdc]
Building the Solid, Flat Circle (Increase Rounds):
The key to a flat circle is a consistent increase pattern. Each round will add the same number of stitches as your starting round (in this case, 10 stitches).
- Round 2: Ch 2. Hdc inc (2 hdc) in each st around. Join with a sl st to the top of the first hdc. [20 hdc]
- Round 3: Ch 2. Hdc in next st, hdc inc in next st. Repeat from * around. Join with a sl st to the top of the first hdc. [30 hdc]
- Round 4: Ch 2. Hdc in next 2 sts, hdc inc in next st. Repeat from * around. Join with a sl st to the top of the first hdc. [40 hdc]
- Round 5: Ch 2. Hdc in next 3 sts, hdc inc in next st. Repeat from * around. Join with a sl st to the top of the first hdc. [50 hdc]
- At this point, your coaster body should be flat. If it’s starting to curl up like a bowl, your tension might be too tight, or you need to add an extra increase in this round. If it’s ruffling, you might have too many increases – consider skipping an increase or going down a hook size.
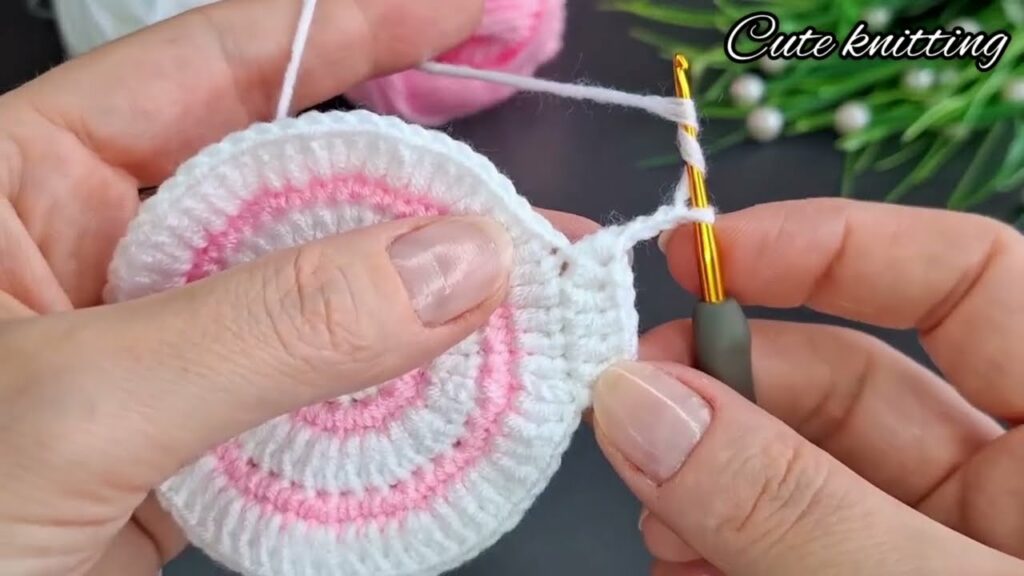
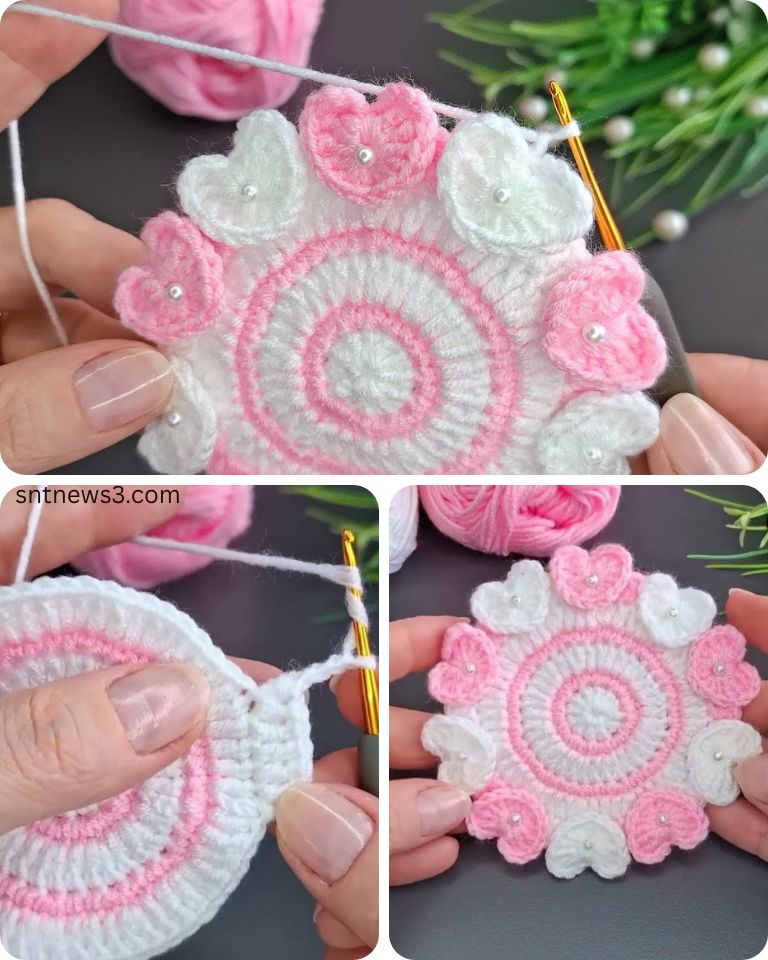
Adding the Gorgeous Decorative Edge:
Now for the pretty part! This simple scallop edge adds elegance.
- Round 6 (Scallop Edge): Ch 1 (does NOT count as a st).
- Skip 1 st. Work (sc, hdc, dc, hdc, sc) into the next st (this forms your first scallop).
- Skip 1 st. Sl st into the next st.
- Repeat from * around the entire coaster. You should end with a sl st.
- Sl st to the beginning Ch 1 or the first sc of the round to join neatly.
- FO, leaving a 6-inch (15 cm) tail.

Finishing Your Coaster:
- Weave in All Ends: Thread the yarn tail onto your yarn needle. Carefully weave the tail through several stitches on the wrong side of your coaster, ensuring it’s secure and hidden. Trim any excess. Do the same for your starting tail if using the Chain 4 method. For a Magic Ring, pull the tail tight and weave it through the center stitches for extra security.
- Blocking (Highly Recommended!):
- Wet Blocking: Submerge your coaster in lukewarm water for about 15-20 minutes. Gently squeeze out excess water (do not wring!).
- Pinning: Lay the damp coaster flat on a blocking mat or a thick towel. Gently stretch and pin the edges of the coaster into a perfect circle, making sure the scallops are evenly spaced.
- Drying: Allow the coaster to air dry completely (this can take several hours or overnight). Once dry, remove pins.
- Blocking is a game-changer for coasters! It evens out your stitches, makes the coaster lie perfectly flat, and truly showcases the decorative edge.
Tips for Success & Making it Truly “Gorgeous”:
- Consistent Increases: The number of stitches between increases in a flat circle always increases by one in each subsequent round (e.g., 0 sts between increases in R1, 1 st in R2, 2 sts in R3, etc.). This is key to preventing curling or ruffling.
- Tight Center: Master the Magic Ring for a professional, hole-free center.
- Color Play:
- Try making the body in one color and the decorative edge in a contrasting color.
- Use variegated cotton yarn for a beautiful, self-striping effect with minimal effort.
- Create a set of coasters in different solid colors that complement each other.
- Set Creation: Once you’ve made one, make a few more to create a matching set! Tie them together with a ribbon for a lovely gift.
- Personalization: For an extra touch, you could embroider a small initial or a simple motif onto a finished coaster.
You’ve now created a truly gorgeous and functional crocheted coaster! Enjoy the beauty and practicality of your handmade creation, and don’t be surprised if your friends and family start requesting their own sets. Happy hooking!
Video tutorial: