 by
by Materials
- Yarn: light / sport / DK (or fingering for delicate look). Example: 200–400 g (depends on project).
- Hook: 3.0 mm – 4.5 mm depending on yarn weight and how open you want the lace.
- Scissors, tapestry needle, stitch marker (optional), blocking pins & mat (recommended).
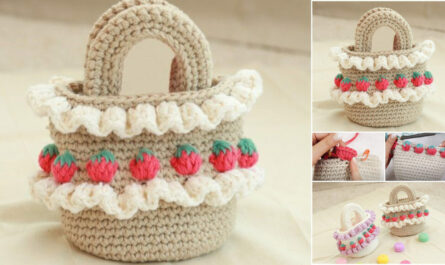
- Finished uses: scarf, shawl, blouse panels, runner, edging.
Abbreviations (US terms)
- ch = chain
- sc = single crochet
- hdc = half-double crochet
- dc = double crochet
- tr = treble (triple) crochet
- sl st = slip stitch
- st = stitch
- sp = space
- rep = repeat
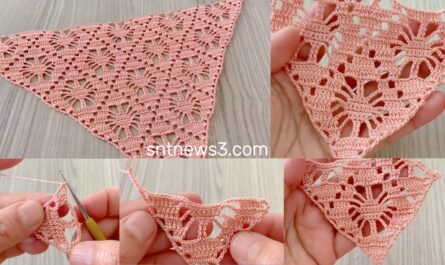
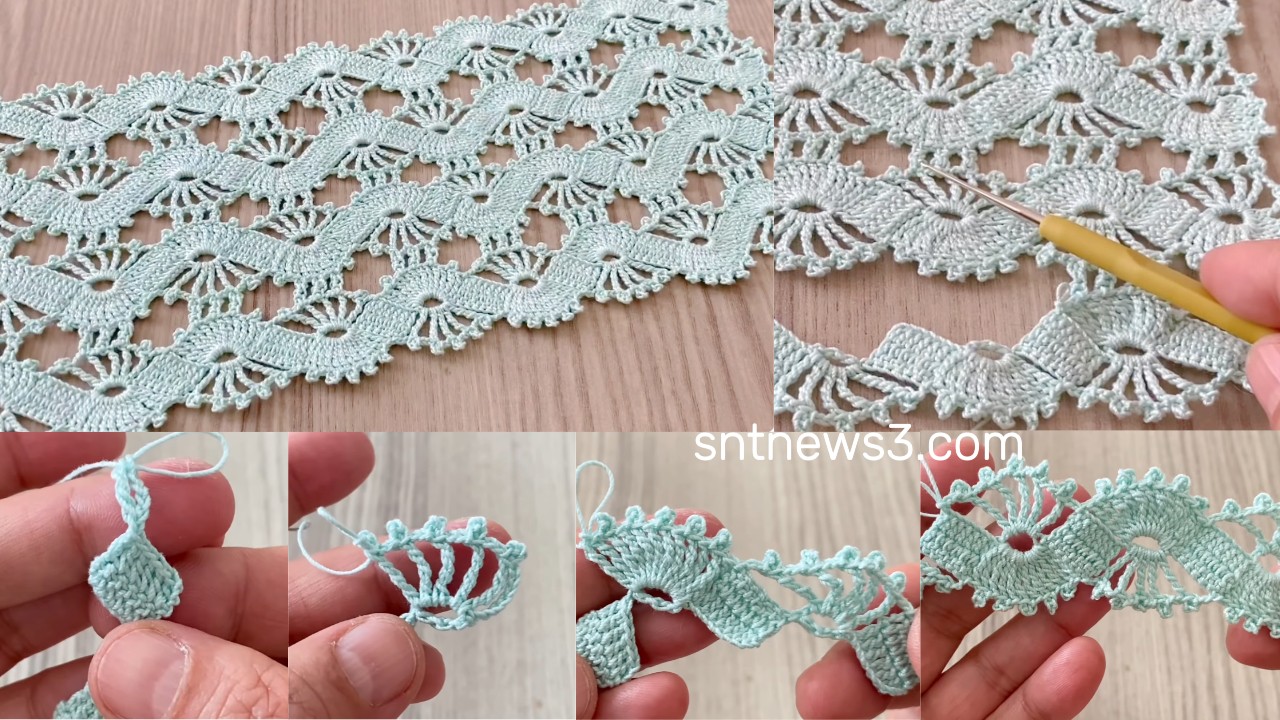
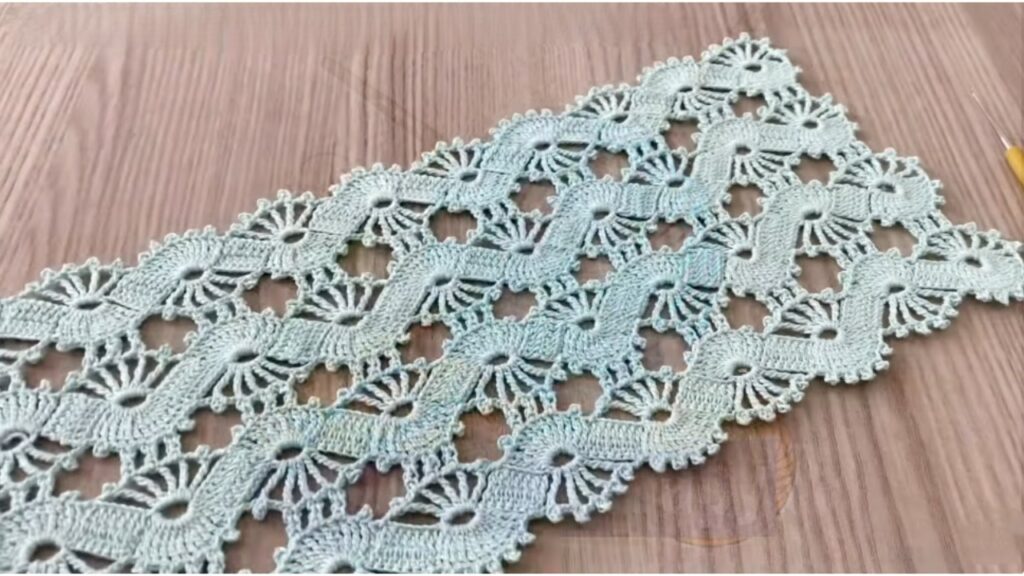
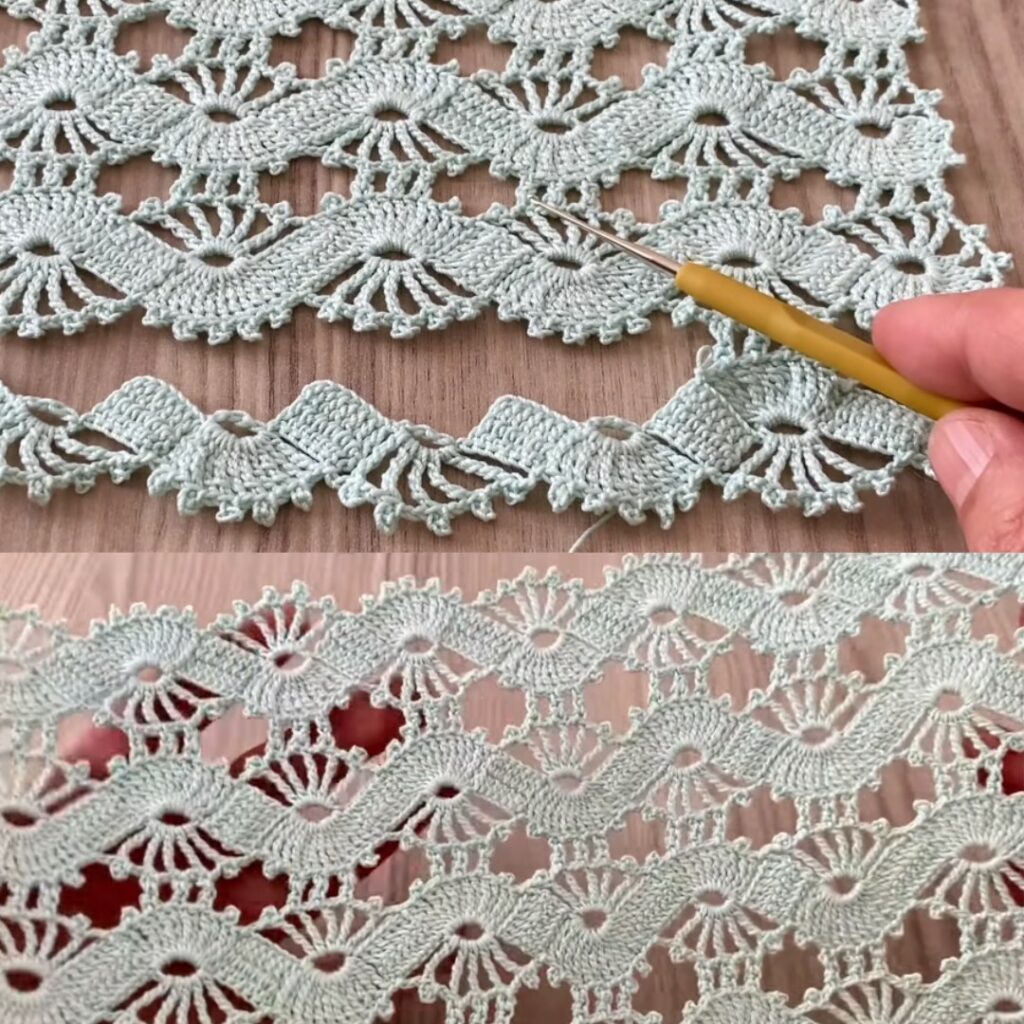
Pattern notes & concept
- Repeat unit: multiple of 6 + 2 (this gives a balanced series of arches and shells).
- The pattern uses three main rows that repeat:
- Loop / arch row (creates chain loops that become anchor points)
- Shell / petal row (work shells/fans into loops)
- Spacer / lift row (taller chains to make room) — sometimes followed by a larger shell row for a richer look.
- Work flat in rows (turn at ends). You can join motifs later to make wider pieces.
Sample swatch foundation (concrete example)
- Foundation chain (sample): ch 44 (6 × 7 + 2).
- Gauge will vary; this sample with DK yarn + 4.0 mm hook produces a ~10 × 20 cm swatch after 6 repeats — adjust for your project.
Step-by-step pattern (row-by-row)
Row 0 — (optional) base row for a neat edge
- Ch 44 (or your chosen multiple).
- Optional: sc in 2nd ch from hook and each ch across. Turn.
Use this optional row if you’ll be attaching the lace to fabric or want a firm starting edge.
Row 1 — Loop / Arch setup
- sc in next 2 sts, ch 4, skip 2 sts — repeat from * across to last 2 sts.
- sc in last 2 sts. Turn.
Result: a row of evenly spacedch-4loops (arches) across the foundation.
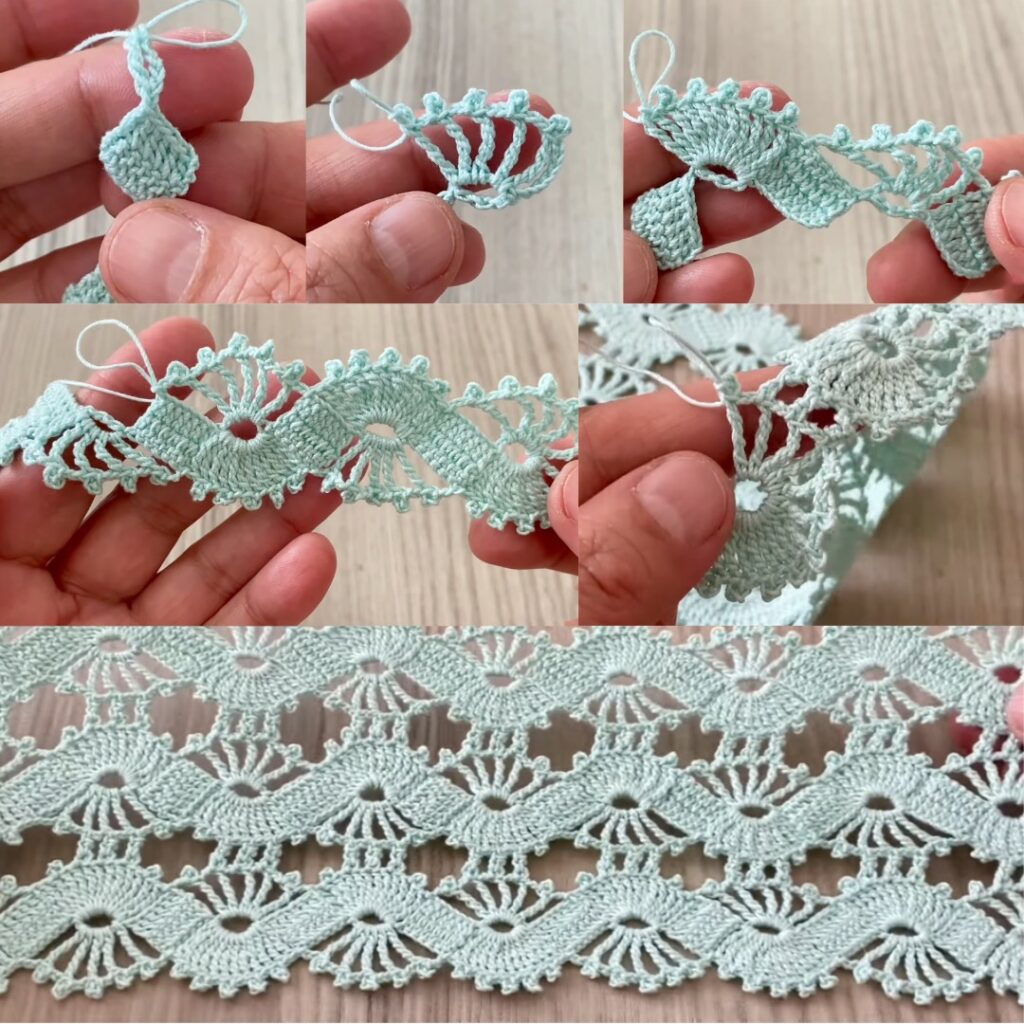
Row 2 — Shell / Petal row (work into the ch-4 loops)
- Into each ch-4 loop work: (dc3, ch2, dc3) — a 3–2–3 shell (fan).
- Between shells, work sc into the anchor stitch (the sc from previous row) to secure and space shells.
- Repeat across; finish with sc in final anchor. Turn.
Result: small floral shells sit on the arches.
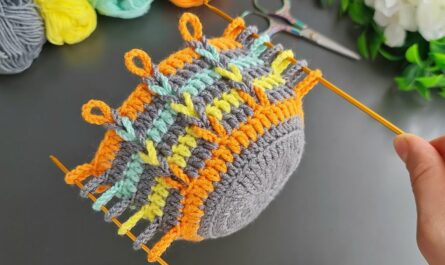
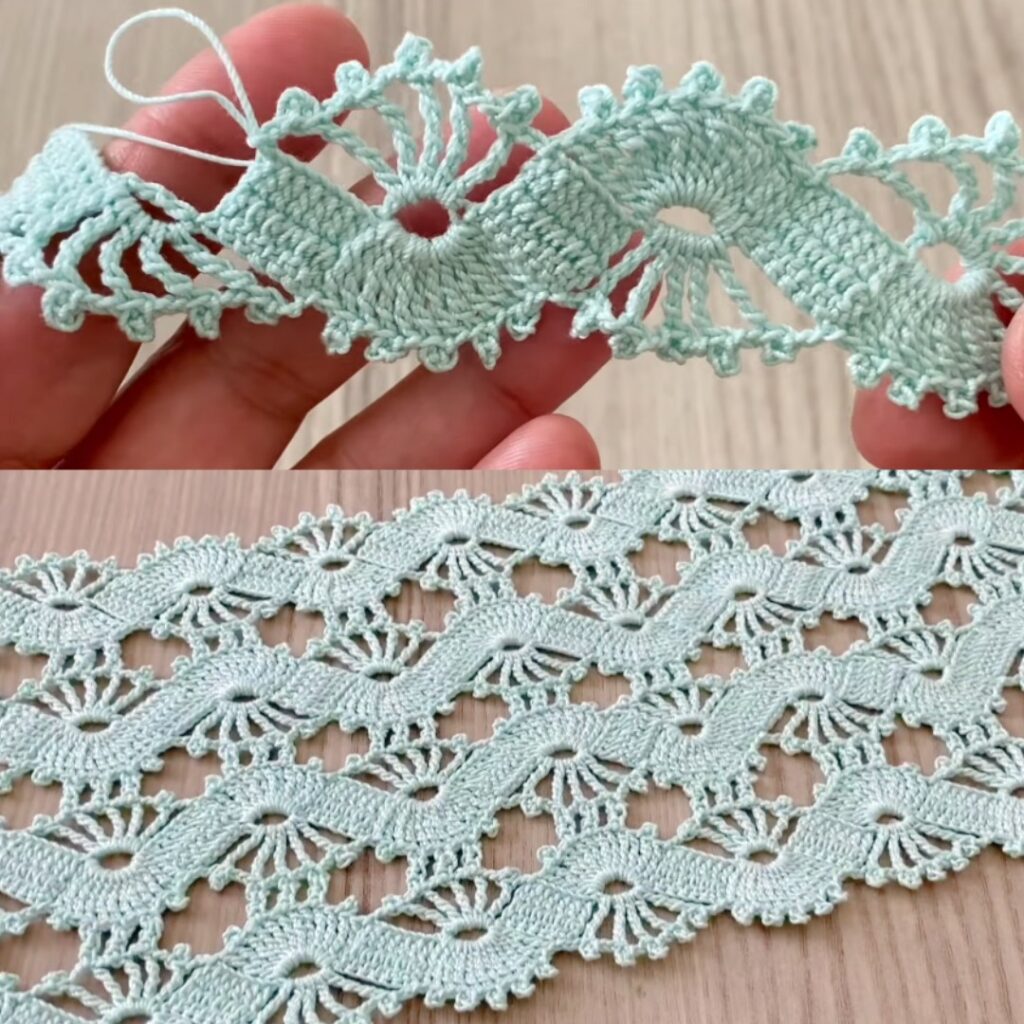
Row 3 — Spacer / Lift row (gives room for next layer)
- sc in first stitch.
- ch 5, sc in top of next shell (or in anchor stitch between shells) — repeat across.
- End with sc in last stitch. Turn.
Result: tallerch-5loops above the shell row for airy lace.
Row 4 — Larger shell / petal layer (optional — fuller pattern)
- Into each ch-5 space work: (sc, dc5, sc) — a fuller petal.
Alternate option: use(3 dc, ch2, 3 dc)in ch-5 for a lacy fan instead of dense dc5. - Anchor with sc into the anchor stitches between loops. Repeat across and turn.
Result: larger petals/second layer; makes pattern richer and 3D.
Row 5 — Repeat sequence
- Repeat Row 1 → Row 4 (or Row 1 → Row 3 for a simpler repeat) until piece reaches the desired length.
- Example simple repeat for airy fabric: Row1, Row2, Row3 — repeat.
- Example fuller repeat for decorative fabric: Row1, Row2, Row3, Row4 — repeat.
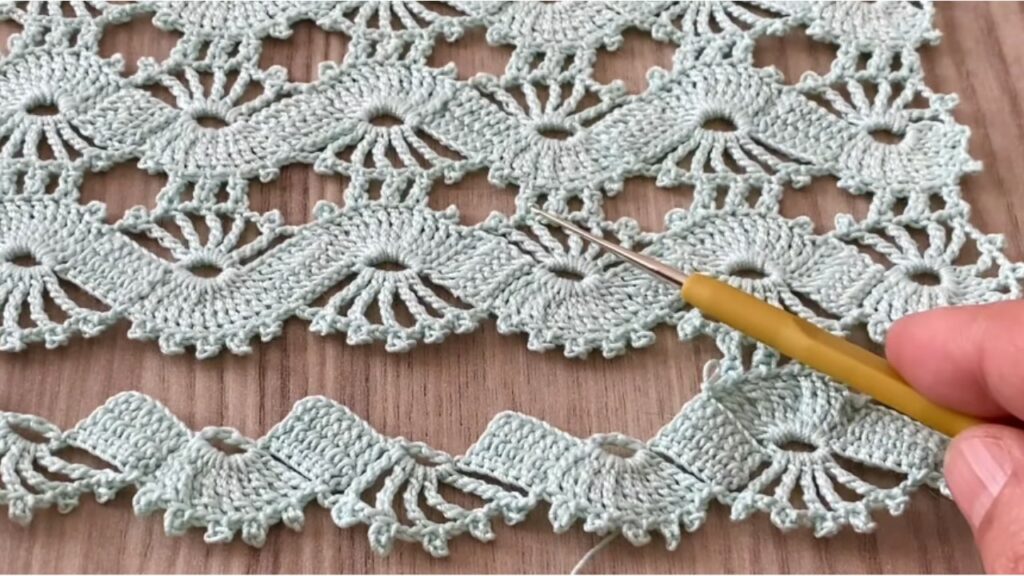
Finishing
- Once desired length reached, work 1 round/row sc around the entire panel (if you made a rectangle, sc up sides and across top) for a neat border.
- Optional: add decorative finishing: crab stitch (reverse sc) or a picot row (
*ch3, sl st into first chain of ch3*) spaced along the top edge. - Weave in all ends; block the piece (wet or steam) and pin to open the shells and flatten the lace. Blocking dramatically improves this style.
Example project conversions (how many chains / repeats)
- Scarf (narrow): foundation ch 34–46 (≈ 6–8 repeats), repeat rows until length ~150–180 cm.
- Shawl / wrap (panel): ch 80–120 (scale to desired width), repeat rows until depth ~60–80 cm.
- Blouse panel (front/back): measure half-bust width in cm, convert to stitches using your gauge (one repeat = 6 sts). Make two panels and seam shoulders & sides leaving armholes.
- Table runner: make long strip: ch as many repeats as table width; repeat rows until length desired.
If you want precise stitch counts for a finished measurement, tell me a target width and yarn/hook and I’ll calculate the chain count and number of repeats.
Troubleshooting & tips (practical)
- Ruffles (wavy edge): too many increases — reduce
chsize for arches (usech-3instead ofch-4) or skip the larger shell row sometimes. - Cupping (bowl effect): not enough increases — add extra
dcinto each shell (e.g., dc4 instead of dc3) or add another increase round. - Shells look tight: loosen tension or use 0.5–1 mm larger hook for shell rows.
- Shells collapse / not defined: block the work; shells open nicely after wet/steam blocking.
- Handles / straps (for bag): crochet chain loops anchored into top border, reinforce with 1–2 rows sc around handle bases.
- Joining multiple panels: use join-as-you-go on last round (work sl st into corresponding ch-spaces of adjoining panel) to avoid sewing.
Variations (fast ideas)
- Two-color look: change color every two rows (e.g., shells in contrast color) for bold stripes.
- Denser version: replace dc3 shells with dc5 and use
ch-3loops for smaller, denser lace. - Chunky version for home décor: use bulky yarn, ch-1 / ch-2 loops and large dc clusters to get a statement look (hooks 8–12 mm).
- Edging: work the same motif as a narrow tape (small chain, repeat across) to make decorative edging for towels or garments.
Sample row-by-row table (concise)
| Row | Action |
|---|---|
| 0 (opt) | sc across foundation chain |
| 1 | sc x2, ch4, skip2 across (loop row) |
| 2 | Work (dc3, ch2, dc3) in each ch4; sc anchors between shells |
| 3 | sc, ch5, sc in next anchor across (spacer row) |
| 4 (opt) | In each ch5: (sc, dc5, sc) or (3 dc, ch2, 3 dc) — larger petal |
| repeat | Repeat rows 1–4 (or 1–3 for simpler) |
Video: