 by
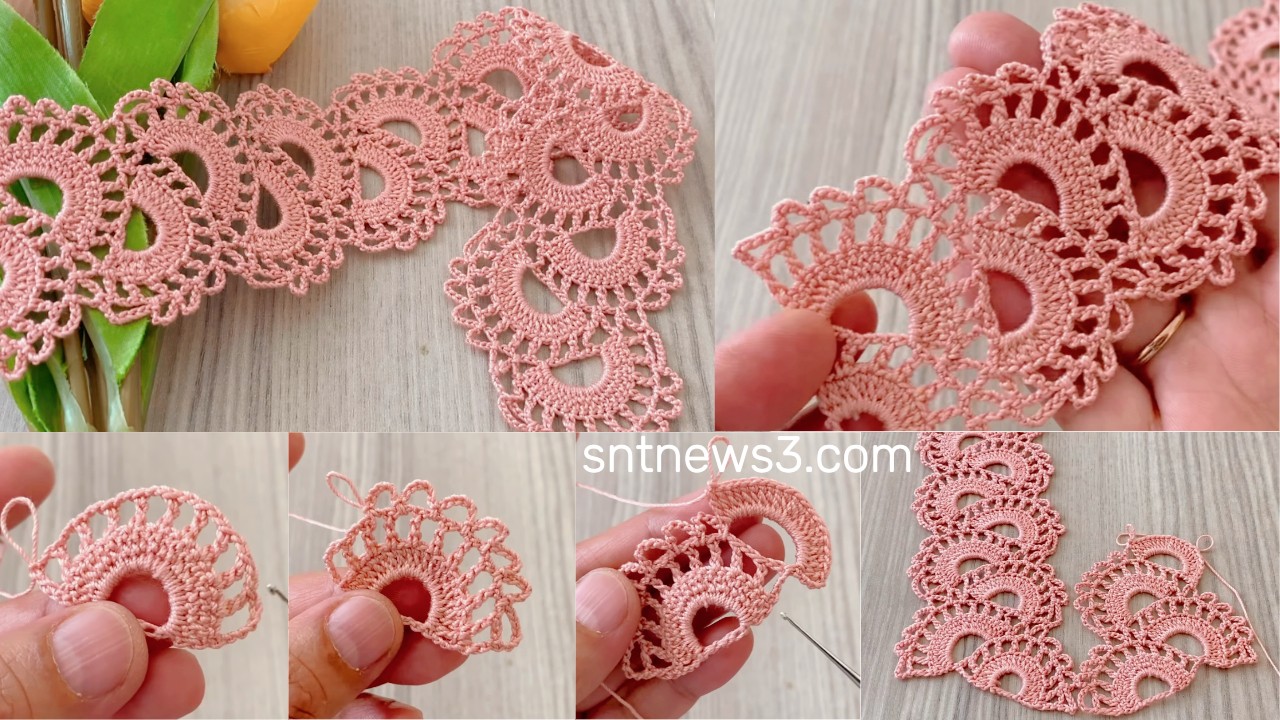
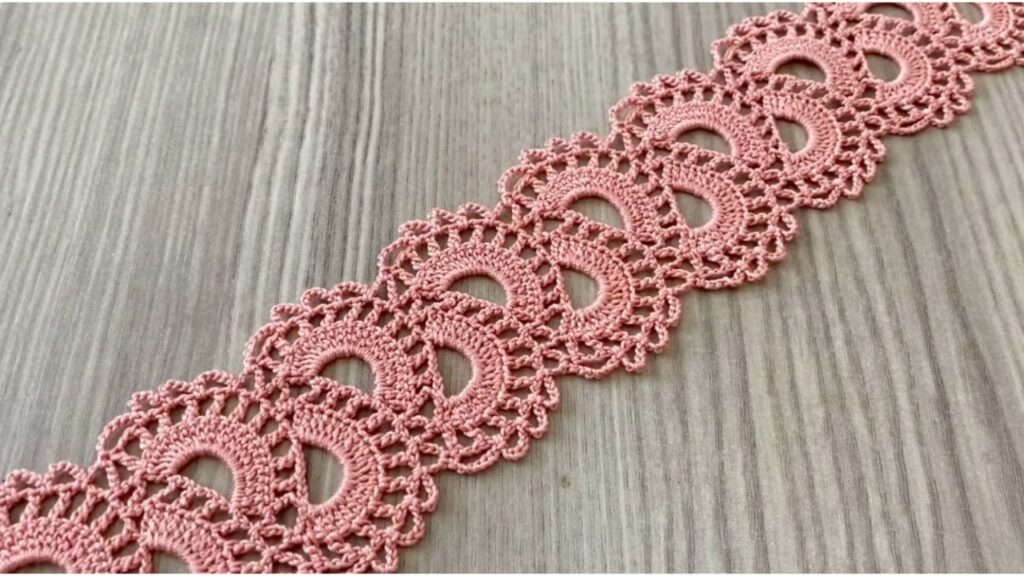
by This pattern is a lace strip / tape pattern. You can use it for:
- scarves
- blouse inserts
- table runners
- borders for towels / pillowcases
- curtains
- doilies
- joining fabric edges
The pattern is repeating, and easy once the rhythm is learned.
🧶 Materials
- Light cotton, acrylic, or thread yarn
- Hook size: 2.0 mm – 3.5 mm (adjust to yarn thickness)
- Scissors and yarn needle
- Blocking surface (optional but recommended for lace)
✨ Abbreviations (US Terms)
| Term | Meaning |
|---|---|
| ch | chain |
| sc | single crochet |
| dc | double crochet |
| hdc | half-double crochet |
| tr | treble crochet |
| sk | skip |
| sp | space |
📏 Foundation
This pattern works in multiples of 6 + 1.
For a practice sample:
Ch 31 (6×5 = 30 + 1).
🌸 STEP-BY-STEP PATTERN
Row 1 — Foundation Row
- Skip the first chain from the hook.
- sc in each chain across.
- Turn.
This creates a firm base.
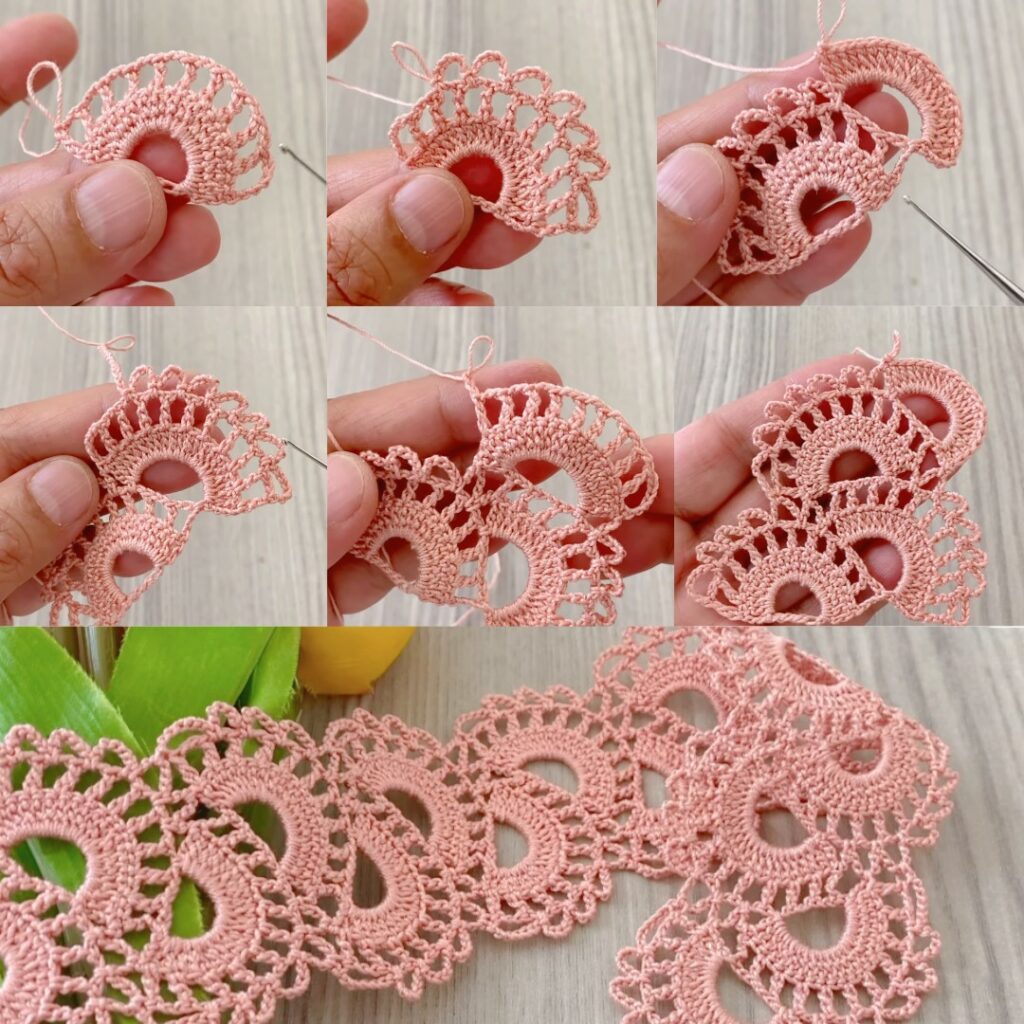
Row 2 — First Arches
- ch 5 (counts as ch3 + skip and turning chain).
- sk 2 sts → sc into next stitch.
- ch 3.
- Repeat steps 2–3 across the row.
- End with sc in the last stitch.
- Turn.
✅ You now have evenly spaced ch-3 arches.
Row 3 — First Shells
- ch 3 (counts as dc).
- In the first ch-3 arch: dc 2, ch 2, dc 3 → first shell made.
- sc into the next sc (anchor point).
- In the next arch: dc 3, ch 2, dc 3.
- Repeat steps 3–4 across the row.
- End with sc in last stitch.
- Turn.
✅ Now you see little flower fans.
Row 4 — Tall Chain Arches
- ch 5.
- sc on top of next shell (at the center ch-2 space).
- ch 5.
- Repeat across the row.
- End with sc in final stitch.
- Turn.
✅ Now tall arches are above the shells.

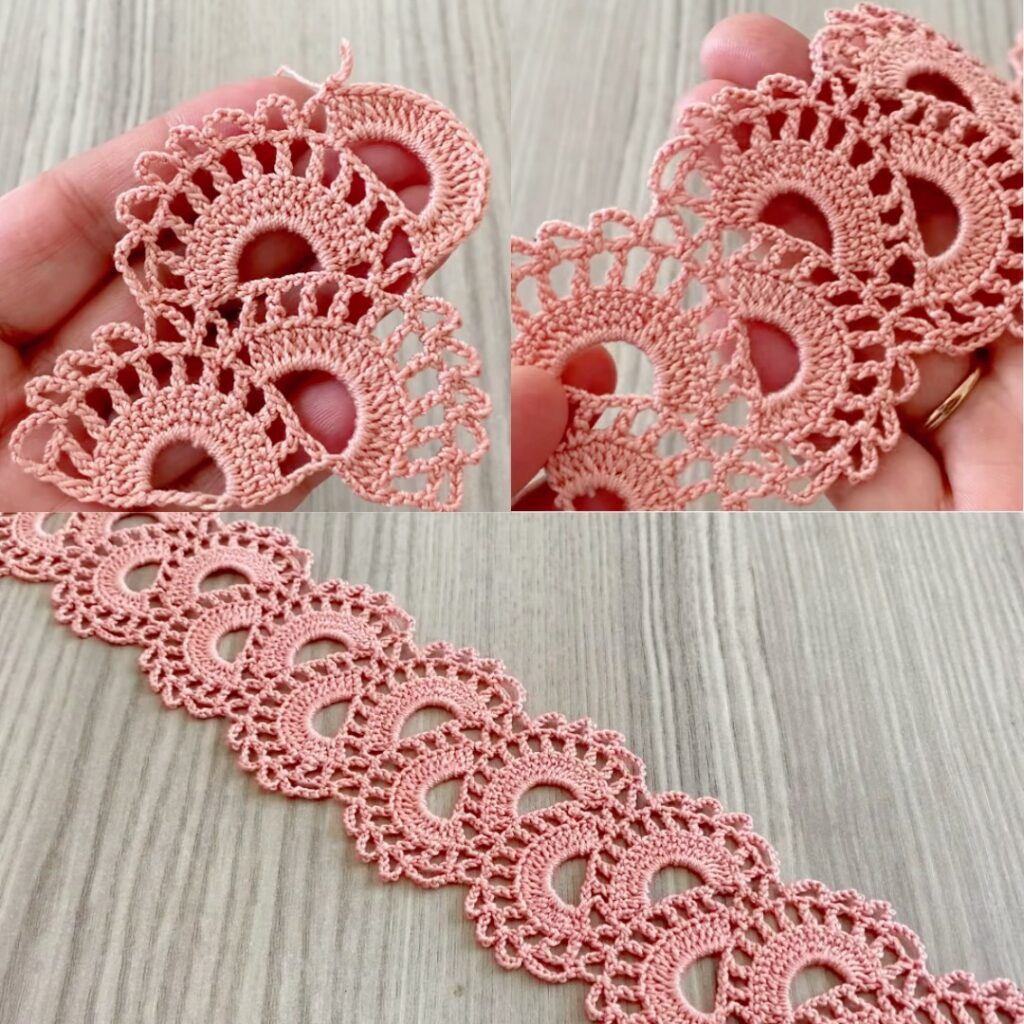
Row 5 — Larger Shells
- Into each ch-5 space: (sc, dc 5, sc) → fuller petal.
- sc into each anchor point (between shells).
- Repeat across.
- Turn.
🔁 Repeat the Pattern
To continue the lace:
Repeat Rows 2 → 5 until it reaches your desired length.
🌷 Edging (Optional)
To finish neatly:
- Work 1 row of sc evenly around edges.
- OR add picot border: (sc, ch3, sl st into same sc) spaced every 2–3 stitches.
✅ Tips for Beautiful Results
| Issue | Fix |
|---|---|
| Lace looks tight | Use a bigger hook or loosen tension |
| Lace looks floppy | Reduce ch-5 arches to ch-4 |
| Pattern curves/ruffles | Keep stitch counts EXACT and tension even |
| Want a denser look | Use dc 5 shells instead of dc 3, ch 2, dc 3 |
Video: