 by
by Nice — I’ll give you a clear, beginner-friendly, step-by-step text tutorial for a versatile crochet pattern you can use as a blouse or a shawl, inspired by the “Crochet with Nese” style (lacy motifs and open arches). I don’t have the exact video transcript, so I created an easy-to-follow, adjustable pattern that reproduces the look: lacy motifs joined into a panel to become a blouse or a triangular/rectangular shawl.
I’ll provide:
- Materials & gauge
- Abbreviations
- Motif pattern (one motif used for both blouse & shawl) — step-by-step rounds
- How to join motifs (JAYG)
- Blouse construction (sizing & assembly)
- Shawl variations (triangle and rectangular)
- Finishing, blocking, and troubleshooting tips
Materials & gauge
- Yarn: Lightweight DK / light worsted (or cotton sport for summer blouse). For a lacy look use mercerized cotton or cotton blend.
- Hook: 3.5–4.5 mm (choose by yarn; for a drapey shawl use larger hook).
- Notions: yarn needle, blocking pins, stitch markers, measuring tape, scissors.
- Gauge (approx): one motif ≈ 10–12 cm (4–4.7 in) across with DK + 4.0 mm hook. Make a test motif to set your gauge.
Abbreviations
- ch — chain
- sl st — slip stitch
- sc — single crochet
- hdc — half double crochet
- dc — double crochet (US)
- tr — treble crochet (US)
- st(s) — stitch(es)
- sp — space
- rep — repeat
- … — repeat between asterisks
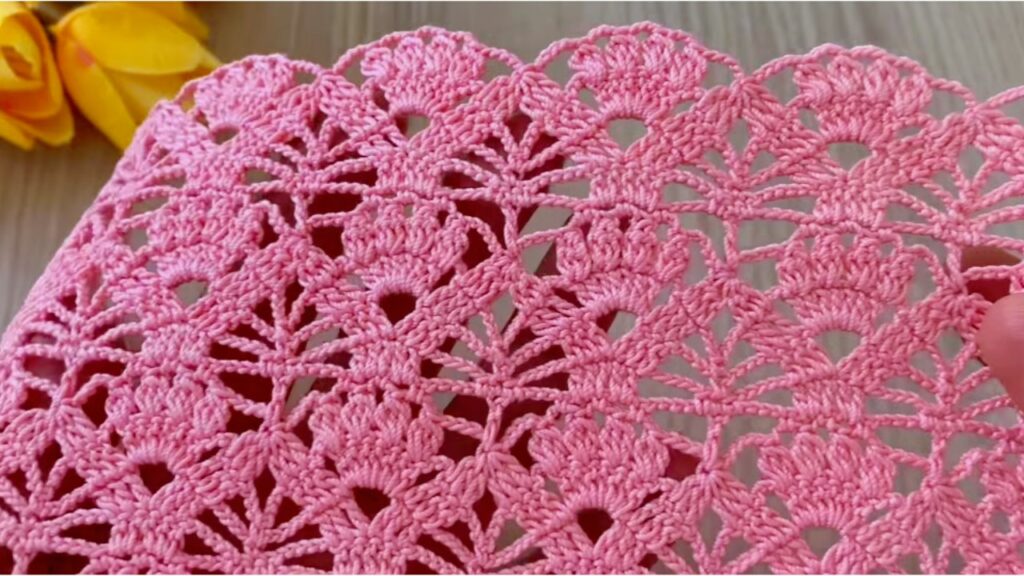
Overview of design
- The motif is a lacy flower/medallion (round) with chain arches and a picot/shell edging.
- Make enough motifs to create panels: for a blouse you join them into front, back, and sleeve panels; for a shawl you join them into a triangle or rectangular arrangement.
- You can join as you go (JAYG) while working the final round, or sew after making motifs.
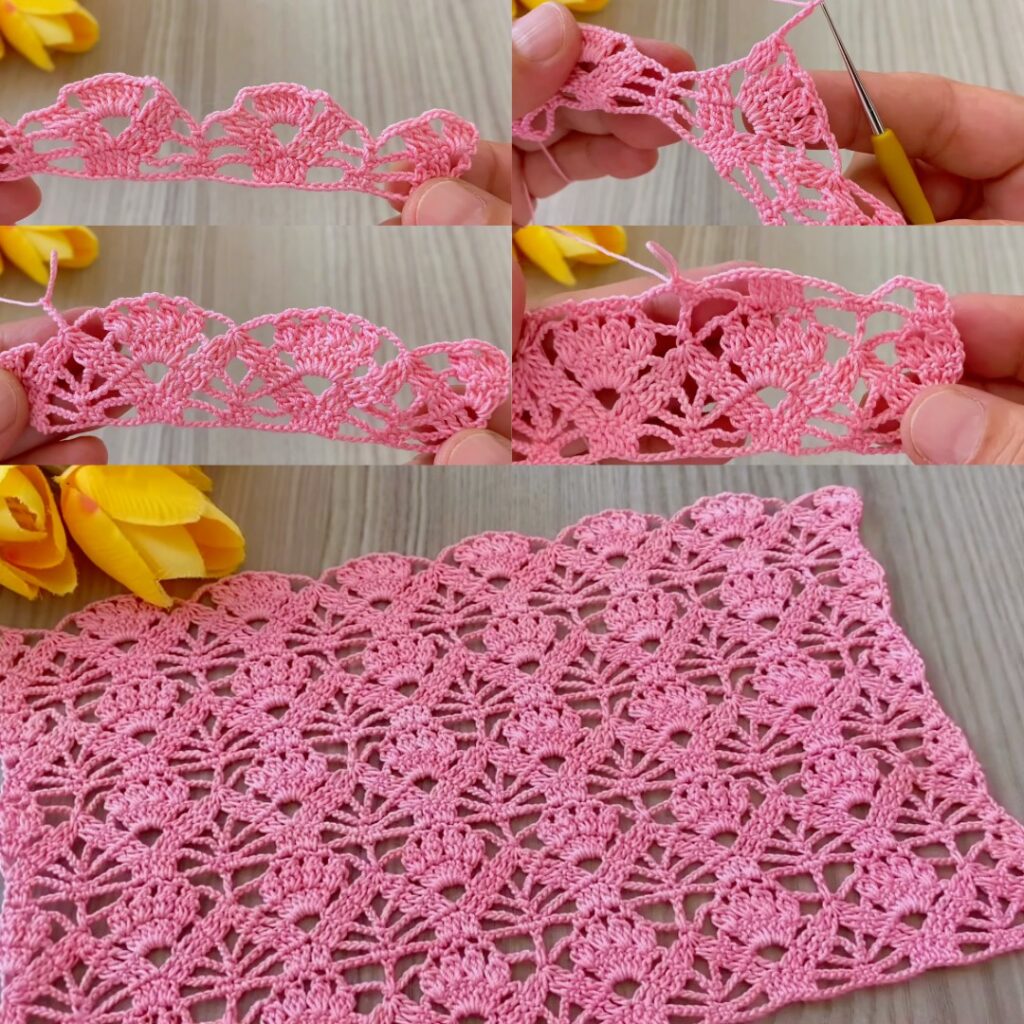
Motif pattern — “Lacy 8-Petal Motif”
(One motif approx. 10–12 cm depending on yarn/hook)
Make a sample motif first and adjust hook/yarn until size looks right.
Round 0 — Foundation
- Make a magic ring (or ch 4, join to ring).
- ch 3 (counts as dc), work 15 dc into ring. (ch-3 + 15 dc = 16 dc total). Pull ring closed. sl st to top of ch-3 to join. (16 dc)
Round 1 — Chain loops (petal bases)
- ch 4, skip next dc, sc in next dc — repeat around to make 8 ch-4 spaces (you’ll end with sc and ch spaces alternating). Join with sl st to first sc.
Round 2 — Petal clusters
- Work into each ch-4 space: (sc, hdc, 7 dc, hdc, sc) all in same ch-4 space.
- This forms a full petal. After each petal sl st to next ch-4 space and repeat.
- After 8 petals, sl st to join. Fasten off or continue.
Round 3 — Base round (sc round)
- Rejoin at base between any two petals. Work sc evenly around the base of the petals — aim for about 8–12 sc per petal distributed so the motif becomes round and flat. Join with sl st.
Round 4 — Chain arches & tall posts (lacy frame)
- sl st to outer edge, ch 7, (tr, ch 2, tr, ch 2, tr) anchored into top of next petal/base sc, sl st to next outer edge — repeat around so you create 8 tall arches between petals. Adjust ch count (6–8) to match spacing.
Round 5 — Fill arches (optional decorative ribs)
- Work into each ch-7 arch: sl st into arch base, ch 3, dc into the center tr post, ch 3, sl st into next anchor or create groups of dc separated by ch-1 to form ribbing inside arch. Repeat around.
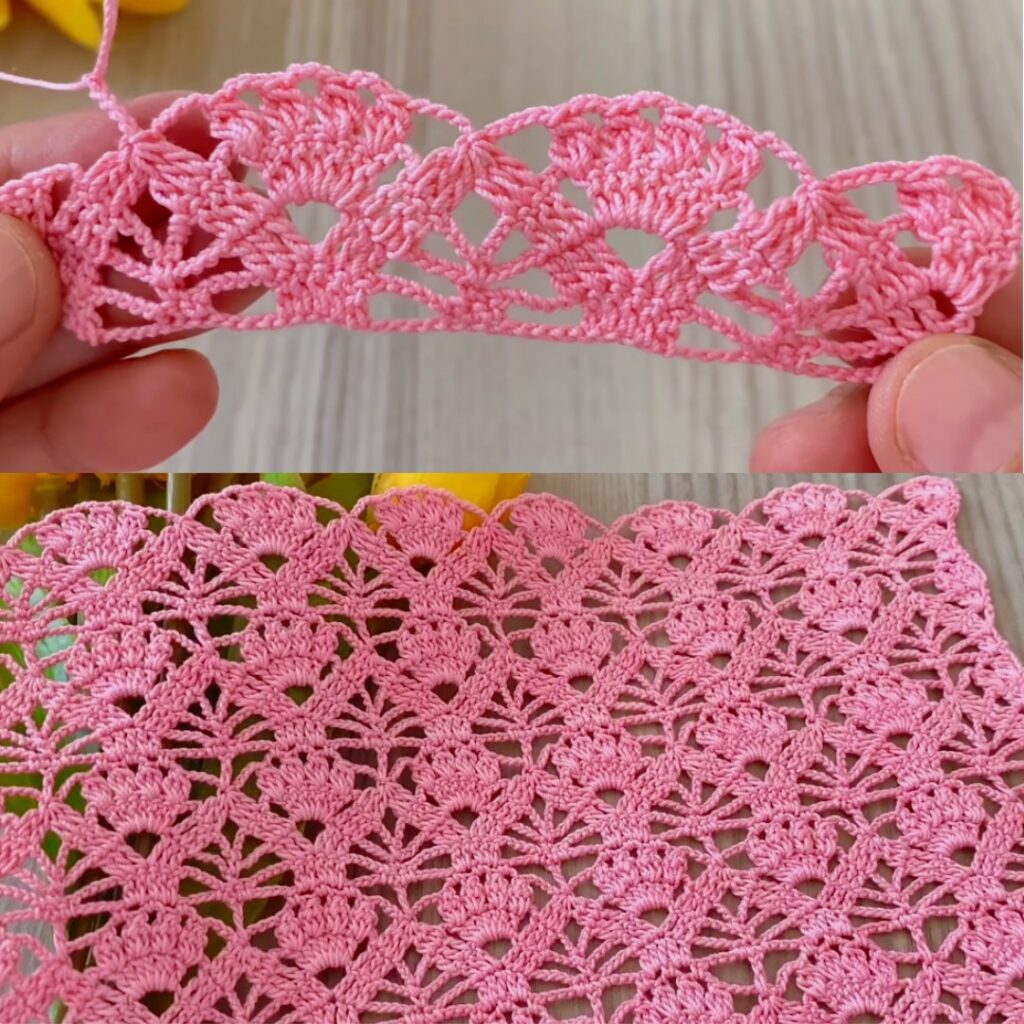
Round 6 — Outer scallop & picot edge
- Along outermost edge, make a scalloped picot edge: sc 3 in a small curve, (ch 3, sl st into same stitch) (picot), sc 4 across next curve — adjust numbers so edge lays flat. Join and fasten off.
- Weave in ends.
Detailed counts (for clarity)
- Round 0: 16 dc.
- Round 1: 8 ch-4 spaces.
- Round 2: 8 petals (sc, hdc, 7 dc, hdc, sc).
- Round 3–6: shaping and decorative rounds to produce the lacy outer arches and picots.
How to Join Motifs
Two recommended methods:
1) Join-As-You-Go (JAYG) — neat, no sewing
- Work motifs up to Round 5 (the decorative arches). When making Round 6 on a new motif, at the point where you make an outer sl st/picots, instead of finishing the picot, sl st into the corresponding stitch of an adjacent finished motif to attach. Continue the edging and attach at each join point. This produces a flat seamless join.
2) Sew-after method
- Make motifs separately, block them, then lay out the design and use tapestry needle and matching yarn to whipstitch or mattress-stitch through the outer sc rounds or outer arches. For a more flexible seam, use a join that connects at chain spaces.
Placement reference:
- When joining in rows, join motif edges at 3–4 evenly spaced points around each motif so the fabric stays flat.
Blouse Construction (easy pullover shell/blouse)
This blouse uses motif panels: front, back, sleeves optional.
Sizing & motif counts (approx; make a swatch to measure)
- Measure finished motif size (A cm).
- For a sample sizing example (motif ≈ 11 cm):
- Small (S): Front panel = 3 motifs across × 3 motifs down (3×3); Back panel = 3×3.
- Medium (M): 4×3 front / 4×3 back.
- Large (L): 5×4 front / 5×4 back.
- Sleeve: small cap sleeve = 2×1 or 2×2 motifs depending on desired width; or create short sleeves by adding rows of motifs.
You can adapt motif counts to your measurements: chest circumference ≈ (number motifs across × motif width) × 2 for front+back seam allowances. Add ease as desired.
Assembly steps
- Make required number of motifs. Block them flat.
- Layout front and back panels in rectangle grids (e.g., 3×3). Make two identical panels for front and back.
- Join front and back at the shoulder: connect top row of motifs across the shoulder seam — leave an opening for the neck (around 18–22 cm for crewneck; larger for boat or V neck). To shape neck, leave 1–2 motifs unjoined in the center of top row (or remove some outer joins) depending on neckline width.
- Join side seams: seam under arms down to desired length (leave armhole opening equal to desired sleeve length; for sleeveless leave full opening).
- Sleeves: either sew motifs to create sleeve panels and attach, or leave open as a shell (no sleeves). For cap sleeves: make motif strips and attach around armhole.
- Edging: Add a simple sc or picot border around neckline, sleeve openings, and hem for a clean finish. Optionally add a row of dc for a little weight.
Neckline finishing
- Pick up stitches evenly around neck edge using hook and yarn. Work 2–3 rounds: Round 1 sc around, Round 2 sc, ch 2, skip 1 to create small decorative eyelets, Round 3 sc to stabilize. Or make picot edging: sc 3, ch 3, sl st.
Shawl Variations
You can turn the motifs into a shawl in a couple of ways:
A) Triangular motif shawl (center-out)
- Make motifs and join them in rows of 1, 2, 3, 4… to form a triangle. Start with 1 motif at the top point, then join a row of 2 motifs below it, then 3, etc., until desired depth. This gives a lacy triangular shawl ideal for wrapping.
B) Rectangular motif shawl / stole
- Arrange motifs in a rectangle: e.g., 5 motifs wide × 8 motifs long for a medium wrap. Join in rows and add a picot edge around.
C) Half-circle/arched shawl (advanced)
- Create a semicircle by joining motifs in expanding rows with added half-motifs at edges — more advanced layout and requires trimming motifs or partial motifs.
Shawl Edging
- After joining, add a lacy scallop: dc, ch 3, dc in each arch or shell 5 dc across outer join points. Add fringe if desired.
Adjusting size & fit
- To make the motif larger: use thicker yarn or larger hook; or increase petal dc (e.g., 9 dc instead of 7).
- To make blouse longer: add more rows of motifs to body.
- For a looser drape: use a hook 0.5–1 mm larger than recommended.
Blocking & Finishing
- Pin motifs to blocking board or towel in their final shape. Gently spray with water or steam without touching yarn. Let dry completely. Blocking sets the lace and evens joins.
- Sew in ends on the reverse side, weave yarn tails neatly.
- Press lightly with a steam iron if yarn allows.
Troubleshooting & Tips
- Motifs cup up: try a slightly larger hook or loosen tension on petal rounds.
- Motifs ripple/ruffle: reduce chains in arches or remove a few stitches on outer edge.
- Fabric too stiff: use a softer yarn or larger hook for drape.
- Joining misalignment: when joining motifs, always block motifs first and align corresponding points — especially important where arches/picots meet.
Beginner simplifications
- If the arch/post rounds feel tricky, substitute Round 4 with a simple ch-5 loop and skip the tall post cluster — still gives an openwork look.
- For a quick shawl, join motifs in a rectangle (no shaping) and add a simple dc border.
Pattern summary (quick reference)
- Make motifs (pattern Rounds 0–6).
- Block motifs.
- Join motifs into panels (JAYG or sew).
- Assemble blouse: join shoulder seams (leave neck), join sides (leave armholes), attach sleeves or finish as shell.
- For shawl: join motifs into a triangle or rectangle, add border.
- Finish: weave ends, block final garment.
VIDEO: