 by
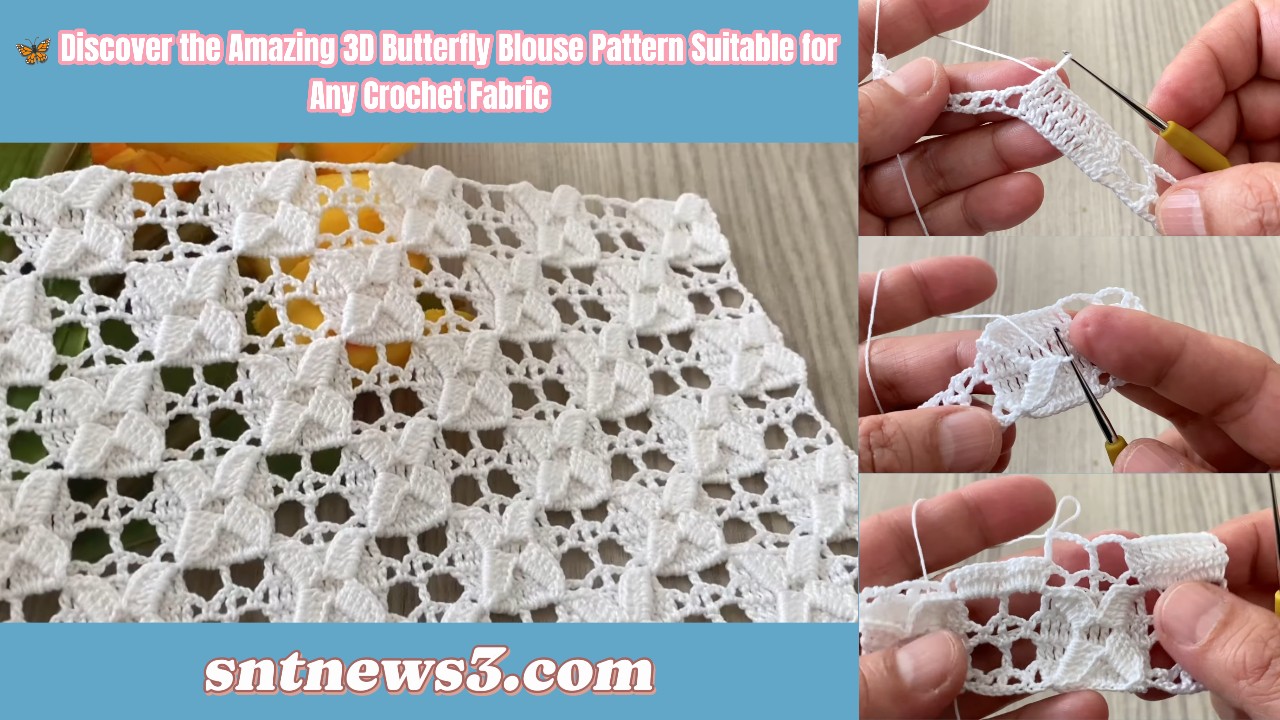
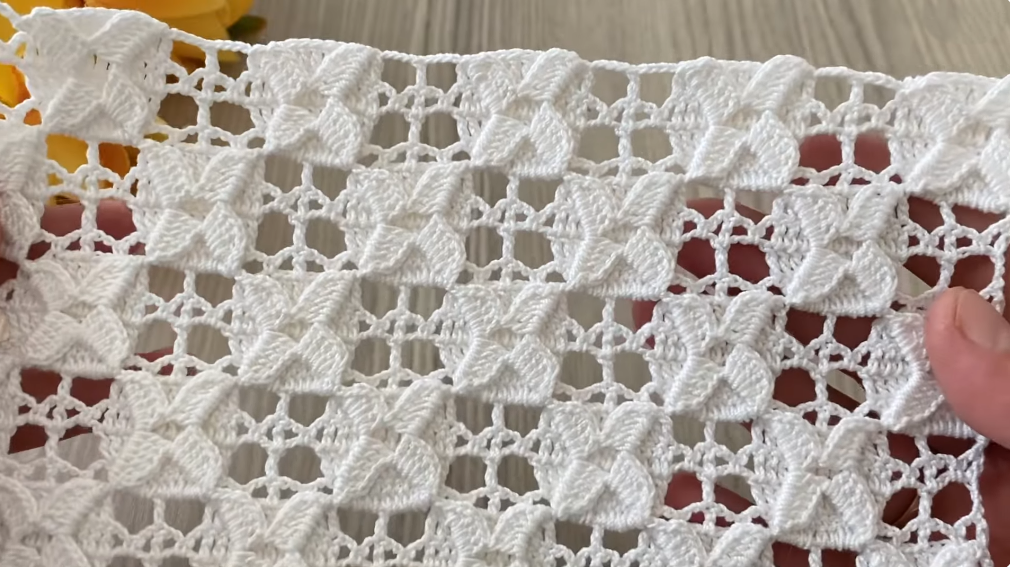
by This tutorial explains how to crochet a beautiful 3D butterfly appliqué and how to attach it to a blouse, shawl, runner, or any crochet fabric. The butterfly is raised (3D), elegant, and works perfectly for clothing decoration.
🦋 AMAZING 3D BUTTERFLY CROCHET PATTERN
Full Step-by-Step Tutorial (Beginner Friendly)
US Crochet Terms
🧶 SKILL LEVEL
Beginner → Easy Intermediate
(Uses basic stitches only)
🧵 MATERIALS
- Yarn: cotton or cotton-blend (recommended for blouses)
- Butterfly color (main)
- Optional contrast color for body
- Crochet hook: 2.5 – 3.5 mm
- Scissors
- Yarn needle
- Stitch marker (optional)
✂️ ABBREVIATIONS (US TERMS)
- ch = chain
- sl st = slip stitch
- sc = single crochet
- hdc = half double crochet
- dc = double crochet
- tr = treble crochet
- sp = space
- st = stitch
📐 SIZE
- One butterfly ≈ 6–8 cm wide (depends on yarn & hook)
- Can be enlarged using thicker yarn or bigger hook
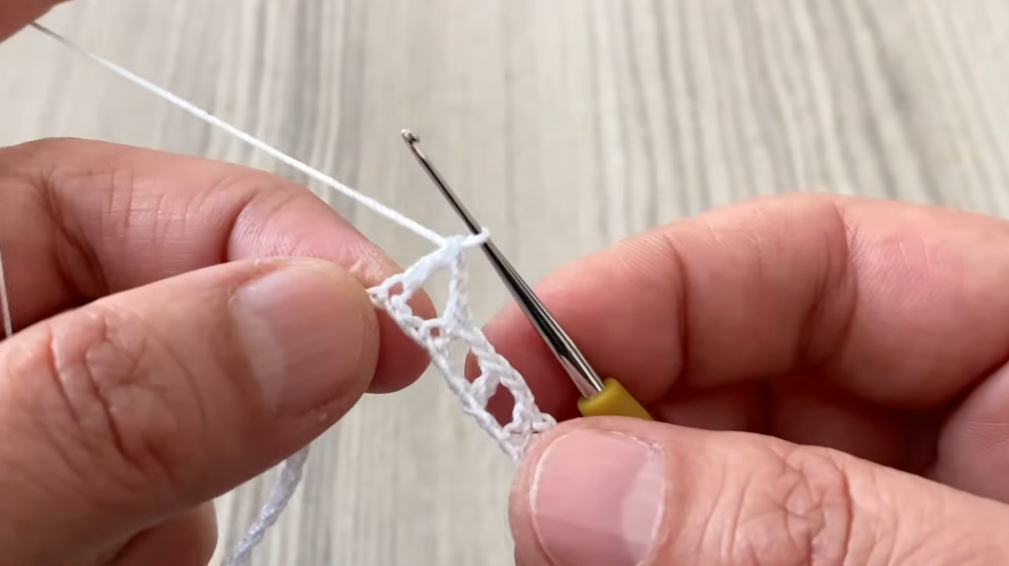
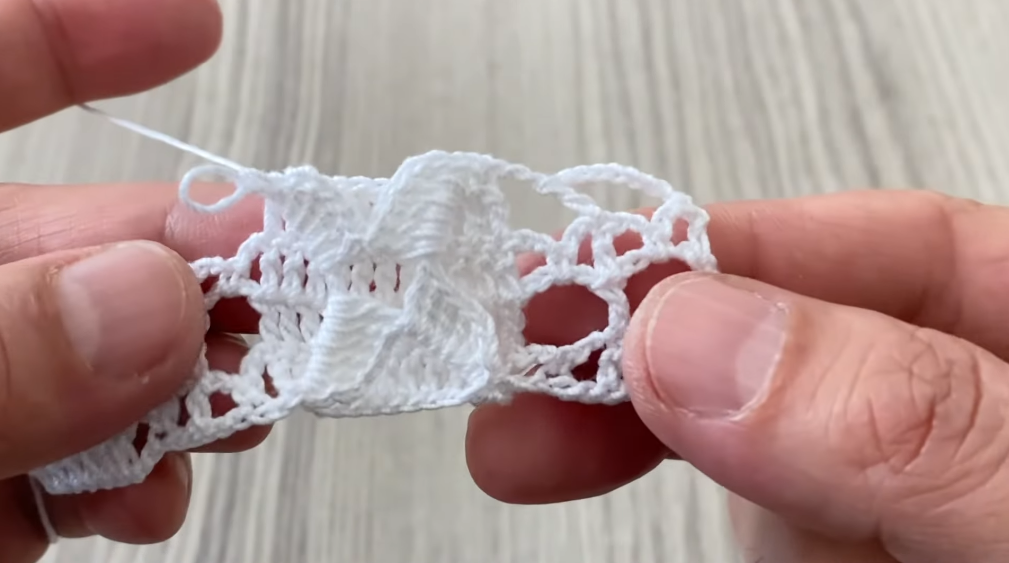
🦋 PART A – BUTTERFLY BODY (CENTER)
This part creates the butterfly body and base for wings.
Step 1
- Make a magic ring
(or ch 4, sl st to form ring)
Step 2
- Ch 3 (counts as first dc).
- Work 9 dc into the ring.
- Sl st into the top of ch-3.
✔ You now have 10 dc forming the body center.
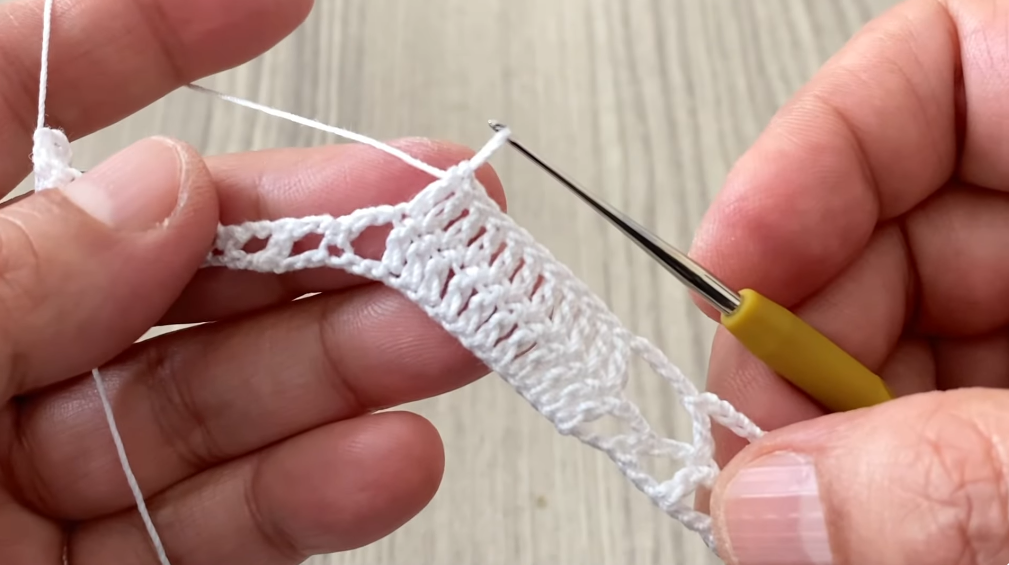
🦋 PART B – UPPER WINGS (LARGE 3D WINGS)
The upper wings are bigger and more dramatic.
Wing 1 (worked in one space)
- Sl st into the same stitch.
- Ch 3.
- Work into the same stitch:
- 2 dc
- 2 tr
- 2 dc
- Ch 3.
- Sl st into the same stitch.
✔ One large upper wing formed.
Wing 2 (opposite side)
- Skip 4 stitches.
- Repeat the same steps in the next stitch:
- sl st
- ch 3
- (2 dc, 2 tr, 2 dc)
- ch 3
- sl st
✔ Two raised upper wings complete 🦋
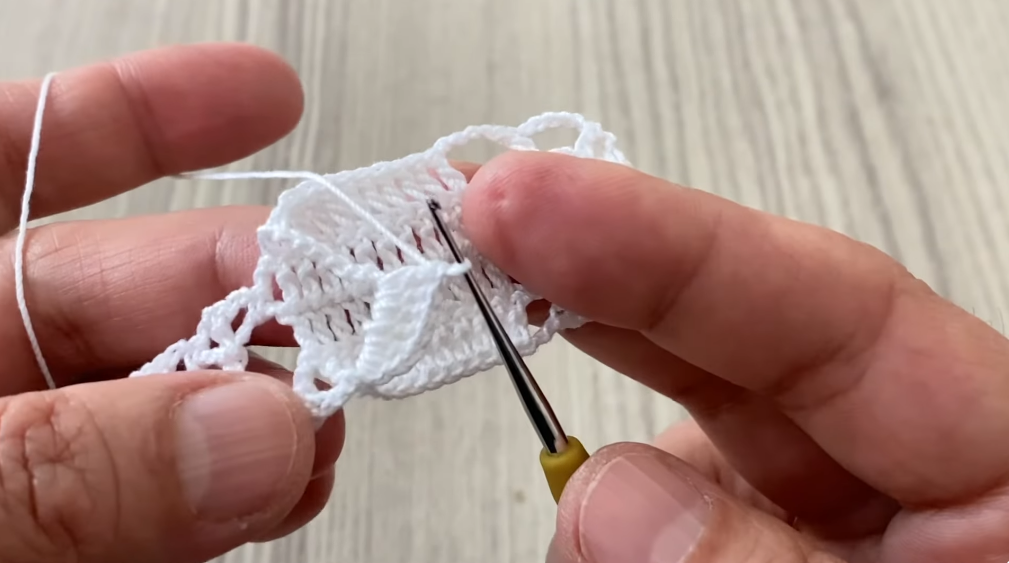
🦋 PART C – LOWER WINGS (SMALL WINGS)
Lower wings are softer and rounder.
Lower Wing 1
- Skip 2 stitches.
- Sl st into next stitch.
- Ch 2.
- Work into same stitch:
- 2 hdc
- 2 dc
- 2 hdc
- Ch 2.
- Sl st into same stitch.
Lower Wing 2
- Skip 2 stitches.
- Repeat the same pattern in next stitch.
✔ Butterfly shape is now visible and dimensional.
🦋 PART D – BUTTERFLY BODY & ANTENNAE
Body Stitching
- Ch 6.
- Sl st back along the chain (one sl st in each ch).
- Sl st into the center of butterfly.
✔ This creates a raised body line.
Antennae (optional)
- Ch 4.
- Sl st into next stitch.
- Ch 4.
- Sl st to secure.
Fasten off, leaving a long tail for sewing.
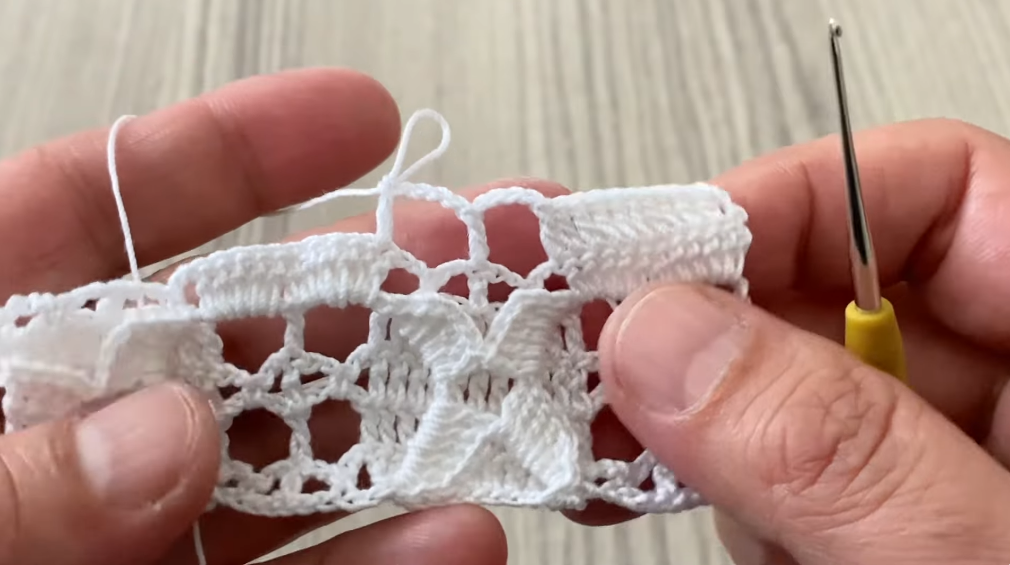
🦋 PART E – SHAPING THE 3D EFFECT
- Gently fold the butterfly wings upward
- Use a yarn needle to add 1–2 hidden stitches at the center to keep wings raised
- Do not flatten the wings
✔ This gives the beautiful 3D butterfly look
👚 PART F – ATTACHING BUTTERFLY TO A BLOUSE / FABRIC
Placement
- Place butterflies evenly across the fabric
- Common placements:
- chest area
- sleeves
- neckline border
- hemline
Sewing Method
- Thread yarn needle with same yarn
- Sew only the center body
- Do NOT sew wings down
- Secure yarn on wrong side
✔ Wings stay free and dimensional
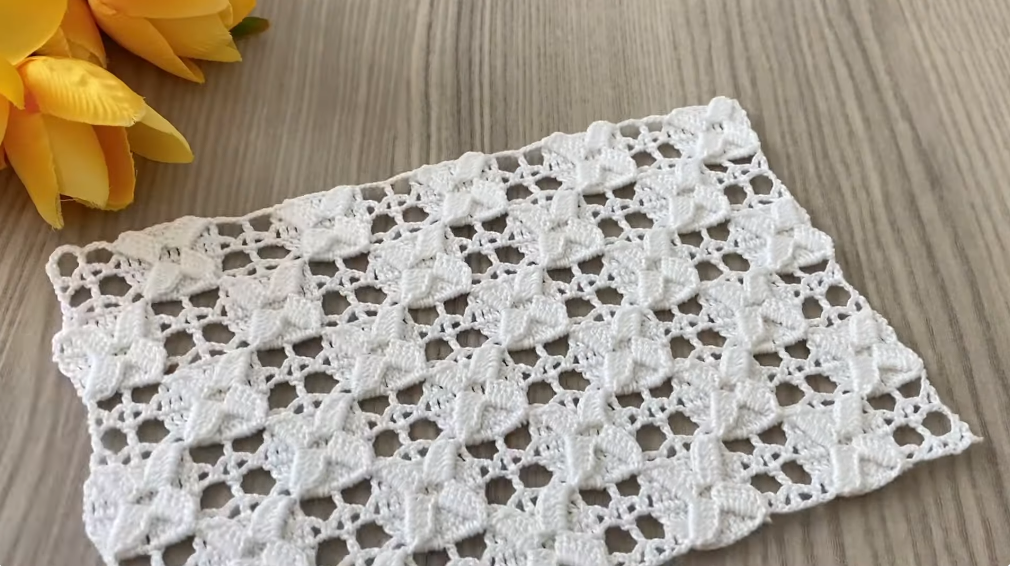
🧶 FABRIC IDEAS TO USE WITH BUTTERFLIES
✔ Crochet blouse
✔ Mesh shawl
✔ Lace runner
✔ Plain granny square blanket
✔ Bags and purses
✔ Scarves
✔ Baby clothing accents
🎨 COLOR IDEAS
- White blouse + pastel butterflies 🦋
- Black fabric + gold butterflies ✨
- Gradient yarn for wings
- Two-tone wings (upper darker, lower lighter)
✨ FINISHING
- Weave in all ends neatly
- Light steam blocking (do not press wings flat)
- Arrange wings gently by hand
💡 BEGINNER TIPS
- Use fine cotton yarn for elegant results
- Keep tension loose for soft wings
- Practice one butterfly first
- Make butterflies in batches
- Attach after blocking fabric
🧠 QUICK MEMORY GUIDE
- Center: dc circle
- Upper wings: dc + tr (large)
- Lower wings: hdc + dc (small)
- Body: slip stitch chain
- Attach by center only
🌟 WHY THIS BUTTERFLY PATTERN IS SPECIAL
✔ True 3D texture
✔ Beginner friendly
✔ Lightweight for clothing
✔ Works on any crochet fabric
✔ Adds luxury & elegance instantly
VIDEO: