 by
by Below is a very clear, very detailed, beginner-friendly, step-by-step written crochet tutorial, written slowly and carefully so you can follow it easily without watching the video.
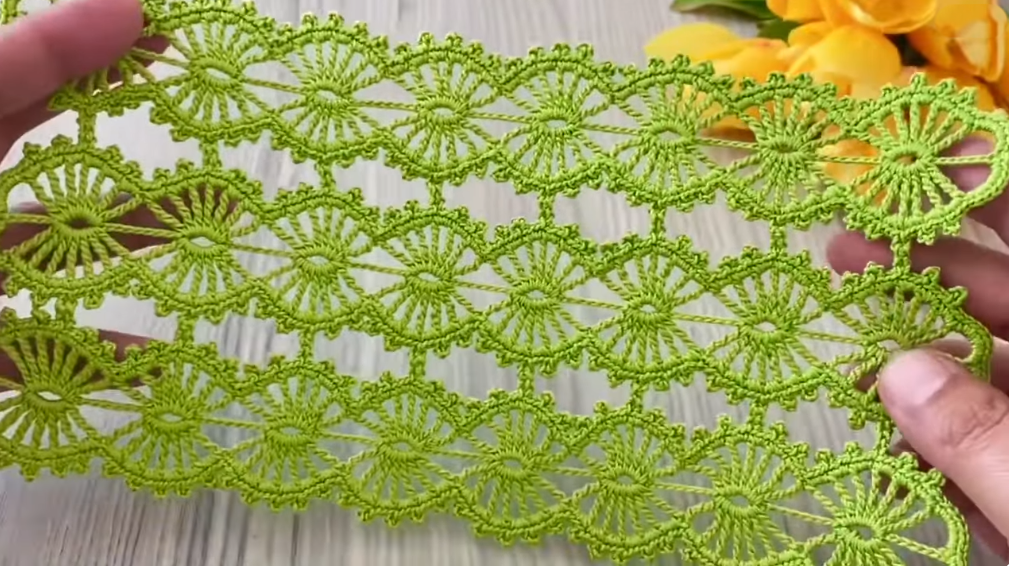
This is a one-piece stripe pattern, not a motif. It is simple, modern, and elegant, perfect for:
- blankets
- shawls
- scarves
- runners
- blouses
- baby items
- cushion covers
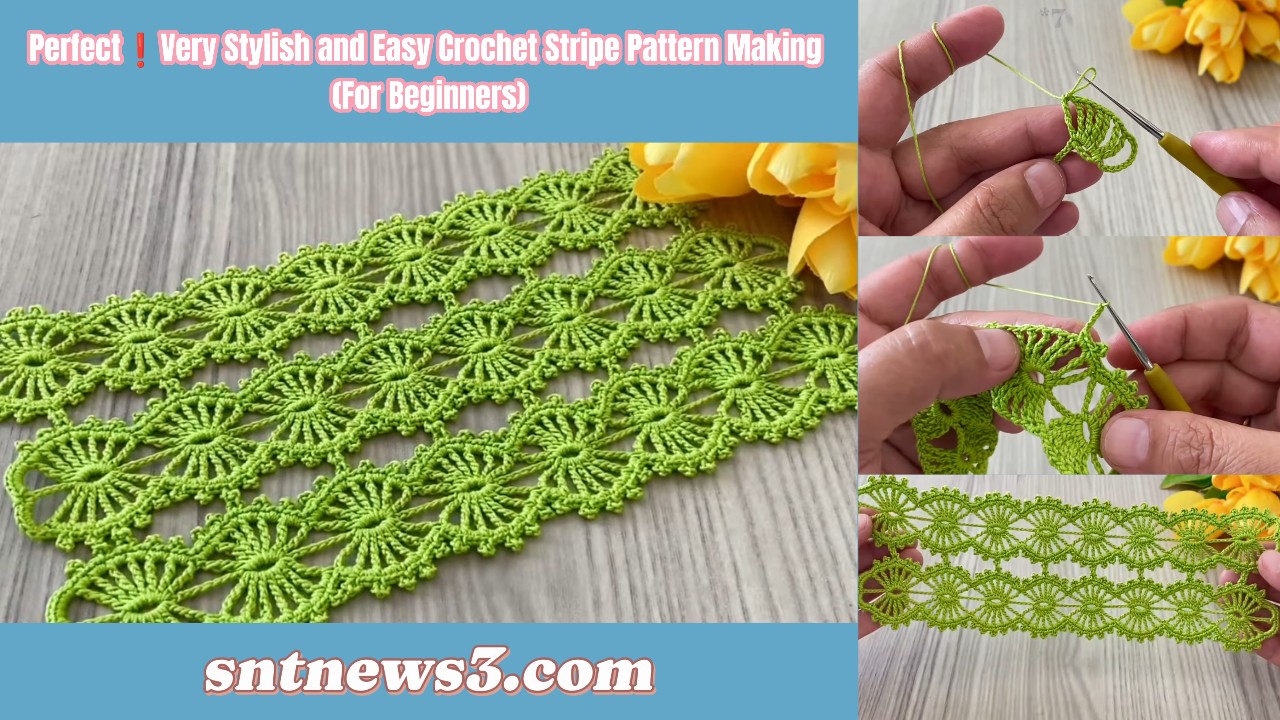
🌟 VERY STYLISH & EASY CROCHET STRIPE PATTERN
Full Step-by-Step Tutorial (Beginner Friendly)
US Crochet Terms
🧶 SKILL LEVEL
Beginner – Very Easy
(Perfect for first projects)
🧵 MATERIALS
- Yarn: cotton, acrylic, or blend
- Use one color or multiple colors for stripes
- Hook: 3.5 – 4.5 mm (match yarn label)
- Scissors
- Yarn needle
- Stitch markers (optional)
✂️ ABBREVIATIONS (US TERMS)
- ch = chain
- sl st = slip stitch
- sc = single crochet
- hdc = half double crochet
- dc = double crochet
- sp = space
- st = stitch
📐 PATTERN NOTES
- Worked in rows
- Repeats the same easy rows
- Stripe effect comes from texture, not color
- Size is fully adjustable (width & length)
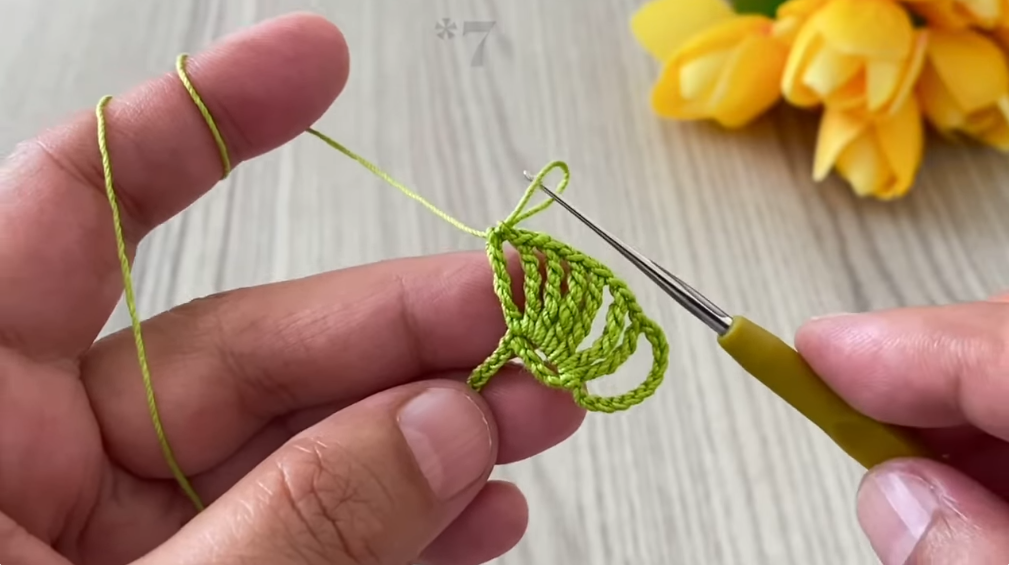
🪡 STEP-BY-STEP INSTRUCTIONS
🔰 FOUNDATION CHAIN
- Make a slip knot.
- Chain any multiple of 2 + 1.
Examples:
- Scarf: ch 31–41
- Runner: ch 61–81
- Blanket: ch 121–161
✔ Always add 1 extra chain for turning.
🔹 ROW 1 – BASE ROW
- Dc in the 4th chain from the hook
(first 3 chains count as first dc). - Dc in each chain across.
- Turn your work.
✔ This creates a strong base.
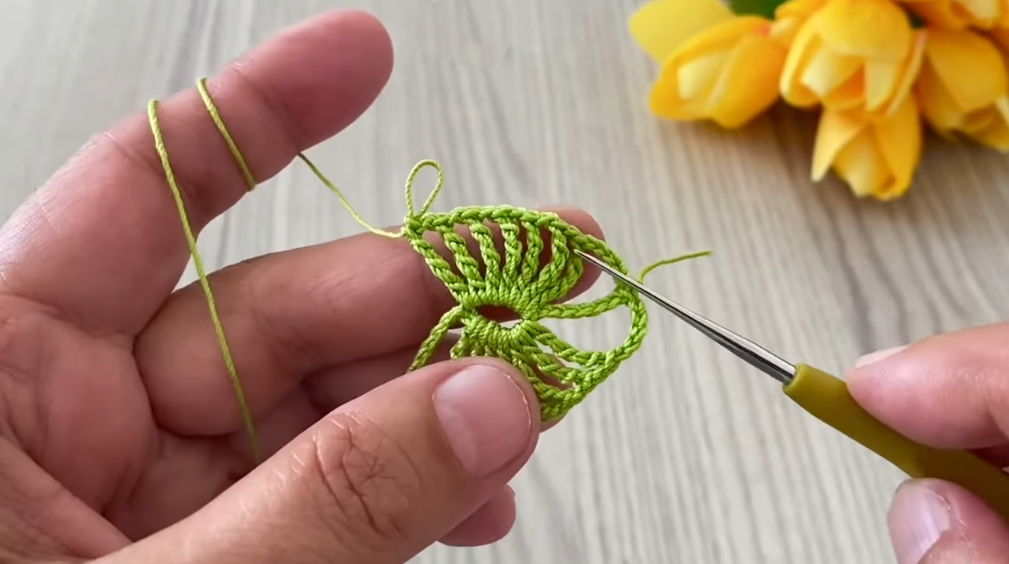
🔹 ROW 2 – TEXTURED STRIPE ROW
This row creates the stylish stripe texture.
- Ch 2 (does not count as a stitch).
- Work hdc in the back loop only (BLO) of each stitch across.
- Hdc into the top of the turning chain.
- Turn.
✔ The back-loop stitches form raised stripes.
🔹 ROW 3 – SMOOTH CONTRAST ROW
- Ch 3 (counts as first dc).
- Dc in both loops of each stitch across.
- Dc in the last stitch.
- Turn.
✔ Smooth row contrasts beautifully with textured row.
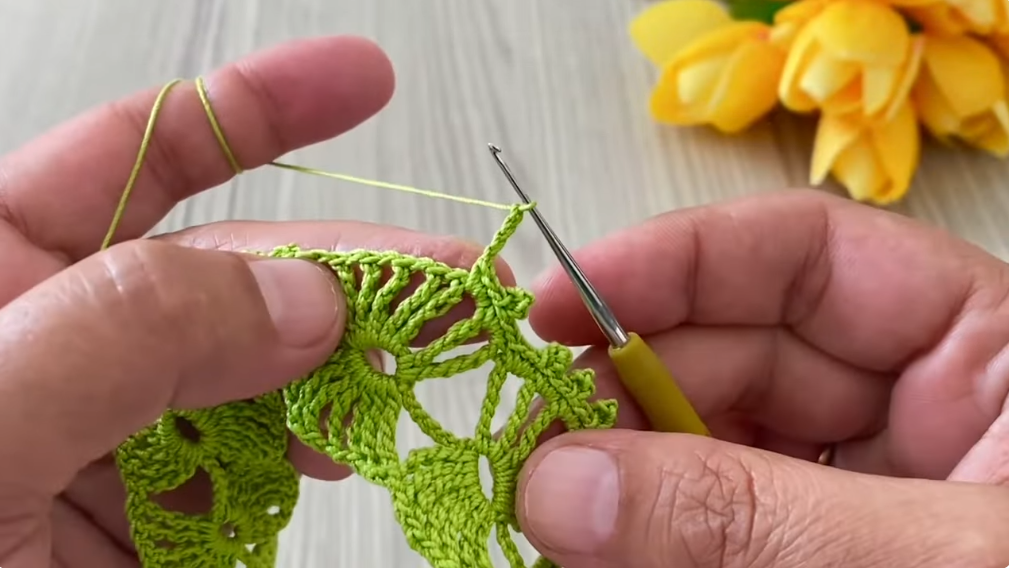
🔁 ROW REPEAT (MAIN PATTERN)
Repeat Rows 2 and 3 until your project reaches the desired length.
- Row 2 → textured stripe
- Row 3 → smooth stripe
✔ This simple 2-row repeat creates a very stylish stripe pattern.
🎨 COLOR STRIPE OPTION (OPTIONAL)
To add color stripes:
- Change color every 2 rows
- Or change color every textured row
Example:
- Rows 1–2: Color A
- Rows 3–4: Color B
- Rows 5–6: Color A
✔ Keep colors soft for elegant results.

🧶 EDGE FINISHING (OPTIONAL BUT RECOMMENDED)
Simple Single Crochet Border
- Ch 1.
- Sc evenly around all edges.
- In corners: (sc, ch 2, sc).
- Sl st to join.
- Fasten off.
✔ This keeps edges straight and neat.
👚 PROJECT IDEAS
🧣 Scarf
- Width: 25–30 cm
- Length: 150–180 cm
🛋 Blanket
- Repeat rows until desired size
- Add a shell or lace border
🟨 Table Runner
- Narrow width
- Long length
- Cotton yarn recommended
👕 Blouse / Tunic
- Work flat panels
- Join sides
- Add neckline edging

✨ FINISHING & BLOCKING
- Cut yarn and pull through
- Weave in all ends securely
- Light steam or wet block
- Lay flat to dry
✔ Blocking enhances stripe texture.
💡 BEGINNER TIPS
- Keep tension relaxed
- Always count stitches
- Use stitch markers for edges
- Practice BLO stitches slowly
- Don’t skip the turning chains
🧠 QUICK MEMORY GUIDE
- Foundation: any size
- Row 1: dc
- Row 2: hdc BLO (texture)
- Row 3: dc (smooth)
- Repeat Rows 2–3
🌟 WHY THIS STRIPE PATTERN IS PERFECT
✔ Extremely beginner friendly
✔ Looks modern and stylish
✔ No complicated counting
✔ Perfect for many projects
✔ Easy to memorize
VIDEO: