 by
by Overview / what you’ll make
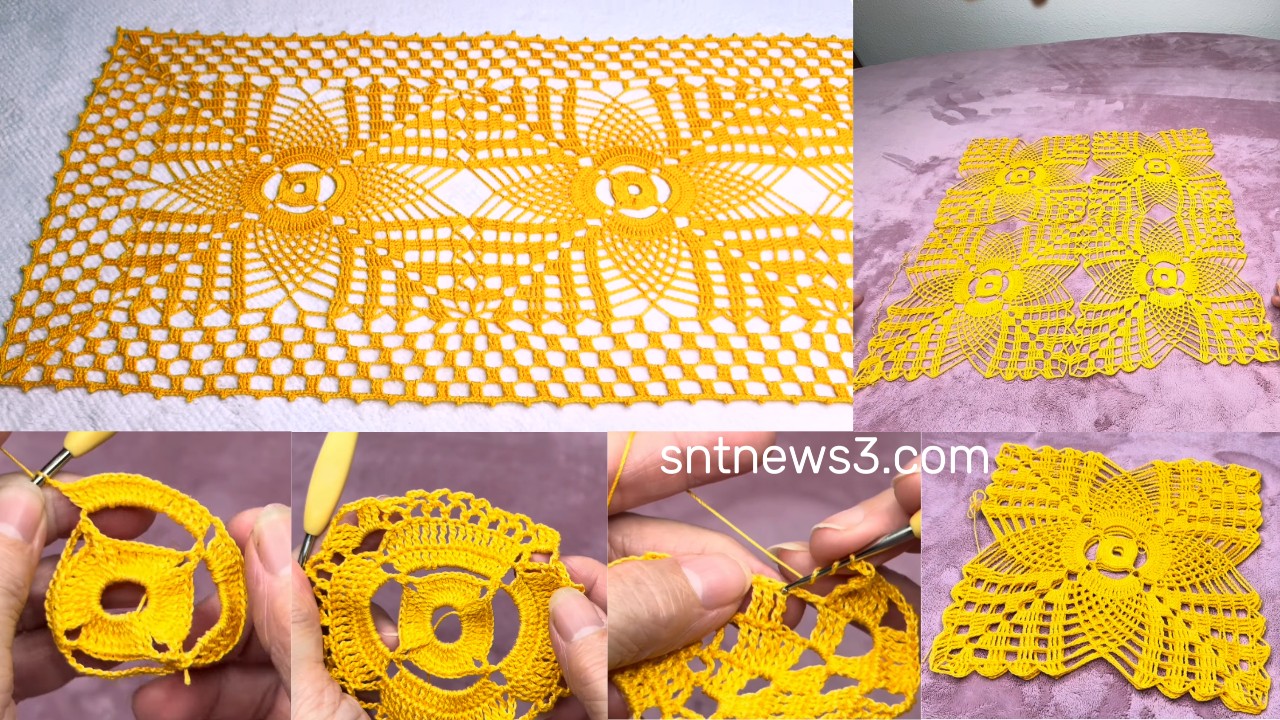
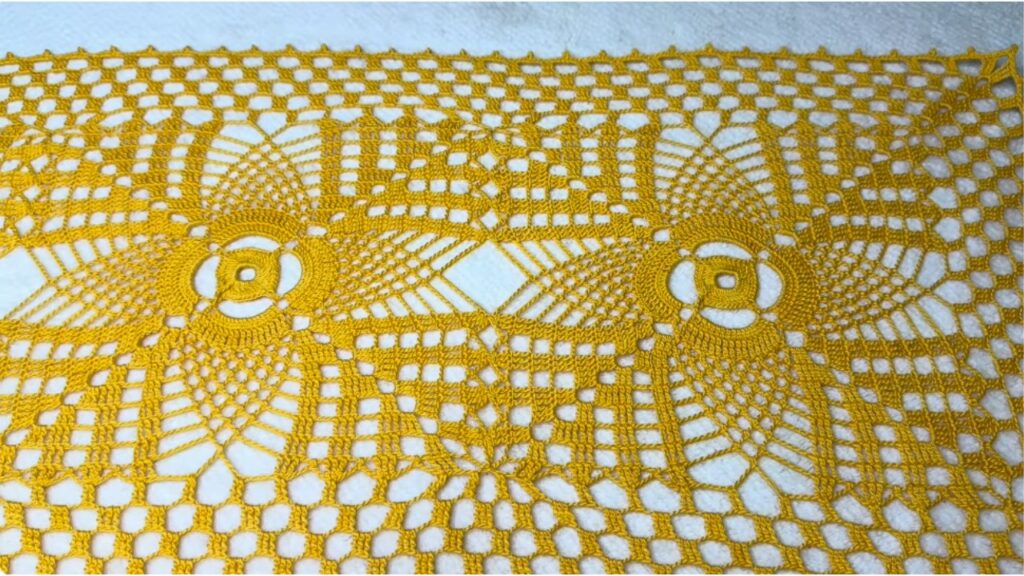
You’ll make a beautiful rectangular table runner built from identical crochet squares, joined together and finished with a multi-round lacy border. The original video shows the pattern worked so that one complete square has 13 rounds and the outer border adds 6 rounds; one square measures about 22 cm, and the finished runner shown is about 30 × 100 cm (adjust number of squares to fit your table).
Materials & tools (recommended)
- Crochet thread or cotton yarn (example: mercerized cotton size 10 / 20 g balls for lace look) — use the same yarn shown in the video if you want identical scale.
- Hook: matched to yarn — for size-10 thread typically 1.25–1.75 mm; for lightweight cotton DK use 2.5–3.5 mm. (Use the hook that gives you the same gauge / look.)
- Scissors, tapestry needle to weave ends, blocking pins and mat.
- Stitch markers (optional, helpful when working rounds).
If you want the runner about the same size as the video: plan for squares ≈22 cm each and a border ≈5 cm. The video maker used enough squares to obtain a final size near 30 × 100 cm.
Abbreviations (US)
- ch = chain
- sl st = slip stitch
- sc = single crochet
- dc = double crochet
- tr = treble (UK: treble = US tr)
- dtr = double treble (if used; otherwise follow video if it shows tall cluster names)
- sp = space
- st = stitch
- [] = work instructions in the brackets as indicated

Quick notes about structure
- Each square is worked in rounds, starting from the center. The square has 13 rounds (this includes the central rounds that form the motif). After you make the necessary number of squares and join them, you will work the edge/border which is 6 rounds in the original video.
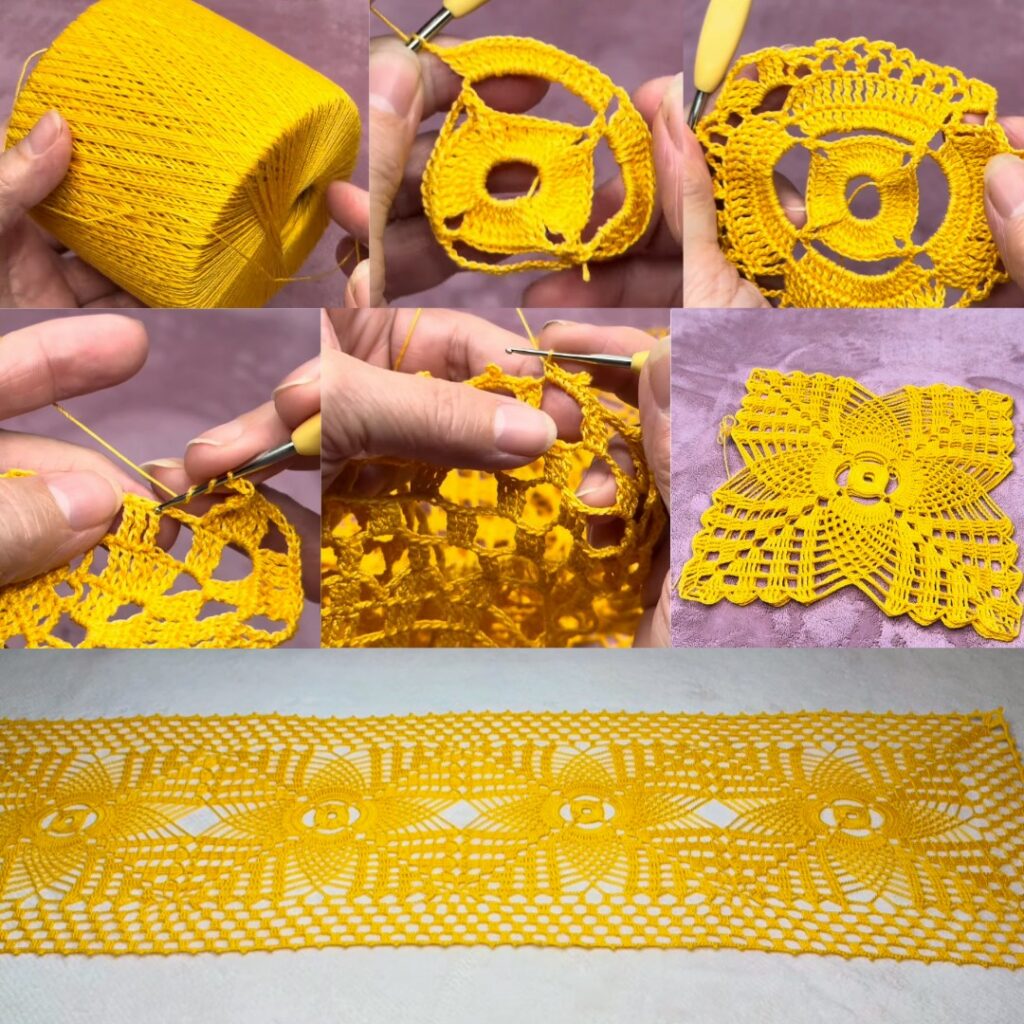
Step-by-step: Make one motif square (13 rounds)
Below is a clear, practical version of what the video demonstrates — follow the rounds while watching the video to match stitch height and spacing.
Round 0 — magic ring (center)
- Make a magic ring (or ch 4 and sl st to make a ring).
- ch 3 (counts as first dc), work 11 dc into the ring (so 12 dc total including ch-3). Tighten the ring. Join with sl st to top of ch-3. (This gives a small circular center.)
Round 1 — create corner chains (start forming square)
- ch 3 (counts as dc), dc in next 2 sts, ch 3, skip 1 — this is a setup to form 4 corner points in later rounds. (Alternatively, you can work small groups and chain spaces so there will be 4 sides.) Join with sl st.
(At the end of this round you’ll have chain arches that will become corners.)
The video organizes these early rounds so that by Round 3–4 you clearly see four sides forming.
Round 2 — build shells and corners
- ch 3 (counts as dc), work shells and corner spaces around: typical shell pattern the video uses is groups of (dc, ch, dc) or (2 dc, ch 2, 2 dc) in corner spaces.
- Where you want a corner: work (2 dc, ch 3, 2 dc) into the same space so it grows square-like. On edges, place shells or clusters spaced evenly into previous round’s sts/spaces. Join with sl st.
Round 3 & 4 — expand square
- Continue working shells along each side and increasing at corners (2 dc, ch 3, 2 dc). On the side spaces place a symmetric group (for example 3 dc in a space or group separated by ch-2 arches) so sides lengthen.
- Check that you have four clearly defined corners by the end of Round 4.
Round 5–9 — develop the lace motif (flower/diamond details)
- The video shows a decorative leaf/flower/diamond motif built into the face of each square by combining chains, clusters of dc and taller stitches (tr).
- Typical approach (follow while watching): in selected side-spaces work [ch-4 arches] alternated with small clusters (2–3 dc in one space) to create the interior pattern. Where the pattern needs height, the instructor uses tr (treble) to make pointed petals. Keep symmetry: the same sequence per side.
Round 10–11 — form the frame of the square
- Add another round of clusters and ch-spaces that square the motif so that outer rounds line up into straight sides. Make sure you place equal numbers of repeats along each side so the square stays even.
Round 12 — outer decorative round
- Work a round that balances edge decor: small picot loops or ch-3 arches separated by sc or dc. This readies the motif for the final round.
Round 13 — final round of the motif (the 13th)
- Work a firm final round to create the exact square edge. Often this is done by sc or dc in the top of clusters and placing (2 dc, ch 3, 2 dc) in corner spaces for a stable corner. Finish with sl st and fasten off.
- Block this square to measured dimensions (video reports one square ≈ 22 cm). Pin to shape while damp and allow to dry to open the lace.
Make however many squares you need
- For the runner in the video they used enough squares to reach approximately 30 x 100 cm finished (arrange squares in a single long strip or join in rows depending on desired width). One square is ≈22 cm so plan your arrangement accordingly.
Joining squares (as shown in the video)
The video shows joining squares as you go or sewing after:
- Join-as-you-go method (recommended while making the last round of a square): On the final round of a new square, when you reach an edge that touches an already-made square, instead of working a full stitch in that space, sl st into corresponding stitch of the neighbor square (or ch-join) so the two squares attach seamlessly. Continue the round and finish. Repeat for each touching side until the layout is complete.
- Sewing method: Block all squares, then use whipstitch or mattress stitch with matching thread to join squares along their edges. The video demonstrates a neat invisible seam worked on the wrong side with a yarn needle.
The video demonstrates both options; join-as-you-go produces fewer ends to weave and a continuous finish.
Outer border / edging (6 rounds)
After all squares are joined and the runner is assembled, work the border. The video’s border uses 6 rounds; a practical step-by-step:
- Border Round 1 (Evening edge): Attach yarn at any corner. Work a round of sc all around (working 3 sc in corner space to turn the corner smoothly). Join with sl st.
- Border Round 2 (Shells or picot chain): ch 3, skip 2 sc, 5 dc in next sc (shell), skip 2 sc, sc in next st — repeat. At corners, work a full shell or (5 dc, ch 3, 5 dc) to emphasize corner. Join.
- Border Round 3 (Open arches): ch 4, sc in every other sc to create little arches; adjust counts so edges remain flat.
- Border Round 4–5 (Decorative repeats): Repeat a pattern of shells/arches/picots to build a layered lacy border (the video demonstrates alternating fans with picots). Work these two rounds with consistent spacing so the finished border is about 5 cm wide as in the original.
- Border Round 6 (Finishing scallop): Work a finishing scallop—example: sl st, skip 1, (5 dc, sl st) in next st or small picots: sc, ch 3, sl st into same st across. Fasten off, weave in ends, and block again so the final edge opens beautifully.
Note: the video maker’s exact stitch counts per border round produce the exact look—watch the border sequences in Part 2 and match your counts/spacing to the rhythm shown.
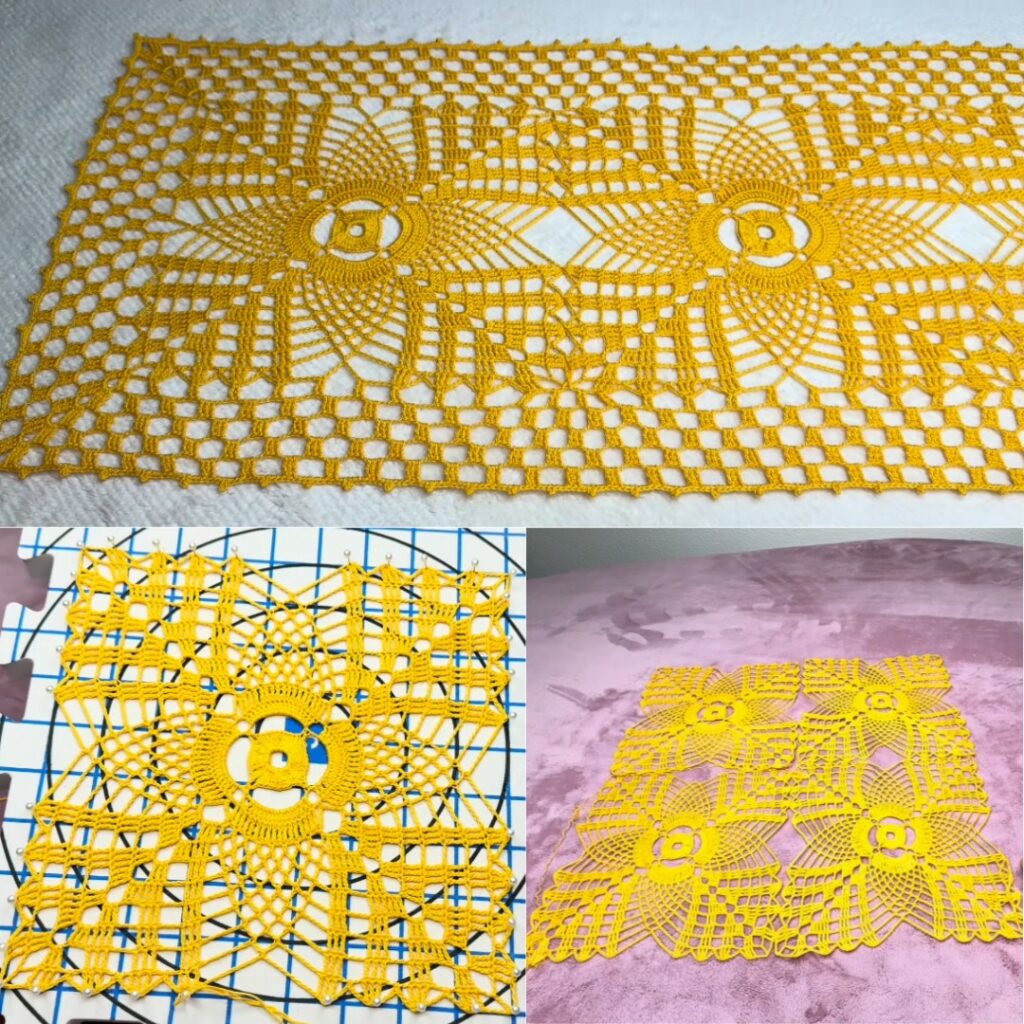
Blocking and finishing
- Lay runner on blocking mat, pin each corner and scallop evenly to open lace. Use steam or wet blocking depending on yarn instructions.
- Let dry fully before removing pins. This will make edges crisp and the runner lie flat.
Troubleshooting & tips (from the video’s style)
- If corners pull: increase corner chains (use ch-3 → ch-4) or add one more dc in corner groups.
- If sides ripple: add/subtract a tiny number of stitches in edge rounds to compensate.
- To match video size exactly: use same thread size and hook and measure a single square after blocking (target ≈ 22 cm), then plan number of squares.
Quick summary checklist (before you start)
- Yarn & hook chosen and swatched.
- Make 1 test square and block it; measure → should be ≈22 cm.
- Decide layout (# of squares length × width) to reach desired runner size (video: ~30 × 100 cm).
- Join squares as you go or stitch after — then work the 6-round border as shown.
Video Part one:
Video Part two: