 by
by Quick facts
- Skill: Beginner → Easy
- Terms: US crochet terms
- Finished sample motif: ~10 cm / 4″ blocked (use your hook/yarn to change size)
- Use: runner, blouse panels, shawl, blanket, placemats
Materials
- Yarn: sport/DK or cotton blend for crisp lace; fingering for delicate, worsted for chunkier.
- Hook: match yarn (example DK → 3.0–3.5 mm).
- Tapestry needle, blocking pins/mat, scissors, stitch markers (optional).
- Optional: blocking wires, small buttons or ribbon if making garment closures.
Abbreviations (US)
- ch = chain
- sl st = slip stitch
- sc = single crochet
- hdc = half double crochet
- dc = double crochet
- tr = treble crochet
- sp = space
- st = stitch
- rep = repeat
- Rnd = round
- JAYG = join-as-you-go
- RS = right side

Before you start — make & block one motif
- Crochet one motif and block it flat.
- Measure W = motif width across flats (cm).
- (Optional) weigh motif g (grams) for yarn estimation.
These numbers let you calculate motif counts and yarn for your project.
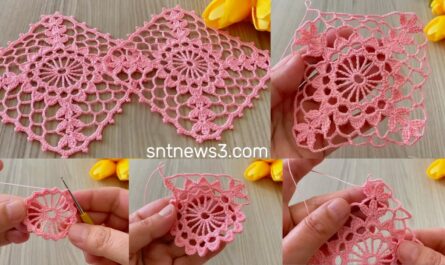
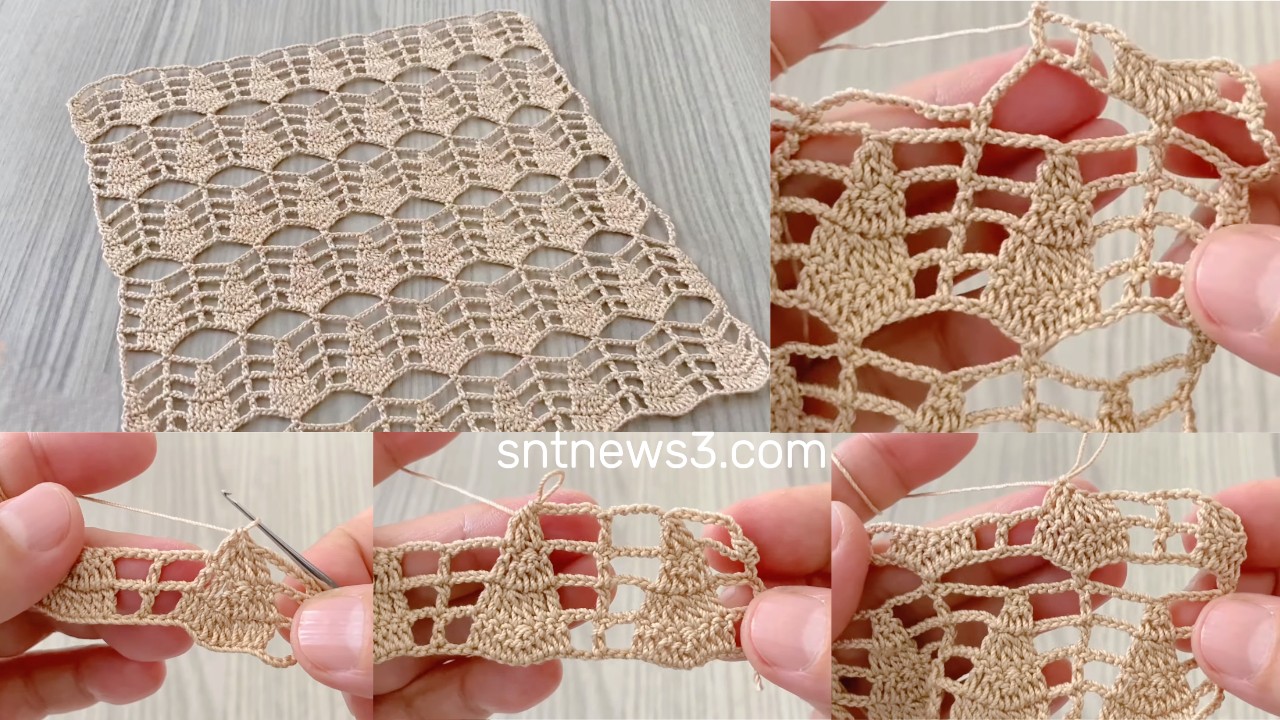
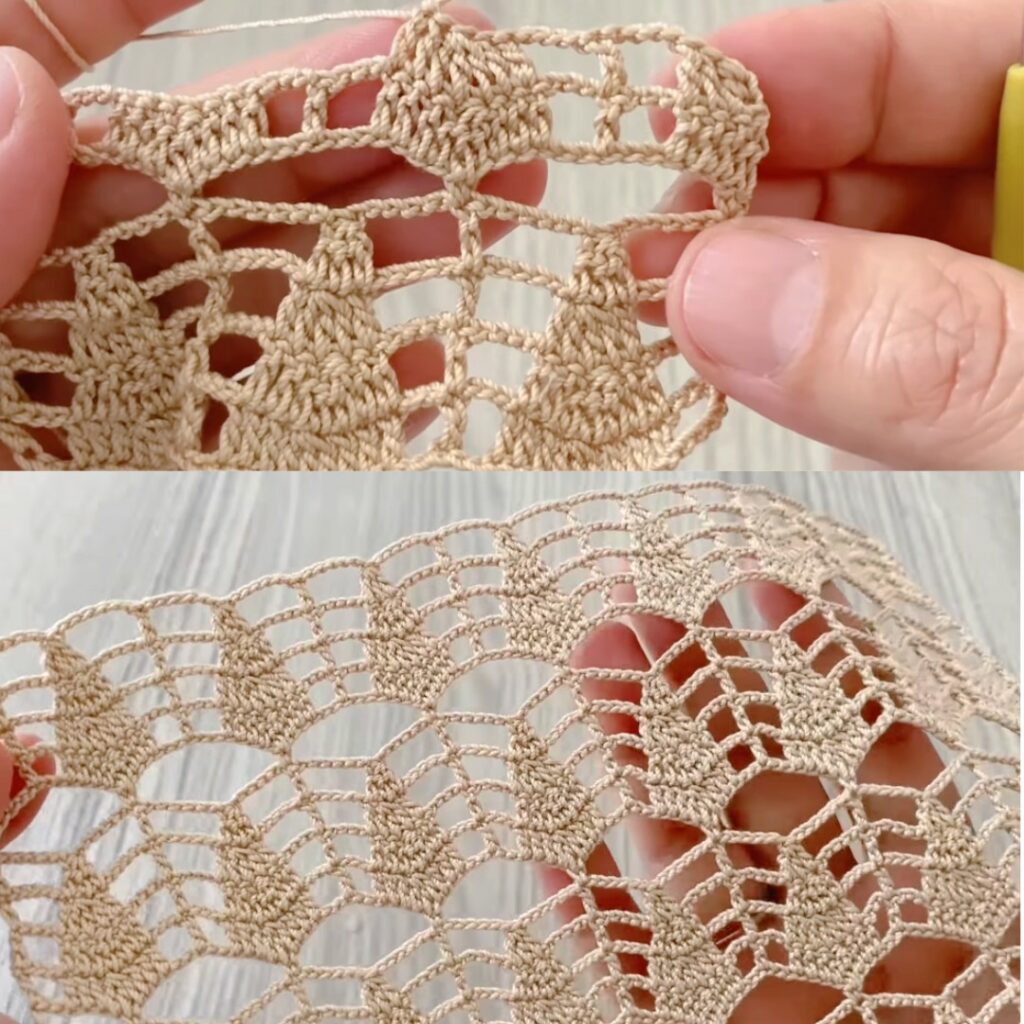
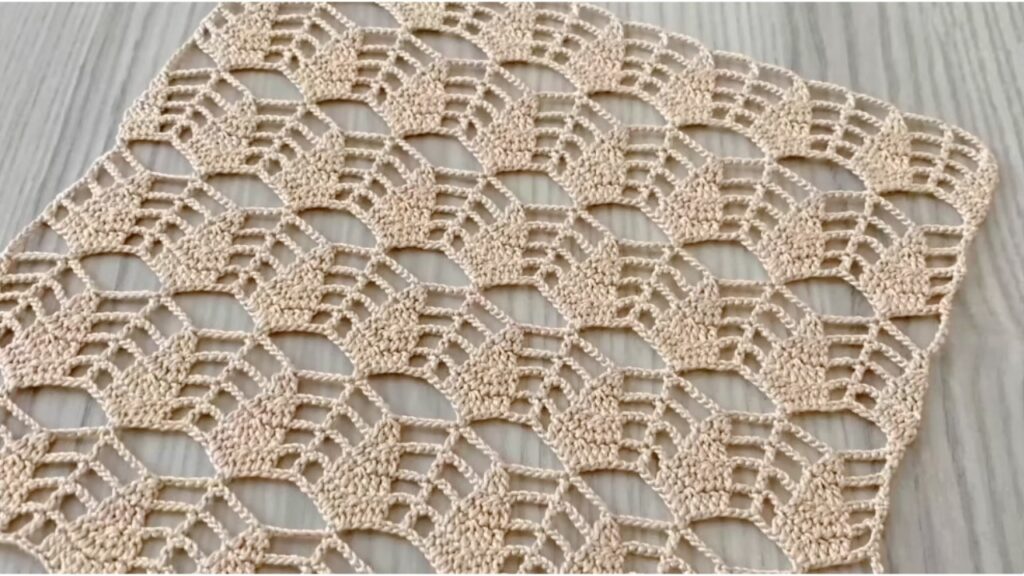
The Motif — round-by-round (US terms)
Work loosely for airy lace. Pattern makes 12 petals then squares into 4 sides.
Rnd 1 — center ring
- Make a magic ring. ch 3 (counts as dc). Work 11 dc into ring (12 dc total). Pull tight. Join with sl st to top of ch-3.
Rnd 2 — anchor loops
- ch 1, sc in next dc, ch 3 — rep around (12 sc + 12 ch-3 loops). Join.
Rnd 3 — small petals
- sl st into first ch-3 loop.
- In each loop work: (sc, ch1, hdc, 3 dc, hdc, ch1, sc) — tapered petal. (12 petals) Join.
Rnd 4 — connector arches
- ch 1, sc in outer sc of petal, ch 5 — rep around (12 ch-5 arches). Join.
Rnd 5 — large fans (alternate)
- Into every other ch-5 arch work: (sc, ch1, hdc, 5 dc, hdc, ch1, sc) (big fan).
- Into the remaining arches work (sc, ch3, sc) (connector). Join.
Rnd 6 — tall loops
- ch 1, sc in first sc, ch 7, sc in next sc — rep around (12 ch-7 loops). Join.
Rnd 7 — top fans
- In each ch-7 loop work: (sc, ch2, 3 dc, ch2, sc) — (12 top fans). Join.
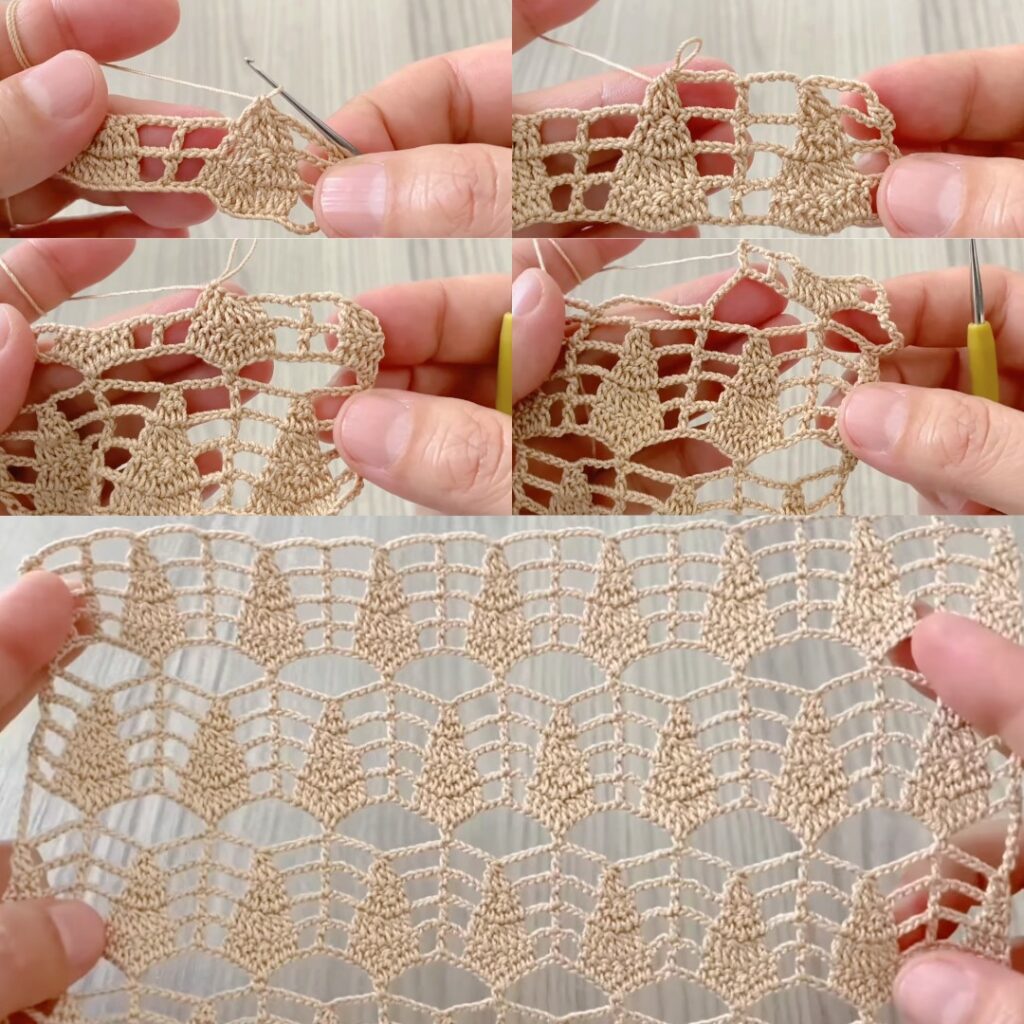
Rnd 8 — squareing round (make 4 sides)
We have 12 top fans; group them so each side contains 3 fans and create 4 corner ch-3 spaces.
- ch 3 (counts as dc), 3 dc in next top-fan space, 3 dc in next top-fan space, in third top-fan space of the trio work (3 dc, ch 3, 3 dc) (corner).
- Repeat the [3dc, 3dc, corner] sequence 4 times to consume all 12 fan tops. Join.
If motif looks a little off, move which fan becomes a corner so the 4 corners are evenly spaced — this tweak is normal for the first motif.
Rnd 9 — tidy sc round (join round)
- ch 1, sc evenly around; place 3 sc in each corner ch-3 to round them. Join.
- Optional Rnd 10: skip 2 sc, 5 dc in next sc (shell), skip 2 sc, sc in next sc — scalloped edge. Fasten off.
- Block motif to exact size W.
Tips for consistent motifs
- Keep the same hook and tension for all motifs.
- Block motifs identically. If some motifs remain smaller, add an extra sc round to them.
- Make a small sample batch first (5–10 motifs) to verify look, then bulk-make.
Joining motifs — two methods
A) Join-As-You-Go (recommended)
Join on Rnd 9 while doing the sc round.
JAYG rule: when your new motif’s Rnd 9 reaches a stitch that will touch a finished neighbor, replace that sc with:
sc in your motif st, ch 1, sl st into the corresponding sc (or corner) of the finished neighbor, ch 1
- For corner joining to two neighbors, sl st into both neighbors’ corner ch-3s, spacing with ch-1 so corner stays open.
- Work the first row left→right (no joins for first motif) and continue row by row. Pin motifs before joining if alignment is tricky.
- If joins pull tight use
ch 2instead ofch 1.
B) Sew after blocking
- Block all motifs and lay them in a grid. Sew with tapestry needle using mattress stitch through back loops only for the flattest seam. Whipstitch is quicker but bulkier.
Edging options
- Simple scallop: sc round → shell round (
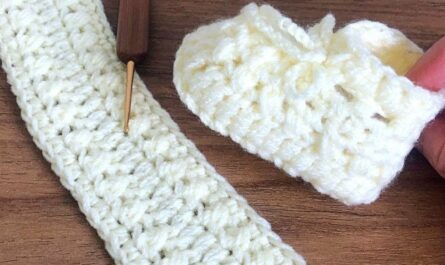
skip 2 sc, 5 dc, skip 2, sc). - Ribbed band (good for garments): sc round → 3–4 rounds hdc in BLO.
- Tiny picot trim: after sc round do
(sc, ch3, sl st in same sc)every 4–6 sc.
Planning projects — counts & yarn
Calculate motif counts
After blocking one motif, use:
motifs_across = round(project_width_cm / W)motifs_down = round(project_length_cm / W)total_motifs = motifs_across × motifs_down
Yarn estimate (accurate)
- Weigh blocked motif: g_per_motif (grams).
total_grams ≈ g_per_motif × total_motifs + 10–15%(joins & border).- Convert grams → skeins using yarn label weight.
Example: motif = 10 g, total motifs = 60 → 600 g + 15% ≈ 690 g → buy ~700 g.
Example mini-projects (use W ≈ 10 cm as example)
Runner 35 × 140 cm
- motifs_across ≈ 4; motifs_down ≈ 14 → total ≈ 56 motifs
Crop blouse (bust ≈ 96 cm, 2 motif rows)
- motifs_across ≈ 10 (split front/back 5+5); rows = 2 → total ≈ 20 motifs
Shawl or throw
- Make a rectangle of motifs to desired size and add a wide scallop border.
Assembly & finishing checklist
- Make motifs in batches (R1×N, R2×N, …) — faster than finishing each one.
- Block in small groups and keep them stacked to avoid drying distortion.
- Join motifs row by row using JAYG or sew after blocking.
- Work a stabilizing sc round around assembled piece.
- Add decorative border and finalize block.
- Weave ends and press/steam lightly.
Troubleshooting & common fixes
- Uneven motif sizes: block all; add 1 sc round to smaller motifs.
- Lopsided corners: ensure Rnd 8 creates 4 evenly spaced corners — shift corner placement if needed.
- Seams pucker/tight: loosen join tension (use
ch 2) or sew with mattress stitch. - Edges ripple: add sc stabilizer round before shell round.
- Pattern miscounts: recount petals/top fans; Rnd 5 alternation must be consistent.
Quick cheat-sheet (one block)
- R1: magic ring → 12 dc.
- R2: sc, ch3 anchors (×12).
- R3: (sc, ch1, hdc, 3dc, hdc, ch1, sc) ×12 (petals).
- R4: sc, ch5 arches (×12).
- R5: alternate big fan (5dc) / small connector (sc,ch3,sc).
- R6: ch7 loops (×12).
- R7: (sc,ch2,3dc,ch2,sc) ×12 (top fans).
- R8: square with 4 corners (group top fans 3 per side).
- R9: sc round (3 sc in corners) — join here (JAYG). Optional R10 scallop.
VIDEO: