by
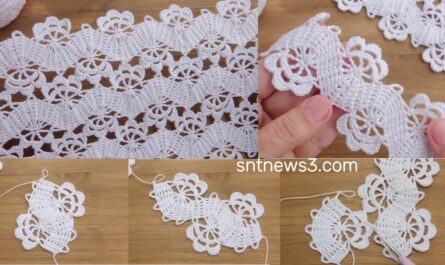
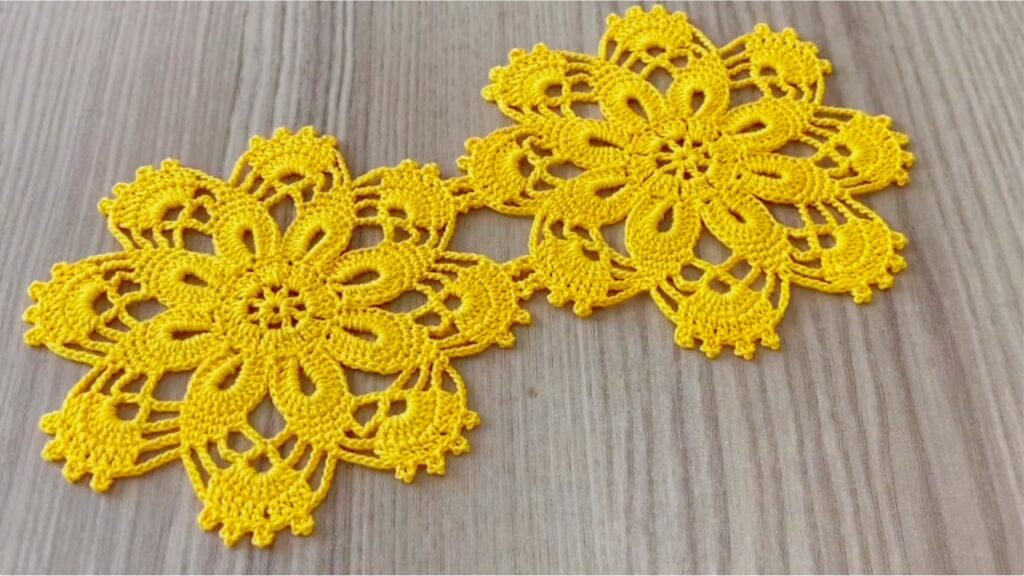
by 🌼 Crochet “Lacy 8-Petal Motif” — step-by-step
Finished size (approx.): 10–12 cm / 4–4.7 in (depends on yarn & hook)
Yarn: 4-ply / sport or cotton thread (or DK for larger result)
Hook: 2.5–3.5 mm (match yarn label; use a size that gives the photo look)
Notions: yarn needle, scissors, blocking pins
Abbreviations
- ch = chain
- sl st = slip stitch
- sc = single crochet
- hdc = half double crochet
- dc = double crochet
- tr = treble (UK = double treble) — I use US terms: tr = US treble
- st(s) = stitch(es)
- … = repeat between asterisks
Note: Pattern makes 8 petals. Work loosely on long loop rounds (chains & tall posts) so the motif lies flat.
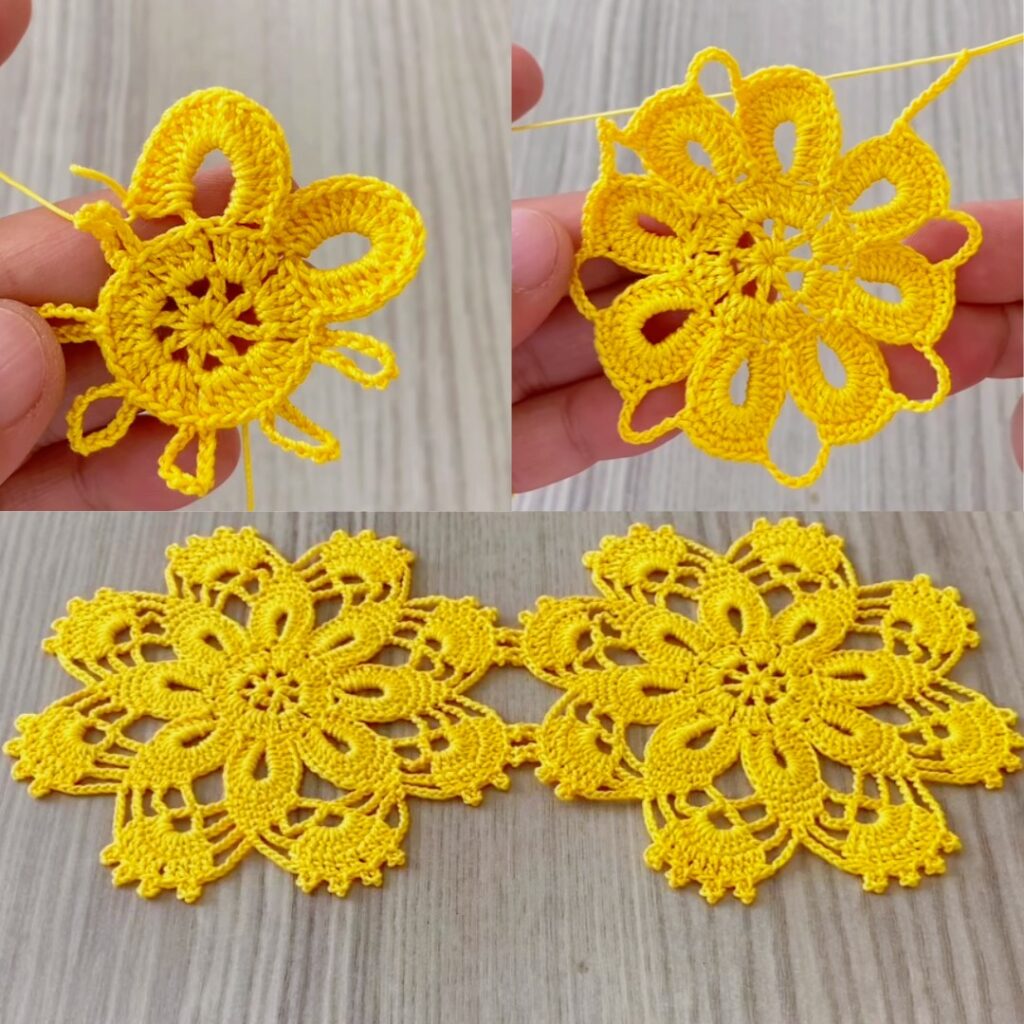
Start — center ring
- Make a magic ring. (If you prefer: ch 4 and join with sl st to make a ring.)
- Round 1: ch 3 (counts as first dc), work 15 dc into the ring. (ch-3 + 15 dc = 16 dc total.) Pull ring closed, sl st to top of ch-3 to join. (16 dc)
Round 2 — form 8 chain spaces
- Ch 4, skip next dc, sc in next dc — repeat * 7 more times for a total of 8 ch-4 spaces.
- After the last repeat, sl st to the first sc to join.
(You now have 8 evenly-spaced ch-4 loops — these will become the base of the petals.)
Round 3 — main petals (worked into each ch-4)
For each ch-4 space work the following flower petal:
- In the first ch-4 space: sc, hdc, 7 dc, hdc, sc all in that same ch-4 space.
- That is: sc, hdc, dc ×7, hdc, sc. This creates a full rounded petal.
- Sl st into the next ch-4 space and repeat the petal sequence into each space.
- After completing the 8th petal, sl st to the base to join. Fasten off if you want to change color for the arches, or continue with same color.
(You should now have 8 pronounced petals.)
Round 4 — 1st decorative round: small sc round to even petal bases
- Rejoin (if needed) at the base between any two petals.
- Work sc evenly around the base of each petal—about 8–12 sc across each petal (distribute evenly), placing 2–3 sc into the curved top if needed to shape it. Join with sl st.
- This round evens the profile and prepares for chain arches.
Round 5 — tall chain arches and post groups (the lacy frame)
This round creates the lacy architecture seen between petals.
For each petal do:
- At the outer base between petals: sl st to the top of the petal edge, ch 7, skip forward to the outer base between next petals and make a cluster of tall posts as follows: (tr, ch 2, tr, ch 2, tr) worked into the sc space at the base of the next petal (or into a single st of Round 4).
- After the tr cluster, sl st to the next petal edge to anchor the arch and repeat.
In simpler numbering form:
- sl st to petal top → ch 7 → tr, ch 2, tr, ch 2, tr (anchored at base) → sl st to petal top → repeat for all 8 arches.
Variation: If your yarn/hooks make the ch7 too long, use ch6 or ch8 to match visual spacing.
Round 6 — secondary arches & small chains
- Working into the ch-7 arch spaces created in Round 5: sl st into arch base, ch 3, (dc into each of the three tr posts from previous round separated by ch-2 spaces), ch 3, sl st into next anchor — this produces three vertical bar openings in each arch (like lacy ribs in the photo).
- Repeat around so every large arch gets three vertical lines of stitches separated by small chain spaces. Join with sl st.
(If the pattern sounds complex, think: each big arch becomes decorated with a pair of small chains and tall posts to create the layered lace look you see in the picture.)
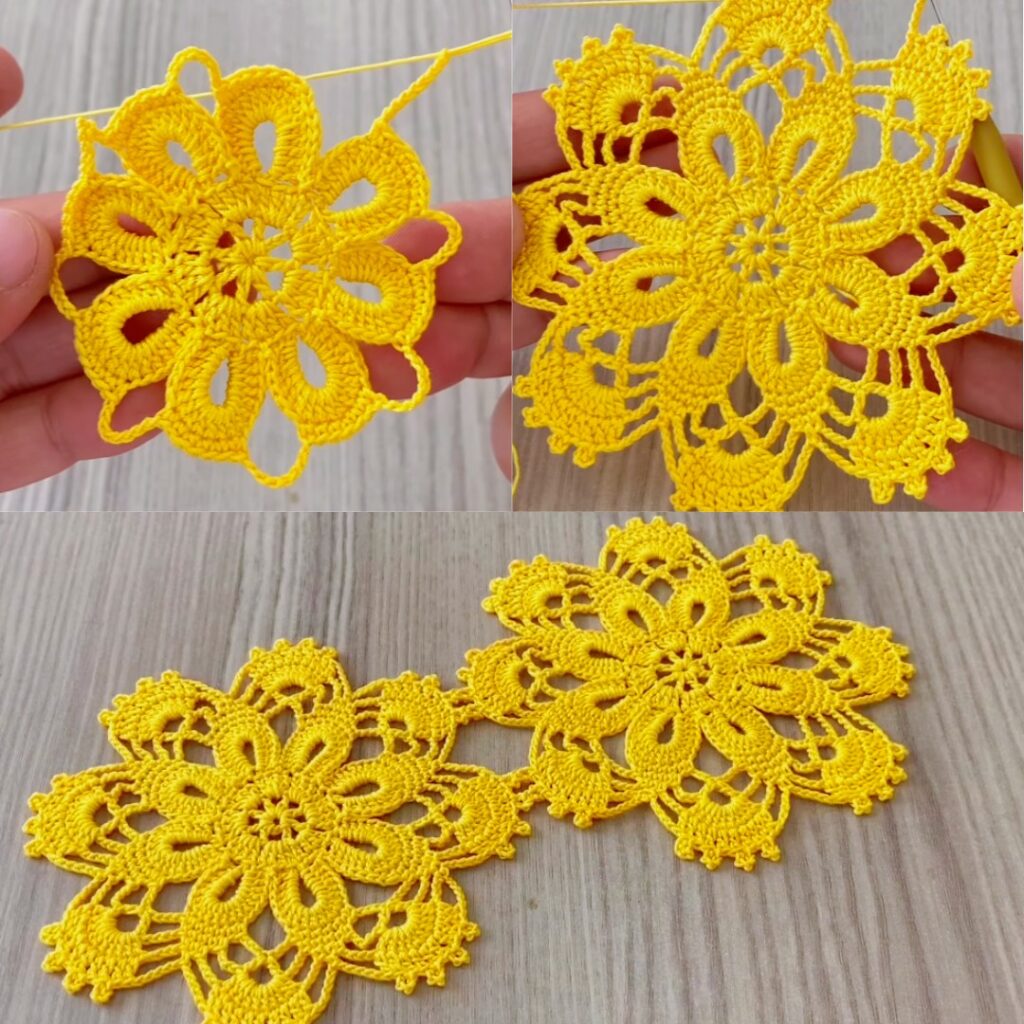
Round 7 — outer scallop & picot edge (finishing flourish)
- Work around the very outer edge: sc 3, (ch 3, sl st into same sc) — this forms a small picot/bud, then sc 5 across the next curved area — repeat around.
- Concretely: place (sc, sc, sc, (ch3 + sl st into same st)) in each little outer bump, then distribute 3–6 sc across flatter outer stretches so the edge becomes a regular scallop.
- Join with sl st and fasten off. Weave in ends.
The tiny dot-like bobbles in the photo are picots (ch-3 sl st back) spaced evenly — you can increase/decrease sc between them to keep the motif flat.
Blocking & finishing
- Wet-block or steam block the motif: pin it flat to the desired shape (gently pull petals into rounded shape) and let dry completely. Pin small points where the picots sit to make the scallop crisp.
- Weave in ends neatly on the back.
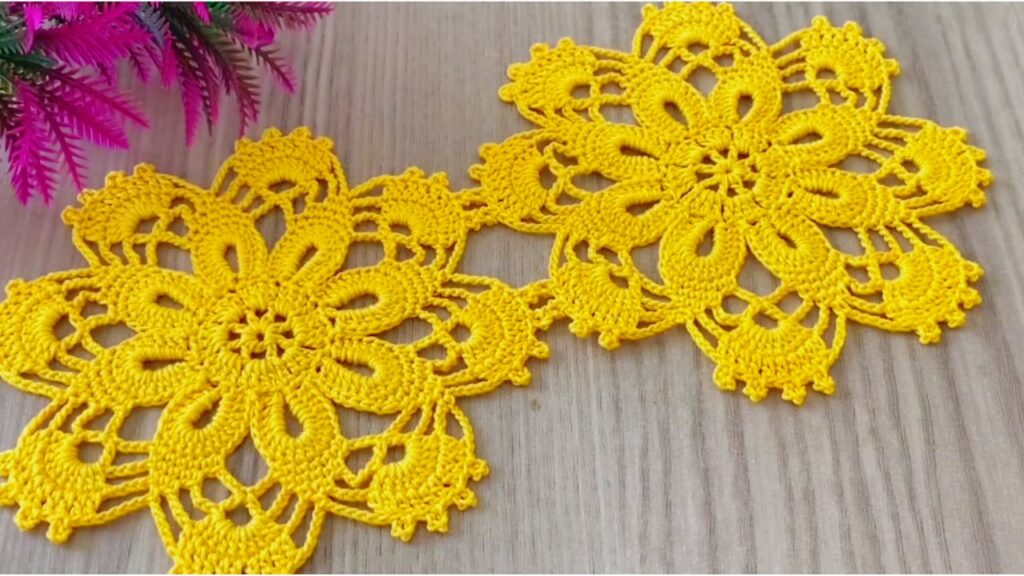
Join motifs (2 ways)
Join As You Go (JAYG)
- When you make Round 7 on a new motif, instead of making the final sl st in a spot, sl st into the corresponding outer stitch of the adjacent motif to attach. Continue finishing the edge — this joins neatly without sewing.
Sewing join
- Make motifs separately. Lay motifs with right sides up and mattress stitch through outermost sc rounds, or use invisible whipstitch along outer arches.
Size & tension tips
- If the motif cups: use a slightly larger hook or relax tension on the petals and arches.
- If it waves/ruffles: tighten the hook or remove a few chains in the arch rounds.
- To make the motif larger but keep look: use thicker yarn and a larger hook (or add extra dc in the petal center, e.g., 9dc instead of 7dc).
Quick variations
- Two-color petals: change color after Round 3 for petals/center contrast.
- Smaller motif: use ch-6 in arches, 5 dc in petals.
- More openwork: replace some petal dc with ch-1 spaces (e.g., clusters like [dc, ch1, dc]).
VIDEO: