 by
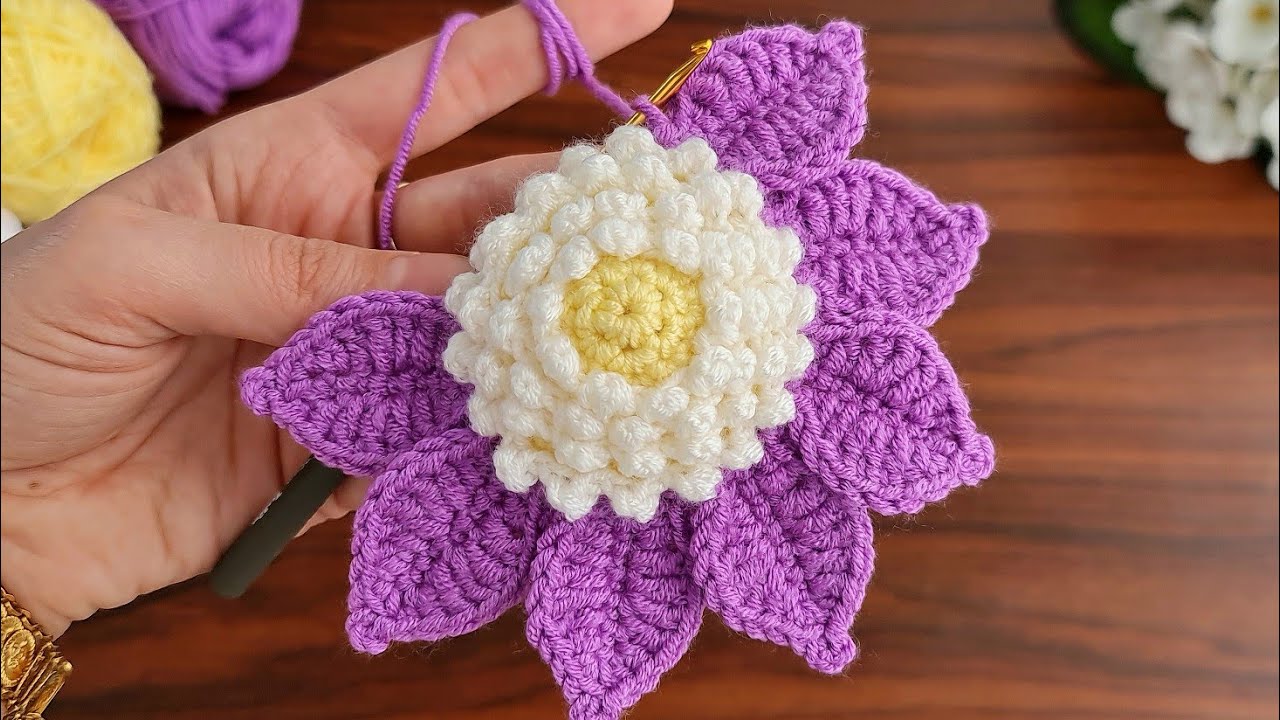
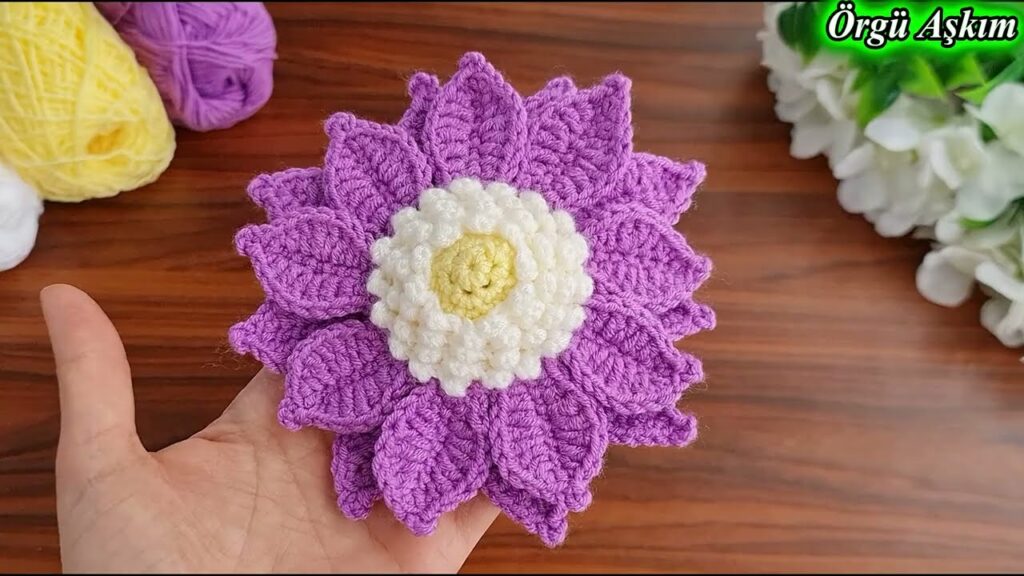
by Crocheting decorative flowers is a charming way to enhance blankets, hats, bags, and even home décor items. A leafy flower adds a touch of nature-inspired elegance to any project. In this guide, you’ll learn how to crochet a beautiful flower with layered petals and delicate leaves.

🧶 Materials You’ll Need
- Yarn: Use worsted weight or DK weight yarn in two or three colors:
- Color A: Flower center
- Color B: Petals
- Color C: Leaves
- Crochet hook: 3.5 mm (E) or 4.0 mm (G), depending on yarn weight
- Scissors
- Yarn needle (for weaving in ends)
- Stitch markers (optional)
✨ Stitches & Abbreviations Used
| Abbreviation | Stitch Name |
|---|---|
| ch | chain |
| sl st | slip stitch |
| sc | single crochet |
| hdc | half double crochet |
| dc | double crochet |
| tr | treble crochet |
| st(s) | stitch(es) |
| sk | skip |
If you’re unfamiliar with any of these stitches, practicing them individually before beginning the project is recommended.
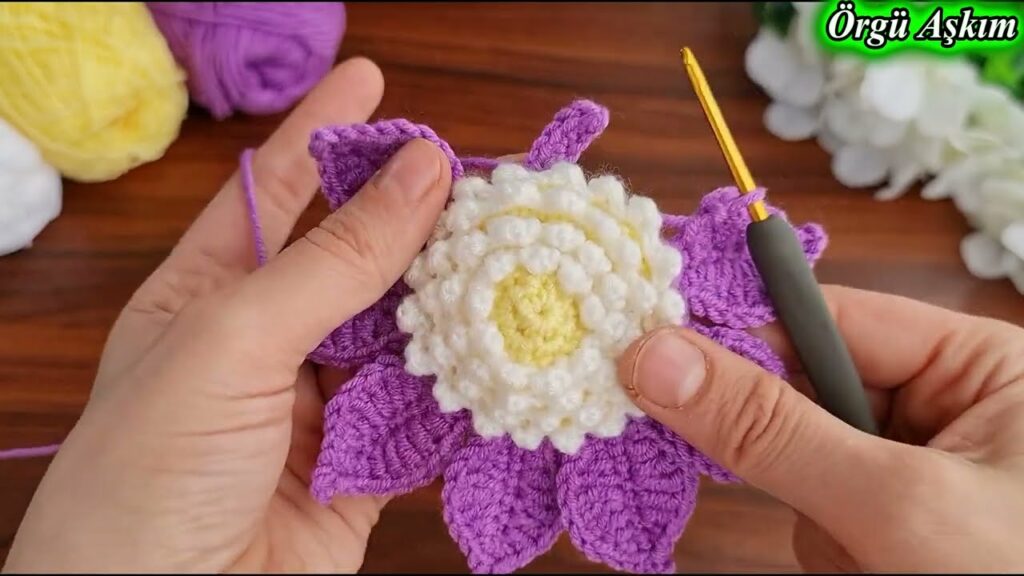
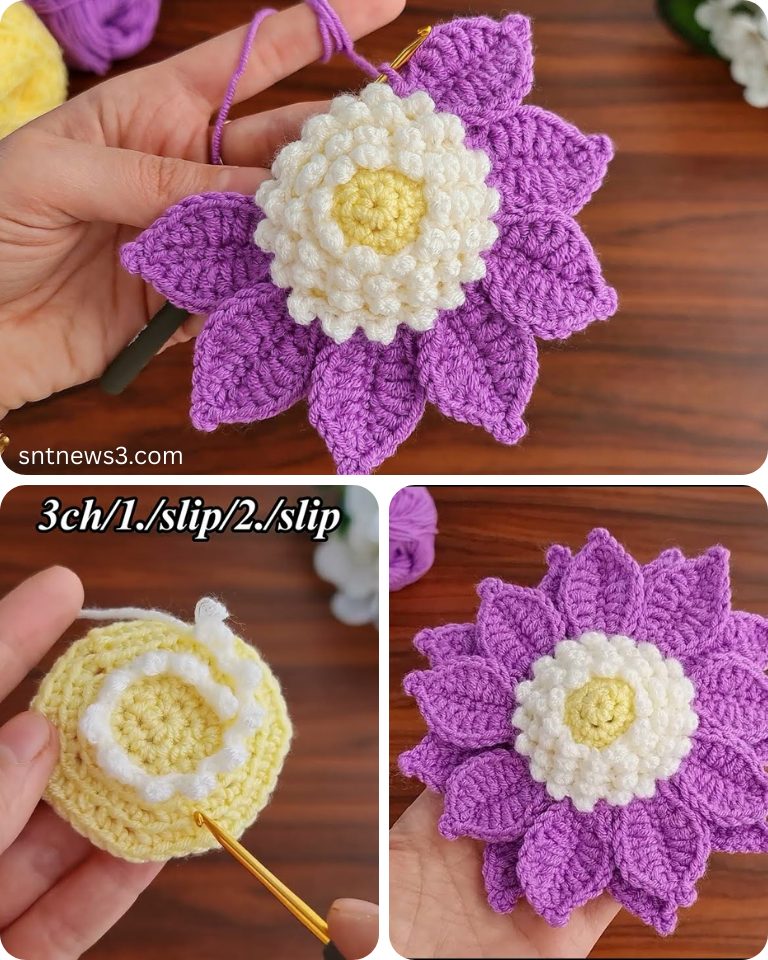
🌼 Part 1: Crocheting the Flower Center
- Magic Ring: Start with a magic ring.
- Round 1: Ch 1 (does not count as a stitch), work 6 sc into the ring. Pull the ring tight. Join with sl st to the first sc. (6 sts)
- Round 2: Ch 1, work 2 sc in each stitch around. Join with sl st. (12 sts)
✅ Tip: You can change colors after Round 2 if you want a contrasting petal color.

🌺 Part 2: Crocheting the Petals (Layer 1)
- Round 3: [Ch 2, skip 1 st, sl st in next] repeat around. You will have 6 chain spaces (petal bases).
- Petal Work: Into each ch-2 space:
- (sc, hdc, dc, tr, dc, hdc, sc) – all in the same space.
- Repeat for each of the 6 spaces to complete your first layer of petals.
You now have a beautiful 6-petal flower. To make it fuller, let’s add a second layer of petals.
🌸 Part 3: Adding a Second Petal Layer (Optional)
- Attach yarn to back loops of Round 2 (the unworked loops).
- [Ch 3, sl st in next back loop] around – creates another set of loops behind the first petals.
- In each ch-3 space:
- (sc, hdc, dc, dc, hdc, sc)
- This creates slightly smaller petals behind the main ones for a layered look.
🍃 Part 4: Crocheting the Leaves
You can crochet individual leaves and sew or attach them directly to the flower.
Leaf Pattern (Make 2 or 3):
- Ch 10
- Work into the chain:
- sc in 2nd ch from hook,
- hdc in next,
- dc in next 2,
- tr in next,
- dc in next 2,
- hdc in next,
- sc in last.
- Do not turn. Work along the opposite side of the chain to mirror the stitches.
- Sl st to the first sc to close the round and fasten off.
🌿 Optional: Ch 3 from base and sl st back to create a small stem.
🧵 Part 5: Assembly and Finishing Touches
- Use a yarn needle to weave in all ends securely.
- Position the leaves behind or around the flower and sew them in place with matching yarn.
- If you’re attaching it to another item, leave a long tail for sewing.
🎨 Customization Tips
- Use variegated yarn for a multicolor effect.
- Add a button or bead to the center for extra flair.
- Mix yarn textures (e.g., cotton petals with fuzzy leaves) for contrast.
🪡 What Can You Use This Leafy Flower For?
- Hair clips or headbands
- Appliqué for clothing or bags
- Brooches or pins
- Decorative garlands
- Scrapbooking embellishments
Video tutorial:
Final Thoughts
Crocheting a leafy flower is a satisfying project that’s both quick and beautiful. It’s a wonderful way to practice essential stitches and use up leftover yarn. Once you’ve made one, you’ll want to make a garden’s worth!
Happy crocheting! 🌼🧶