by
by Crochet lovers, rejoice! If you’ve ever wanted to craft something both stunning and practical, a crochet shoe is the perfect project. Whether you’re a seasoned hook-wielder or a curious beginner, creating your own pair of crochet shoes is not only rewarding but surprisingly easy. In this article, we’ll explore what makes crochet shoes so beautiful, why they’re simple to make, and how you can start creating your own stylish pair today.

The Charm of Crochet Shoes
There’s something truly enchanting about handmade items, and crochet shoes are no exception. They blend the softness and warmth of yarn with the personal touch of handcrafted art. A well-made crochet shoe feels like a cozy hug for your feet — and better yet, they can be customized to your taste with endless options in color, design, and embellishment.
Why they’re beautiful:
- Elegant texture: The stitches add depth and character, giving them a boutique feel.
- Custom colors: From pastels to vibrant tones, you can match them with any outfit or mood.
- Adorable designs: Think baby booties with bows, boho-style sandals, or slipper sneakers with playful patterns.
Yes, They’re Actually Easy to Make
You might be thinking, “Shoes? That sounds complicated!” But in the world of crochet, shoes are among the most approachable wearable items. With a simple sole pattern and a few basic stitches, even a beginner can whip up a lovely pair in no time.
What You Need:
- Yarn (cotton or acrylic works well for sturdiness)
- Crochet hook (size depends on your yarn)
- Yarn needle
- Stitch marker
- Optional: rubber soles or flip-flop bottoms for extra durability
Basic Stitches to Know:
- Chain stitch (ch)
- Single crochet (sc)
- Double crochet (dc)
- Slip stitch (sl st)
If you know these four, you’re already equipped to start!
A Simple Beginner-Friendly Pattern Outline
Let’s break down a basic shoe pattern that almost anyone can follow:
1. Start with the Sole
The sole is the foundation of your shoe. You’ll begin with a chain (usually 10–20 depending on the size) and work around it in an oval shape using single crochets. You’ll increase at the ends to shape the toe and heel.
2. Build the Upper
Once you’ve built up a few rows of the sole, you’ll start working in rounds to form the upper part of the shoe. This can be a simple series of single or double crochets going up to the ankle or lower, depending on your desired style.
3. Add Details
This is where you make them your own! Add a strap across the top, a decorative bow, or even crochet flowers. You can also alternate yarn colors or add textured stitches for flair.
4. Optional: Attach a Sole
To make your shoes outdoor-friendly, attach them to a pre-cut rubber or flip-flop sole using a strong thread or glue and a tapestry needle.
🧶 How to Make a Beautiful and Easy Crochet Shoe
🧵 Materials Needed:
- Worsted weight yarn (cotton or acrylic) – about 100g
- Crochet hook (usually 4.0 mm or 5.0 mm – check yarn label)
- Yarn needle for weaving in ends
- Scissors
- Stitch marker (optional)
- Non-slip sole material (optional: felt, flip-flop base, or puff paint)
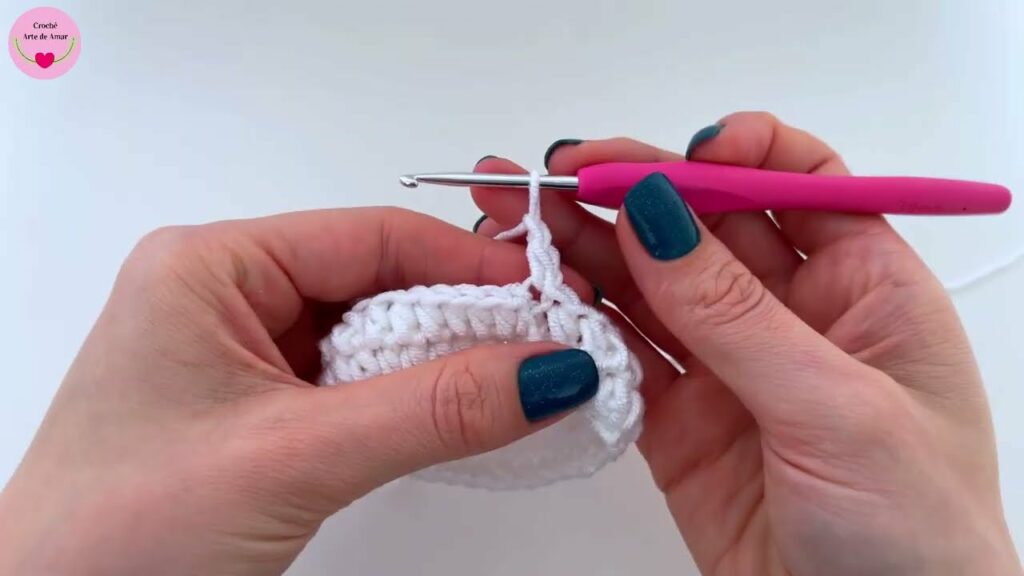
👣 Part 1: Crochet the Sole
Step 1: Foundation Chain
- Chain 18 (adjust if you want a longer or shorter shoe).
Step 2: Oval Sole Base
- In the 2nd chain from hook, make 2 single crochets (sc).
- Make 1 sc in each chain across.
- In the last chain, make 5 sc (to turn the corner).
- Work down the other side of the chain, making 1 sc in each.
- In the very first stitch (where you started), make 2 sc to complete the oval.
- Join with slip stitch to first sc.
Step 3: Build Sole Thickness (Optional)
- Repeat the round 1–2 more times, increasing slightly around toe and heel corners (use 2 sc in same stitch on the ends).
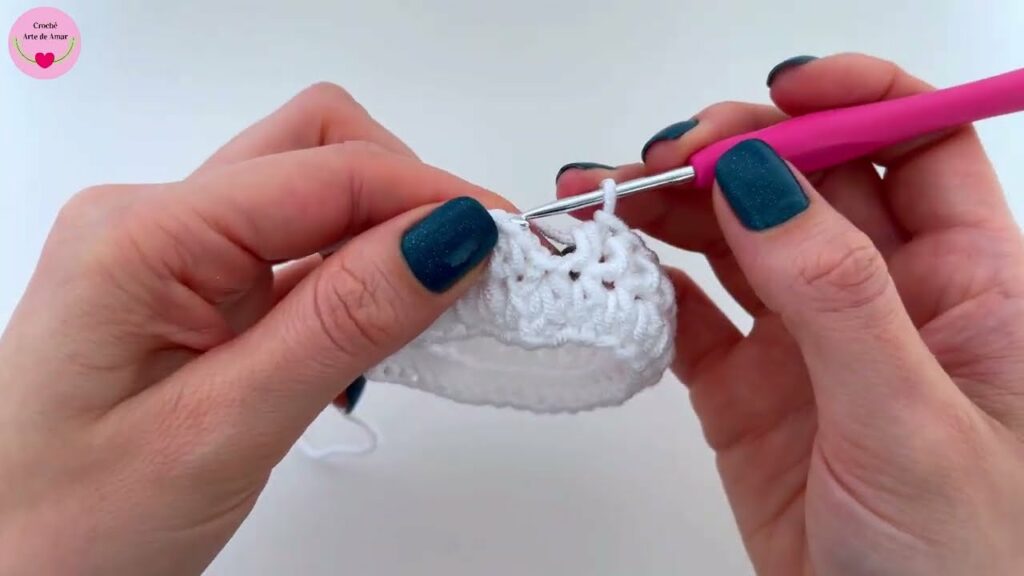
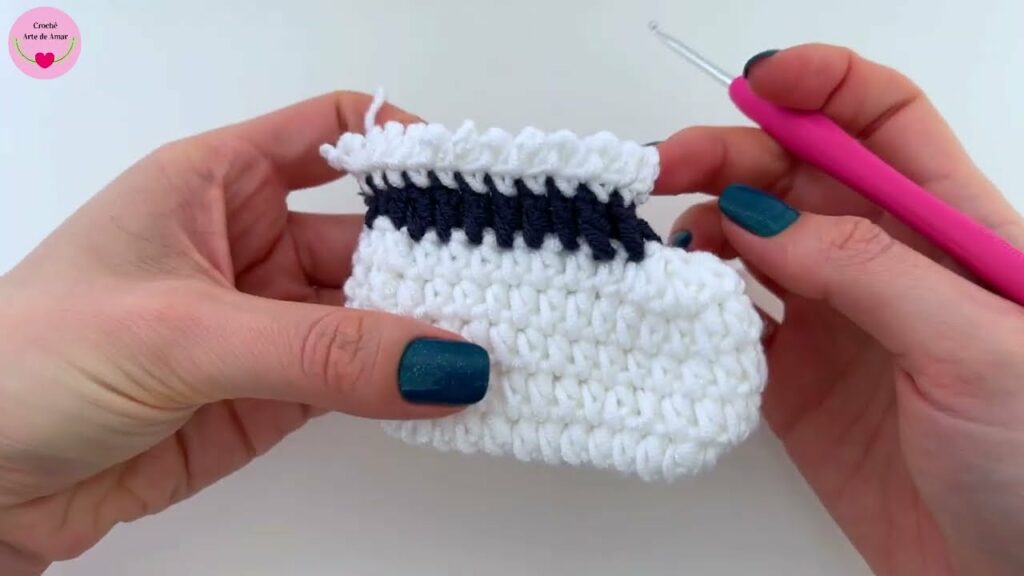
👟 Part 2: Crochet the Upper Part of the Shoe
Step 1: Create the Wall
- Start crocheting single crochets (sc) in the back loops only of the previous round to form the wall.
- Do this for 2–3 rounds, depending on how high you want the sides.
Step 2: Shape the Toe
- Find the center front (use stitch marker).
- Crochet back and forth halfway across the front to cover the toe area.
- Example:
- Row 1: Halfway across in sc, turn.
- Row 2–4: Decrease one stitch at each end (sc2tog at both ends) to shape the toe.
- Fasten off and leave a tail for sewing.
Step 3: Close the Toe
- Fold the toe section down and sew to the sides using the yarn needle and leftover yarn tail.
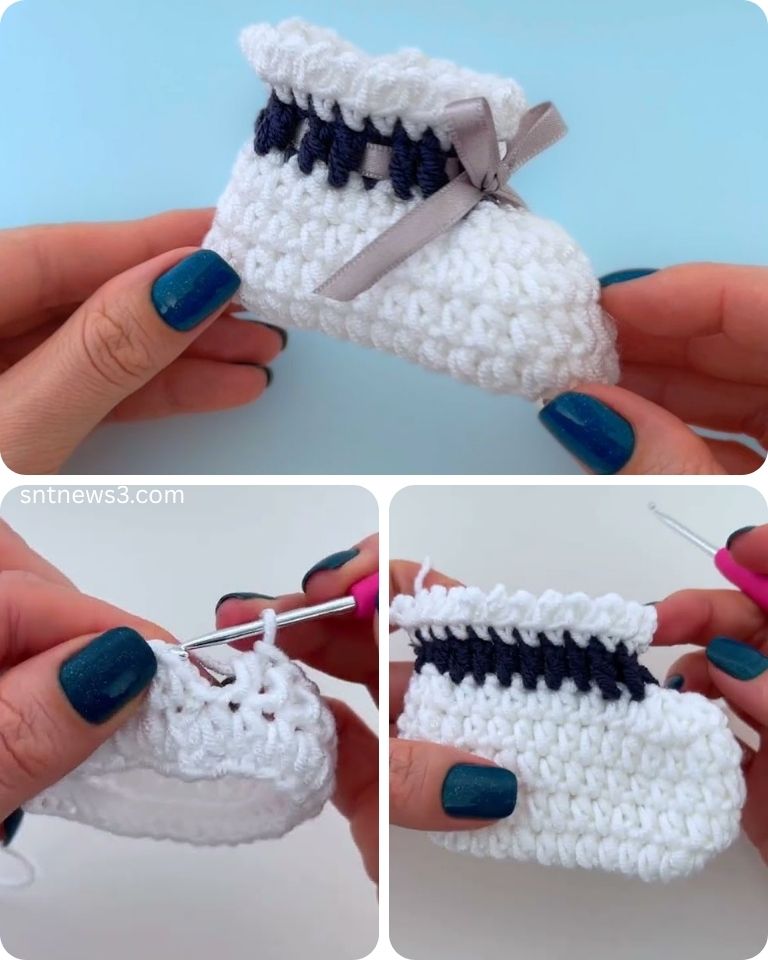
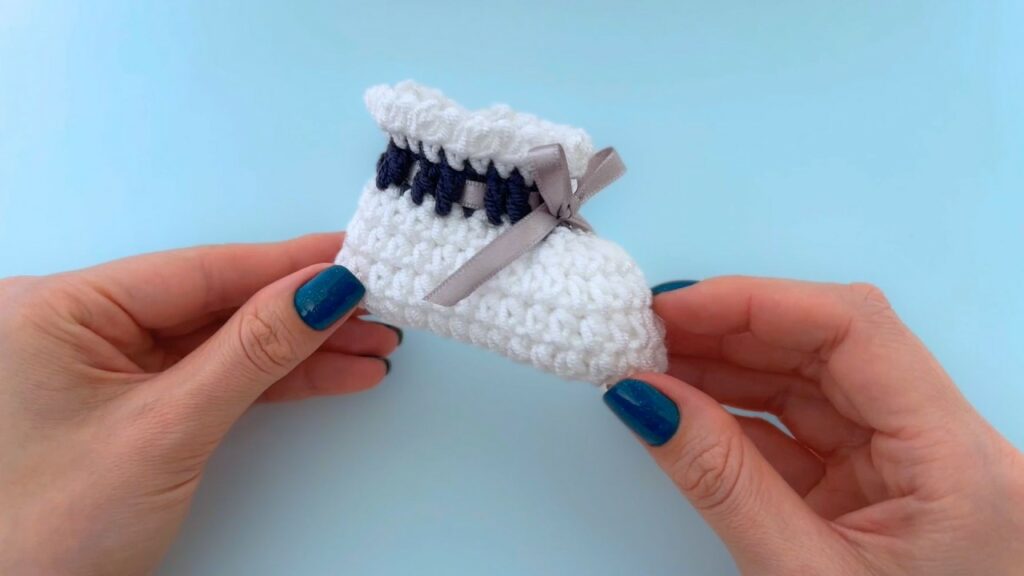
🎀 Part 3: Optional Details
Strap or Bow
- Chain 20, then single crochet back. Attach as a strap or make a bow.
Add Sole Padding or Grip
- Cut a piece of felt or foam to fit the bottom.
- Glue or sew it to the sole for comfort and durability.
- For grip: use puff paint or rubber dots on the bottom.
✅ Finishing Touches
- Weave in all ends with your yarn needle.
- Try on the shoe and adjust if needed.
- Make the second shoe the same way (reverse shaping for left/right if necessary).
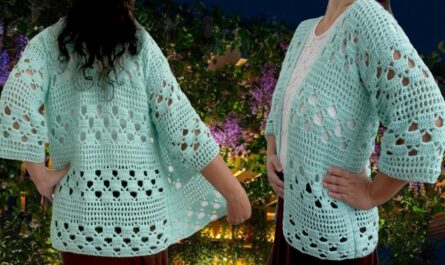
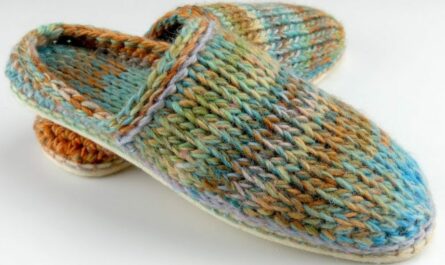
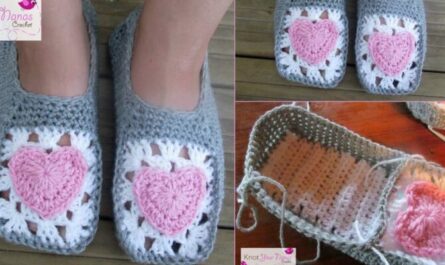
Ideas for Crochet Shoe Styles
Looking for inspiration? Here are a few trendy crochet shoe ideas to try:
- Baby booties: Soft, tiny, and quick to make. Ideal for gifts!
- Home slippers: Cozy, plush, and perfect for lounging.
- Summer sandals: Open-toe designs with straps for warm weather.
- Sneaker-style shoes: Add laces and contrasting colors for a fun twist.
Tips for Success
- Choose a sturdy yarn if you want durability.
- Use a non-slip sole for safety, especially on tile or wood floors.
- Check your gauge to ensure the shoe fits well.
- Try them on as you go — that’s the beauty of DIY!
Final Thoughts
What a beautiful crochet shoe — and very easy, indeed! With just a little yarn and a bit of time, you can create something functional, fashionable, and entirely handmade. It’s a project that combines creativity, comfort, and practicality — all while honing your crochet skills.
Whether you’re crafting for yourself, a loved one, or even to sell at a craft fair, crochet shoes are a fantastic way to bring beauty to every step. So grab your hook, choose your yarn, and start stitching — your feet will thank you!
Video tutorial: