 by
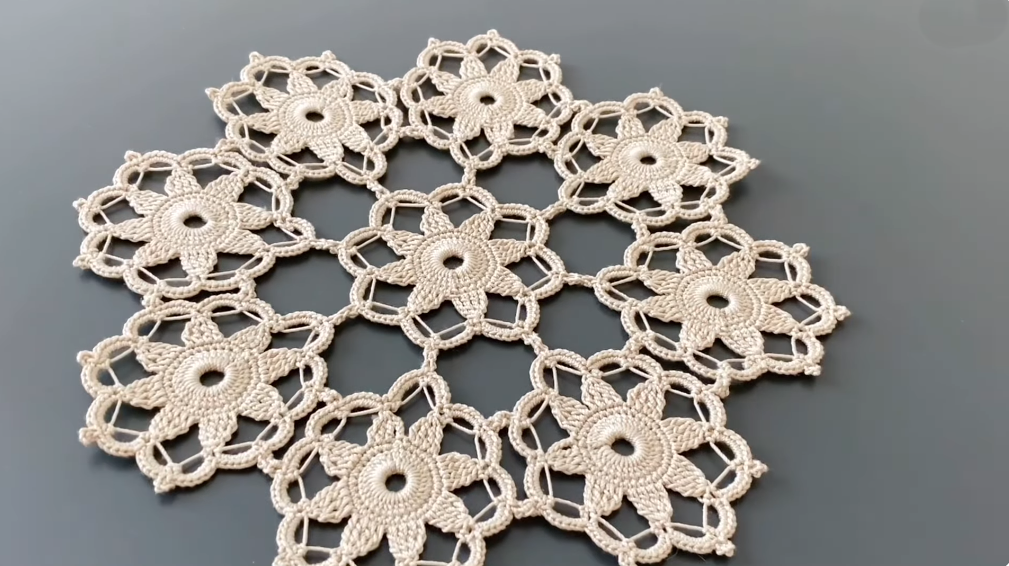
by This motif is elegant, light, and versatile, perfect for:
- blankets
- table runners
- shawls
- pillow covers
- bags
- blouses
- decorative napkins
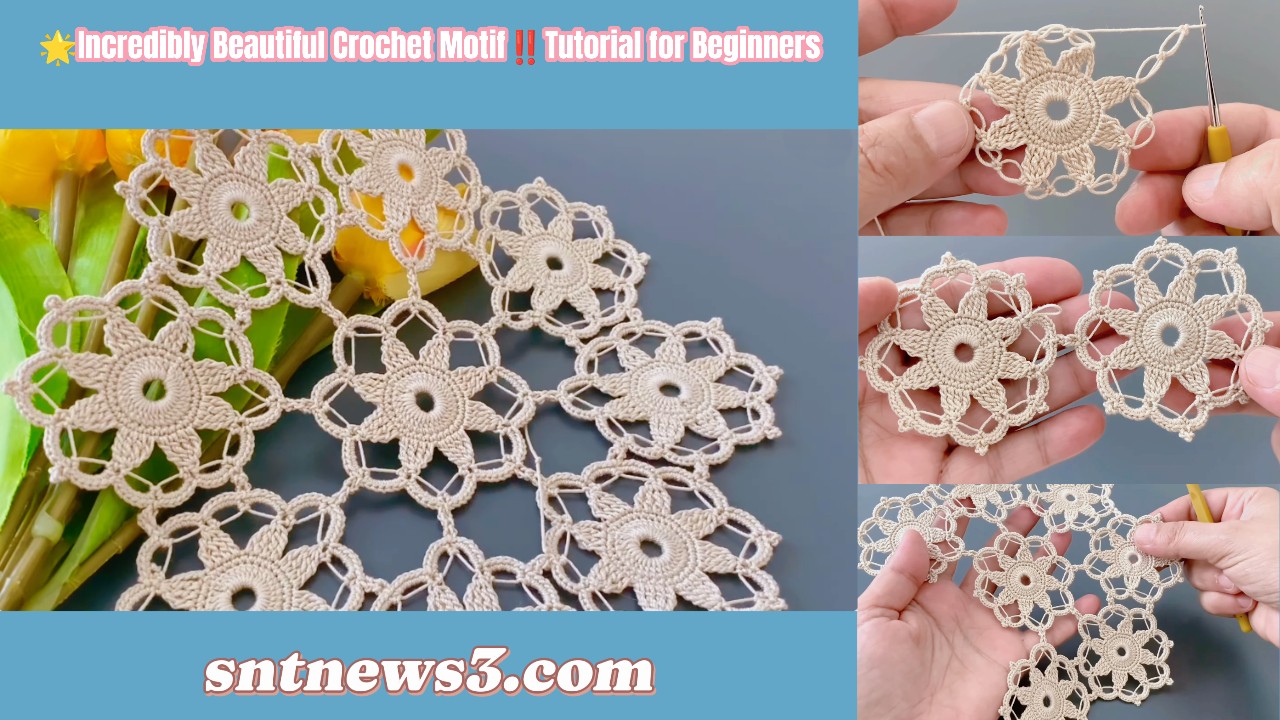
🌟 INCREDIBLY BEAUTIFUL CROCHET MOTIF
Beginner Friendly – Full Written Tutorial
(US Crochet Terms)
🧶 SKILL LEVEL
Beginner – Easy
🧵 MATERIALS
- Yarn: cotton or light acrylic (any color)
- Hook: 3.0 – 4.0 mm (match yarn label)
- Scissors
- Yarn needle
✂️ ABBREVIATIONS (US TERMS)
- ch = chain
- sl st = slip stitch
- sc = single crochet
- hdc = half double crochet
- dc = double crochet
- sp = space
- rep = repeat
📐 MOTIF SIZE
- Square motif
- Can be joined to create larger projects
- Size depends on yarn and hook
🧶 STEP-BY-STEP INSTRUCTIONS
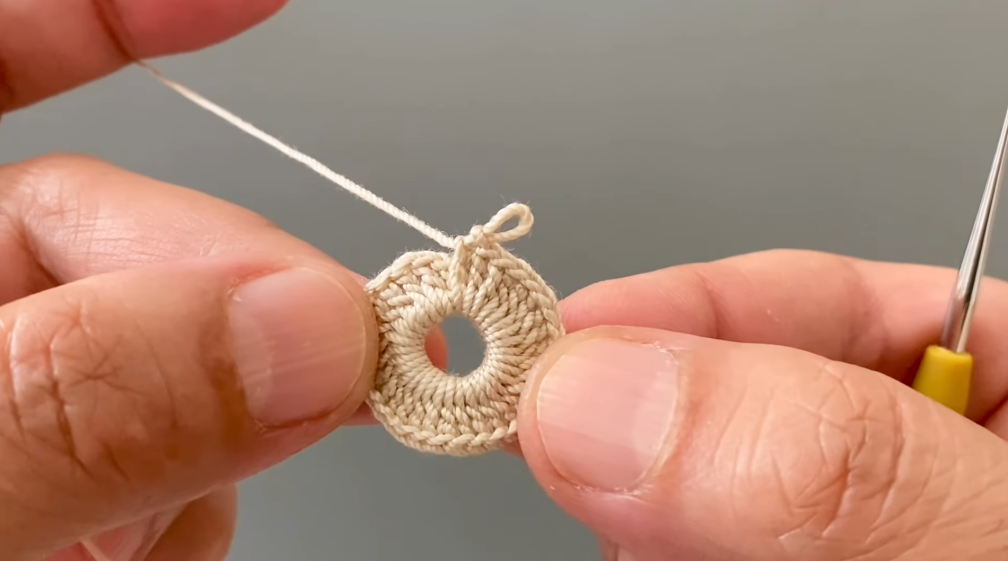
🔰 ROUND 1 – MOTIF CENTER
- Make a magic ring
(or ch 4 and sl st to form a ring). - Ch 3 (counts as first dc).
- Work 11 dc into the ring.
- Sl st to the top of ch-3 to close.
✔ You have 12 dc in total.
🔹 ROUND 2 – PETAL BASE
- Ch 3.
- Dc in the same stitch.
- Ch 2.
- Sk next stitch.
- In next stitch: 2 dc.
- Ch 2.
- Repeat around:
- (2 dc, ch 2, sk 1 st)
- Sl st to the top of ch-3.
✔ This forms open spaces between clusters.
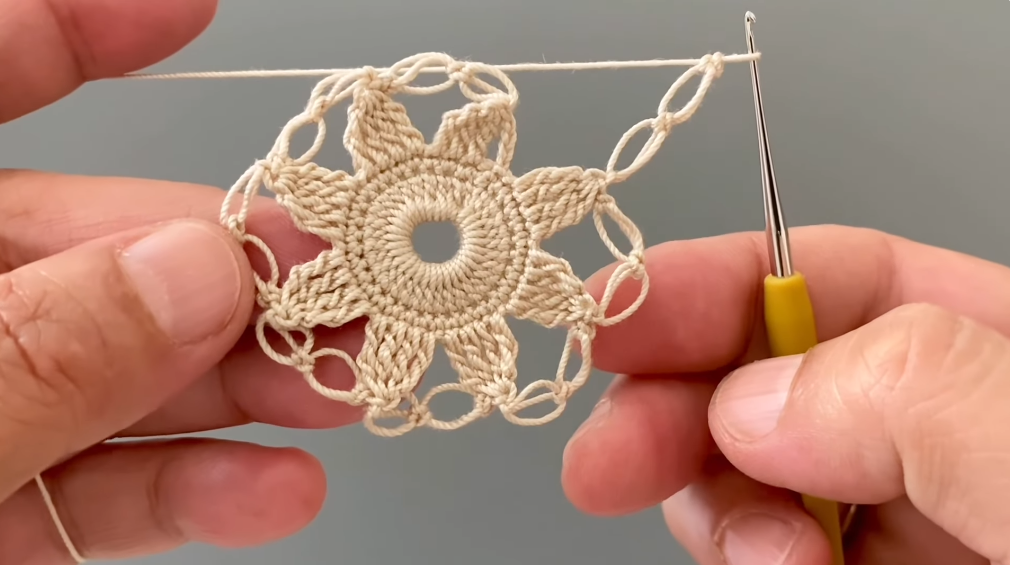
🔹 ROUND 3 – DECORATIVE PETALS
- Sl st into the ch-2 space.
- Ch 1.
- Into the same space work:
- sc, hdc, 3 dc, hdc, sc
- Sl st in the next ch-2 space.
- Repeat the petal around the motif.
- Sl st to the first stitch to close.
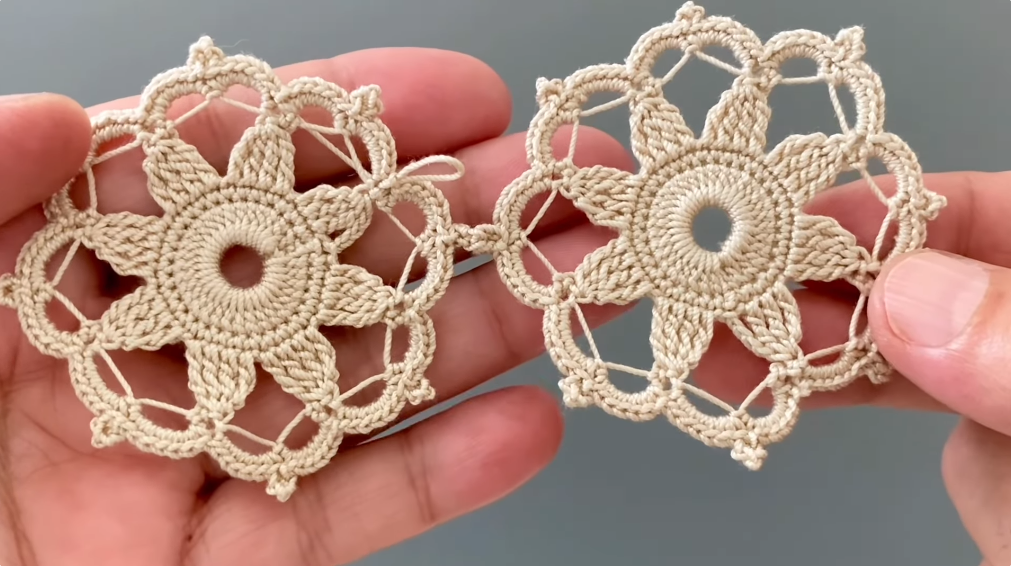
✔ Soft flower-like shapes appear.
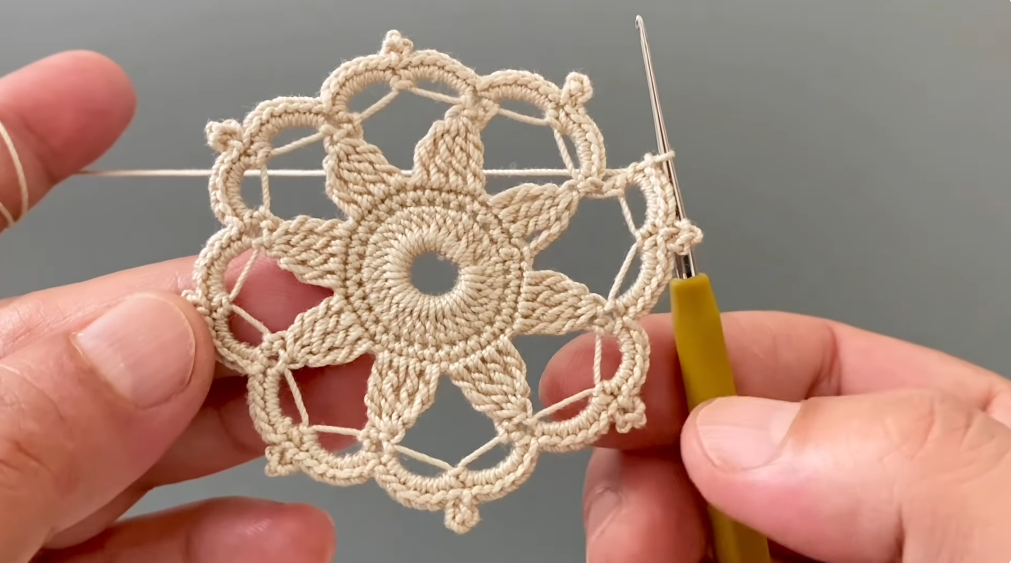
🔹 ROUND 4 – SQUARING THE MOTIF
- Sl st to the center of a petal.
- Ch 3.
- Dc in same stitch.
- Ch 2.
- In next space work 3 dc.
- Ch 2.
- At every 4th petal, make a corner:
- (3 dc, ch 3, 3 dc)
- Continue around.
- Sl st to close.
✔ The motif now becomes square.
🔹 ROUND 5 – FINAL EDGE (OPTIONAL)
- Ch 1.
- Sc evenly around the square.
- In corners:
- (sc, ch 2, sc)
- Sl st to finish.
✔ Gives a clean and professional edge.
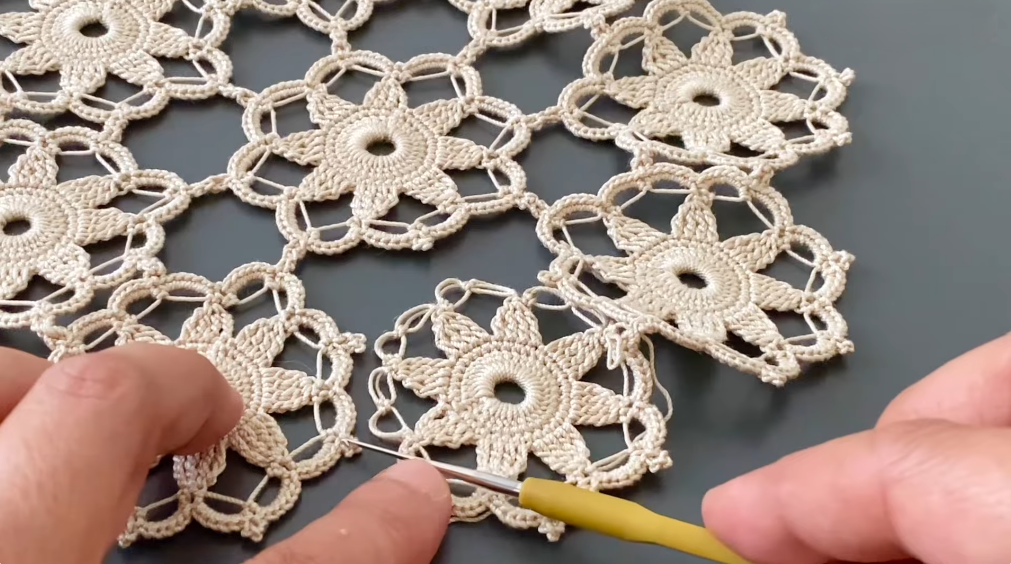
🔁 JOINING MOTIFS (OPTIONAL)
- Join motifs as you go using sl st or sc
- Or sew together with yarn needle
- Perfect for blankets and runners
🌸 PROJECT IDEAS
✔ Join many motifs → blanket
✔ 4 motifs → cushion cover
✔ Single motif → coaster or napkin
✔ Long strip → table runner
✔ Motifs + fabric → stylish blouse
✨ FINISHING
- Cut yarn.
- Pull through final loop.
- Weave in ends securely.
- Light blocking recommended to open stitches.
💡 BEGINNER TIPS
- Count stitches every round
- Keep tension relaxed
- Use stitch markers for corners
- Practice one motif before making many
🧶 QUICK MEMORY GUIDE
- Round 1: solid center
- Round 2: open spaces
- Round 3: petal design
- Round 4: square shaping
- Round 5: neat border
🌟 WHY THIS MOTIF IS SO POPULAR
✔ Beginner friendly
✔ Elegant texture
✔ Endless uses
✔ Easy to memorize
✔ Beautiful in any color
VIDEO: