 by
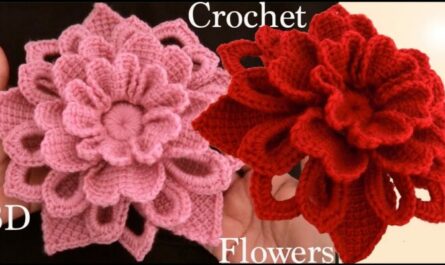
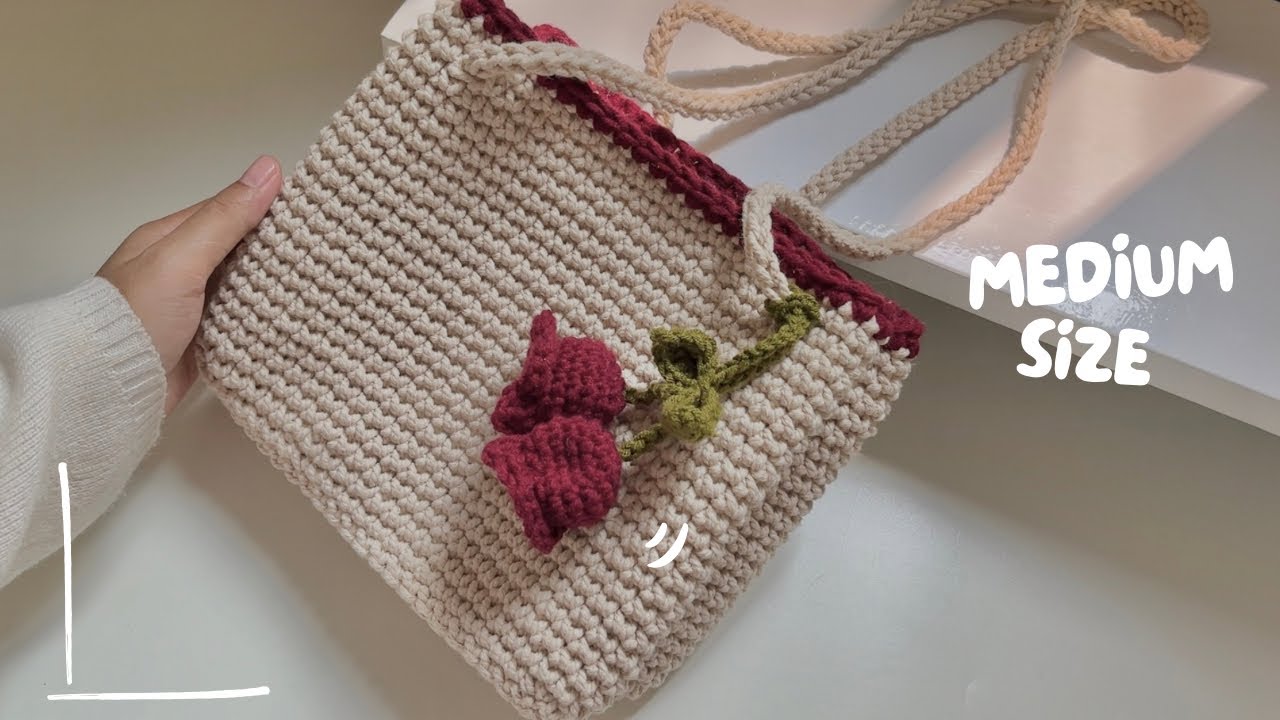
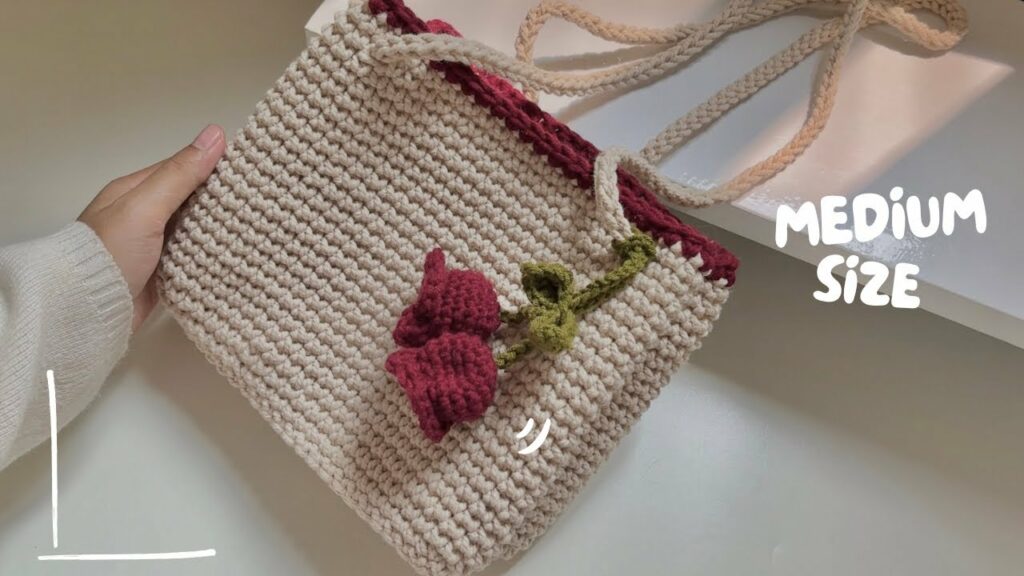
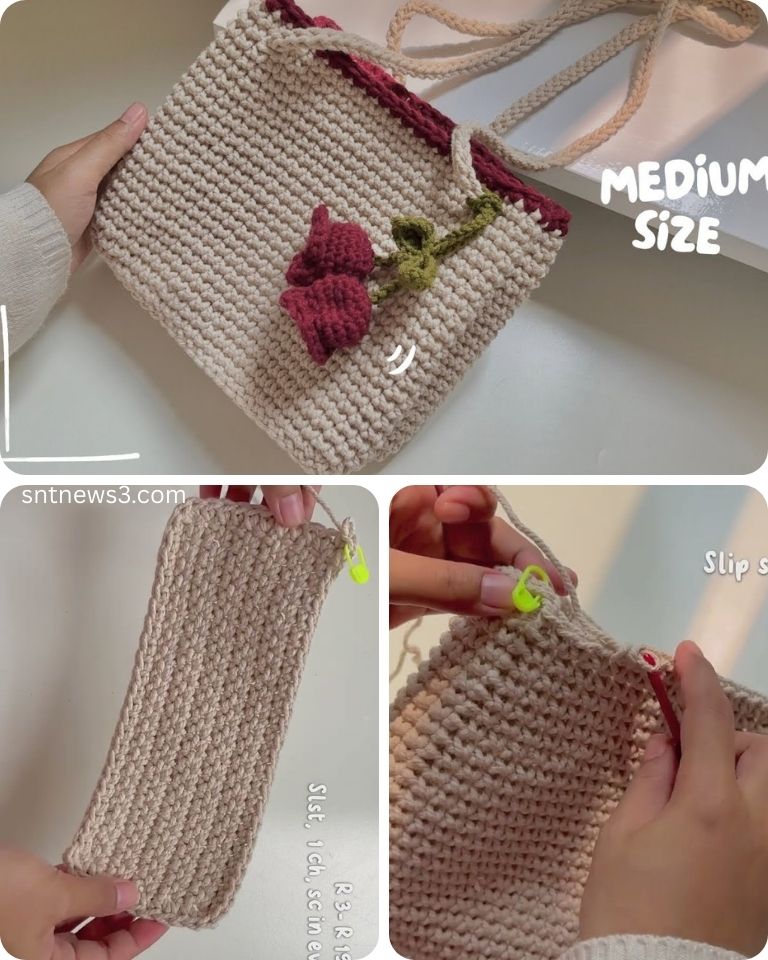
by Crocheted bags are timeless, stylish, and eco-friendly. One standout design is the Lily Crochet Bag, named for its elegant, petal-like pattern. This tutorial walks you through creating a medium-sized lily-inspired crochet bag with step-by-step instructions, stitch guidance, and finishing tips.
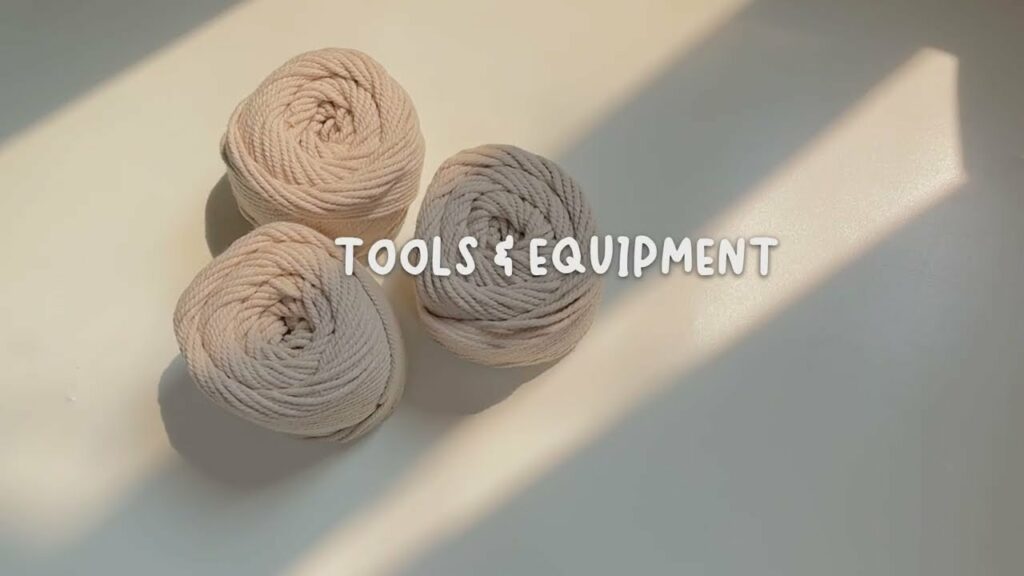
✨ Materials Needed
Before you begin, gather the following materials:
- Yarn: Worsted weight cotton yarn (Category 4), ~250–300 grams (approx. 400–450 meters). Cotton provides structure and durability.
- Hook: 4.0 mm (G/6) or 4.5 mm hook, depending on tension.
- Tapestry needle for weaving in ends
- Stitch markers to track rounds
- Scissors
- Optional: Bag lining fabric, magnetic clasp, or leather/wood handles
📏 Finished Size
- Width: Approx. 12–13 inches (30–33 cm)
- Height (without handles): Approx. 10 inches (25 cm)
- Straps: Shoulder or tote length (16–22 inches, adjustable)
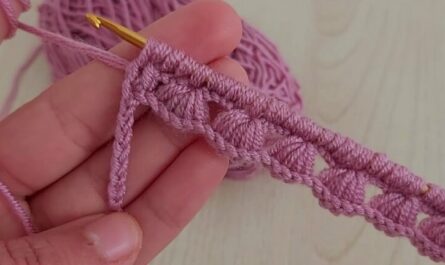
🌸 Lily-Inspired Stitch Pattern Overview
The lily crochet motif resembles blooming petals and adds a graceful texture. We’ll use:
- Shell stitch for floral texture
- Puff stitch for petal-like details
- Single crochet (sc) and half double crochet (hdc) for structure
🧶 Abbreviations (US terms)
- ch – chain
- sc – single crochet
- hdc – half double crochet
- dc – double crochet
- sl st – slip stitch
- puff st – puff stitch (yo, insert hook, pull through, repeat 3 times, yo, pull through all loops)
- shell – 5 dc in same stitch
🧵 Pattern Instructions
✅ Step 1: Base of the Bag (Oval Bottom)
- Ch 31.
- Row 1: Hdc in 2nd ch from hook and in next 28 ch, 3 hdc in last ch. Rotate, work 28 hdc down the other side of chain, 2 hdc in last ch. (Total: 62 hdc)
- Row 2–6: Continue working in rounds, increasing at both ends (oval shaping). Each round increases by 4 sts. End with approx. 80–84 hdc. Sl st to join.
This forms a sturdy, flat oval base for the bag.
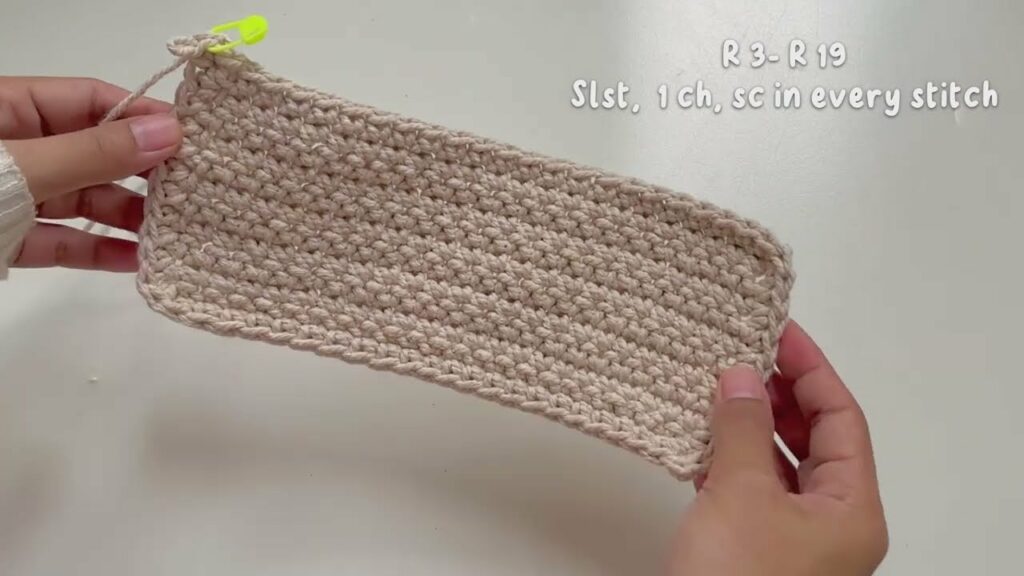
✅ Step 2: Body of the Bag (Lily Shell Pattern)
- Round 1 (Transition): Ch 1, sc in each stitch around. (No increases). Join.
- Round 2: Skip 2 sts, 5 dc in next st (shell), skip 2 sts, sc in next. Repeat from * around.
- Round 3: Sl st into center of shell, ch 1, sc in center of shell, shell in next sc. Repeat.
- Repeat Round 3 until the bag reaches your desired height (~25 rounds for medium size).
Optional: Work a few rounds with puff stitch between shells for added texture.
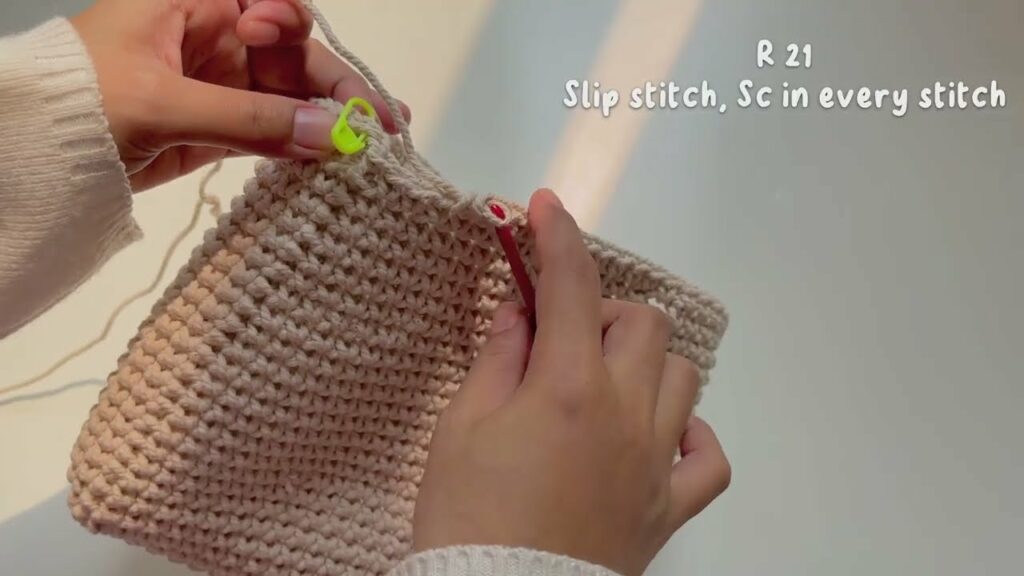
✅ Step 3: Top Edge & Finishing
- Last 2 Rounds: Switch to hdc or sc for a clean, firm top edge.
- Optional Drawstring Holes: Ch 1, sc in next 3 sts, ch 1, skip 1. Repeat. Use chain or i-cord for drawstring.
✅ Step 4: Straps/Handles
Option 1: Crochet Straps
- Ch 80–100 (for shoulder length).
- Sc in each ch. Repeat for 3 rows for thickness.
- Attach to bag 3–4 inches from each side.
Option 2: Pre-Made Handles
- Sew or crochet loops for attaching bamboo, leather, or wooden handles.
✅ Step 5: Lining (Optional but Recommended)
To prevent stretching:
- Cut fabric 1″ larger than bag dimensions.
- Sew side seams.
- Fold over top edge and sew inside bag using hand needle or sewing machine.
🎀 Finishing Touches
- Weave in all ends
- Add a magnetic clasp, button, or zipper
- Decorate with crocheted flowers, tassels, or a charm
💡 Tips for a Perfect Lily Bag
- Use cotton yarn for durability and shape.
- Block your pieces before assembling to enhance the stitch definition.
- For a boho look, add fringes at the bottom.
- If you’re a beginner, keep your tension even to avoid warping.
📸 Style It Your Way
Pair your Lily Crochet Bag with casual outfits, beachwear, or spring dresses. It makes a perfect gift, a market bag, or even a crochet project tote.
Video tutorial:
🌼 Conclusion
The Lily Crochet Bag is an elegant and functional accessory that you’ll love carrying around. Whether you’re at the market, on a weekend getaway, or heading to brunch, this medium-sized handmade bag will turn heads and carry your essentials in style.
Let the stitches bloom like petals—and enjoy the process of crafting something truly special!