 by
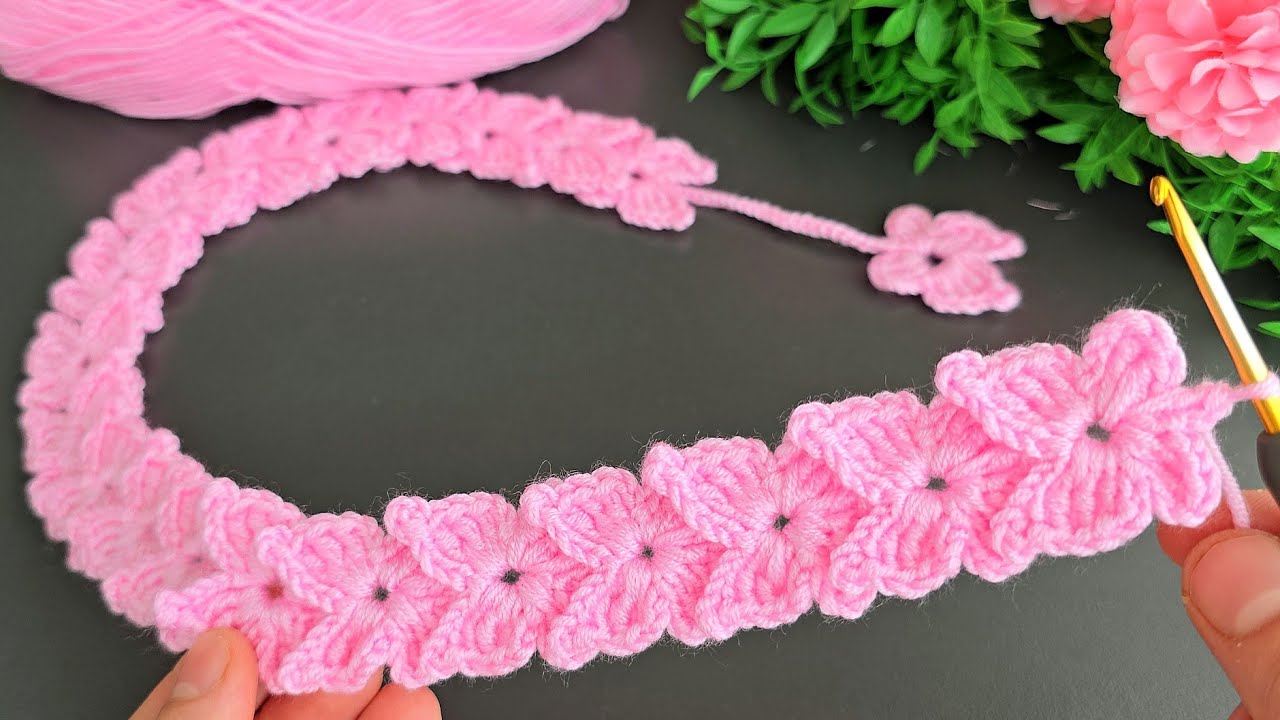
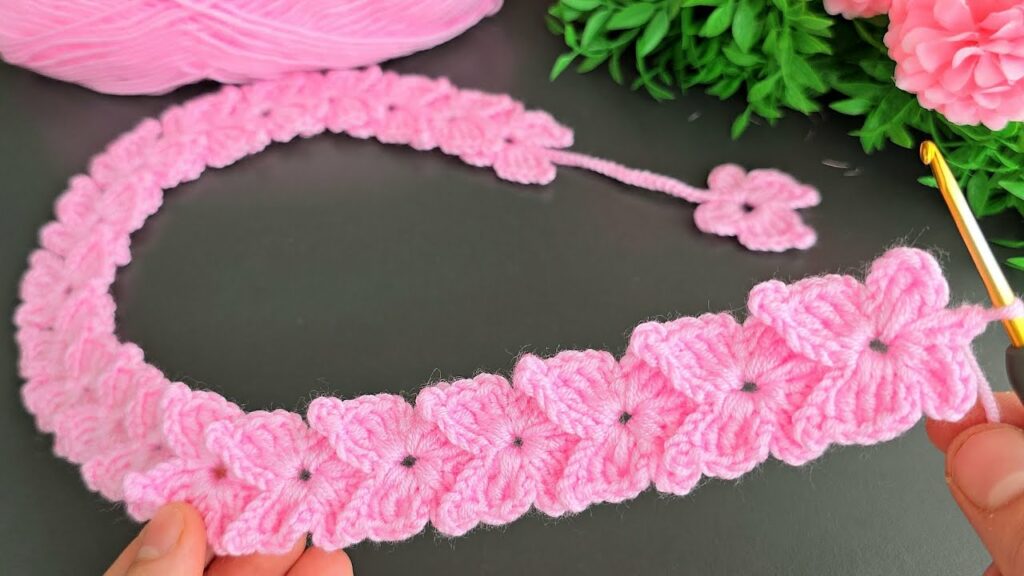
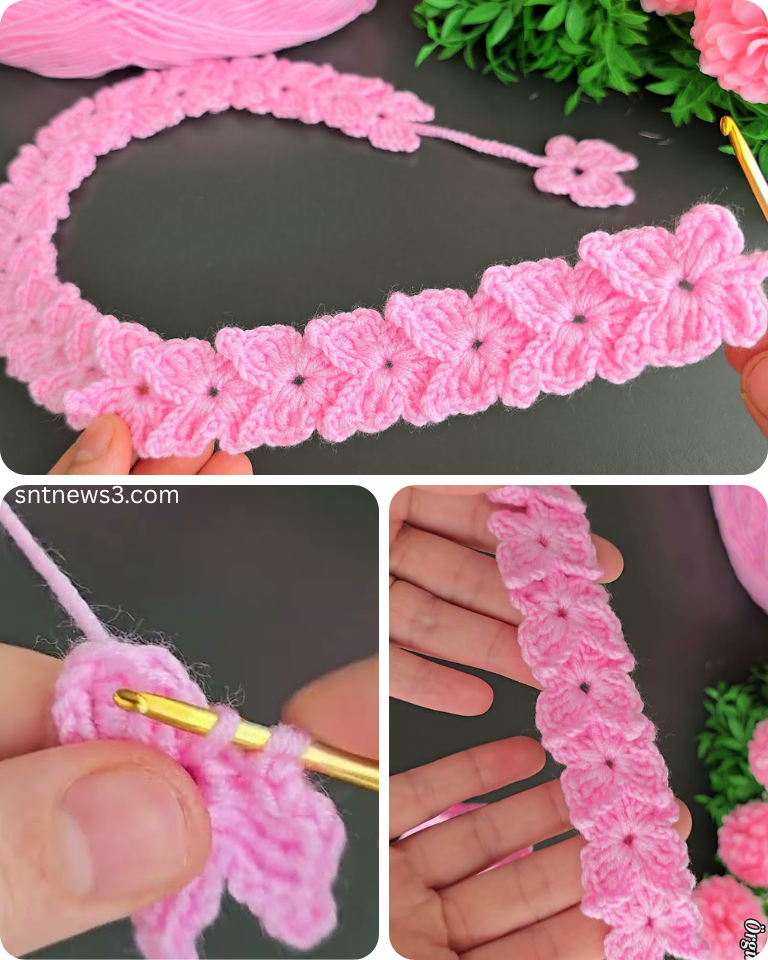
by Crochet butterfly hair bands are a delightful, quick, and beginner-friendly project that adds a whimsical touch to any hairstyle. Whether you’re crafting for a child, teen, or adult, this accessory combines simplicity with charm. It’s also a great way to use up scrap yarn and make a handmade gift or party favor. In this article, we’ll walk you through everything you need to know to create your own easy butterfly hair band—from materials to a simple step-by-step pattern.
Why Make a Crochet Butterfly Hair Band?
Crocheted butterfly hair bands are:
- Beginner-friendly: Ideal for those new to crochet or looking for a quick win.
- Adorable and functional: Add a cute accent while holding hair back.
- Customizable: Use any colors and yarn types to suit your style.
- Fast and affordable: Most can be made in under 30 minutes using leftover yarn.
Materials Needed
You’ll need just a few basic supplies:
Yarn
- Type: Any lightweight or medium-weight yarn (Cotton or Acrylic works best)
- Colors: One or more colors for the butterfly; optional contrast color for the band
Tools
- Crochet Hook: Size 3.5 mm to 4.0 mm (E or G hook), or according to yarn label
- Tapestry Needle: For sewing the butterfly to the band
- Scissors
- Elastic Hair Band or Crochet Cord: To make the hair band stretchable
Basic Stitches Used
This project uses just a few simple stitches:
- Chain (ch)
- Slip Stitch (sl st)
- Single Crochet (sc)
- Double Crochet (dc)
- Treble Crochet (tr) (optional for wing detail)
Step-by-Step Pattern: Easy Butterfly Hair Band
🌸 Step 1: Make the Butterfly
Abbreviated Terms:
- ch = chain
- sl st = slip stitch
- dc = double crochet
- tr = treble crochet
Instructions:
Using your chosen yarn and hook:
Round 1:
Ch 5, sl st into first ch to form a ring.
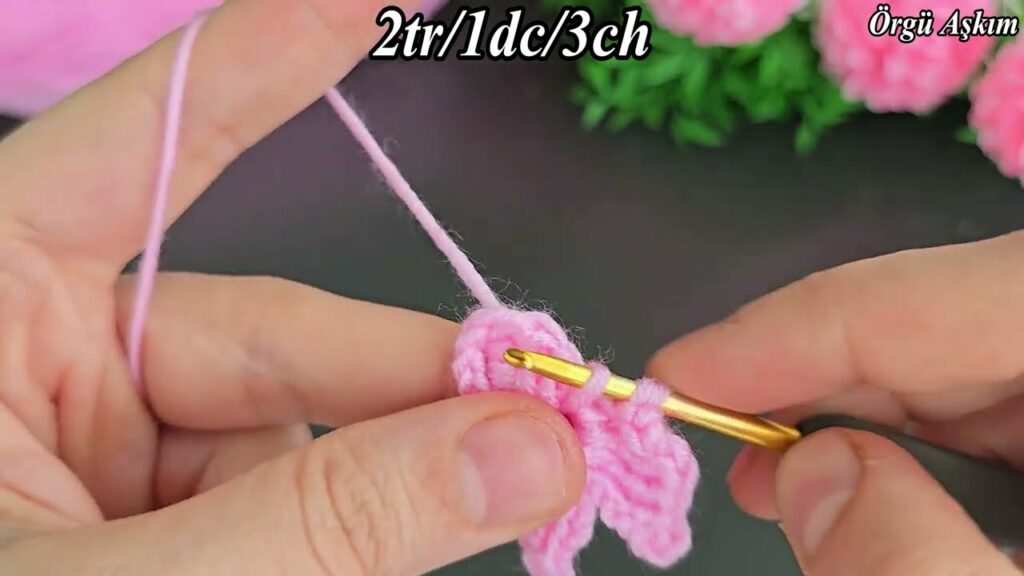
Round 2 (Wings):
*Ch 3, 3 dc into ring, ch 3, sl st into ring* (repeat 4 times to make 4 wings)
You will now have a small four-winged shape.
Fasten off, leaving a tail.
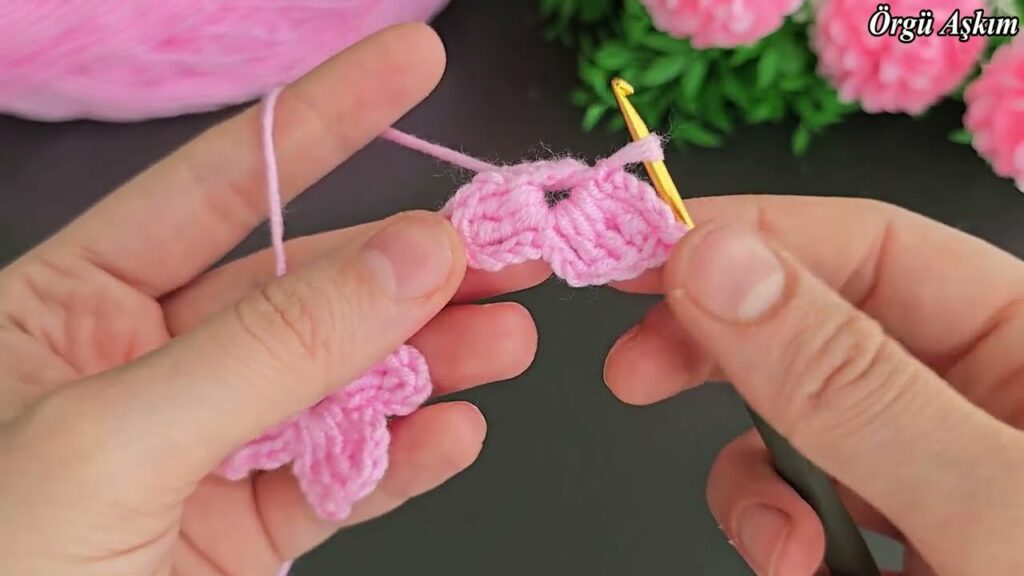
To shape the butterfly:
- Fold the piece in half so two wings are on each side.
- Use the yarn tail or a contrasting yarn to tightly wrap around the center 5–7 times.
- Tie a knot at the back and trim ends neatly.
✨ Optional: Antennae
- Use a few inches of yarn and tie in the center with a double knot to mimic antennae.
- Trim ends to desired length.
🌼 Step 2: Make the Hair Band
You have two options here:
Option 1: Use a Store-Bought Elastic Hair Tie
- Simply sew or glue the butterfly securely onto the elastic band using your tapestry needle.
Option 2: Crochet the Hair Band
Simple Crochet Hair Band Pattern:
Ch 60–70 (or as long as needed to wrap around the head).
Sc in second ch from hook and across. (Optional: add a second row for width)

Fasten off and sew the two ends together to form a loop.
Attach the butterfly securely in the center.
Customization Ideas
- Multicolor Wings: Use variegated yarn or change color every wing.
- Sparkle Yarn: Add shimmer with metallic thread or glitter yarn.
- Beaded Center: Sew a bead or button in the middle for sparkle.
- Layered Butterflies: Create two butterflies of different sizes and layer them.
Safety Notes
- Always supervise young children when using hair accessories.
- Avoid small beads or buttons if making for toddlers or babies.
Care Instructions
- Hand wash or machine wash on gentle if using washable yarn.
- Lay flat to dry to preserve shape.
Final Thoughts
Crocheting a butterfly hair band is a fun, fast project that requires minimal materials and time. It’s a charming accessory for all ages and perfect for handmade gifts, craft fairs, or just to brighten up your day. With just a few stitches and some creativity, you can create a whimsical piece that’s as unique as the person wearing it.
Video tutorial: