 by
by 🧶 Materials Needed
- T-shirt yarn (or any bulky cord yarn)
- Crochet hook sized appropriately for the yarn (bulky hook, often 8-12 mm depending on yarn thickness)
- Scissors and tapestry needle to weave in ends
🌟 Overview
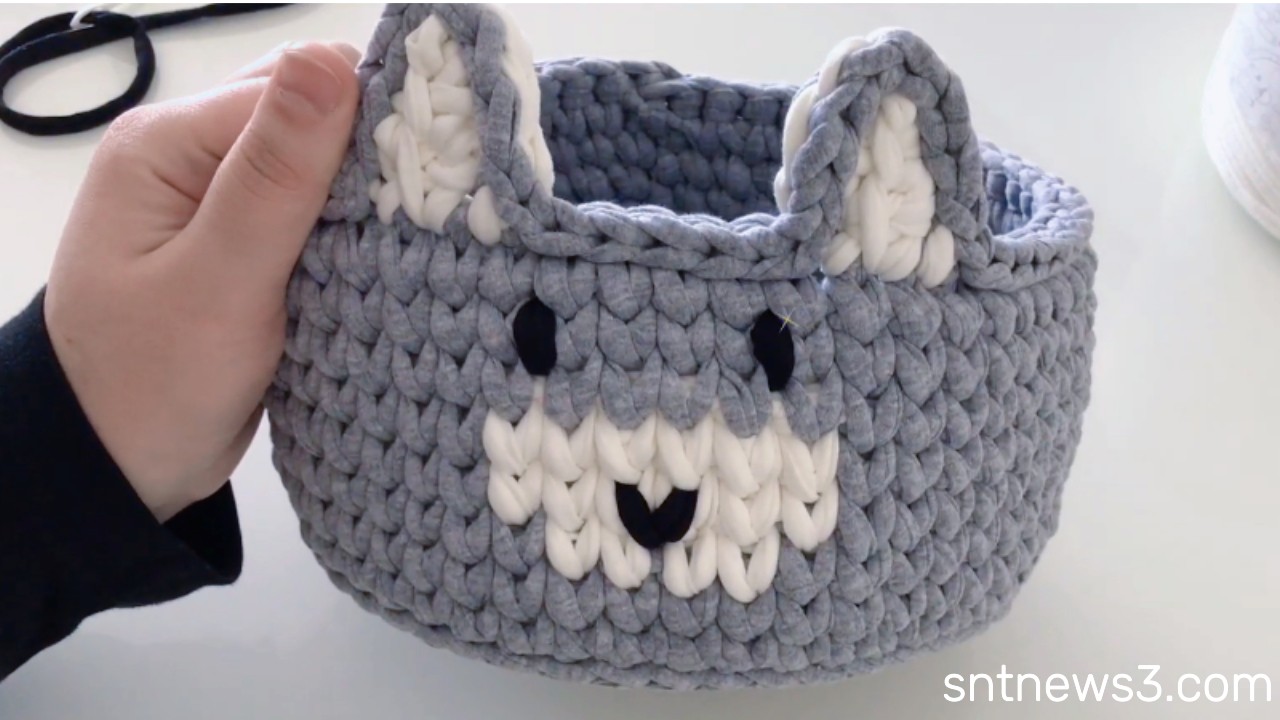
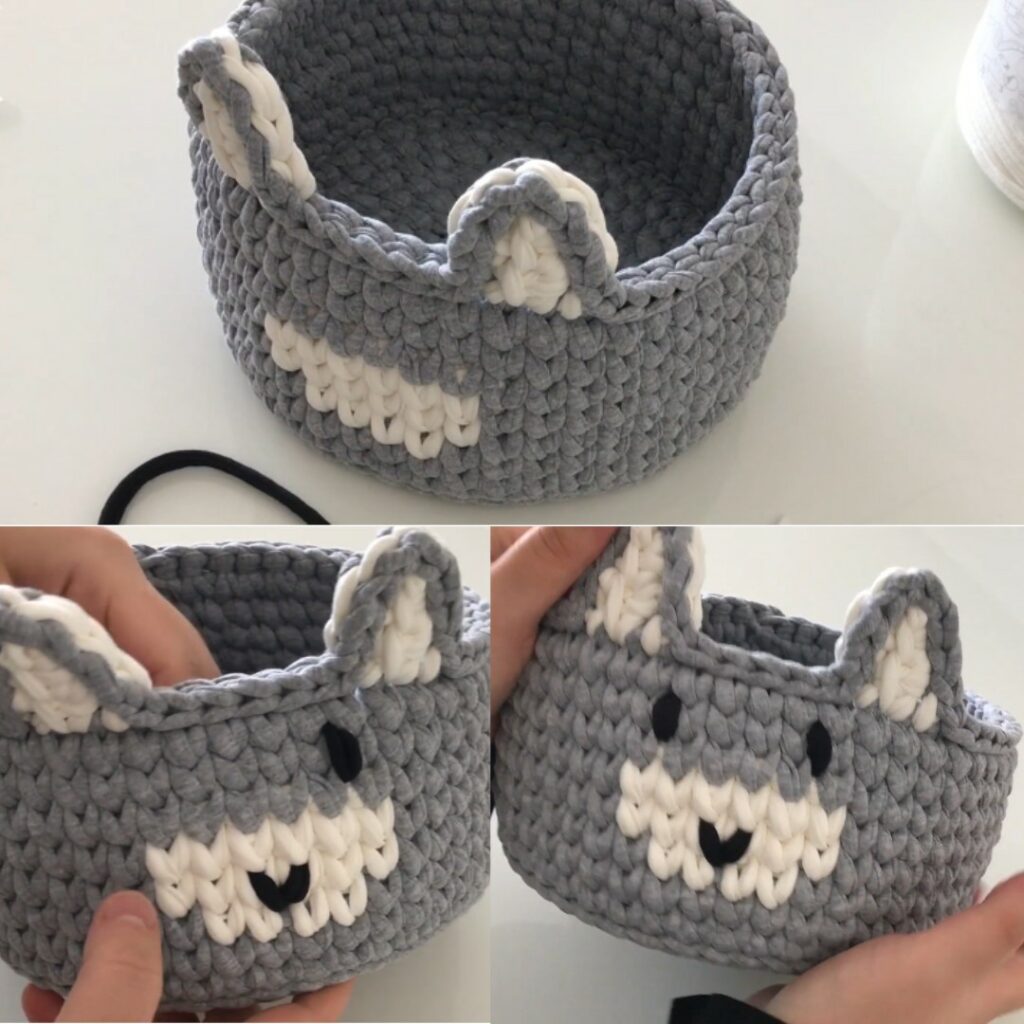
You’ll make a mini bear basket: first you crochet a flat round base, then build up the sides, and finally add cute rabbit ears to the sides. It’s worked mostly in single crochet
🔧 Step-by-Step Instructions
Below is a reconstruction of what’s shown in the video. Some stitch counts are approximate (because they aren’t always shown), so adjust as needed to keep the shape looking good.
Base Rounds
- Round 1: Start with a magic ring (or adjustable loop), then make 6 single crochets (sc) into the ring. Pull tight to close. Join with a slip stitch.
- Round 2: 2 sc in each stitch around (i.e. increase every stitch) so you double the stitch count from Round 1. Join with slip stitch.
- Round 3: Increase pattern: likely 1 sc in first stitch, then 2 sc in next stitch, repeated around. Join.
- Round 4: Continue increasing in a spaced pattern (for example 1 sc each in two stitches, then 2 sc in the next, repeat) to enlarge the base. Join.
- Keep doing rounds with increases until your base is the diameter you want for the bottom of the basket (so it’s flat, not cupping).
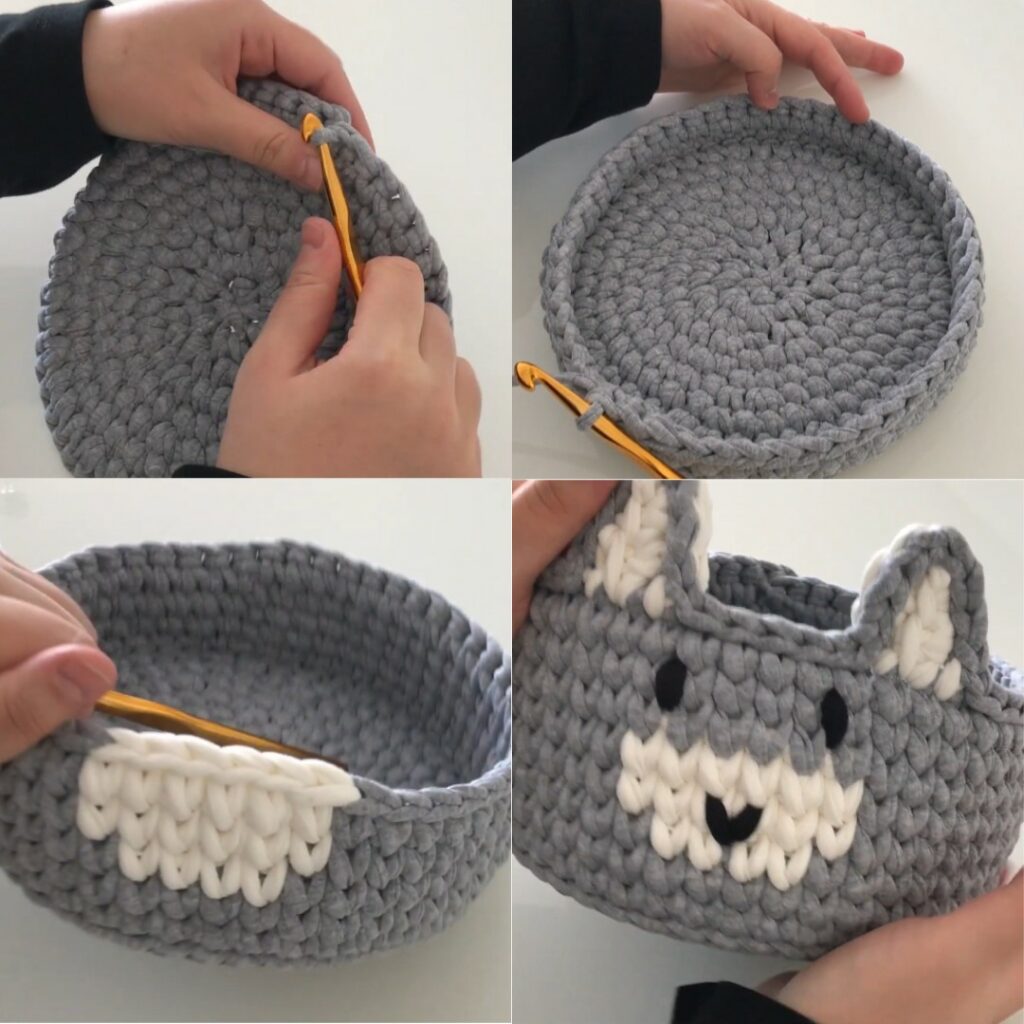
Sides of the Basket
- Start building the side walls: once the base is big enough, stop increasing. From this point, work rounds of single crochet around without increasing, to form the sides.
- Continue crocheting rounds of single crochet until you reach the height you want for the basket (mini size in this case). YouTube
Rabbit Ears
- To make the ears, attach yarn at the top edge on the front side (where you want each ear). Chain a number of stitches for the base of the ear (e.g. chain 6 or so).
- Then build up the ear shape by working stitches into those chain stitches: slip stitch or single crochet, half-double or double crochet depending on the shape, increasing a little so the ear has a nice curve, then working back down. The video shows a symmetrical style ear with increases in an arch.
- Make two ears, one on each side of front of basket. Weave yarn ends neatly.
Finishing Touches
- Optionally add a border round around the top edge to make it neat (one round of sc).
- Weave in all loose ends. If desired, block lightly so the base lays flat and the basket stands well.
📝 Tips for Success
- Keep your tension fairly tight with t-shirt yarn so the basket holds its shape.
- Count your stitches at the end of each base round to ensure even increases so the base stays flat.
- Position the ears evenly spaced so the rabbit look is symmetrical.
- If your basket seams or top edge feels floppy, you may add a reinforcing round or use a thicker hook for that row.
Video Tutorial: https://www.youtube.com/watch?v=mAKzNpTSyLk