 by
by 🌞 Very Simple & Stylish Summer Blouse — Step-by-Step Text Tutorial
I wrote a clear, beginner-friendly pattern you can crochet straight away. Two options included so you can choose the look you prefer:
- Option A — One-piece join-as-you-go motif blouse (boho floral motifs joined into a one-piece pullover; no seaming).
- Option B — Simple top-down mesh blouse (worked in rows/top-down for an easy fitted tee with lacy summer drape).
Both are written in US terms and include exact rounds/rows, finishing, blocking, sizing guidance and troubleshooting.
Materials & Tools (both options)
- Yarn: Sport / DK / lightweight cotton (for summer drape)
- Hook: 3.5–4.5 mm (adjust for gauge — larger hook = drapier fabric)
- Notions: tapestry needle, blocking pins/mat, stitch markers, scissors, measuring tape
- Gauge: make a swatch / one motif to set size (examples below assume one blocked motif ≈ 11 cm / 4.3 in)
Abbreviations (US)
- ch = chain
- sl st = slip stitch
- sc = single crochet
- hdc = half double crochet
- dc = double crochet
- tr = treble crochet
- sk = skip
- rep = repeat
- st(s) = stitch(es)
- pic = picot (ch3, sl st into base)

How to choose option
- Want a boho, decorative blouse made of pretty motifs → choose Option A.
- Want a quick, wearable summer tee (breathable, fast) → choose Option B.
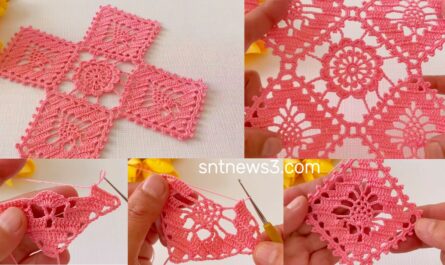
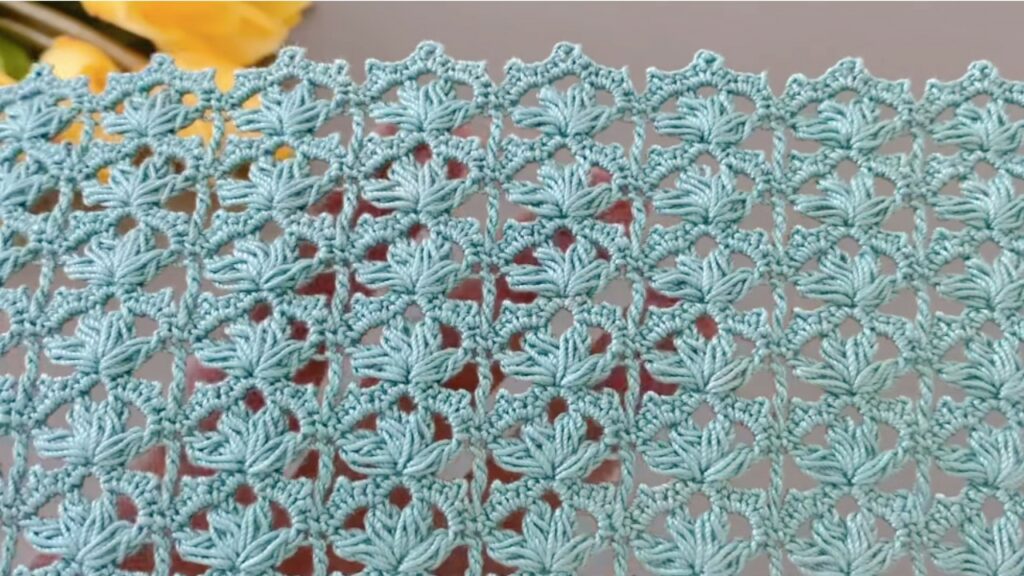
OPTION A — One-piece Join-As-You-Go Motif Blouse (boho floral look)
Overview: make square floral motifs (medallion → square conversion) and JAYG into one continuous sheet. Leave neck opening and underarm spacing while joining to create a one-piece blouse — minimal sewing.
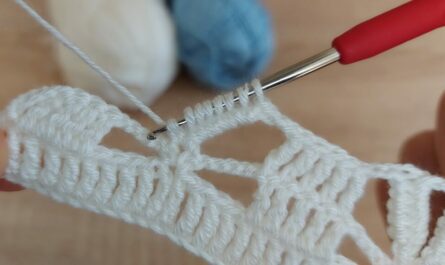
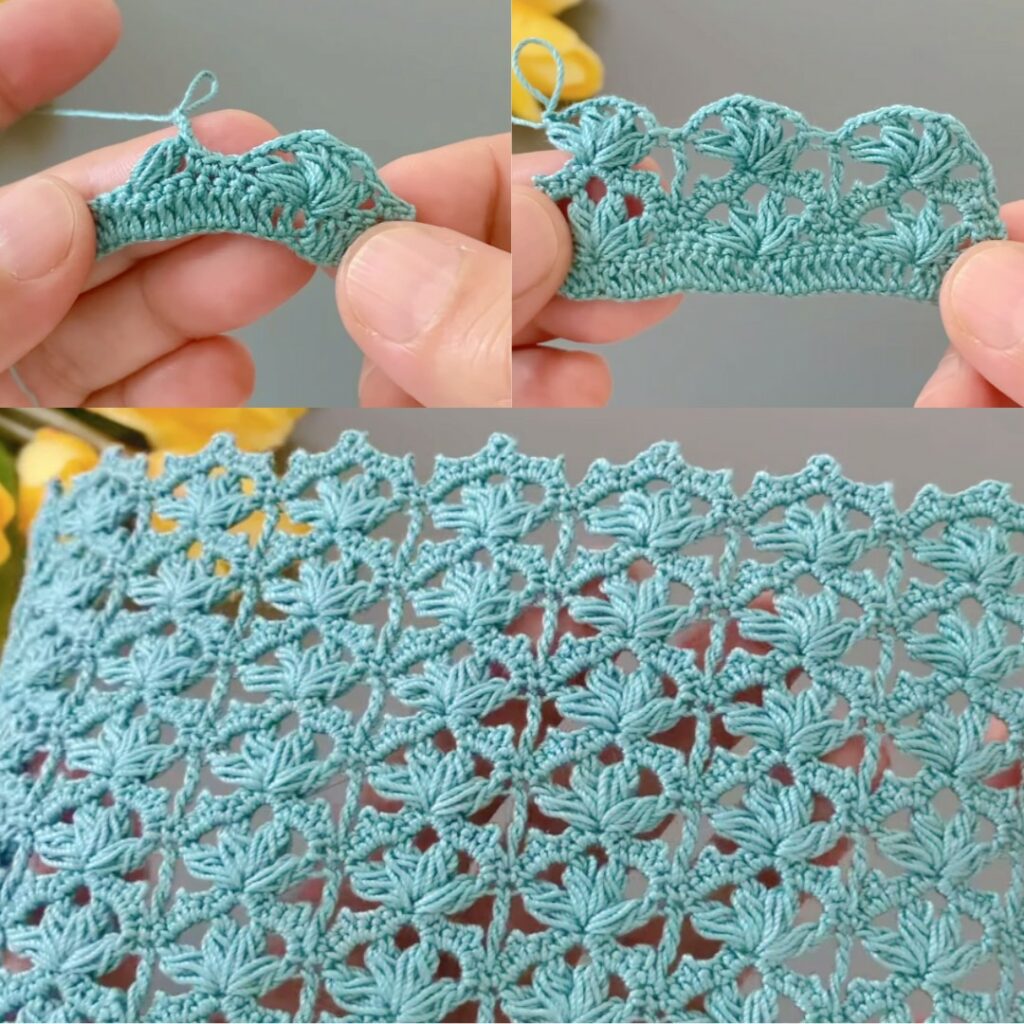
Motif (worked in rounds — US terms)
Finished (blocked) motif ≈ 11 cm (adjust by hook/yarn).
Round 1 — center
- Magic ring. ch3 (counts as dc), work 15 dc into ring (total 16 dc). sl st to join. (16 dc)
Round 2 — loop base
- ch4, sk next dc, sc in next dc — repeat × around → 8 ch-4 loops + 8 sc. sl st to join.
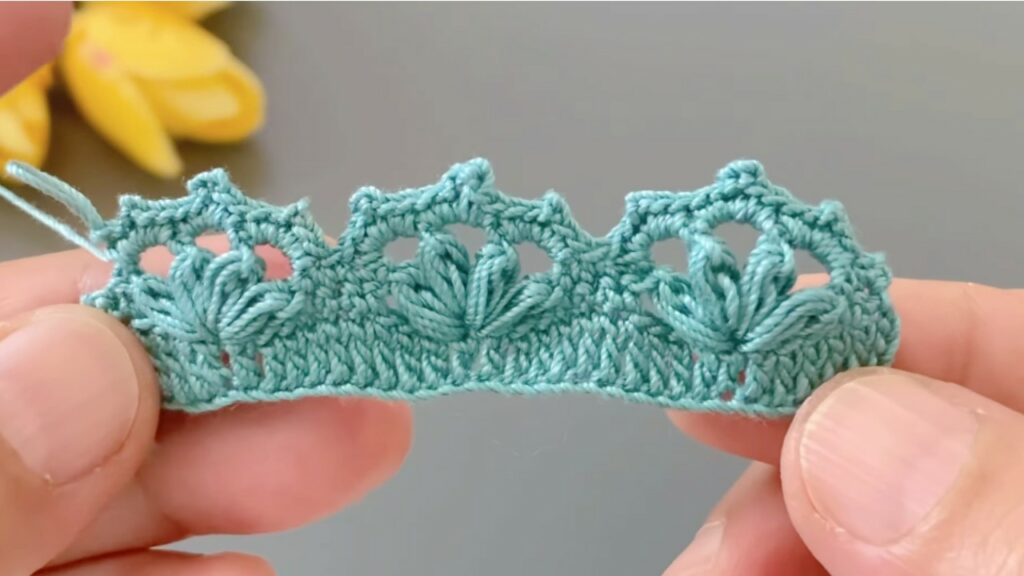
Round 3 — petals
- In each ch-4 loop: (sc, hdc, 7 dc, hdc, sc) all into same loop. sl st to join. (8 petals)
Round 4 — tidy sc round
- sc evenly around petal bases to make a round boundary — distribute ~10 sc per petal area. sl st to join.
Round 5 — arches
- From petal tip: sl st to tip, ch7, anchor in next base with (tr, ch2, tr, ch2, tr), sl st to next tip — repeat around. sl st to join. (8 arches)
Round 6 — inside ribs
- In each ch-arch: sl st to arch base → ch3 → dc, ch1, dc, ch1, dc → ch3 → sl st (or 3 dc spaced by ch1). Join.
Round 7 — square conversion
- Mark 4 quarter points (every 2 petals). Rejoin at a quarter. Along each side: distribute sc X, (sc, ch4, sc) repeated Y times, sc X then ch6 at corner (corner loop). Make same X, Y on all sides so motifs match when joining. sl st to join.
Round 8 — scallop edge
- Rejoin and work sc3, (pic: ch3, sl st into same st), sc4 around. sl st, fasten off, weave ends. Block square.
Tip: pick X & Y so sides are balanced — example: sc8, (sc,ch4,sc)×3, sc8 (adjust to motif size).
Joining-as-you-go (JAYG)
- Make first motif completely. For each new motif, work through Round 7. On Round 8 when you reach a place that meets an adjacent finished motif, replace that sl st/picot with sl st into the corresponding stitch/picot of the finished motif to join. Join along side loops and corner loops. Continue building rows; leave neckline and armhole openings unjoined per size notes below.
Layout & shaping (top edge / neckline)
- Build top row = the row that will sit across your shoulders/chest (choose number of motifs across by measurement — see sizing).
- Leave the neckline: for a round/boat neck, skip joining the central 1–2 motif joins in the top row; for a V or keyhole you’ll remove/skip different joins or omit center motif(s).
- After front top row, continue adding rows downwards joining as you go to desired torso length. For a one-piece pullover, after finishing the front rows, continue across the shoulder to build the back without seams (or make a separate back panel and join shoulders).
Sizing example (motif ≈ 11 cm blocked)
- Measure desired chest circumference C. Half-chest = C/2. Motifs across top row ≈ round(half-chest ÷ 11).
- Example S: chest 92 cm → half = 46 → 46 ÷ 11 ≈ 4 motifs across. Rows down (3–5 rows depending on desired length).
Sleeves / armholes
- For sleeveless: leave side joins unjoined for armhole depth ≈ 1–2 motif heights.
- For caps/short sleeves: make short motif strips and JAYG into open armhole. Or simply leave more joins open for larger armholes.
Finishing
- Pick up stitches around neck/armholes and work 2 rounds sc + a picot or eyelet round. Block gently.
OPTION B — Simple Top-Down Mesh Summer Blouse (fast & wearable)
Overview: work top-down yoke in rounds, split for sleeves, continue body in mesh pattern. Easy to size and quick to make.
Measurements to decide first
- Desired bust circumference C and ease (positive ease 5–12 cm).
- Neck opening width N (measured across back+front top). Typical N ≈ 28–36 cm for adult.
- Hook and yarn to obtain comfortable drape.
Gauge example & starting
- Using chosen yarn & hook, chain a foundation chain to measure neck opening: chain enough so chain length ≈ N. Join to work in the round (be careful not to twist).
Yoke (neckline)
- Join chain into ring. Round 1: ch3 (counts as dc), dc evenly across chain (about 1 dc per 1–1.5 cm depending on yarn) — join.
- Round 2: ch3, dc in same st, ch1, sk1, dc in next st — creates a lightweight mesh/eyelet row. Join.
- Round 3–5: Repeat mesh rows to build yoke depth (about 4–6 cm depending on style). Place markers to mark underarm points (divide stitch count into quarters).
Divide for sleeves (raglan-ish or drop shoulder)
- Option A (drop shoulder, simpler): continue mesh in the round without division until desired shoulder width, then split for body and sleeves: leave sleeve openings and attach separate sleeve panels later (or make no sleeves — just continue body).
- Option B (raglan shaping, more shaping): at four marker points increase evenly (e.g., increase 1 dc before and after each marker every other round) to shape yoke — this is optional more advanced shaping.
Body (mesh)
- After yoke depth, remove markers for sleeves (if drop shoulder) and continue working in the round in this mesh sequence: ch1, sc in next st, ch3, sk2 or a lacy open mesh: dc, ch2, sk2 etc. My simple favorite:
- Row: sc in next st, ch3, skip next 2 dc repeat — gives airy fabric.
- Work rounds until desired torso length (e.g., 45–60 cm from shoulder depending on tunic length).
Hem & edging
- Work 2 rounds hdc for weight; finish with single crochet round + picot if desired. Block.
Sleeves (if adding)
- Simple sleeve: pick up stitches around armhole and work rounds of mesh until desired sleeve length; finish cuff with sc or small picot edge. Or make motif sleeve panels separately and sew.
Sizing cheat sheet (Option B)
- Make a 10 cm / 4 in sample of mesh to compute rows/inch. Use body measurements to compute rounds needed for width/length.

Finishing touches (both options)
- Blocking: essential for motifs; block to measurements and shape neckline/hem.
- Weave ends on wrong side. Light steam block after assembly.
- Optional lining: sew lightweight lining for modesty if motif fabric is open.
- Care: wash per yarn instructions (cotton: gentle hand-wash or machine on gentle).
Troubleshooting & tips
- Motifs/runs curl: adjust chain length in arches or loosen/tighten tension; block firmly.
- Garment too small: increase motif count across or use larger hook.
- Garment too floppy: use slightly smaller hook or add a weight round (dc hem).
- JAYG joins look loose: attach with sl st more tightly or add an extra join stitch at each meeting point.
- Want more drape: use a softer yarn and 0.5–1.0 mm larger hook.
Quick Variations & Styling Ideas
- Add a waist tie by crocheting an I-cord or chain and threading through lower motif row.
- Add contrasting color for motifs’ petals or edgings.
- Make cropped top by reducing number of rows; add high-waist skirt or wear over tank.
- For beach cover-up: use Option A with larger motifs and open joins — lightweight and pretty.
VIDEO: