 by
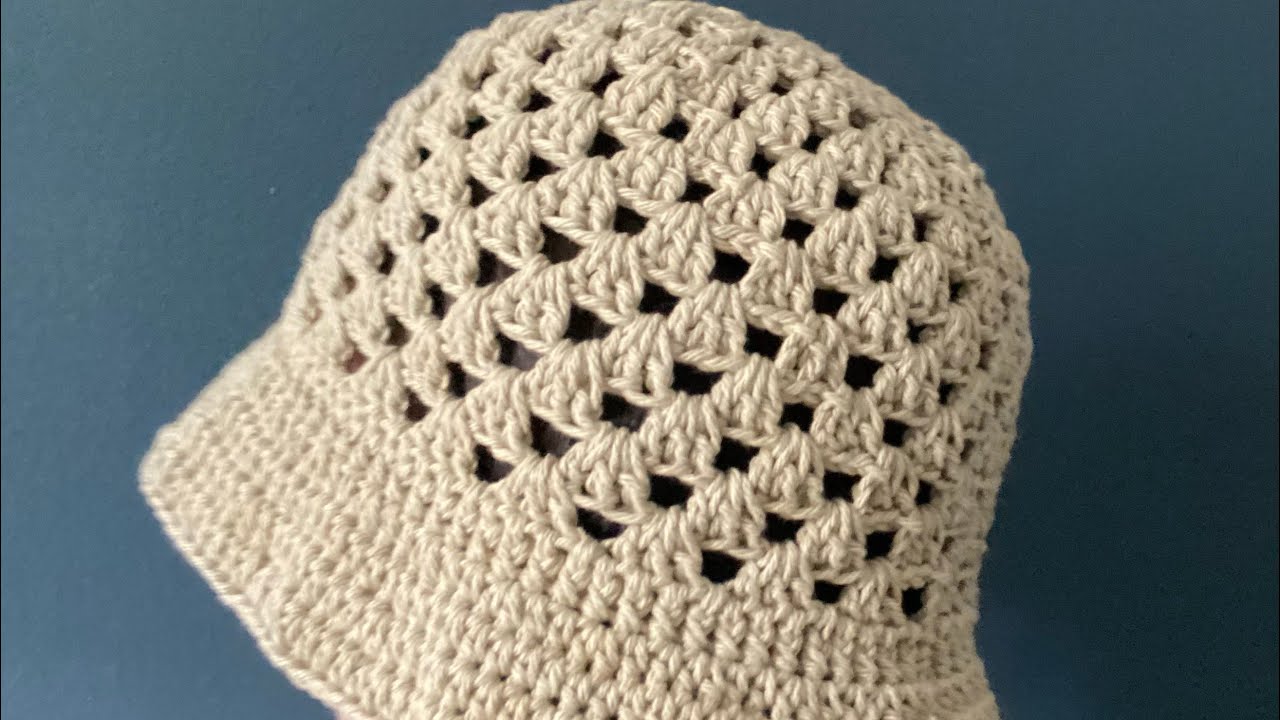
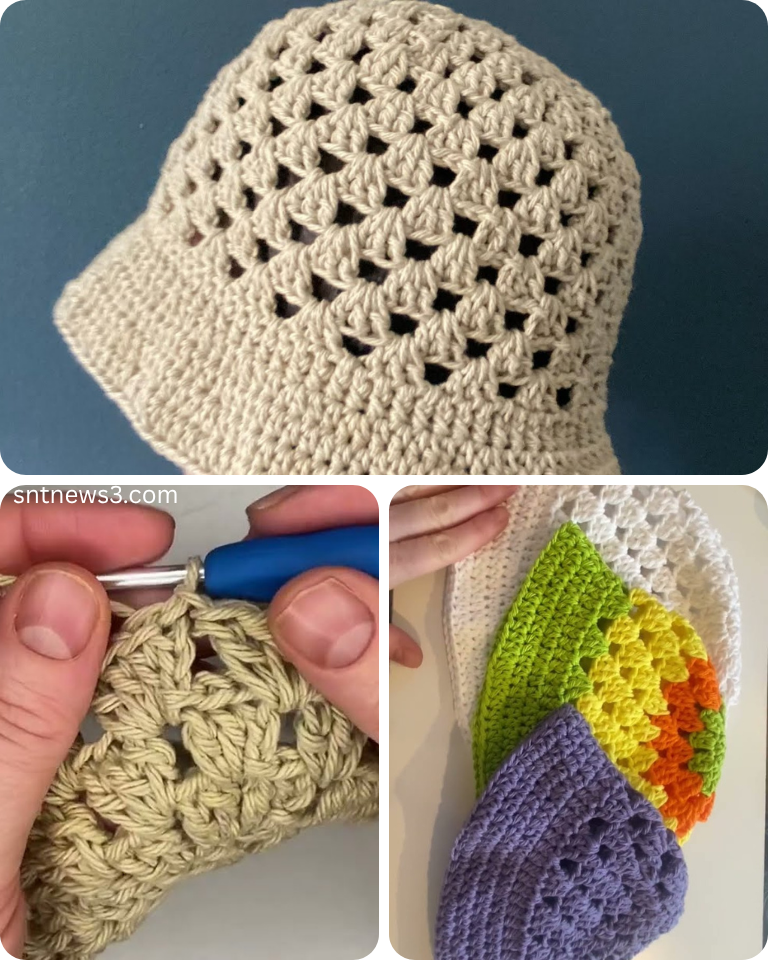
by Crochet bucket hats are the perfect blend of retro style and modern handmade fashion. Whether you’re shielding yourself from the sun or just adding a cool, artsy accessory to your outfit, a crochet bucket hat is a trendy and practical project that you can complete in just a day or two.
If you’ve ever wondered how to crochet a bucket hat, you’re in the right place. This step-by-step tutorial will walk you through creating your own hat from scratch—even if you’re a beginner!

🧶 Why Crochet a Bucket Hat?
- Trendy & Timeless: Bucket hats are stylish in all seasons.
- Beginner-Friendly: Uses basic stitches and simple shaping.
- Customizable: Play with colors, stripes, textures, or appliqués.
- Quick Project: Typically takes 2–4 hours to complete.
🧵 What You’ll Need:
Materials:
- Worsted weight yarn (Size 4) – Cotton yarn works best for breathability and shape
- Crochet hook – 4.0 mm to 5.0 mm (check yarn label)
- Yarn needle – for sewing in ends
- Scissors
- Stitch marker (optional but helpful for marking rounds)
Optional Add-Ons:
- Faux leather tag
- Embroidered flowers
- Color changes or stripes
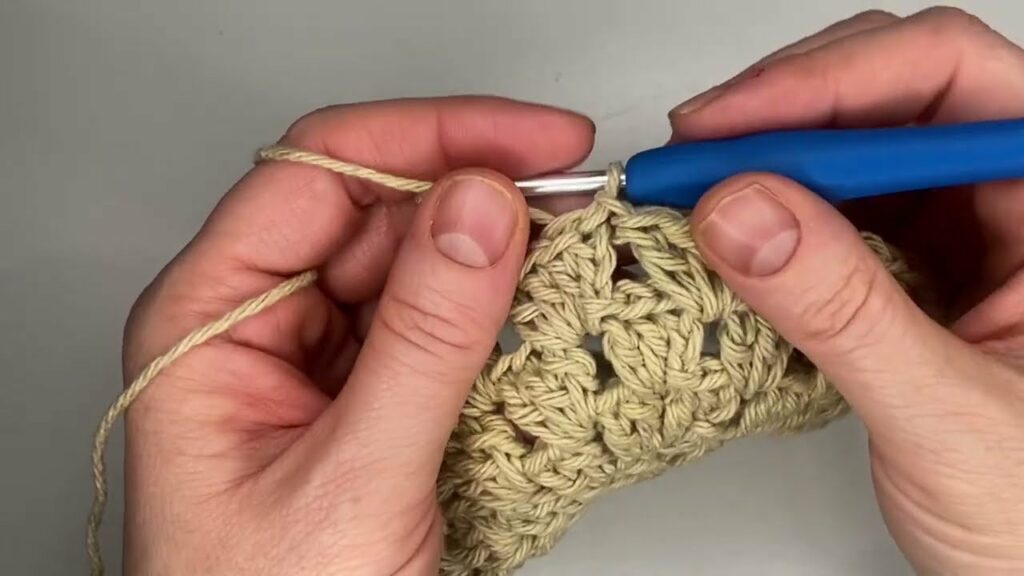
🪡 Stitches You Should Know:
- ch – chain
- sl st – slip stitch
- sc – single crochet
- hdc – half double crochet
- dc – double crochet
- inc – increase (2 stitches in one)
✅ If you’re new, start by practicing the magic ring and basic increase in the round techniques.
🎩 CROCHET BUCKET HAT PATTERN (Adult Size)
📏 Hat Dimensions:
- Crown diameter: ~17–18 cm (6.5–7 in)
- Hat height: ~16–18 cm (6.5–7 in)
- Brim width: ~5–7 cm (2–2.5 in)
✅ Step 1: Crochet the Crown (Top)
This is worked in continuous rounds. Use a stitch marker to mark your first stitch of each round.
- Start with a magic ring
- Rnd 1: 10 dc into the ring. Join with sl st. (10 sts)
- Rnd 2: 2 dc in each st around. (20 sts)
- Rnd 3: 1 dc, inc around. (30 sts)
- Rnd 4: 2 dc, inc around. (40 sts)
- Rnd 5: 3 dc, inc around. (50 sts)
- Continue increasing until the crown reaches ~17–18 cm in diameter (usually around Rnd 8–10, depending on yarn and hook).
✅ Step 2: Build the Sides (Hat Body)
Now that your crown is wide enough, stop increasing and start working evenly to form the sides.
- Rnd X–X+10: dc in each st around for 8–10 rounds, or until the sides measure ~10–12 cm tall.
- Optional: Switch to hdc or sc for the last couple of rounds for a tighter fit.
This creates the classic straight drop of the bucket hat!
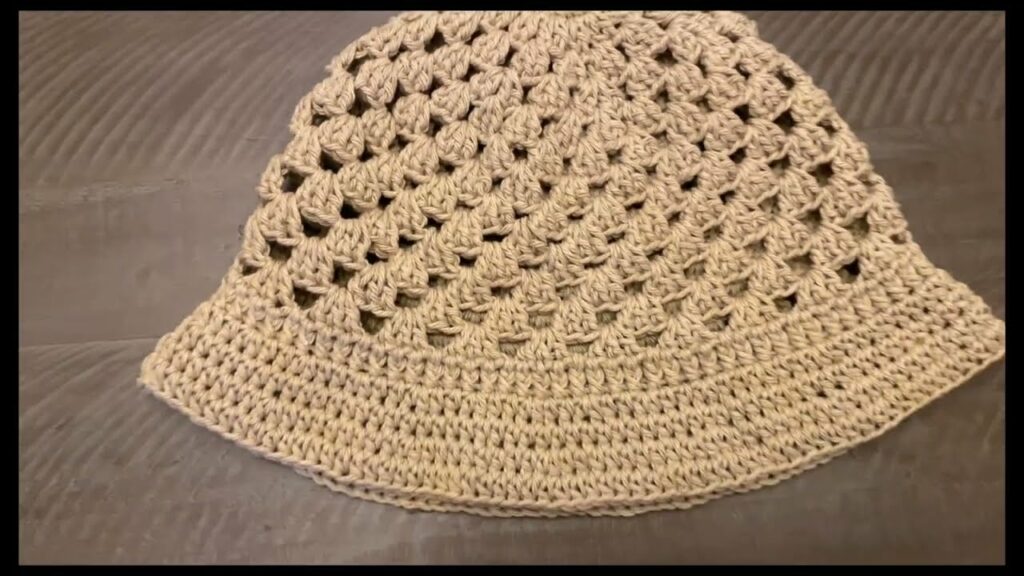
✅ Step 3: Add the Brim
The brim is wider than the crown and gently curves out. It’s made by increasing again.
- Rnd 1: 4 dc, inc around. (Increase 1 every 5 sts)
- Rnd 2: 5 dc, inc around.
- Rnd 3–5: dc around evenly for a wide brim. You can also switch to hdc or sc for a firmer edge.
- Optional final round: sl st around for a clean edge.
🧵 You can shape your brim to flare out more dramatically or stay subtle based on how many increases you do.

🌟 Tips for Customizing:
- Color block it: Use two or three shades in bold blocks or stripes.
- Add texture: Try alternate rows of sc and dc for a patterned look.
- Fuzzy flair: Use chenille or velvet yarn for a soft-touch fashion hat.
- Seasonal swap: Use cotton for summer and wool blends for winter.
🧽 Blocking & Finishing
After finishing, lightly block your hat to smooth edges and shape the brim:
- Steam gently with an iron (hover above, do not press directly).
- Shape the crown and brim with your hands.
- Let it cool and dry fully before wearing.

🧢 Need a Smaller or Larger Size?
- Smaller: Stop crown increases earlier, and reduce hat height by 1–2 rounds.
- Larger: Add more increase rounds in the crown and extend the sides.
Let me know your head size in cm and I can adjust the stitch count for a perfect fit!
📺 Bonus: Want a Video Tutorial?
If you’re a visual learner, search YouTube for:
“Easy Crochet Bucket Hat Tutorial for Beginners”
Look for ones with step-by-step slow demos and English subtitles.
Would you like a specific link recommendation?
Video tutorial:
Final Thoughts
Learning how to crochet a bucket hat is a rewarding project for any skill level. With just one or two skeins of yarn and a little time, you can make something fashionable, functional, and 100% you. Once you’ve made one, chances are you’ll be hooked and ready to create a whole wardrobe of handmade hats.
So grab your hook, choose your color, and stitch your way into style. 🎨🧶