 by
by A crochet twisted headband is the perfect project for beginners who want something cozy, stylish, and super quick to make. Not only is it practical for cooler weather, but the twist design also gives it a chic, store-bought look — and the best part? It’s much easier than it looks!
This guide walks you through every step of making your very own twisted crochet headband — even if you’re brand new to crochet.
✨ WHY YOU’LL LOVE THIS PROJECT
- ✅ Beginner-friendly
- ✅ Quick to make (less than an hour!)
- ✅ Uses simple stitches
- ✅ No shaping required
- ✅ Stylish with minimal effort
🧵 MATERIALS NEEDED
- Yarn: 1 skein of worsted weight yarn (Category 4)
- Acrylic, cotton, or wool blends all work great
- Hook: 5.0 mm (H-8) – or size needed to meet gauge
- Scissors
- Yarn needle (for sewing and weaving in ends)
- Measuring tape
📏 MEASUREMENTS & SIZING
The headband should have negative ease, meaning it should be slightly smaller than your head circumference to ensure a snug fit.
| Size | Head Circumference | Headband Length |
|---|---|---|
| Teen/Adult | 21–23 inches | 18–20 inches |
| Child | 18–20 inches | 16–17 inches |
The width can vary depending on preference, typically 4 to 5 inches.
🔁 STITCHES USED
We’ll use the half double crochet (hdc) stitch for a thick but stretchy texture.
📌 Stitch Glossary:
- ch – chain
- hdc – half double crochet
- st – stitch
- sl st – slip stitch
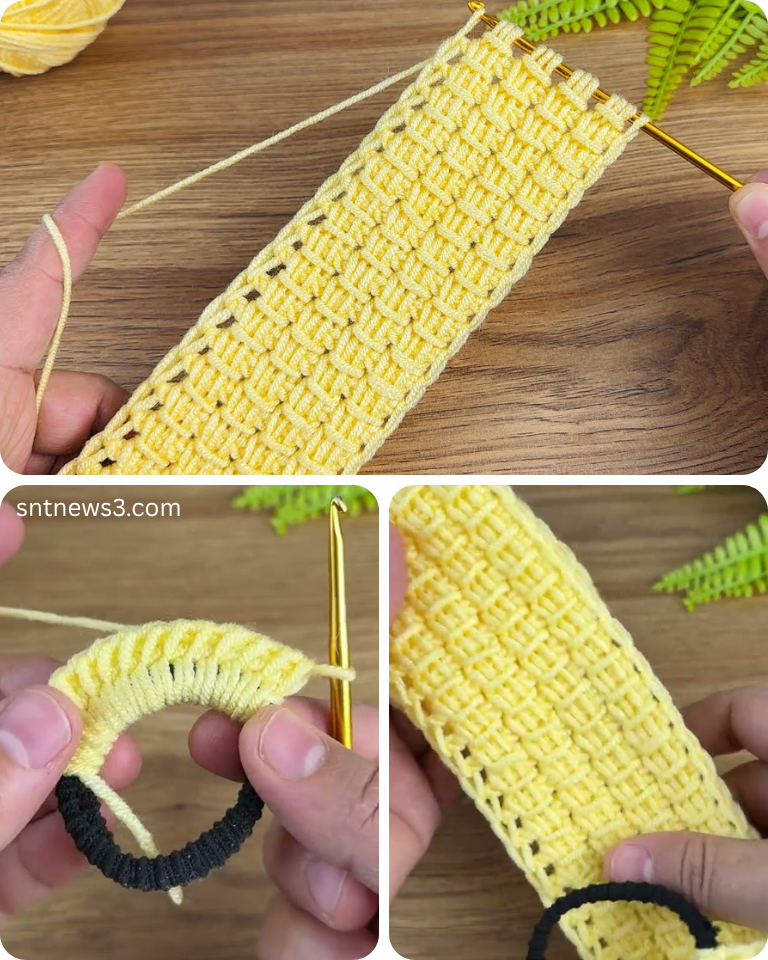
🧶 STEP-BY-STEP INSTRUCTIONS
🪡 STEP 1: MAKE THE FOUNDATION CHAIN
- Chain approximately 20–25 chains for desired width (adjust based on how wide you want the headband).
- Add 1 extra chain for turning.
Example: Chain 21 for a 4″ wide headband.
🧶 STEP 2: CROCHET THE BODY OF THE HEADBAND
Row 1:
- Hdc in 2nd chain from hook and in each chain across.
- Turn.
Row 2 and onward:
- Chain 1, hdc in each stitch across.
- Turn.
Repeat this row until your piece reaches the desired length (around 18–20 inches for an adult).
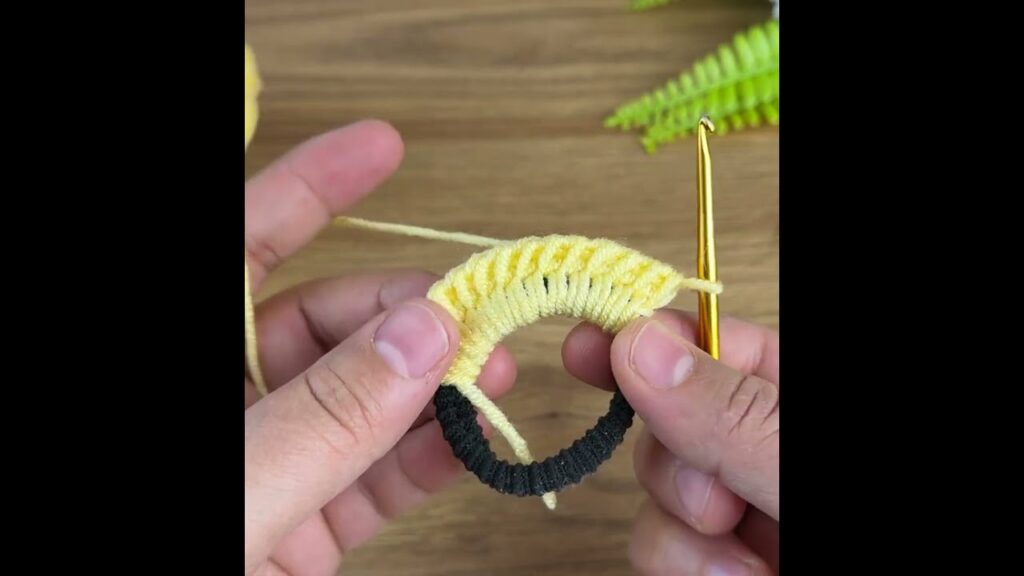
🪢 STEP 3: THE TWIST (MAGIC JOIN METHOD)
This is the fun part — and it’s easier than it looks!
1. Fold your headband in half lengthwise.
- Each short end should be facing each other.
2. Create the twist:
- Instead of aligning ends flat, fold each end in half like a “C” and interlock them like two “U” shapes.
- You’ll have 4 layers stacked together — alternate the layers (like weaving fingers).
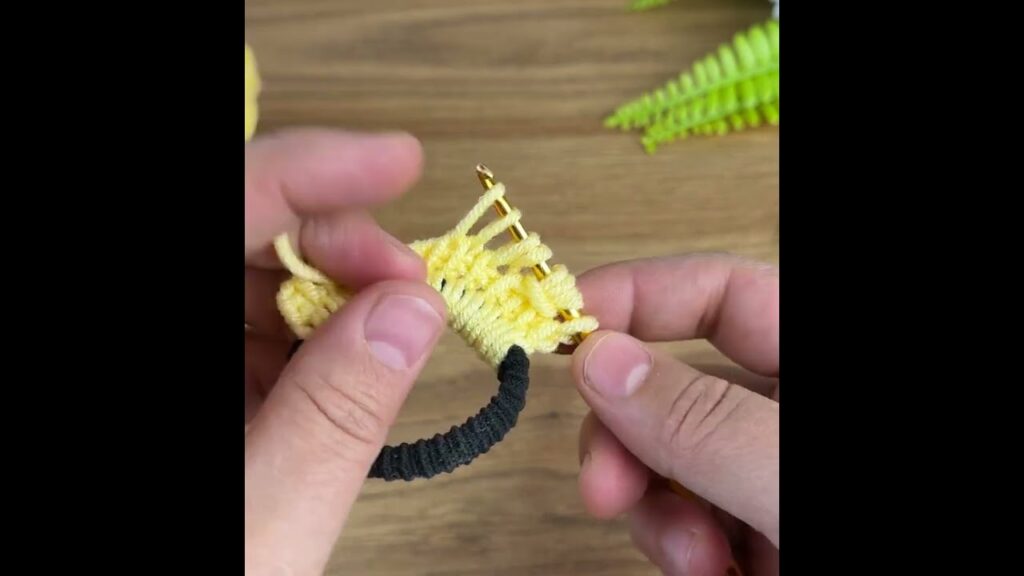
3. Sew the ends together:
- Using a yarn needle and matching yarn, sew through all 4 layers using a whip stitch or mattress stitch.
- Make sure to catch all layers securely.
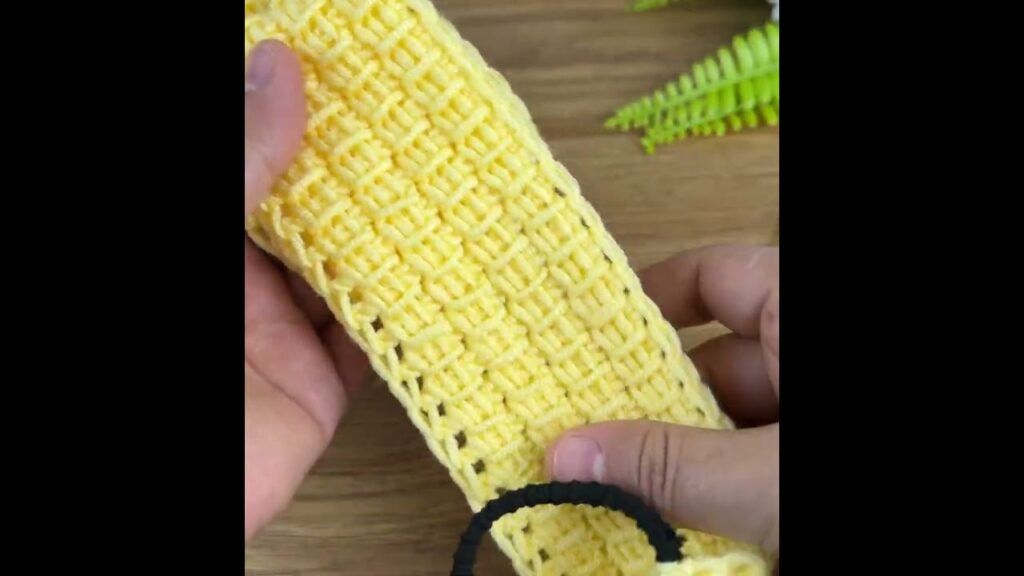
✨ STEP 4: FINISHING
- Turn the headband inside out — the twist will now be on the right side and look perfect!
- Weave in all ends with a yarn needle.
- Give it a gentle stretch and try it on!
🧼 CARE INSTRUCTIONS
- Hand wash gently with cold water
- Lay flat to dry
- Avoid hanging to prevent stretching
🎨 CUSTOMIZATION IDEAS
- Use ribbed stitches (like hdc in the back loop only) for more texture.
- Alternate colors for striped headbands.
- Use bulky yarn and a bigger hook for a thicker, warmer version.
- Add embellishments like buttons, bows, or even faux fur trim.
Video tutorial:
💬 FINAL THOUGHTS
The crochet twisted headband is one of those perfect projects: quick, simple, stylish, and incredibly giftable. Once you’ve made one, you’ll want to make a dozen in different colors! Whether you’re crafting for yourself or gifting to friends, this easy twist design adds just the right touch of flair to your winter wardrobe.