by
by Nice — the crochet tutorial wrote a full, practical step-by-step pattern you can follow at home: oval foundation, increase rules, the cable-stitch texture (how to do the crossed/post stitches), edging, and finishing tips. I used Tiffany’s oval method and her cable-rug pattern references as source material.
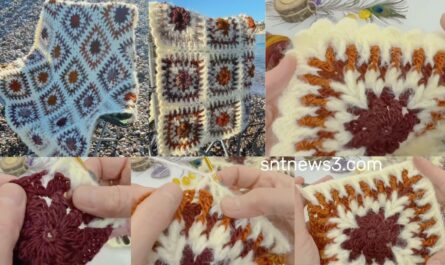
Crochet With Tiffany — Cable-Stitch Oval Rug (step-by-step)
Level: Intermediate (post stitches / cable crossings)
Tools used in video: bulky / rug yarn (or worsted/aran for smaller rug), large hook recommended. Pattern sold as a PDF by the designer (Tiffany) if you want the exact shop pattern.
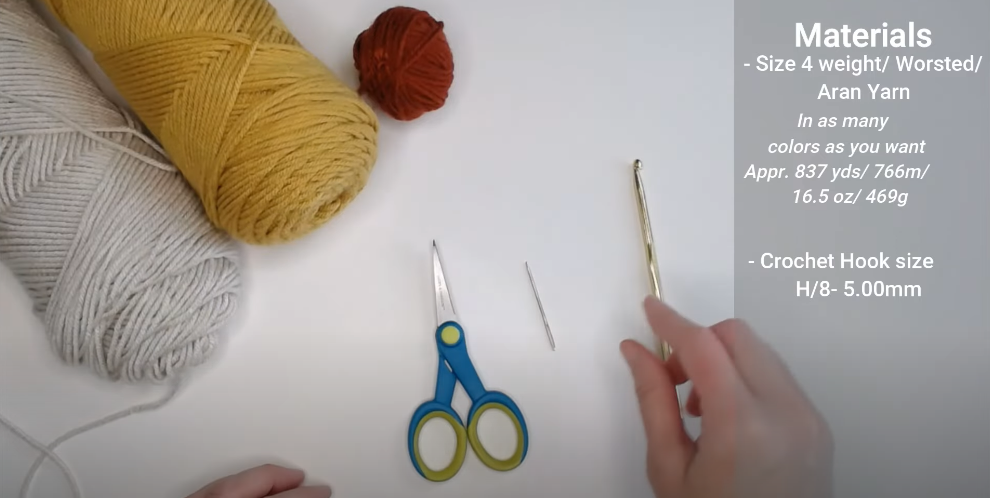
Materials
- Rug yarn (t-shirt yarn, bulky cotton cord, or a chunky/worsted yarn doubled) — amount depends on final size. Tiffany sells a cable-oval rug pattern/kit if you want an exact yarn list.
- Hook: big enough for the yarn (examples: 8–12 mm for t-shirt yarn; 6–8 mm for bulky yarn doubled)
- Scissors, tapestry needle, measuring tape, stitch marker (optional)
- Non-slip backing (optional if rug will be on a slippery floor)
(If you want I can calculate yarn amounts for a specific diameter once you tell me yarn type + hook.)
Abbreviations (US terms)
- ch = chain
- sl st = slip stitch
- sc = single crochet
- hdc = half-double crochet
- dc = double crochet
- fpdc = front-post double crochet
- bpdc = back-post double crochet
- st(s) = stitch(es)
- ( ) = work what’s inside the parentheses into the same stitch
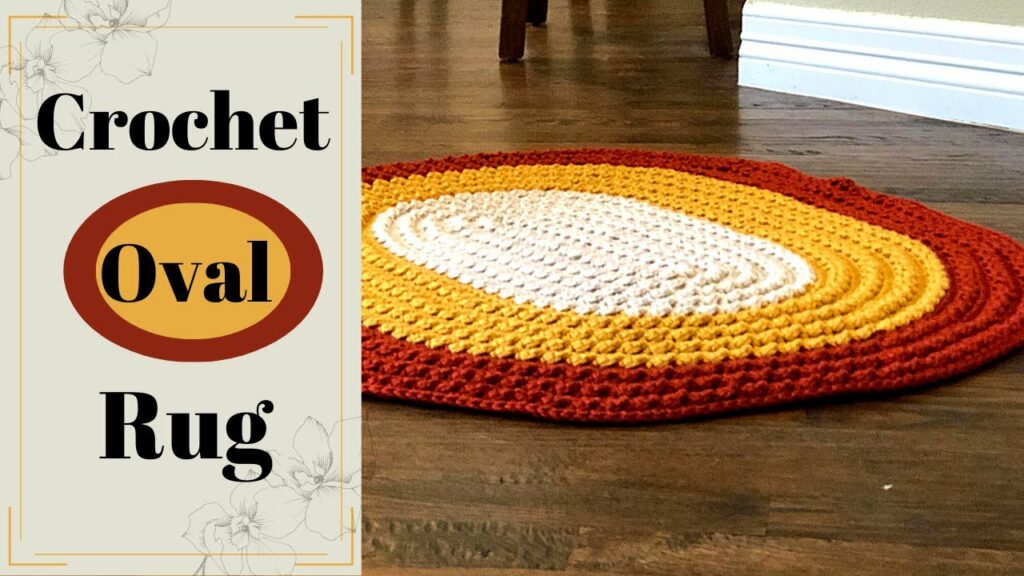
How the oval is made (concept)
Tiffany’s approach: choose a foundation length (this sets the “straight” part of the oval), build the oval base by working across the chain and around the chain underside to form a closed oval, then continue working in rounds and place increases only in the curved ends so the rug remains flat. She explains how to plan increases and how each round changes diameter — a great reference while you work.
Overall plan (what you’ll do)
- Decide final length (long side) and width (short side) → choose a foundation chain length that matches desired length (Tiffany’s article explains how to calculate).
- Make the oval base from that chain (sc across, 3 sc in end, sc along underside, 3 sc in other end).
- Continue rounds of sc (or hdc for faster growth) and increase only in the end groups until the base reaches the width you want.
- Work body rounds and switch to the cable texture rows (post/crossed stitches) for the plush, cable look. (Cable technique described below.)
- Finish with a tidy border, secure tails, and optionally add a nonslip backing.
Exact step-by-step (sample foundation + directions you can adapt)
The steps below use a sample foundation chain of 40 so you can see concrete counts. Adjust the chain length longer for a longer rug or shorter for a small mat. The method is the same.
SAMPLE: start (foundation chain = 40)
- ch 40. (You can substitute a foundation chain stitch or a foundation sc if you prefer.)
- Round 1 (make oval base): Starting in 2nd ch from hook, sc in each ch across to the last chain — that will be 39 sc across the top. In the last chain, work 3 sc (this creates the rounded end). Now working down the underside of the foundation chain, sc in each chain back toward the start (another 39 sc). In the first chain (the starting chain), work 3 sc to round that end. Join with sl st to first sc.
- Total stitches after Round 1 = 39 + 3 + 39 + 3 = 84 sts.
- (If you chose a different chain length, replace the 39 with (chain length − 1).)
- Round 2: sc in each stitch around, but when you reach each 3-sc end group, increase to shape the curve. A simple reliable way: in each 3-sc group work 2 sc in each sc (i.e., 2 sc in each of the 3 stitches) — this expands the curve evenly. Join.
- (That will add 3 extra sts per corner × 2 corners = +12 stitches; gauge and flatness determine whether you increase every round or every other round.)
- Subsequent base rounds: Continue rounds of sc (or switch to hdc for faster growth) without increasing along the straight sides; only increase at the ends as you did in Round 2 to keep the oval expanding in width. Check after each round: lay the piece flat — if it cups, stop increasing or increase less often; if it ruffles, reduce increases. Tiffany’s oval guide explains exactly how increase placement changes shape (rounded vs pointy).
- Stop increasing when the base/flat portion reaches the width you want (measure across the short side). At that point you have the rug base finished.
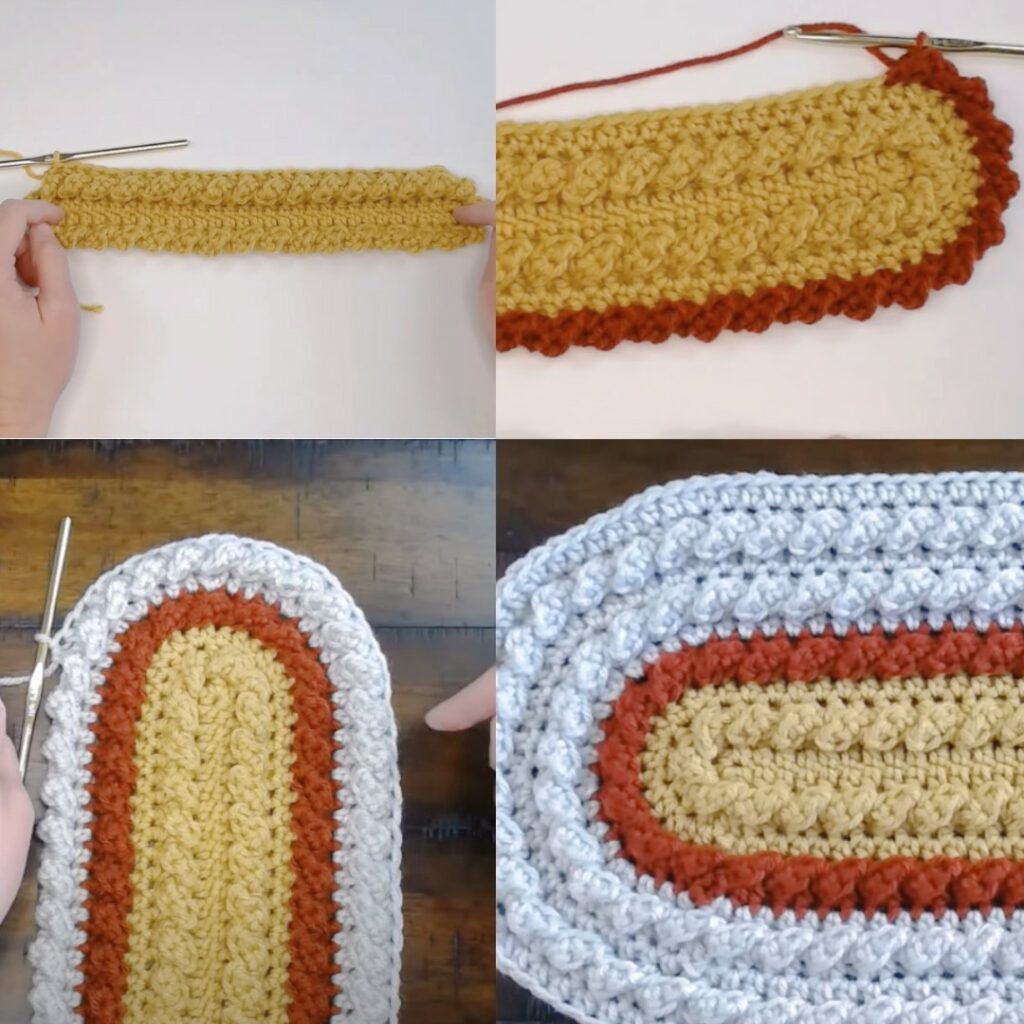
Switching to cable texture (the “eye-catching” surface)
Tiffany uses a cable/raised texture for the rug body. Cable stitches in crochet are made by crossing post stitches (front-post & back-post double crochet) or by crossed double crochets — both create the twisted, rope-like effect. Use post stitches for the best “cable” look on a rug. (Good cable technique references: Yarnspirations / Crochet.com.)
Suggested cable pattern (worked in rounds)
Set-up (1 round): With base complete, work 1 round of dc (or hdc for chunkier look) around the oval to create a uniform base for the cables. Join if you like or work continuous rounds.
Cable round (repeat these two rounds to create the textured fabric):
Round A (background row): dc in each st around (or alternate dc + dc in next to adjust count for cable repeat). This row creates a tidy background and sets the posts for the crossing on the next round.
Round B (cable crossing row) — a simple 4-post cable (right cross then left cross):
Work in repeats across the row (you will need the oval stitch count to be a multiple that matches the repeat you choose — 4 or 6 stitches per cable block usually works).
A common 4-post cable crossing (right-cross) sequence (worked over 4 stitches) — Right Cross Cable (RC):
- Skip the next 2 stitches, fpdc around the next 2 posts (work fpdc around the post of stitch 3 and 4), now go back and fpdc around the posts of the 2 stitches you skipped.
- This “crosses” two front-post double crochets over the two behind them and makes a right-leaning cable. (Reverse the order to create a left cross — do the two fpdc on the skipped posts first, then the fpdc on the next two.)
How to do a single fpdc (reminder): Yarn over, insert hook from front to back to front around the post of the indicated stitch (around the post, not in the top loops), yarn over and pull up a loop, yarn over and complete the dc as usual (two pulls through loops). There are many photo/video tutorials for fpdc if you want a close demo.
Working the cable in the round: Repeat the RC/LC pattern across the row: e.g., (RC over stitches 1–4), dc in next 2 sts (spacer) — repeat to end. On the next cable round you may offset crossings to create braided look.
Repeat the two rounds (Round A then Round B) until the area covered by cables is the depth you want (or continue cable pattern for the whole rug surface if desired).
Border & edge
- After you’ve worked the cable rows to desired height/coverage, finish with 2 rounds of sc around the entire rug edge for a tidy, stable border.
- Optional: add a scalloped border or picot edge for decoration.
- Weave in all ends securely with a tapestry needle. If you attached any cable bumps or seed stitches, double-stitch them down in a few places for long-term durability.

Securing & non-slip backing
- For rugs that will see foot traffic, sew on a non-slip rug pad backing, or glue a non-slip mat to the back. If you plan a floor rug, consider lining with jute backing or adding a thin rug pad. (Video tutorial shows styling/use.)
Troubleshooting tips (from Tiffany + cable technique guides)
- Oval starts to cup → you increased too few times at the ends — add a round of increases evenly at both ends.
- Oval ruffles → you increased too much; skip one increase round.
- Cables look loose → use tighter tension on the post stitches or reduce hook size by 1–2 mm for cable rounds.
- Cable crossing looks messy → practice the crossing on a 10×10 cm swatch: work 8–12 sts of the cable repeat and do the crossing until you’re comfortable with the timing.
(General “how to cross” techniques and visuals: Yarnspirations and Crochet.com show the standard fpdc/bpdc cross methods used to make crochet cables.)
Example summary (quick cheat sheet)
- Foundation chain: ch 40 (sample)
- Rnd 1: sc across (39), 3 sc in last ch, sc across bottom (39), 3 sc in first ch → 84 sts total.
- Rnd 2: sc all around, 2 sc in each sc of the 3-sc end groups (increase in corners) — check flatness.
- Continue until base width matches target.
- 1 round dc, then alternate Background Round (dc) + Cable Round (fpdc crossings) to make the cable texture.
- Finish with 2 rounds sc + weave in ends + backing if needed.
Want exact row counts for a specific size?
I can calculate a precise, row-by-row pattern for a target rug diameter (small / medium / large) — I’ll just need either:
- the yarn + hook you’ll use (so I can estimate gauge), or
- your gauge swatch (e.g., how many single crochets / 10 cm with your yarn and hook).
Tell me which you prefer and I’ll produce a printable recipe (exact rounds, increases, and a cable repeat that fits the stitch multiple) — or I can convert Tiffany’s shop pattern into an easy row table if you already own it. (No problem either way — I’ll generate it right here.)
Sources / references (useful to follow with video demonstrations)
- Original YouTube tutorial (Crochet With Tiffany) — video tutorial used as reference.
- Tiffany’s “How to Crochet the Perfect Oval” (planning, where to place increases).
- Tiffany’s Etsy listing for the Cable Stitch Crochet Oval Rug (pattern/kit available)
- Cable / crossed post technique references (how to make fpdc / crossed cables).
Video Tutorial: https://www.youtube.com/watch?v=fh8DbPAuan0