 by
by 🧶 Materials
- A fine or light-weight yarn (for towel/cover edging) or slightly heavier yarn if you want a wider border.
- Crochet hook appropriate to your yarn size (for example 2.5 mm–4 mm for lace edge)
- Scissors and tapestry needle for weaving in ends
- Optional: a towel or cover to attach the edging to
✏️ Abbreviations (US terms)
- ch = chain
- sl st = slip stitch
- sc = single crochet
- dc = double crochet
- st(s) = stitch(es)
- rep = repeat
- ( … ) = work all instructions inside the same stitch or space
- … * = repeat instructions inside
🌟 Pattern Overview
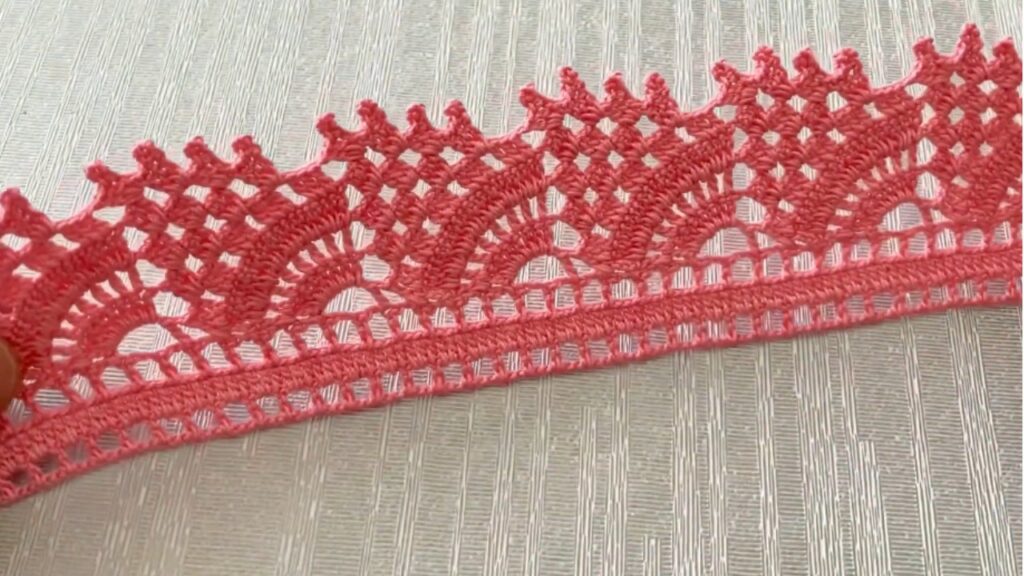
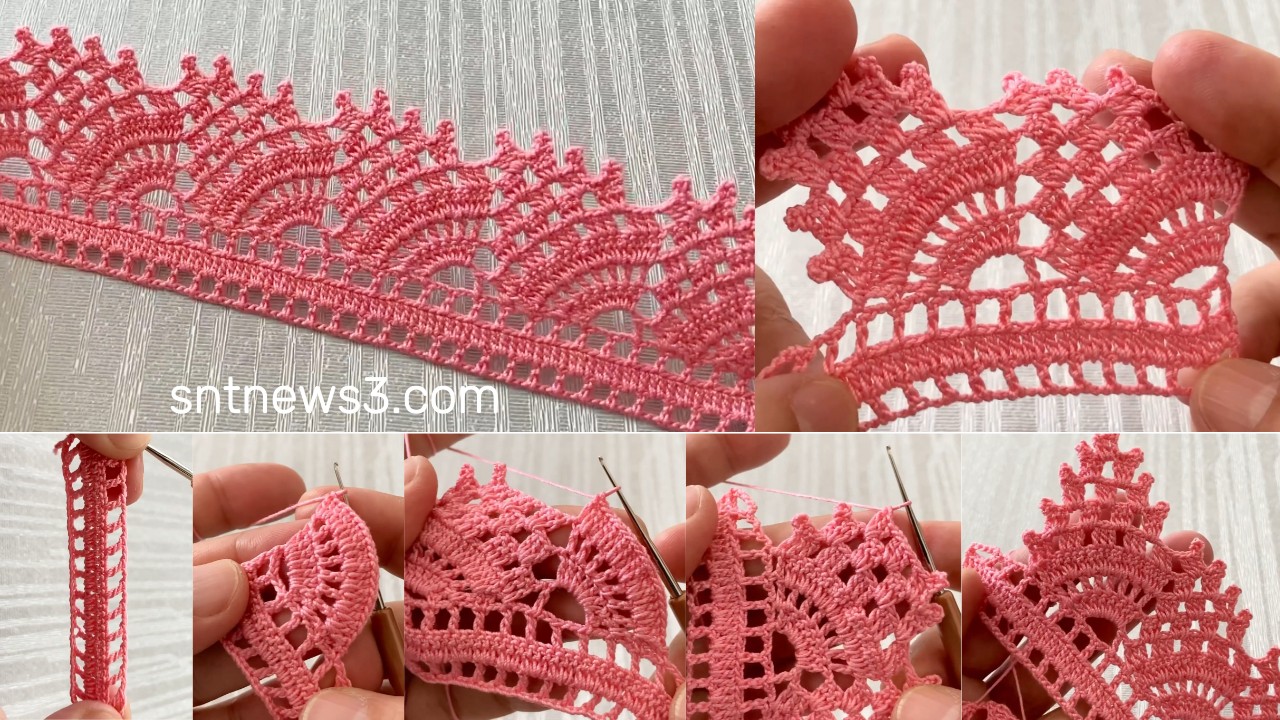
The tutorial shows how to attach a delicate lace edge to a towel or cover: first you work a foundation row along the fabric edge (or base row if starting separately), then a row of chain-spaces (open loops), then a row of fan or shell motifs worked in those loops, repeating these rows until you reach desired width. The final border is neat and decorative.
✅ Step-by-Step Instructions
Step 1 – Foundation Row
- If attaching to a towel/cover: work sc evenly into the edge of the fabric (or along the hem) around the perimeter; if you’re working the edge separately, chain a number of stitches to match the length of the side you’ll attach.
- Work sc in each stitch or space along the edge. Turn or move to the next row.
- This row stabilizes the edge and anchors the lace.
Step 2 – Row 2 – Loop/Space Row
- Sc in next 2 sts.
- Ch 4, skip 1 stitch, sc in next stitch.
- Sc in next 2 sts, ch 4, skip 1 st, sc in next st.
- Continue this pattern across the row until you reach the end.
- At the end: sc in last stitch (if required), ch 1, turn.
- You now have a series of chain-4 loops along the edge which will hold the lace motifs.
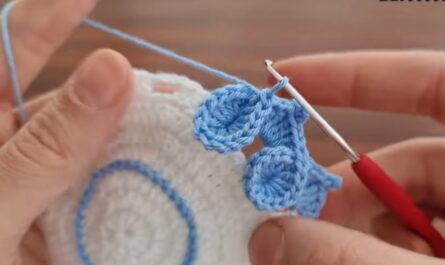
Step 3 – Row 3 – Motif Row
- Sc in first stitch.
- In each chain-4 loop: work (dc 3, ch 2, dc 3) — this forms a shell/fan motif inside the loop.
- After each shell, sc in the next base stitch (the one between loops) to anchor.
- Repeat across: shell in loop, sc in next, shell in loop, etc.
- At end: sc in last stitch. Ch 1, turn.
Step 4 – Row 4 – Alternate Loop Row (Optional)
- Sc in first stitch.
- Ch 4, skip over the shell cluster, sc in next anchor stitch.
- Repeat across: chain-4 loops above the shells, sc in next anchor.
- At end: sc in last stitch. Ch 1, turn.
- This adds an open decorative row above the motif row.
- If you want a narrower border, you may skip this step and just repeat the motif row.
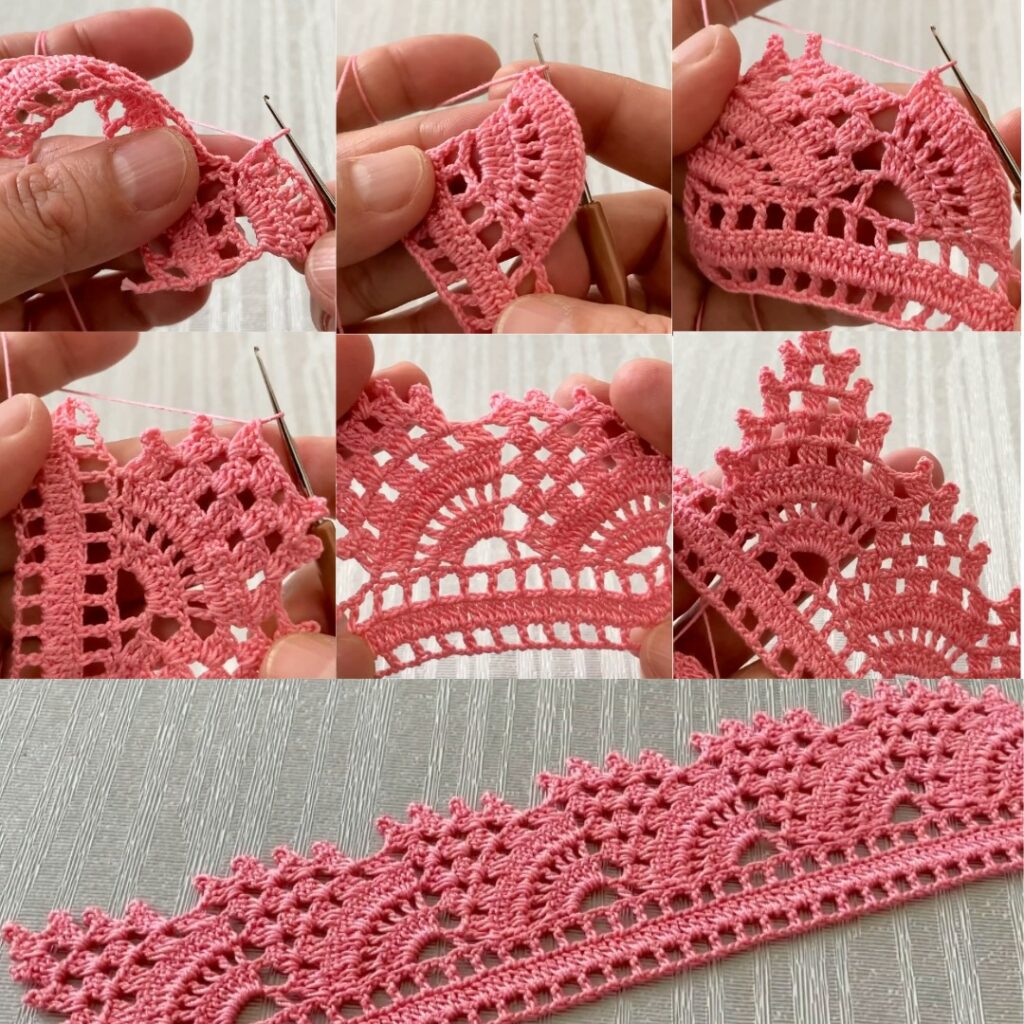
Step 5 – Repeat Motif & Loop Rows
- Continue alternating Motif Row (Row 3) and optionally Loop Row (Row 4) until your lace edge has reached the desired width for your towel or cover.
- Measure as you go, especially when working free-hand along a fabric edge, so the lace aligns and doesn’t flare.
Step 6 – Finishing Row & Attachment
- Work 1 row of sc across the top of the last motif row for a neat, stable finish.
- If not already attached to fabric: sew or slip-stitch this finished edge onto your towel/cover.
- Fasten off yarn, cut tail, and weave in all ends with tapestry needle.

📋 Quick Reference Table
| Row | Stitch Pattern |
|---|---|
| Foundation | sc evenly along fabric edge or base chain |
| Row 2 | sc x2, ch 4 skip 1, sc … repeat across; ch 1 turn |
| Row 3 | sc first; (dc 3, ch 2, dc 3) in chain-4 loop, sc in next anchor; turn |
| Row 4 | sc first; ch 4 skip shell, sc in anchor; repeat; turn (optional) |
| Repeat | Alternate Row 3 & Row 4 until desired width |
| Finish | 1 row sc across top, attach to fabric if needed |
✨ Tips & Adaptations
- Use fine cotton thread and small hook for delicate towel edging; use bulkier yarn + larger hook for wider decorative borders on cushion covers or throws.
- When attaching to a towel, maintain consistent stitch spacing along the fabric edge to avoid puckering or waviness.
- For corners: When edging a rectangular towel, at corner turns you may need to work extra stitches (for example, 3 sc in corner) or chain more loops so the lace turns around smoothly.
- Keep chain loops (ch 4) consistent length so the lace edge looks even. If the loops begin to stretch, reduce chain count (e.g., ch 3) or use smaller hook.
- Change motif colour for contrast if you want the shells/fans to stand out.