 by
by 🧶 Materials
- Lightweight or sport-weight yarn (or choose any yarn weight depending on your project).
- Appropriate crochet hook to match your yarn (e.g., 3.0 mm–4.0 mm for lighter yarn).
- Scissors and tapestry needle for weaving in ends.
- Optional: a piece of fabric or blanket edge to attach the lace border.
✏️ Abbreviations (US terms)
- ch = chain
- sl st = slip stitch
- sc = single crochet
- dc = double crochet
- st(s) = stitch(es)
- rep = repeat
- ( … ) = work all inside same stitch or space
- … * = repeat instructions inside
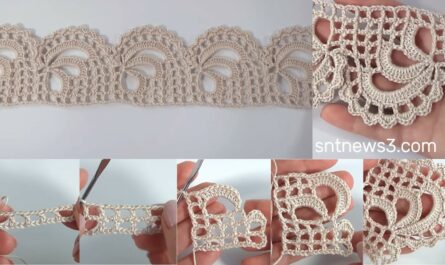
🌿 Overview of the Border
- You’ll begin by working along a foundation edge (either a base row or directly into the edge of piece).
- Row 1: stable row of sc to create a base for the lace.
- Row 2: chain-spaces to create loops which will form the heart motifs.
- Row 3: work the heart motifs (clusters of dc and ch spaces) into the loops.
- Continue repeat of loop row + motif row as needed.
- Finish with a neat edge row of sc (or optional decorative finish).
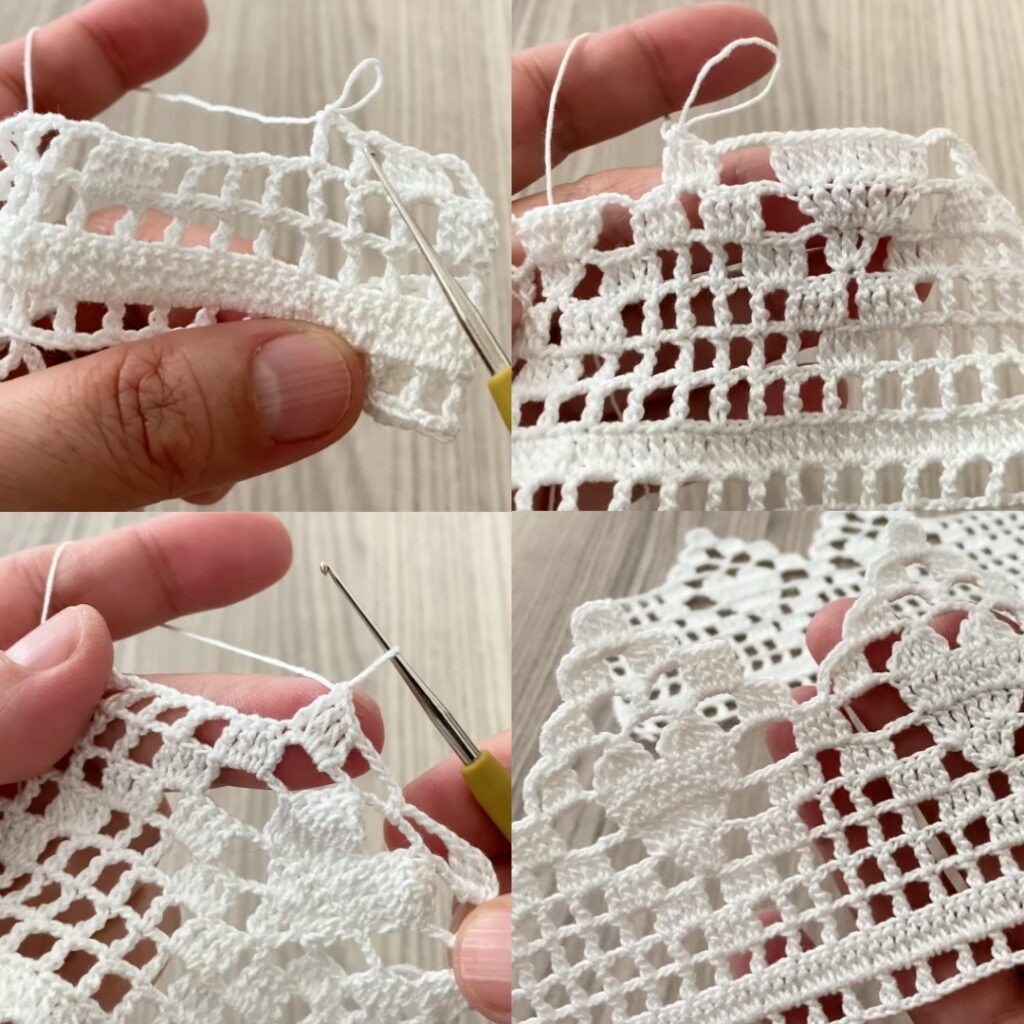
✅ Step-by-Step Tutorial
Here is a practical adaptation of the video pattern — exact stitch counts may vary depending on yarn/hook, so use this as a template and adjust as needed.
Step 1 – Foundation Row
- Attach yarn to the edge of your piece (or chain a foundation if working separately).
- Work sc evenly across the edge (or foundation chain) to create a stable base.
- At the end of the row, ch 1, turn.
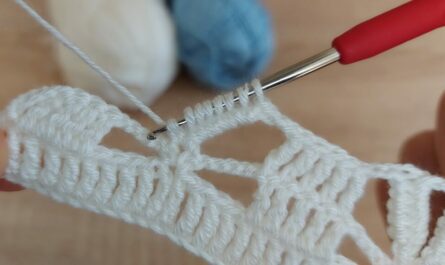
Step 2 – Row 2 – Loop/Space Row
- sc in next 2 sts.
- ch 4, skip 1 stitch, sc in next st.
- sc in next 2 sts, ch 4, skip 1 st, sc in next st — repeat across the row until the end.
- At end of row: sc in last stitch.
- ch 1, turn.
- You now have a row of chain-4 loops that will hold the heart motifs.
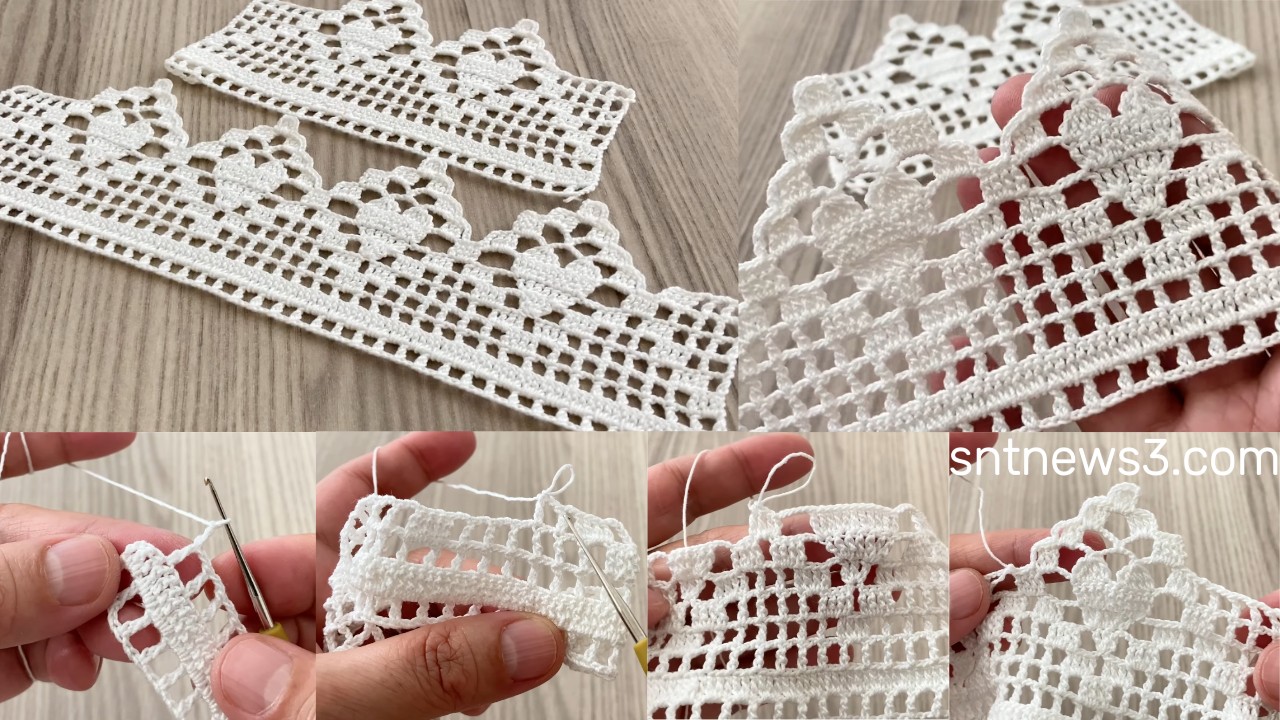
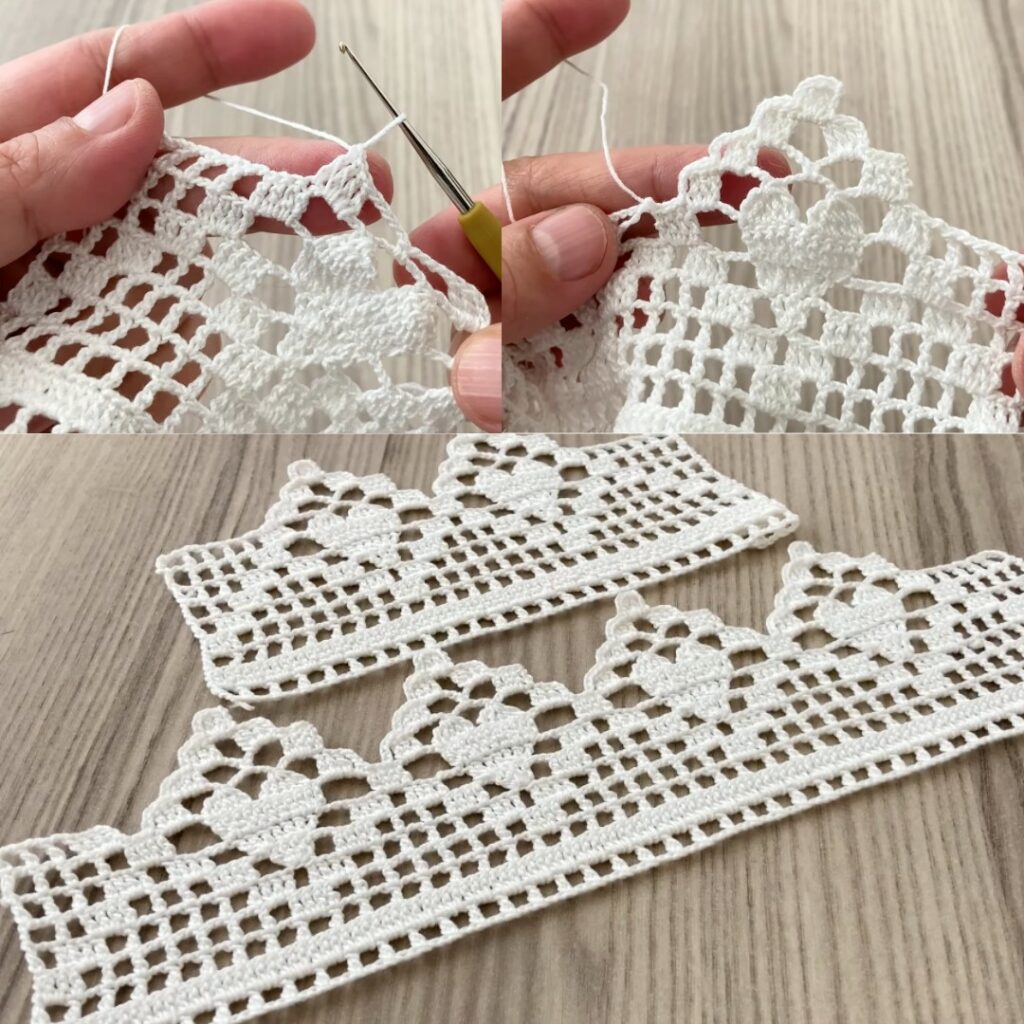
Step 3 – Row 3 – Heart Motif Row
- sc in first stitch.
- In each chain-4 loop from previous row work the heart motif: e.g. (dc 3, ch 2, dc 3) into the loop.
- Then sc in the next base stitch (the one between loops) to anchor.
- Repeat: heart motif in loop, sc in next stitch across.
- At end: sc in last stitch.
- ch 1, turn.
Step 4 – Row 4 – Loop Row (if repeating)
- sc in first stitch.
- ch 4, skip over one motif cluster, sc in next anchor stitch.
- Repeat across: loops above motifs, sc anchors between.
- At end: sc in last stitch.
- ch 1, turn.
- This row creates additional open space above motif row for width or decorative look.
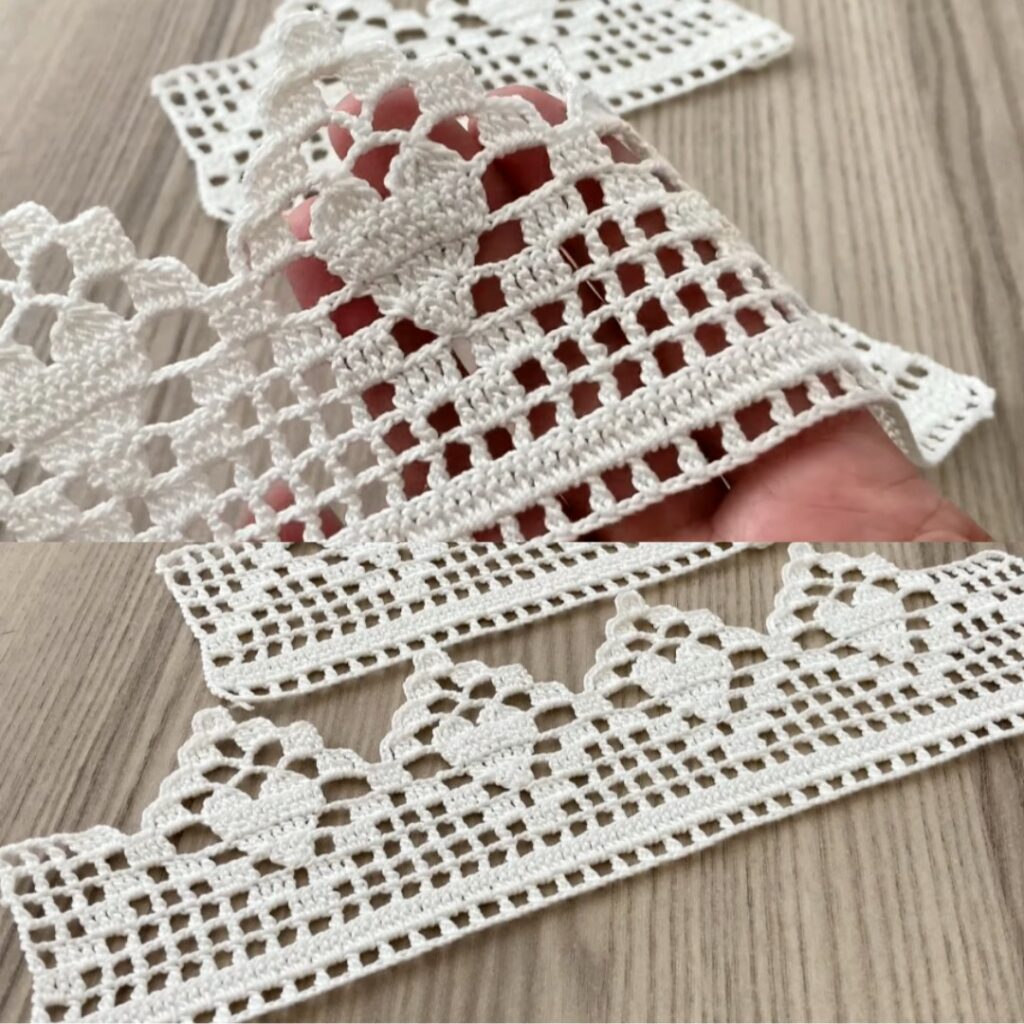
Step 5 – Repeat Motif & Loop Rows
- Continue repeating Row 3 (Heart motif) and optionally Row 4 (Loop row) until your border reaches the desired width or you’ve edged the entire piece.
- Always make sure motifs align and loops stay consistent.
Step 6 – Finish Edge
- When done, work 1 row of sc across the top of the last motif row for a neat finish.
- Fasten off yarn.
- Weave in all ends with tapestry needle.
- If edging a separate piece, attach the border to your fabric via slip stitches or sewing.
📋 Quick Reference Table
| Row | Stitch pattern |
|---|---|
| Foundation | sc across base edge or foundation chain |
| Row 2 | sc x2, ch 4 skip 1, sc — repeat across; ch 1, turn |
| Row 3 | sc in first; (dc 3, ch 2, dc 3) in each loop, sc in next; turn |
| Row 4 | sc in first; ch 4 skip motif cluster, sc in anchor; turn |
| Repeat | Alternate motif & loop rows until width/length reached |
| Finish | 1 row sc across + fasten off + weave in ends |
✨ Tips & Variations
- Use a different colour for the heart motifs to make them stand out against the base.
- Adjust loop size: if ch 4 loops feel too large or wide for your yarn/hook, you can use ch 3 instead for a tighter look.
- For larger motifs, use dc 5, ch 3, dc 5 instead of dc 3/ch2/dc3.
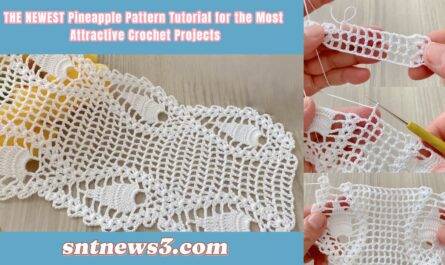
- This border works beautifully for blankets, shawls, towels, table runners, or as a decorative trim on garments.
- When edging corners (in case of rectangle fabric), add extra stitches at corners such as 3 extra sc or a fan cluster to help the lace turn smoothly.
- Keep your loops and motifs consistent in size; if the border begins to pull in or flare out, adjust your chain-spaces or stitch counts.