 by
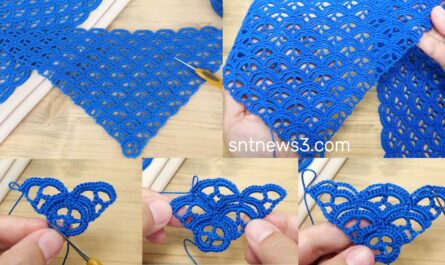
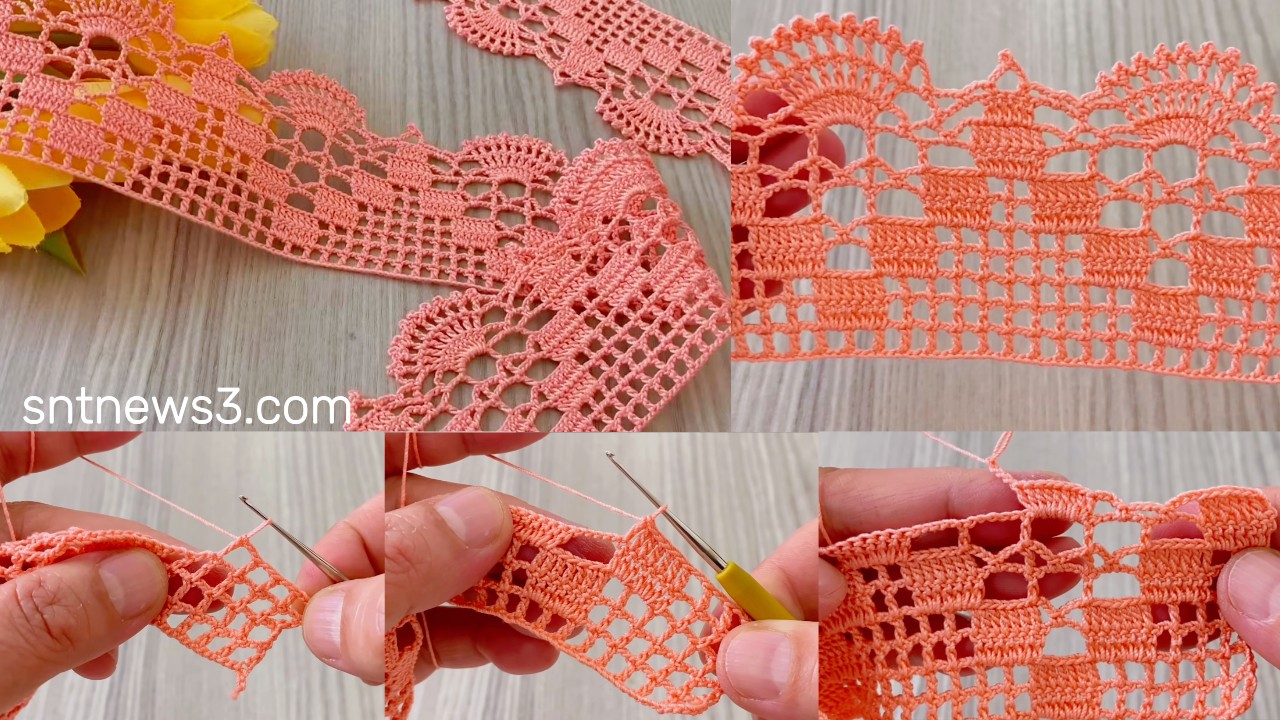
by This is a clear, beginner-friendly edge you can crochet onto shawls, blouses, towels, table runners — or as a stand-alone strip. It produces pointed leaf-scallops with tiny picot dots and a tidy underside so it attaches and blocks beautifully. US terms.
What you’ll need
- Yarn: fingering → DK (cotton for crisp trim; cotton-blend or acrylic for softer drape)
- Hook: 2.5–4.5 mm depending on yarn & desired openness
- Notions: tapestry needle, blocking pins/towel, scissors
- Gauge / sample: make 6 repeats, block, then adjust hook if needed
Abbreviations (US)
- ch = chain
- sl st = slip stitch
- sc = single crochet
- hdc = half double crochet
- dc = double crochet
- tr = treble crochet
- pic = picot (ch 3, sl st into base)
- sk = skip
- sp = space
- rep = repeat
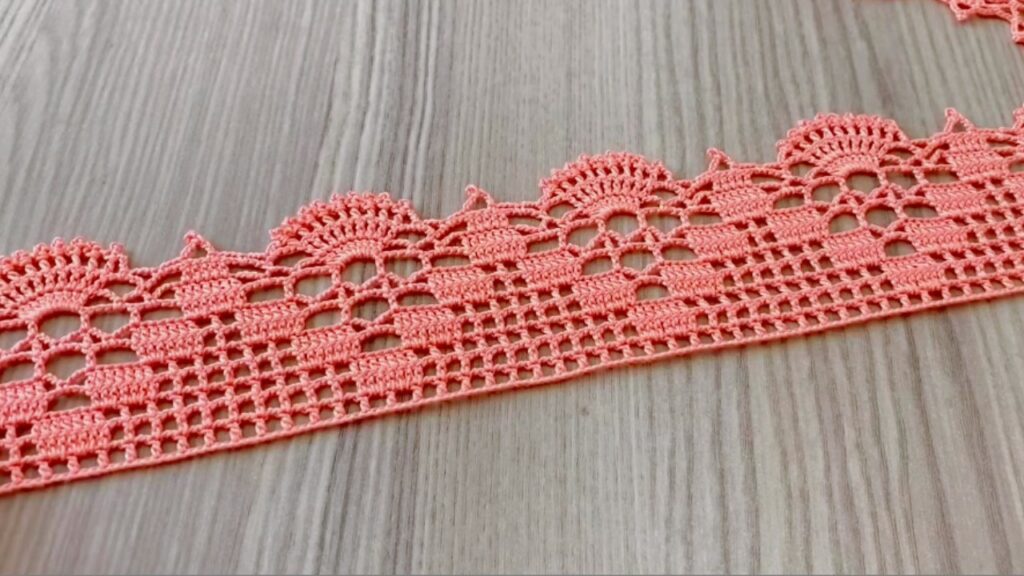
Pattern concept (quick)
- Foundation = row of even sc (worked on garment edge or into a chain strip).
- Create small anchor loops (ch-3) spaced along the base.
- Work each loop as a leaf cluster:
sc, hdc, 3 dc, tr, 3 dc, hdc, sc. - Finish with tiny picot dots on each tip and a tidy underside row.
- Repeat multiple: 6 + 2 (6 stitches per repeat + 2 for the end).
Preparation / Foundation
Option A — Crochet onto an existing edge (recommended):
Work a row of sc evenly along the raw edge of your piece (1 sc per edge stitch, or spaced to taste). Use this sc row as the base anchors for the lace.
Option B — Make a separate border strip (to sew on):
Ch a multiple of 6 + 2 (example ch 38). Row 1: sc in 2nd ch from hook and across — now you have a base sc row.
Row 1 — anchor loops
Work into the base sc row (either option):
- sc in next 3 sc, ch 3, sk 2 sc — repeat across the row.
- End with sc in the last 1–2 sc so the row finishes neatly.
Check: an evenly spaced ch-3 loop every ~3 base sc.
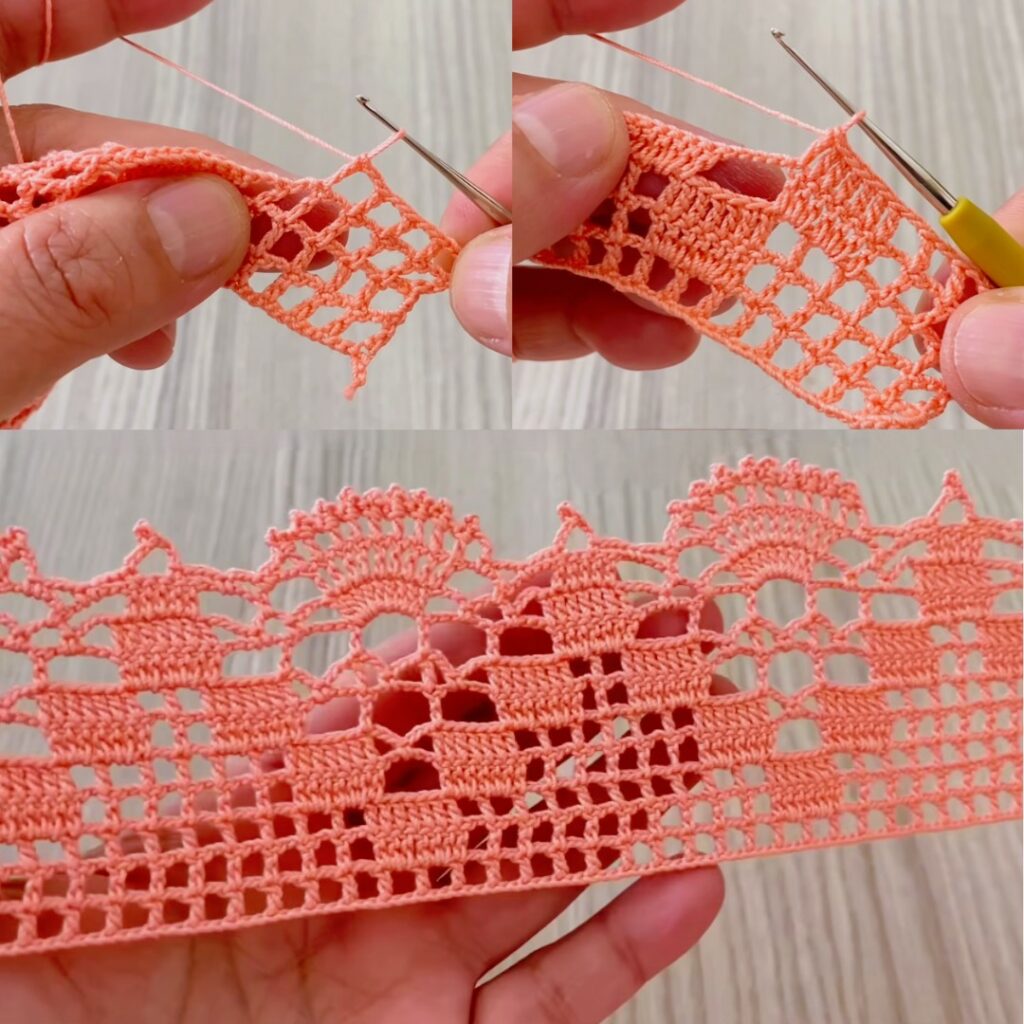
Row 2 — leaf cluster (main decorative row)
Work each leaf entirely into the ch-3 loop:
Into loop:sc, hdc, 3 dc, tr, 3 dc, hdc, sc — all in same loop.
After finishing a leaf: sl st into the next base sc to anchor. Then continue: sc in next 2 sc, ch 3, sk 2 sc (this returns you to the next loop).
Repeat across.
Tip: if your yarn/hook makes the leaf too large or small, adjust 3 dc → 2 dc or 4 dc (and keep symmetry).
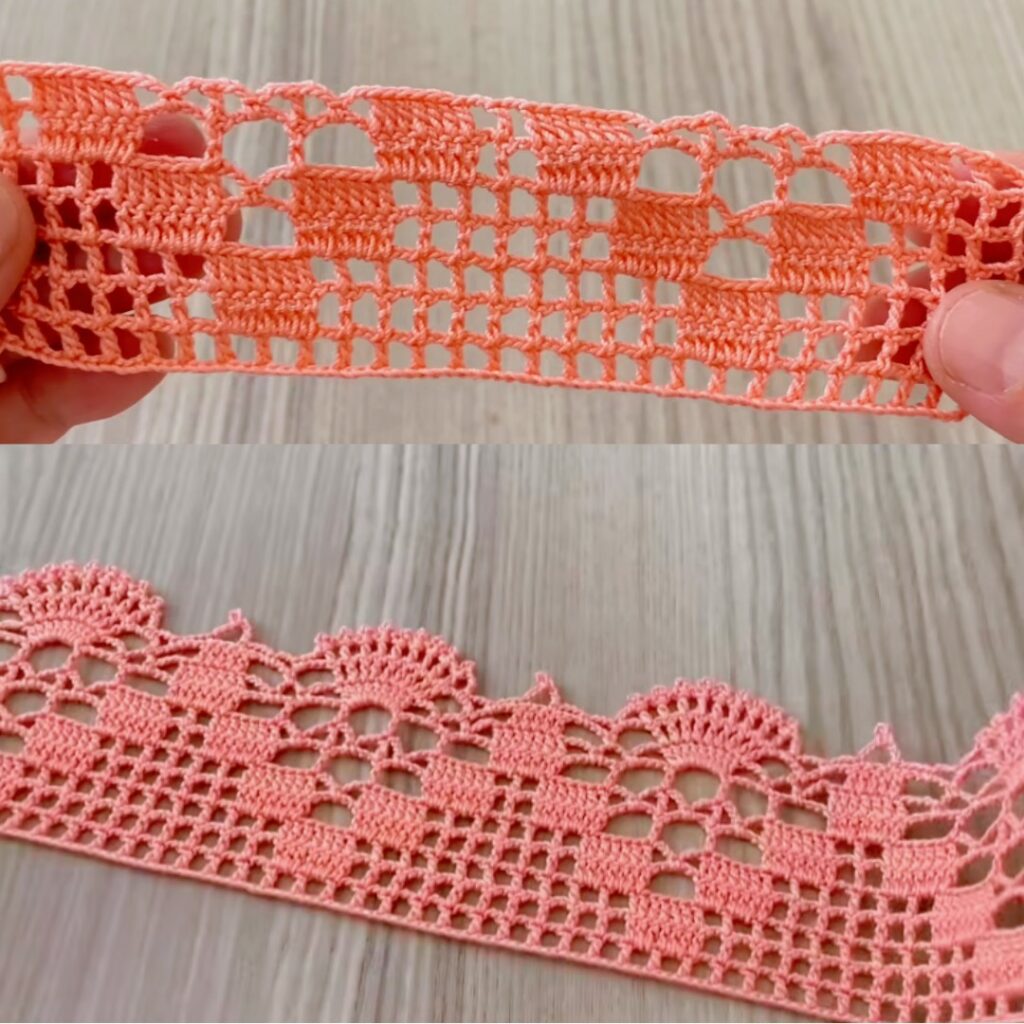
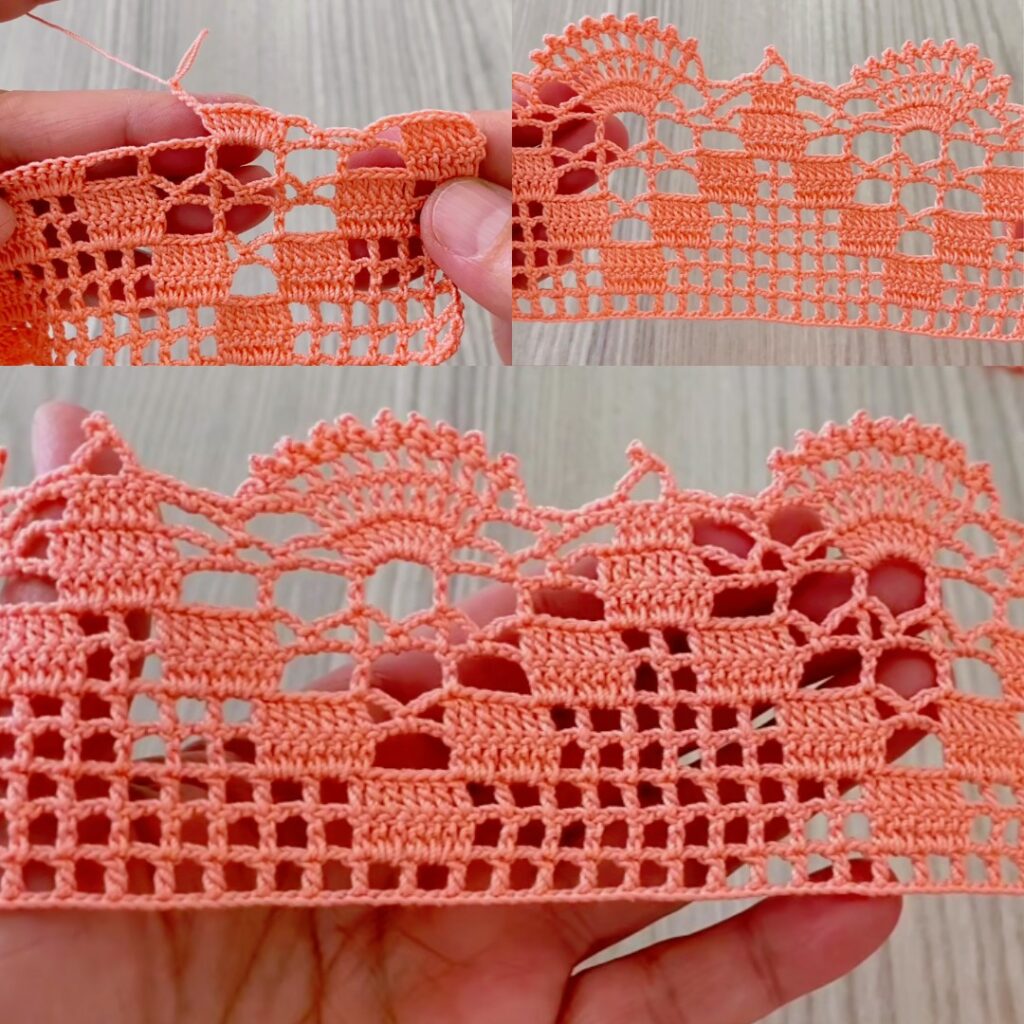
Row 3 — tip picots & tidy underside
- Join yarn at the top of any leaf (or continue). For each leaf tip: sl st into the top tr → ch 3 → sl st into same tr — this makes a small picot dot at the tip.
- Alternative:
(sc, ch 3, sc)for a tiny bud instead of a single picot.
- Alternative:
- After placing the picot, work sc 2 along the base between leaves (or
sl st + scif your base spacing needs it) to tidy the underside. - Fasten off, weave in ends.
Check: pointy leaves with small dotted picots; underside neat.
Corners (turning a rectangular piece)
When you reach a corner:
- Work the last full leaf, then ch 6 (corner loop). Anchor the next side’s first leaf into that ch-6 so the border turns the corner smoothly.
- For a tighter corner use ch-4; for a gentler curve use ch-8. Keep corner size consistent.
Attaching the strip (if you made one)
- Sew with a fine whipstitch through the base sc row and the fabric edge, or
- Crochet-on: hold strip to edge and work sc through both the fabric edge and base sc to attach — this gives the cleanest result.
Blocking & finishing
- Pin each leaf tip and picot to the blocking board/towel so peaks are sharp. Pull corners into shape. Mist with water and let dry fully.
- For crisp table linens, apply light spray starch after blocking (test on scrap). For garments, skip heavy stiffening.
Variations & adjustments
- Smaller scallops: change
3 dc→2 dc,tr→dc, use smaller hook/finer yarn. - Bolder leaves: change
3 dc→5 dcand usech 4anchors for larger drama. - Two-colour: work base sc row in Color A, switch to Color B for leaves for a pop.
- Beaded edge: slide small beads on yarn and place one bead on the central tr of each leaf (thread bead before crocheting).
- Fringe: after finishing, attach fringe between scallops for boho look.
Troubleshooting
- Edge ripples / too many scallops: increase spacing:
sc 4, ch 3, sk 3instead ofsc 3, ch 3, sk 2. - Tips curl up (cupping): shorten the center height (use
dcinstead oftr) or use a slightly tighter picot (ch 2) and block firmly. - Leaves flatten: block more strongly or shorten the tr; try slightly larger hook on the leaf round to reduce tension.
- Uneven repeats: count first 3–4 repeats, keep tension consistent, and adjust start/end stitches so edges square up before blocking.
Compact stitch diagram (one repeat)
- Base:
… sc, sc, sc, ch3, sk2 … - In ch3:
sc, hdc, 3dc, tr, 3dc, hdc, sc→ sl st into base →sc, sc, ch3, sk2→ repeat.
VIDEO: